“Fun-time Ensemble” part one…

Advance 8990

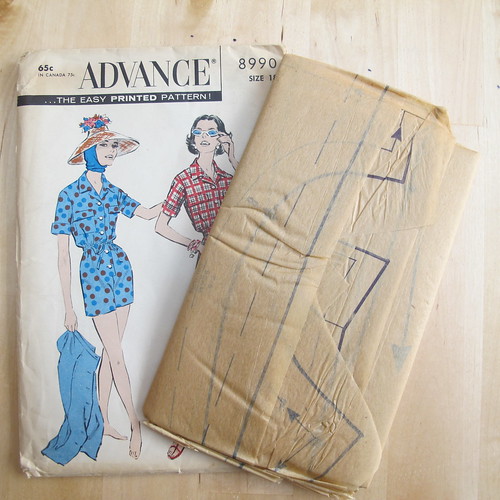
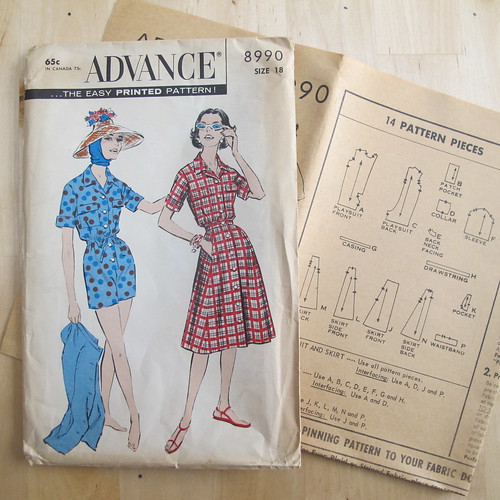
Say hello to the lovely ladies of Advance 8990 – a 1959 pattern for a playsuit and skirt. I did have a momentary pause about making what is, after all, a glorified onesie, but it looked like a useful garment for wearing in the heat. I like that it’s quite a formal-looking romper, what with the collar and turned-back sleeves, but I particularly like the idea of popping a matching skirt over the top so that you’ve instantly got a nice smart dress!

Advance 8990

I asked for Paul’s opinion (as I usually do) before I bought the pattern, and was met with an emphatic shaking of the head. Oh dear. To be honest, I think he was put off by the rather alarming hat-and-balaclava combination, which I definitely won’t be attempting to carry off! But honestly. How could I possibly resist a pattern that describes itself as a “Fun-time Ensemble”? I’m only disappointed that it doesn’t list “novelty prints” amongst the suitable fabrics. (Rest assured though – a novelty print version will be forthcoming at some stage.) It could only be better if it had a raglan sleeve.

Advance 8990

I was quite excited to discover that the pattern, despite being 56 years old, was actually brand new and still in its factory folds! Unfortunately, it looks as though it perhaps hasn’t been stored in the best conditions, because the paper was incredibly fragile – more so than any other vintage pattern I’ve come across so far. I managed to tear the pieces several times as I was unfolding them and cutting them out, so I think drastic measures are going to be called for. I expect to be using this pattern more than once, so I think I’m going to iron the pieces onto some lightweight interfacing to stabilise them. I know this will effectively destroy the original pattern, but it’s in such poor condition that it’s pretty much ruined anyway. Normally I’d trace the pieces onto stronger paper, but the originals are just going to fall apart in the envelope, so I might as well make sure that I can use them for the purpose for which they were intended.

(The museum/conservation person in me is writhing in horror at the prospect of ironing these pattern pieces onto adhesive interfacing. But I do believe that these things are made to be used, and this particular example is no longer of a quality worth trying to preserve in its original state. So, I’m doing it anyway.)

Advance 8990

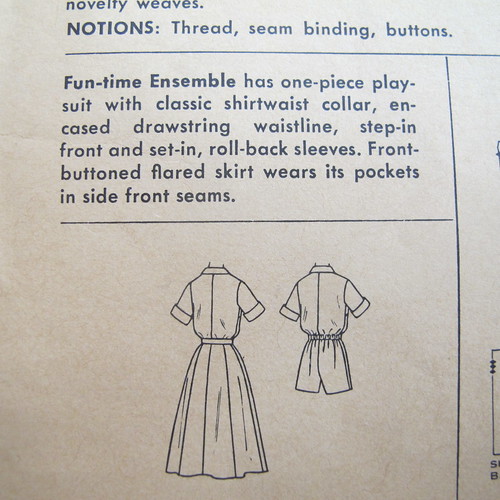
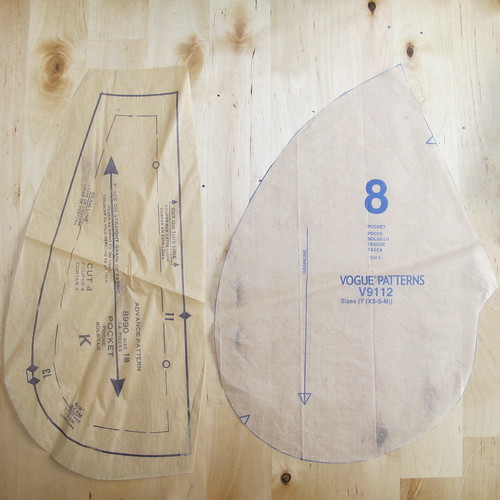
According to the envelope, the “Front-buttoned flared skirt wears its pockets in side front seams.” I spent ages looking for the pocket pattern, thinking that the piece on the left was some kind of cuff or trim. Nope – it’s the pocket. But it’s tiny! The innermost dashed line marks the seam allowance, which will be the finished size of the pocket – and I can’t even get my hand inside it! What were the designers thinking?! I don’t know what the lady of 1959 was expecting to be able to keep in there, but it must have been very small.

When I make the skirt, I’m going to substitute the pockets from my new Marcy Tilton pattern, Vogue 9112. You know, ones I can actually fit my hands into. I’ll probably add slightly smaller pockets to the playsuit as well, just because. You can never have too many pockets.

Advance 8990

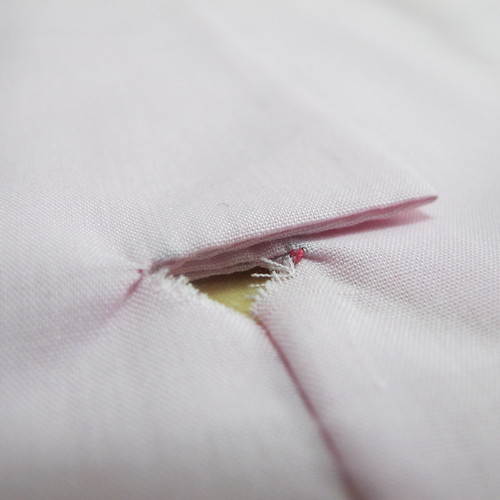
I have to say that the instructions for this pattern are pretty sparse. They basically say “cut out pieces; make playsuit”. So when I followed an instruction that said “clip to small dots”, I did so… but apparently in the wrong direction. This extremely neat little triangular hole is at the bottom of the front placket. I can patch it so that it looks deliberate, but it’s not the best place for a hole in a pair of shorts, really! I will now be annotating the instructions on a separate piece of paper, as I go along.

Advance 8990

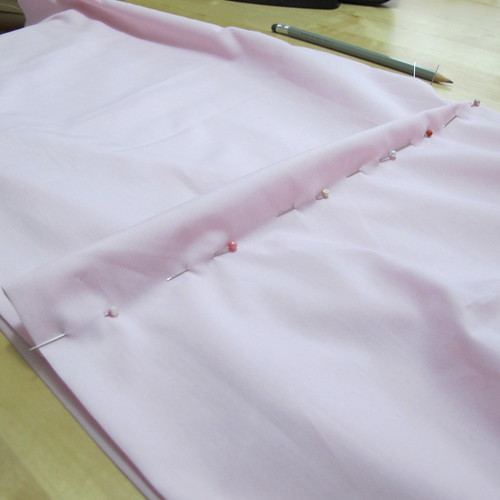
This attractive pale pink poly-cotton was just a piece of left-over fabric sitting in the stash, and I’m very glad that I decided to use it to try out the pattern before cutting it out in decent fabric! These pins represent a slightly unusual alteration, in that I’m taking 6cm out of the length at the too-long centre front, and then tapering it out to nothing at the side seams because the back is the perfect length.

I was a bit confused about this at first – how could the back length be fine, but the front be far too long? However, I think what I’m actually doing here is making a sway back/big bum alteration in reverse. Normally I’d expect to lengthen the centre back to create extra room, but I’d also expected the playsuit to be too long overall, because I’m very short in the body. As a result, the back is fine as it is, which makes the front too long by comparison. It’s all very complicated!

The only other alteration I’m going to need to make is to add a couple of inches of width at the hips. The shorts fit, but they’re quite snug, and it looks a bit out of balance with the rest of the garment being so loose. Adding a little bit of extra ease will give me the space to include the pockets, too.

I have to admit that the temptation to run down to the local fabric shop and snap up five metres of lots of different cheap novelty-print cottons is very high. But I do have some fabric in the stash that I can use up first, and I’m still trying as hard as I can not to buy non-organic cottons. We’ll see how long my resolve lasts.

Garden update – June 2015

Garden, June 2015

I read an article online which said that yesterday (24th June) was St John’s Wort Day. This struck me as slightly odd, because I know we’ve got loads of St John’s Wort in our garden, but I wasn’t aware of it having flowered yet, so I thought I’d take the camera for a walk and see what I could find.

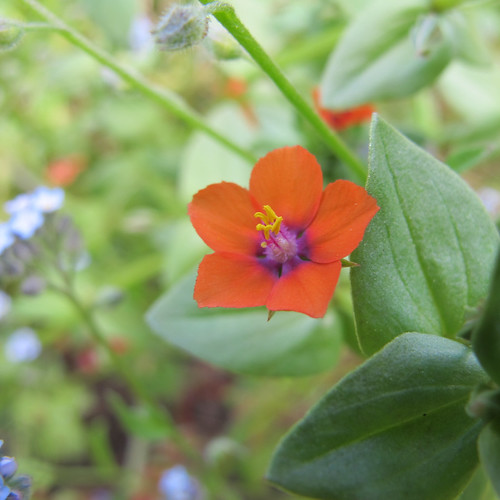
This is not St John’s Wort, it’s Scarlet Pimpernel (Anagallis arvensis). It’s in what used to be the vegetable patch, which we’re going to gradually transform into an orchard. We just need to figure out how many fruit and nut trees we’ve got the space to plant!

Garden, June 2015

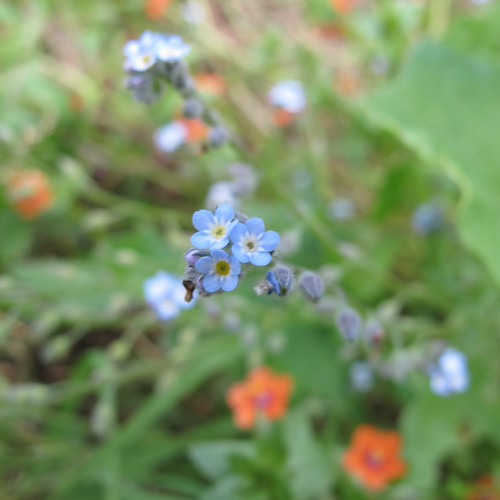
Pretty forget-me-nots (Myosotis – no idea which species these are), with the scarlet pimpernel hiding underneath them. Also in the vegetable patch/orchard.

Garden, June 2015

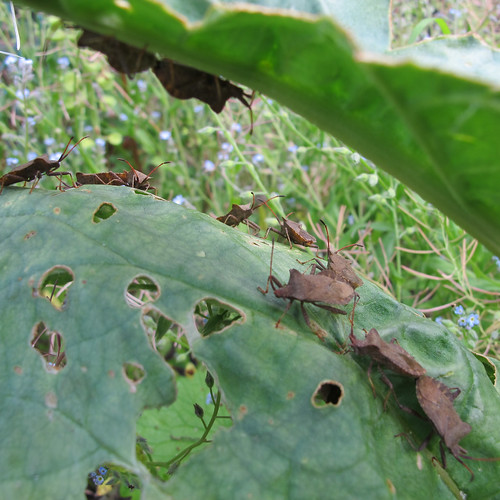
Ah. Well now. This explains why the rhubarb’s been in such a sorry state this year! A measly two stalks, and most of the leaves have been stripped right back to the veins. This was taken a couple of weekends ago, and we counted TWENTY shield bugs on what was left of the leaves, merrily making more shield bugs to eat the rest. Thanks, guys!

Garden, June 2015

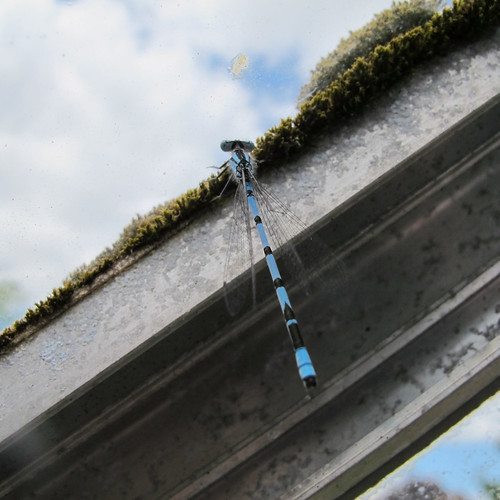
This is a Common Blue damselfly, who I found buzzing around inside the greenhouse. We see a lot of different types of damselfly, and thanks to next door’s lovely pond, we sometimes see dragonflies too.

Garden, June 2015

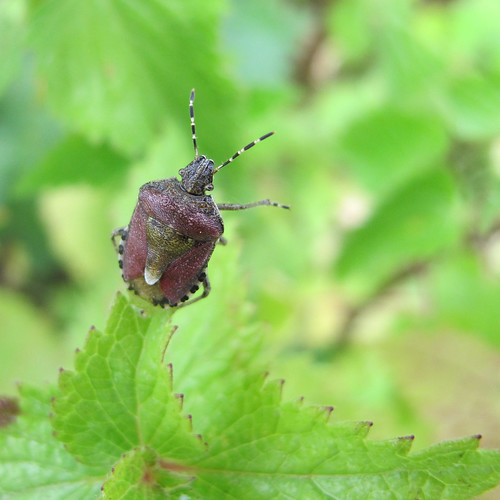
Hello! This is a different type of shield bug, hanging around on the dead nettles. We did some weeding underneath what’s going to be a native fruit-and-nut hedge, as the plants we didn’t want in that space were starting to crowd out the immature hedge plants. It needed doing, but we upset a lot of insects in the process. I felt very sad to see a huge spider running away carrying her eggs. But, we’re gradually getting rid of all the horrible shrubs that were in the garden when we moved in, and hopefully by adding lots of native plants we’ll be creating a better habitat for the future.

Garden, June 2015

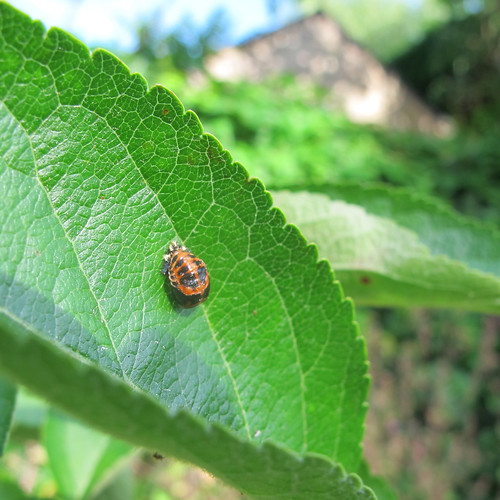
We’re keeping a close eye on the apple and pear trees this year. They’re only a few years old, and they haven’t done that well at fruiting yet. I don’t think we’ve managed to harvest a single pear (they seem to fall off the tree long before they’re ripe), and last year’s apples seemed to be full of moths. This is a ladybird larva, so I’m kind of hoping it’s eating whatever’s been ruining the apples!

Garden, June 2015

And here’s the chap that prompted the walk down the garden in the first place – St John’s Wort (Hypericum perforatum). We have a few clusters of plants, although not as many as last year by the looks of it. Most of them are just about coming into bud, but this was the only one that was actually in flower, so harvesting them right now seems a little premature!

Garden, June 2015

And here’s how it gets its name – the little spots all over the leaves. This is one way that you can tell St John’s Wort from other types of hypericum – it’s called perforatum for a reason.

Garden, June 2015

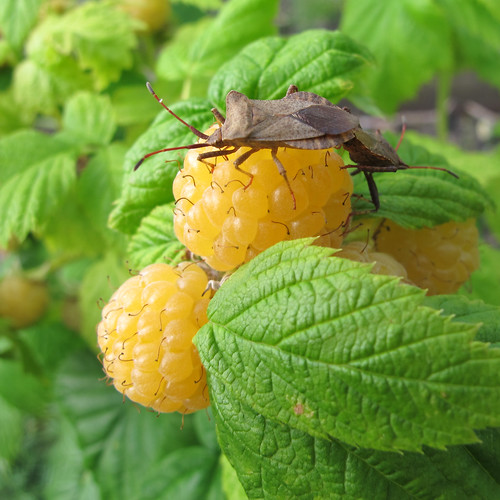
Apparently the shield bugs like the golden raspberries too. (Guys! We want to eat those!) This plant was a gift from friends, and now that we’ve finally got it out of the pot and into the ground it’s doing amazingly well! Last year I think we had six raspberries, which we just stood and ate in the garden. This year we might get enough to make a pie! (Or we might just stand and eat them in the garden again. Who knows.) We do need to harvest them soon though, the one that the shield bugs are sitting on is lovely and ripe.

Garden, June 2015

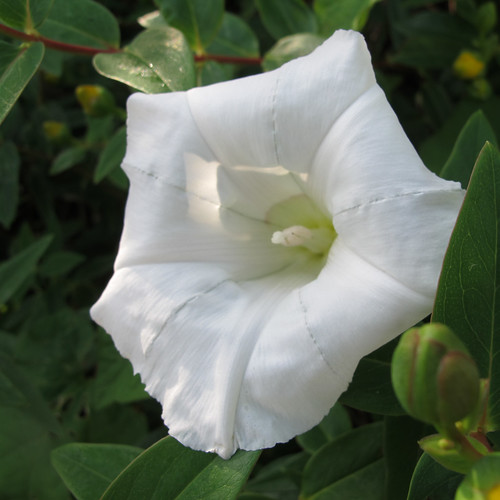
It’s not all fabulous out there – the shots I’ve taken don’t show you the overall wildness of the garden. Which I do love, but at the same time we do need to try and control things a little bit. We certainly haven’t managed to control the bindweed, which is winding its way through all the shrubs in the garden, and we have to keep disentangling it from our baby hedge plants. Here it’s coming up through another hypericum – an enormous shrub version. And we’re also contending with a neighbour’s cat, which has recently started making its presence felt in the middle of the lawn. Not in the flower beds, not in the convenient freshly-dug soil. Right out on the damn lawn. Marvellous.

Garden, June 2015

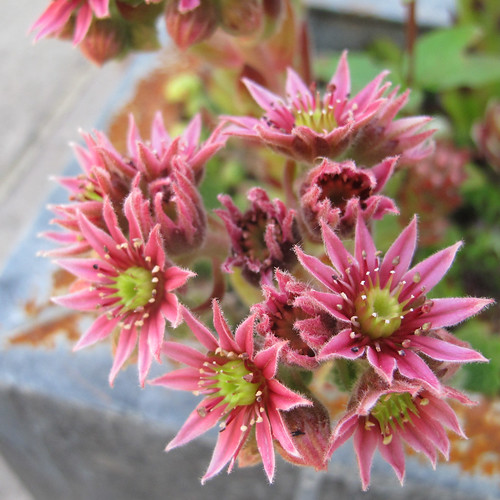
But to end on a much more pleasant note – the sempervivium has gone mad! It’s crammed into a smallish pot, where it’s lived for years and years, and I don’t think I’ve ever seen it with so many flowers! Amazing what benign neglect can do for your plants. Just as well really, as that does seem to be our primary method of gardening!

Sew, Knit N Stretch

1960s Sew Knit N Stretch 228

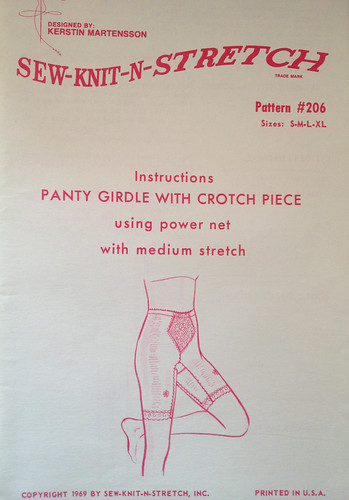
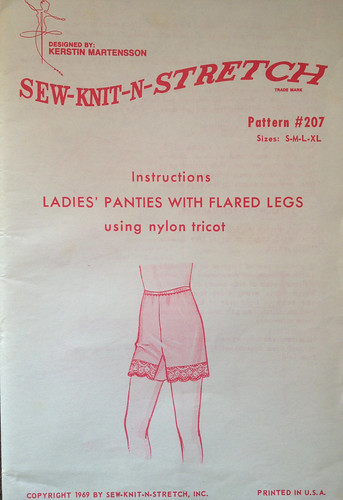
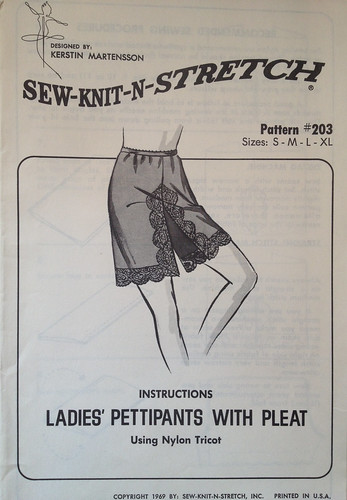
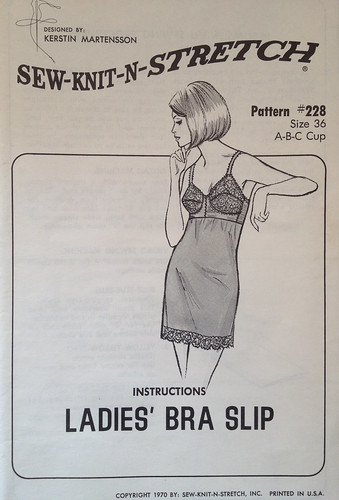
I’ve been collecting these Sew-Knit-N-Stretch (the precursor to Kwik Sew) patterns for about a year. These particular designs date from 1969 and 1970, so I can’t really think of them as being “vintage” just yet. Okay, yes, they’re from before I was born, but only by three or four years. And that’s NOT OLD. Definitely not.

The peculiar thing about these patterns is that they come without any kind of size reference whatsoever. Yes, they say “S-M-L-XL’ on the front, but there is absolutely no indication, anywhere, as to what those sizes might mean. Not on the envelope, not in the instructions, not on the pattern pieces. Not anywhere.

Sew-Knit-N-Stretch

I made an XL in this one, a complete guess, and thankfully it turned out quite well. Okay, they have been relegated to pyjamas, but I need to do a bit of fabric thinking before I make another pair. The pattern calls for power net (as they’re supposed to be a “control” garment), I went for cotton jersey… but I think perhaps some kind of sportswear fabric might turn out to be a good in-between answer.

Sew-Knit-N-Stretch

You saw these as part of Me-Made May – and yes, they’re now pyjamas too. I made a size XL, thinking they’d be nice and comfy, and I think they will be in a woven fabric. In a knit though, I can definitely go down to a size L without any trouble at all.

Sew-Knit-N-Stretch

This pair I haven’t made yet, but I think I’m going to start by tracing off the size L this time, and hoping that the sizing is the same as for the other patterns!

These, and the ones above, are designed for nylon tricot. Personally I’m not a huge fan of nylon – it creates static electricity, it clings to your legs, and it’s hot and sticky in the summer. Hot and sticky is precisely what I’m trying to avoid by making this type of underwear, so I think a different fabric choice is going to be required. It needs to be something slippery, so that cotton dresses move nicely over the top, but not something that’s going to be hot or static or climb up your legs in an annoying way.

I think I need to stalk Scruffy Badger’s blog – she makes some lovely running shorts in sportswear and performance fabrics, so I think there might be inspiration to be had over there!

Sew-Knit-N-Stretch

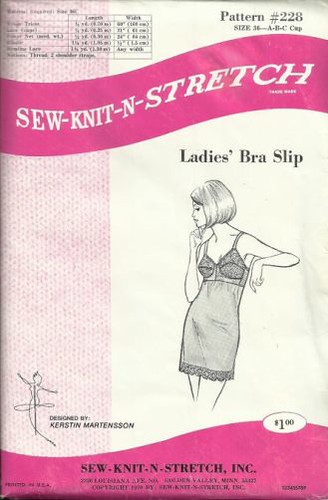
This one is the weirdest of all, in that it turned out to (mostly) fit first time! I made a 36C, assuming it would be too big, and I could then alter it down to fit. In an off-the-shelf bra I wear a 36A, or a 34B, or a 32D, depending on what mood the manufacturer was in on the day they decided to pluck the imaginary sizes out of thin air. Surprisingly the 36C turned out to be almost spot on… although the more I wear the slip, the more I wonder whether I should try and find a copy in a 38 to see whether that would fit even better.

Most UK bras are sized using the frankly bizarre “+4” system – you measure around your ribcage to find your underbust measurement, you add four inches to this measurement for no readily apparent reason (three inches if it’s an odd number, obviously), and that’s your bra size. You then measure around the fullest part of your bust, and work out the difference between the under bust and over bust measurements to determine which cup size you need. Then you go to a shop, take every bra in that size into a changing room, and weep gently as not a single one of them turns out to fit you, and they’re all wrong in a different way. Or is that just me?

Anyway, I wonder whether, being a dressmaking pattern, this bra slip is actually given as a dress size, rather than a bra size. Dress patterns are sized according to your over bust measurement, and most of the vintage patterns I buy are a size 38 or 39″ bust. (This could be anything from a size 14 to a size 20½, depending on which decade the pattern is from.)

Actually, a quick search has turned out to reveal that the bra slip is only available up to a size 36, but what looks like the identical bra pattern without the slip part is available in a 38. Perhaps I can cobble the two together and see what happens.

Thinking about dresses

Three dresses

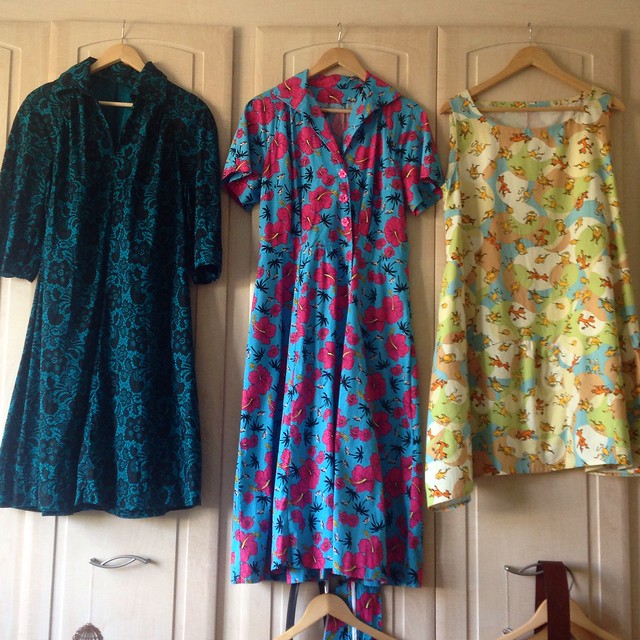
I’ve had these three dresses hanging over my wardrobe doors for a couple of weeks now, trying to decide which is my favourite, and which I should therefore make again.

Trouble is, I haven’t really been wearing dresses lately, as I tend to reach for them only in the heights of summer and winter. Last winter was so mild we didn’t see a single flake of snow, and so I didn’t need my usual winter outfits of leggings (or bloomers and knee socks), a long petticoat, a long sleeve t-shirt, a long flowing dress, and a jumper. This summer… well, we haven’t quite reached it yet, and so I’m in a limbo of chinos and t-shirts, or ancient jeans that I really should have thrown out already.

IMG_4183

I wore the dress on the right (Vogue 9112, Marcy Tilton’s “Cirque” dress) to visit a friend, and it turned out to be perfect for having a picnic on the lawn, followed by having a small plastic car driven over my knees on the sofa. What more could I ask of a dress? I wore it with yoga pants, as it was always my intention for this one to be more of a tunic style. (I am also eagerly awaiting the release of the Dottie Angel Dress pattern, for tunic-making purposes.)

17/5/14

The middle dress, Advance 8065, a 1956 pattern, I wore to work on my last day at the Museum. It was comfortable, but I do need a slightly longer slip to wear underneath it, to stop it from catching on my bloomers and going all bunchy around the knees. (Either that or I need to start making my bloomers in silk rather than cotton!)

Bee dress, July 2014

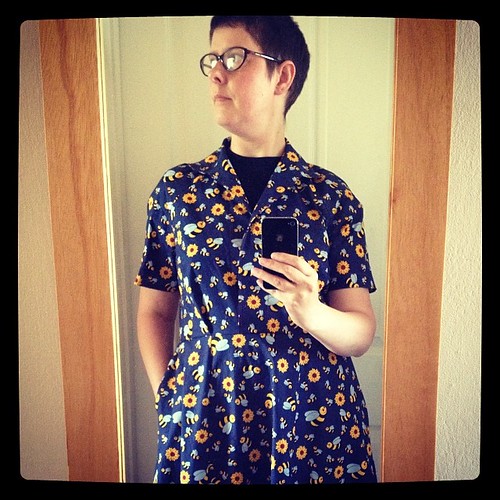
I’d had the same issue the day before, when I wore a not-quite-finished dress, which had started life as a shirt but ended up with the skirt from the pattern above added to the bottom. It still needs a placket and buttons, but although it was a bit tricky to get off again, it held together okay with a big brooch at the collar!

But did I enjoy wearing it enough to finish this one and make another? At the moment I’m not sure. I feel as though a dress should be an easy option for an outfit. One garment, pop it on, add a cardigan, and away you go. Somehow the reality of having to pair a dress with a bra slip and bloomers makes it seem like more trouble than it’s worth.

1970s dress

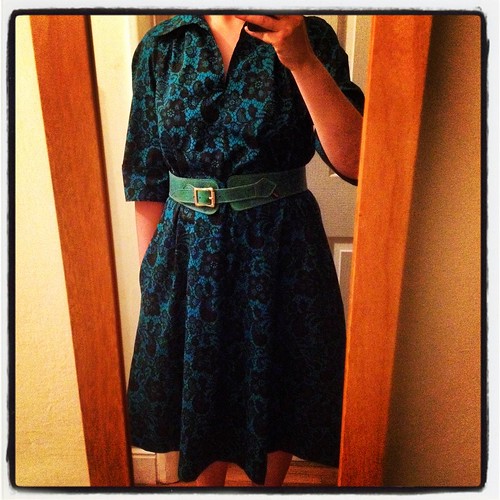
As for this one, the dress on the left in the top photo (Butterick 4637, a 1970s pattern), I haven’t worn it more than a few times since I made it, and most of those times were as soon as it came off the machine. Even having it hanging around in full view simply isn’t tempting me to put it on. Maybe because the fabric’s quite dark, so it feels like a winter dress. Perhaps it would be better with leggings and a long sleeved t-shirt underneath. It just doesn’t feel right for summer, somehow.

I still haven’t had a proper sort-out of the side of the wardrobe that hides all of my dresses, so perhaps I need to do that before I decide anything. This year I definitely feel more drawn towards novelty prints and vintage styles than I do towards my long floppy linen dresses and long petticoats. But maybe that’s just because the weather hasn’t warmed up yet, and it’ll be tunics and petticoats and bloomers all the way once the sun comes out.

All I know is that I currently have so much stuff that I’m feeling totally overwhelmed by it. I definitely need to make a concerted effort to sew things that I’m actually going to wear, rather than being tempted by interesting patterns and pretty fabrics. Either that, or actually stop sewing for a while, and concentrate on wearing the things I have already. We’ll see.

New shoes in progress…

Felt shoes

Did I mention that I was making some new shoes? I suspect that might be one of those things that I only mentioned on Facebook and Instagram, while I was having a bit of a break from the blog. I started working on them back in April, with some lovely wool felt from Cloud Craft.

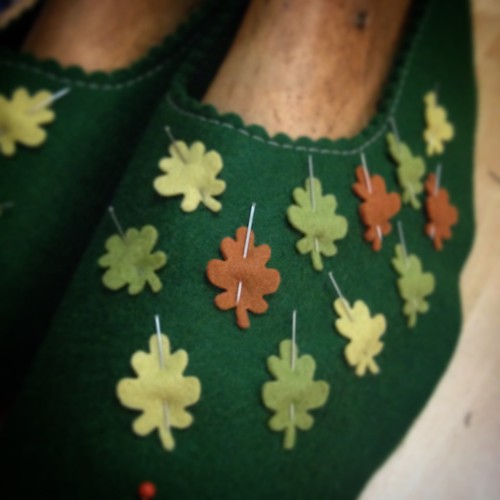
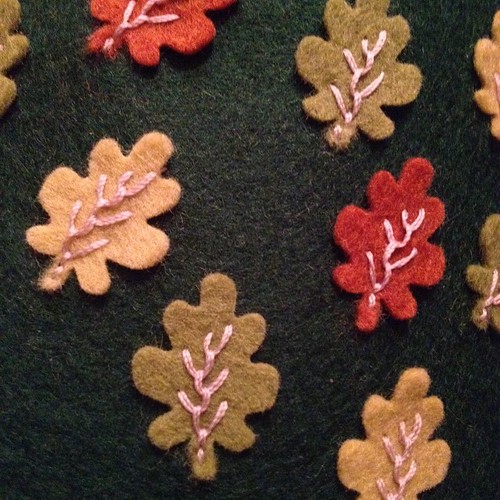
Embroidered felt leaves

I’d originally wanted to make my own felt, but my hands and shoulders haven’t been well enough to allow that, so I decided to bite the bullet and buy some. I love the combination of felt and embroidery (I seem to be doing that a lot these days!), and I figured that I could use the techniques from my original fabric shoes to make something a bit more robust.

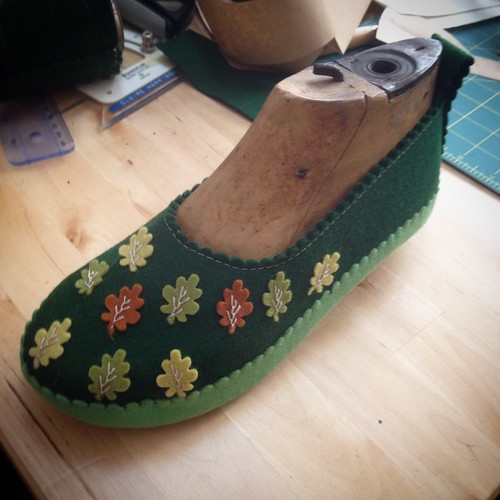
Felt shoes

This turned out to be very nearly the case. These are just lacking their rubber outdoor soles, and they look really good on the lasts – if I do say so myself!

Felt shoes

Unfortunately something went a bit peculiar in the sizing department. When I took them off the lasts and put them on my feet, they were enormous! By this time I’d already taken orders for ten prototype pairs, so I could thoroughly test the techniques before letting them loose in my Etsy shop. Obviously I couldn’t make ten pairs of shoes that didn’t fit their recipients, so I decided to bite the bullet and borrow enough money to allow me to order some lasts.
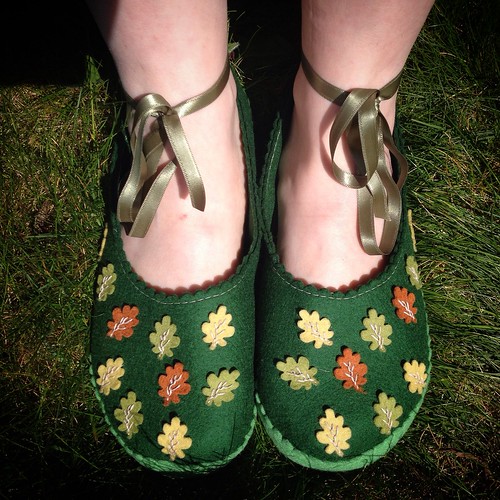
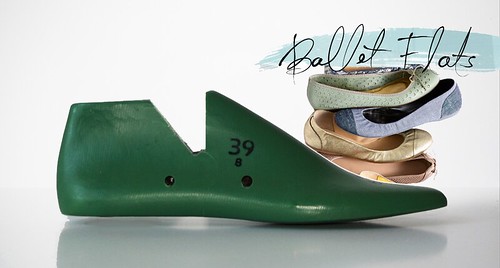
Ballet Flats lasts from shoe-last-shop.com, ordered in sized 32-45!

I found the perfect style at Shoe Last Shop, a company which specialises in selling small quantities of lasts to shoemakers without factories, who aren’t mass-producing thousands of pairs. I’ve ordered a full set of these, in European sizes 32 to 45. I suspect that the smallest and largest sizes will get a lot of use (which is why I wanted them), as most commercial shoe ranges only include sizes 36 to 41, sometimes up to a 43 if you’re lucky.

I was expecting to have ten finished pairs of shoes to show you by now, as the lasts were scheduled to arrive just over a month ago! Sadly there have been some production delays at the factory, and I’m going to have to keep people waiting a while longer, which I really don’t like. It’s bad customer service on my part, even though there’s nothing I could have done to fix it. (Well, except for not having taken the shoe orders, even for prototypes, until I had the lasts in my hands.)

Thankfully, I received an email yesterday to say that the production backlog had been caught up, and my lasts should be shipping in the next couple of days. I have a huge pile of felt read and waiting, so as soon as they turn up I can make new upper patterns to fit them, and get a move on with the shoes!

Birthday Dress and a Thank You

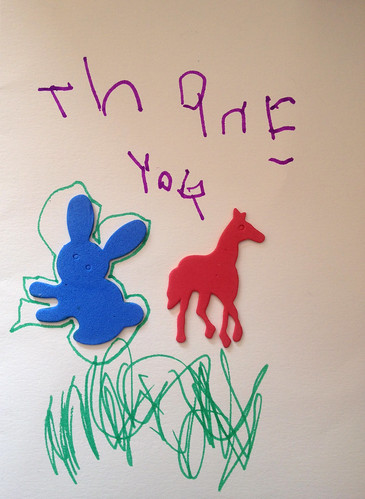
Thank You card

Last month we sent my niece, Milly, a box full of arty and crafty things for her fourth birthday. Paul picked out lots of stickers that he thought Milly would like (the wobbly eyes were especially popular), and we’ve just received this fantastic Thank You card. Isn’t it cute?

Milly's 4th Birthday Dress

There was also a Birthday Dress, of course, as well as a little pile of tote bags made in Frozen fabric, for everyone at her birthday party.

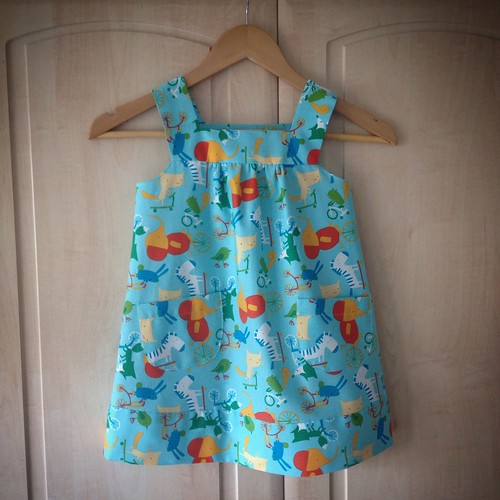
This year’s dress is McCalls 6022, another one with finishing techniques far more complicated than I would have expected for an “everyday” kind of dress like this – and especially one marked “Easy”! I had one metre of fabric, and only just managed to squeeze the dress out of it by cutting the yokes, pockets, and the “contrast” band at the bottom on the cross. I think this works quite well, as it gives all of the different characters a chance to appear the right way up!

The thing I like about these dresses is that they last for quite a long time. Even though Milly’s quite tall, she can carry on wearing this as a tunic or top over jeans or leggings, long after she’s outgrown it as a dress. I have this pattern up to age 6, so I expect I’ll be making a few more versions of it over the next couple of years. I will be re-writing the instructions though, to make the finishing a bit less fiddly. (And buying a little bit more fabric next time!)

Meet the Universal Aunts!

Universal Aunts

Do you miss your Mum? Fancy a chat with your sister?
Need a word of wisdom from your Grandma?
Has your favourite cousin gone off travelling
the big wide world without you?
Simply choose your favourite Universal Aunt,
and you’ll always have a companion at your side! 

(Please note: advice given by Universal Aunts cannot
be guaranteed. Some of them are wiser than others.)

Universal Aunts
If you’ve been following me on Facebook or Instagram lately, you’ll have seen these little Ladies popping up all over the place.

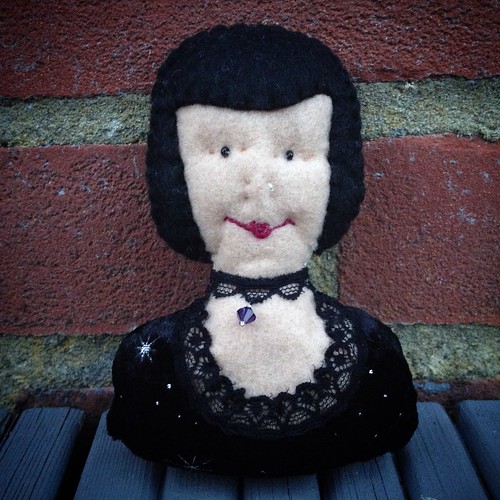
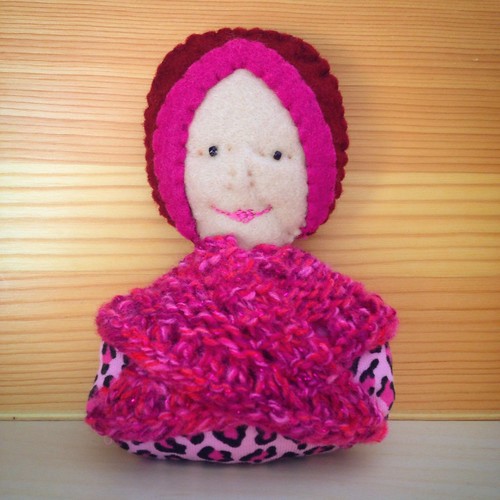
I have a couple of BIG DOLLS wandering about in my head. (As you do.) They’ve been in there for a year or two, but I’m too intimidated to let them out. So, I needed to improve my doll-making skills, and what better way than by making some little ones? I started with the Lady above, just as an experiment really, using up scraps from my sewing room and trying to create a character.

Universal Aunts

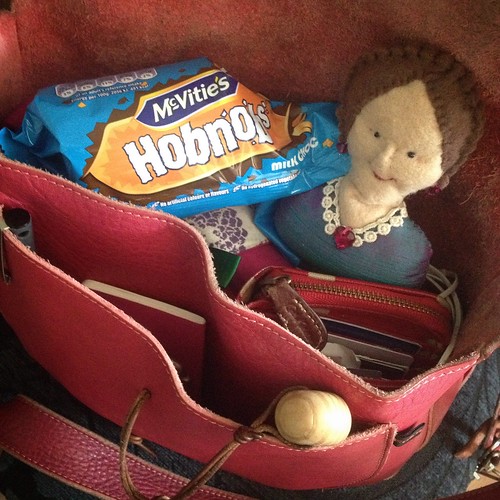
I wasn’t sure who this Lady was, to begin with, so I started carrying her about with me, showing her to people, and waiting to see who she turned into. (Here she is, in my Fairysteps handbag, bringing a packet of chocolate biscuits to a friend.)

Universal Aunts

Over the next week or so, more Ladies started to appear, wearing different outfits, and keeping me company. (This Lady, as you can see, is doing a spot of shopping.)

Universal Aunts

It has been suggested that some of these Ladies are incarnations of various different parts of my personality over the years. I couldn’t possibly comment.

Universal Aunts

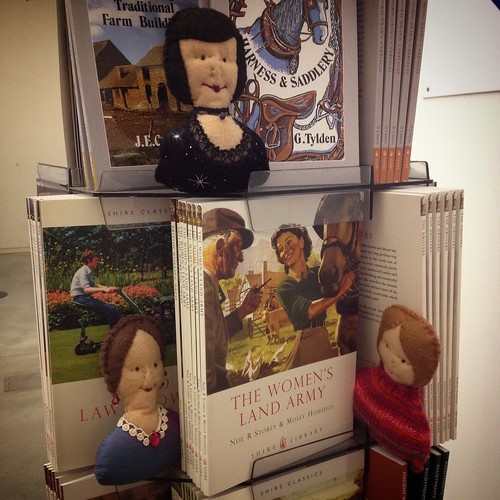
(I spent far too long deciding which books the Ladies should be looking at. So far, nobody seems to have noticed that the two Sensible Ladies are interested in the Women’s Land Army, while the Goth Lady glances sideways at Harness & Saddlery.)

As I was carrying a selection of small felt dolls around in my handbag (doesn’t everybody?), I found that I was really enjoying thinking of places where I could photograph them, and also feeling comforted by the quiet sense of companionship from having a tiny character who I could just glance at during a stressful day.

Universal Aunts

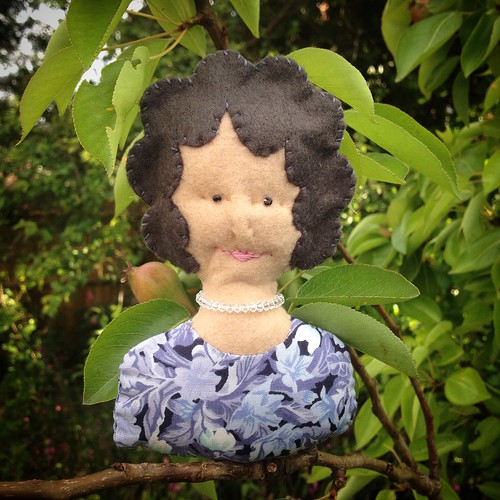
(A friend suggested that this very smartly-dressed Lady should be named Mrs Partridge. Because she’s in a pear tree. Get it?)

It was at this point that the Universal Aunts were born.

A small felt keepsake doll, just right for sitting on your bedside table, keeping you company at your desk, or tucking safely into your handbag. I think of them as a cross between those tiny little “worry dolls” and my niece’s beloved Bunny, who goes everywhere with her. We may think of ourselves as “too old” for bunnies and blankies and even dolls… but who couldn’t do with somebody friendly to confide in every once in a while?

Mr & Mrs Smith Go On Honeymoon

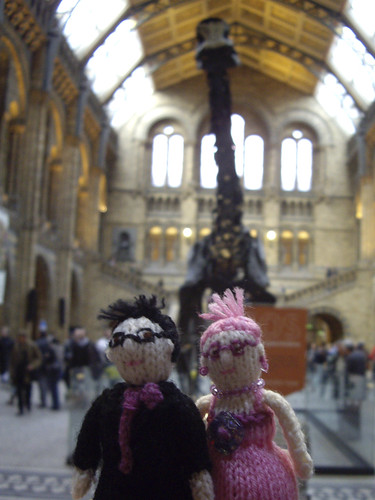
They also reminded me of my honeymoon, where we took little knitted incarnations of ourselves (beautifully made by my Mum) and had great fun taking photographs of them on their holiday!

Universal Aunts

These first few Ladies aren’t for sale – they’re made from acrylic felt, with plastic eyes, and a lot of them have some distinctly experimental stitching involved! But now that the patterns are developing nicely, I’ve bought some wool felt and some glass beads, and I’ll be making a lot more Ladies of a much higher quality to pop into the Inexplicable Emporium.

(They’re going into the Emporium rather than the Eternal Magpie shop because I thought they might get a bit lost amongst the hats, and I wanted the Universal Aunts to have a little showcase all to themselves.)

Universal Aunts

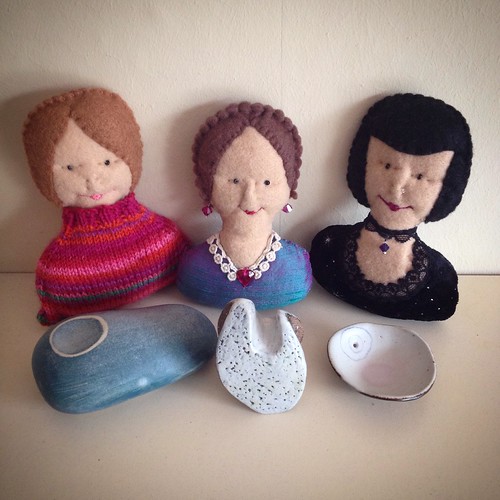
I’m planning to go back through my Instagram posts and tag all of the Ladies with #universalaunts, in the hope that once they start making their way out into the world, I can encourage other people to do the same. Wouldn’t it be lovely to see what kinds of adventures the Aunts end up on? (Here, they’re admiring my small collection of ceramics by Sue Mundy.)

So, there you have it.

Universal Aunts.

I hope you like them!

Meet Lucinda

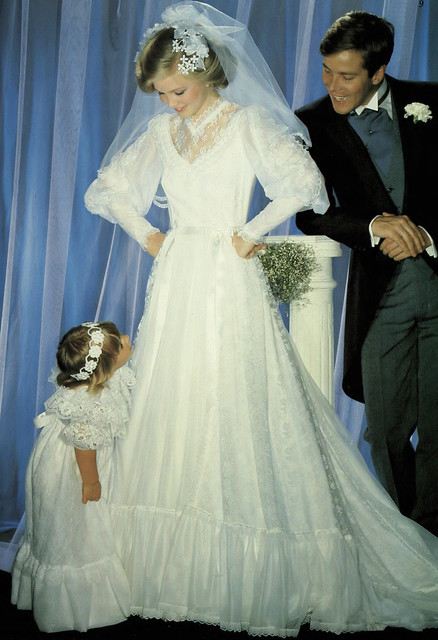
Pronuptia Lucinda, 1983

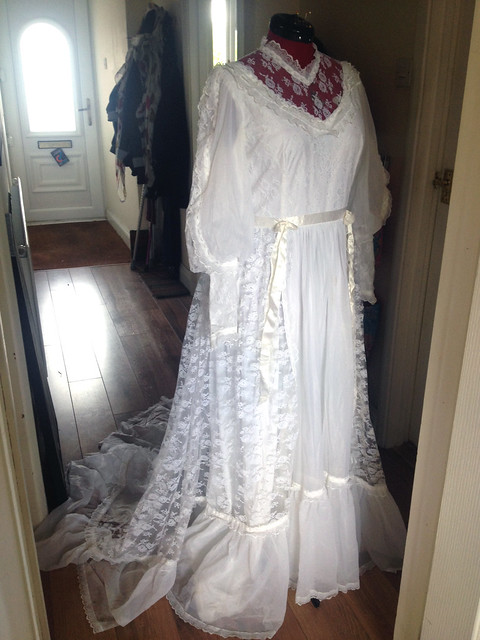
Say hello to “Lucinda”, one of Pronuptia‘s finest wedding dresses of 1983.

I’d been looking on Ebay for a while for a stereotypically 1980s wedding dress, the bigger and the pouffier the better, but somehow I always seemed to end up being outbid by 15p at the very last minute. I had a look in charity shops, but everything they had was too nice, or too far out of my very limited budget.

So, I asked around on Facebook, and a photographer friend said he thought he might have something appropriate lurking around in the garage, from a project that had never come to fruition. He sent it over to me, and it turned out to be perfect!

Pronuptia Lucinda, 1983

It’s a perfect example of 1980s-does-Edwardian, and being a Pronuptia gown it’s really well made. Okay, yes, it’s really well made from 100% nylon (lovely!), but that means it’s survived a trip through the washing machine, and has come out looking great. And best of all, as you can see by the mannequin, the dress is an absolutely perfect fit. I couldn’t have asked for anything better!

There’s a little bit of damage to the bottom ruffle – a hole at the back, and a couple of places where the lace is coming away. There’s also some staining on the lining of the train, where the dress has obviously been wet at some stage… and there’s a mark on the front of the skirt, that might be wine, or might be gravy!

Clearly this dress has had one very good day in its life, but considering the dated style and the damage, I can’t say I feel too bad about making some slight alterations. Details will follow later, but what I will say is that this is for a photo project of my own, mainly involving messing about in the woods in a big white dress. After I’ve taken the scissors to it, that is.
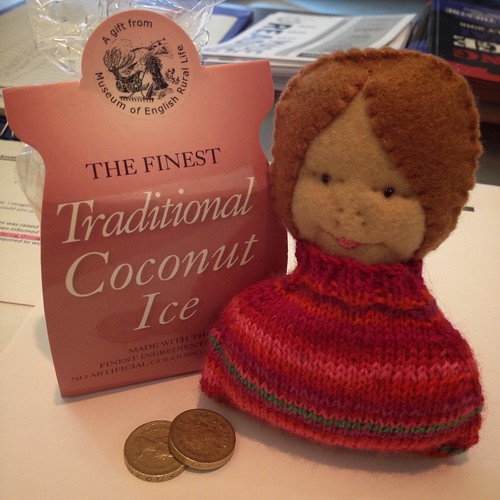
(Oh, and if you fancy a bit of a giggle, Pronuptia have digitised 60 years’ worth of their catalogues, and made them available online!)

A slightly unexpected change.

IMG_4496

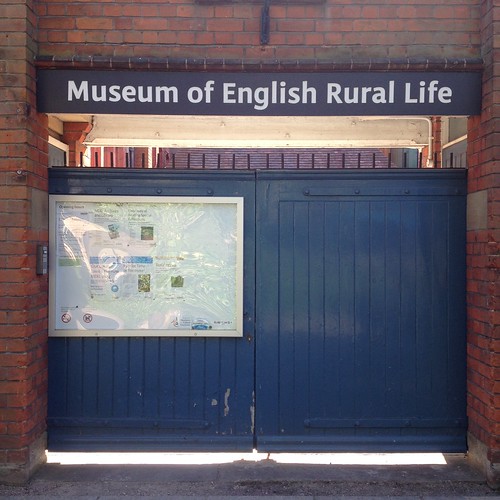
Well, this week’s a bit of a strange one. That’s because (barring holidays and illnesses), this is the first week in six years that I haven’t been working or volunteering at the Museum of English Rural Life.

IMG_4509

No more staff entrance for me – I’ve handed in my notice, handed in my key, and to be honest, it all still feels very strange indeed.

IMG_4508

I’ve written about my various roles at the museum on a number of occasions, and I’ve really, really enjoyed spending my time there over the past six years.

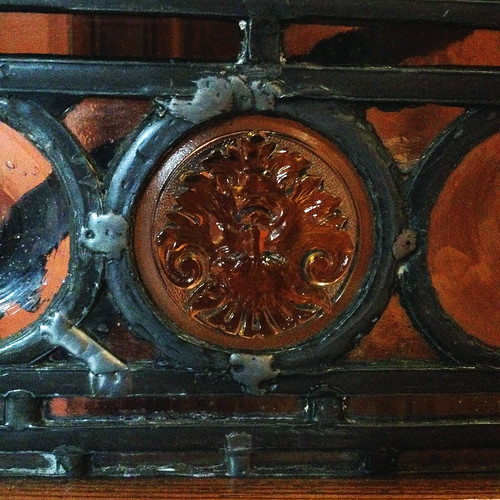
(This little upside-down piece of glass is one of my favourite parts of the Waterhouse-designed building.)

So why leave?

Well, one reason is that the fibromyalgia’s been getting on top of me. It’s been mostly stable, but not improving, and having a job that was mainly sitting down, particularly in a cold environment, wasn’t really doing me any favours. I was spending more time recovering from the work than I was actually doing the work, and that seemed silly.

Another is that my job-share colleague decided to take the plunge and leave the museum to start a course in clinical aromatherapy. This made me think about the massage qualification which I completed in 2006, and then wasn’t well enough to follow up. I’m doing my two distance learning courses in Aromatherapy and Herbalism (albeit very slowly), but perhaps there was more I could be doing.

IMG_4234

A couple of weeks later I spotted an advert from the local Physiotherapy clinic, asking for help over the summer. I spent a day doing a voluntary session there, just watching what was required, and chatting to everybody who came in for treatment. By the end of the day I was very tired from having been standing up and dashing around for hours, but I didn’t have that terrible grey fibromyalgia exhaustion which leaves you unable to do anything, yet simultaneously unable to sleep.

About an hour after I got home I received a phone call asking me to go in the following morning for a bit of a chat, at which point I was offered the job of Physio Assistant. Hopefully not just because they’d already got a badge in the drawer with my name on it!

A hard weekend of thinking followed, and a decision was made. The clinic is a five minute walk from my house, so no more commute, and I save around £35 a month on bus fares. The hours are about the same, the money’s about the same, the job makes direct use of a qualification I worked hard for and would like to expand upon, and there is room for expansion into other roles at the clinic in the future.

Decision made.

I love the museum, and have made a lot of good friends during my time there, and I know I’m going to miss it terribly. But I think this change will be good for my health, and I have to put that first.

IMG_4223

As a result, the past few weeks have been full of training (turns out treating people with lasers isn’t anything like as exciting as James Bond made it out to be), as well as working my first few Physio Assistant shifts, and working my notice at the museum. It’s been hectic, but I think it’s going to be okay.

The only down side of the new role?

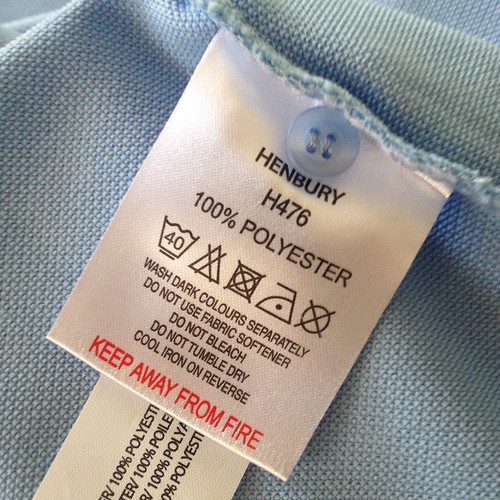
After all these years of eradicating all traces of synthetic fibres from my wardrobe, and insisting on natural fabrics and organic cottons… this is the label from my new uniform!

Still. I can wear my Monkee Genes dark blue chinos with it, and comfy trainers… and no more worrying about Smart-Casual. From now on, when I’m not at work, I can wear anything I like!

Back to the hats!

IMG_5008

Well, it’s been a while, but I am finally getting back to the hats. This bright orange beauty is now in my Etsy shop, I just need to find a box the right size for shipping this new style.

A couple of months ago I made the difficult decision to sell two of my cloche blocks to another milliner, and to put the money towards two new things – a set of shoe lasts (currently AWOL in transit between here and Portugal, argh), and a mini top hat block. To decide whether mini top hats were definitely going to be the way forward, I made an impromptu block out of an old biscuit tin, and ended up with this:

IMG_5019

As you can see, the shape is a bit short and wide for a top hat, and I did have some issues to do with not using a proper block (note: cardboard, however thick, is not a great surface for millinery!), so this one won’t be for sale. However, I was really happy with the idea, and with the felt-and-Swarovski crystal embellishments.

IMG_3804

Convinced that the idea would work, I went ahead and ordered the block below. The crown (the top part) measures about 11cm tall, and the brim is about 17cm across with the edges curled upwards. I’m not totally convinced by the outward flare at the bottom of the crown, but the five-part blocks necessary for a beautifully curved top hat shape were beyond my budget, so this one it had to be.

(To make a curved top hat shape, you need a block that’s designed to come apart inside the finished hat. Otherwise you can’t get the wide top of the crown out past the narrow bit in the middle! And of course, the engineering involved to make those costs money that I don’t have right now. One day, though. One day.)

IMG_4133

The style feels a little more Guy-Fawkes-goes-Steampunk than I’d intended, but I really like the size and the proportions of the resulting hat. I haven’t trimmed this red one yet, because I don’t have any item in my sewing room that’s either a matching shade of red, or a good contrasting colour. I don’t know how that’s possible, but it seems to be true!

IMG_5009

This orange one’s trimmed with remnants of a lovely bouclé tweed, so it’s absolutely one of a kind – I don’t have enough of this fabric left to make another. Which is a shame really, as it would have looked great trimming a navy hat, or a bright pink one! I will put up a made-to-order version on Etsy though, as I really fancy making some of these trimmed with a nice bit of proper Harris Tweed.

Any takers?