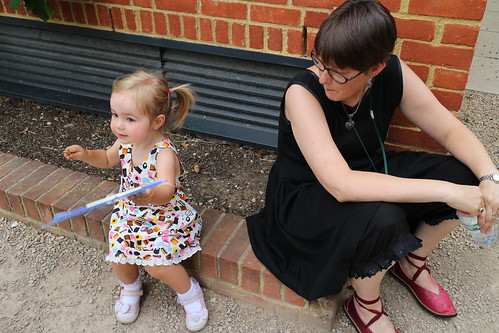
Thinking about dresses

Three dresses

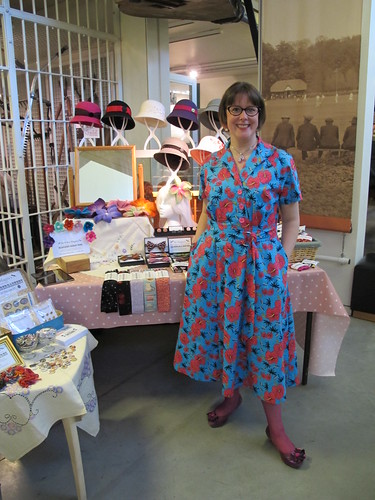
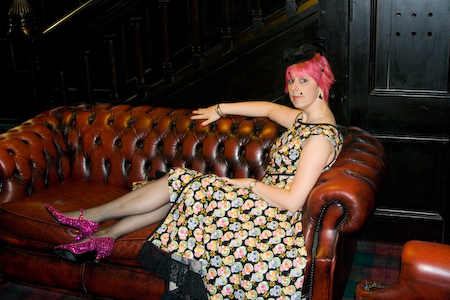
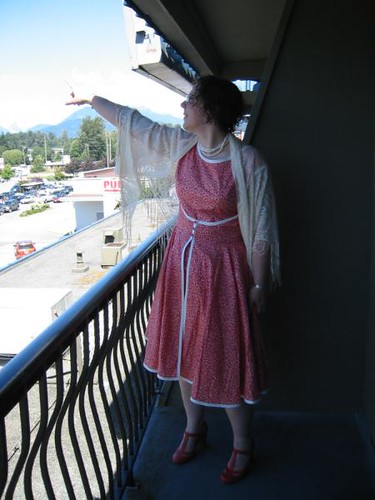
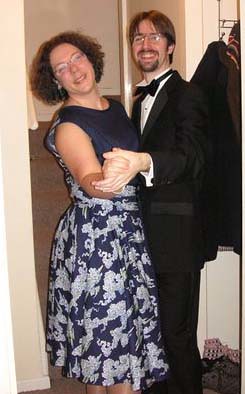
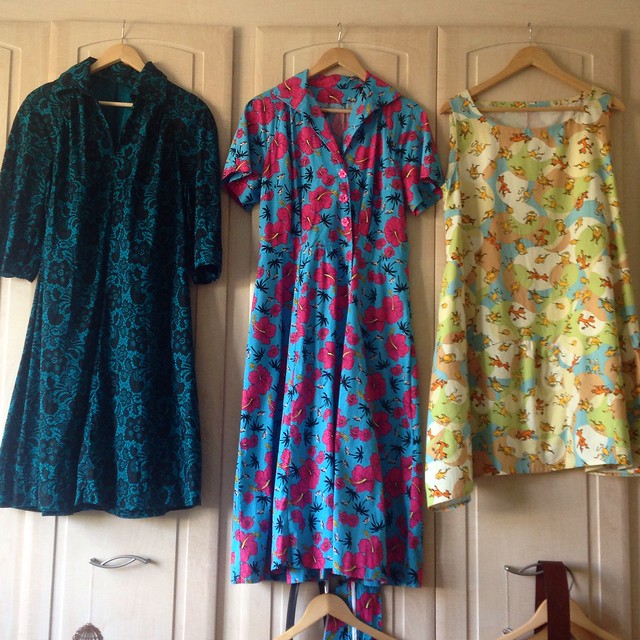
I’ve had these three dresses hanging over my wardrobe doors for a couple of weeks now, trying to decide which is my favourite, and which I should therefore make again.

Trouble is, I haven’t really been wearing dresses lately, as I tend to reach for them only in the heights of summer and winter. Last winter was so mild we didn’t see a single flake of snow, and so I didn’t need my usual winter outfits of leggings (or bloomers and knee socks), a long petticoat, a long sleeve t-shirt, a long flowing dress, and a jumper. This summer… well, we haven’t quite reached it yet, and so I’m in a limbo of chinos and t-shirts, or ancient jeans that I really should have thrown out already.

IMG_4183

I wore the dress on the right (Vogue 9112, Marcy Tilton’s “Cirque” dress) to visit a friend, and it turned out to be perfect for having a picnic on the lawn, followed by having a small plastic car driven over my knees on the sofa. What more could I ask of a dress? I wore it with yoga pants, as it was always my intention for this one to be more of a tunic style. (I am also eagerly awaiting the release of the Dottie Angel Dress pattern, for tunic-making purposes.)

17/5/14

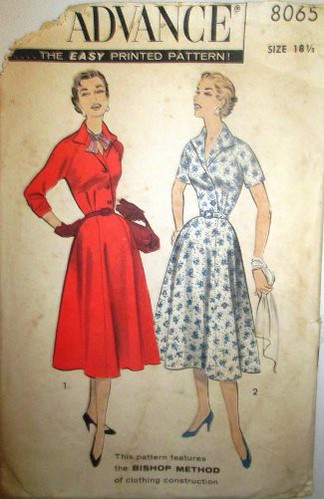
The middle dress, Advance 8065, a 1956 pattern, I wore to work on my last day at the Museum. It was comfortable, but I do need a slightly longer slip to wear underneath it, to stop it from catching on my bloomers and going all bunchy around the knees. (Either that or I need to start making my bloomers in silk rather than cotton!)

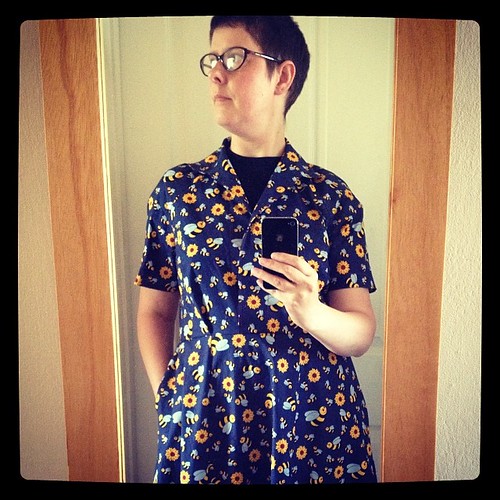
Bee dress, July 2014

I’d had the same issue the day before, when I wore a not-quite-finished dress, which had started life as a shirt but ended up with the skirt from the pattern above added to the bottom. It still needs a placket and buttons, but although it was a bit tricky to get off again, it held together okay with a big brooch at the collar!

But did I enjoy wearing it enough to finish this one and make another? At the moment I’m not sure. I feel as though a dress should be an easy option for an outfit. One garment, pop it on, add a cardigan, and away you go. Somehow the reality of having to pair a dress with a bra slip and bloomers makes it seem like more trouble than it’s worth.

1970s dress

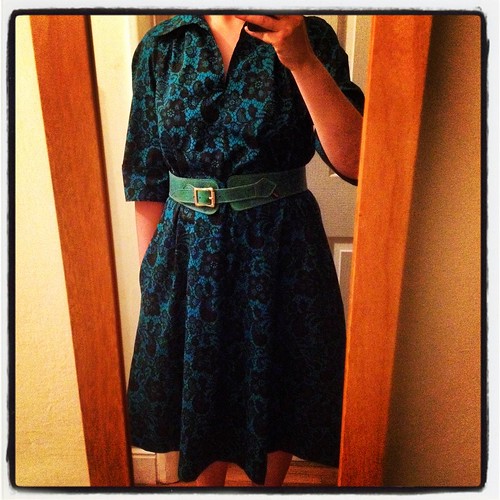
As for this one, the dress on the left in the top photo (Butterick 4637, a 1970s pattern), I haven’t worn it more than a few times since I made it, and most of those times were as soon as it came off the machine. Even having it hanging around in full view simply isn’t tempting me to put it on. Maybe because the fabric’s quite dark, so it feels like a winter dress. Perhaps it would be better with leggings and a long sleeved t-shirt underneath. It just doesn’t feel right for summer, somehow.

I still haven’t had a proper sort-out of the side of the wardrobe that hides all of my dresses, so perhaps I need to do that before I decide anything. This year I definitely feel more drawn towards novelty prints and vintage styles than I do towards my long floppy linen dresses and long petticoats. But maybe that’s just because the weather hasn’t warmed up yet, and it’ll be tunics and petticoats and bloomers all the way once the sun comes out.

All I know is that I currently have so much stuff that I’m feeling totally overwhelmed by it. I definitely need to make a concerted effort to sew things that I’m actually going to wear, rather than being tempted by interesting patterns and pretty fabrics. Either that, or actually stop sewing for a while, and concentrate on wearing the things I have already. We’ll see.

Do you wanna build a snowman…?

IMG_2817

As someone with an almost-four year old niece, it was inevitable that Aunty Claire was going to get the call at some point. I was half-expecting a request for a Princess Elsa dress for her birthday, but it turned out to be a slightly last-minute Anna cloak to wear to a Frozen-themed party. So, I leapt into action, dashed down to the fabric shop, managed to grab the very last of the purple pom-pom trim, and set to work!

IMG_2906

The finished cloak was a bit on the big side, but thankfully very well received, despite not being quite as screen-accurate as I normally like my costumes to be! The silver clasp at the neck worried me a little bit – I was concerned that Milly wouldn’t be able to fasten it easily, or might be hurt if another child pulled on the cloak or stepped on it. So Paul cut off the hook and loop, filed them down smooth, and I sewed on the two pieces as decoration only. The cloak fastens with a piece of velcro, so it will come apart quickly if necessary, and Milly can easily dress herself.

IMG_2117

This one is Milly’s somewhat delayed Christmas Dress. She’d finally grown out of the pattern I’d been using since her first birthday, so this is a new one – Butterick 5876. I have to say that I don’t really recommend the pattern. It does make a lovely dress, but the finishing techniques, for a garment that’s going to be outgrown in a matter of minutes, were frankly bonkers. Lots of mucking about with facings and hand stitching around the arms, that could have been accomplished so much more quickly and easily with a bit of bias binding! Next time…

IMG_2897

The only alteration I made to the pattern on this occasion was to significantly enlarge the pocket. Honestly, what’s the point of a silly little pocket that even a three year old can’t get her hand into? As you can see from this picture, the pocket was full of jelly beans. And Milly had her face painted like a cat, to match the dress – how cute is that?!

IMG_2907

And here is a tiny piece of evidence that my niece is very much a child after my own heart. Fancy dress costume, pretty party dress, giant stompy boots underneath. Excellent!

Sewing Bee Show-Off

the-original-1950s-walkaway-dress

Hands up, who watched last night’s Great British Sewing Bee? I must confess to getting a bit over-excited when they announced that the challenge was going to be the Walk-away dress! The idea was that the dress was so simple to make that you could, as the ad above says, “cut it out at 9 o’clock… wear it out at noon!”

The illustrations also show the use of a binding foot to make all that trimming easier. We may think of all these gadgets as new and modern, but they’re really not. The machines may have only been able to do one straight stitch, but the amount of extra presser feet that came with them was phenomenal. Bias binding, lace insertion, quilting, ruffles… all sorts of things!

Hallowe'en dress

I thought it was ridiculously popular when the pattern was re-issued a few years ago (seriously, the dratted thing was everywhere), but during the 1950s according to Butterick, “Sales of the pattern were so great, that at one point manufacturing of all other patterns ceased, and only the ‘walk-away’ dress was produced until all back-orders for this dress could be filled.”

20061028_00003_5.jpg

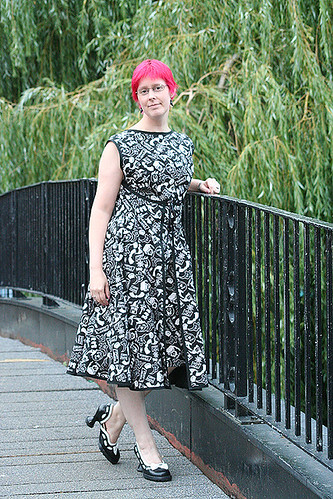
I’ve certainly made my fair share of these dresses, although I don’t think I ever followed the pattern exactly, and I certainly never made one in only three hours! The Hallowe’en version, above, tied with ribbons at the front because my weight used to fluctuate a lot, so I knew buttons would be no good. This skull print one had a deep lace trim around the bottom of the circle skirt, which I was really pleased with. I seem to remember that I also added a layer of net inside the skirt, to give it a bit of extra body.

Nicola's Katie Jump Rope walk-away dress

This one’s in a lovely Denyse Schmidt quilting cotton, with the binding continued all the way around the hem, and three gorgeous little flower buttons…

Nicola's Buddha's Cloud walk-away dress

…and this one has a contrast front section in a plain cotton. One thing it is important to note if you’re making this dress from a printed fabric, is that you need to choose a design that’s non-directional. If your print only works one way up, it will turn out to be upside down at some point on a circular skirt! Thankfully nobody was caught out by that on last night’s sewing bee, but it’s something I had to learn the hard way…

20070606_00020_15.jpg

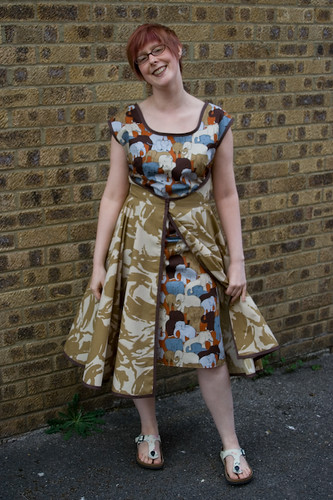
And of course, I’ve saved my favourite version for last – my “camouflaged elephants” dress. You can see that I’ve modified the neckline to make it lower (boat necks really don’t suit my narrow shoulders), and I’ve also shortened the bodice. Unfortunately I eventually had to resign myself to the fact that no matter how many alterations I made, this dress simply didn’t suit me, and was a nuisance to wear as a result. If it doesn’t fit very tightly around the waist, the heavy circle skirt pulls the much lighter inner layer up and back, and it’s really annoying to keep fiddling with it all day!
For me, this was a lesson in being seduced by the popular pattern of the day, regardless of whether it actually suits your body type or will be comfortable to wear. Turns out this is a lesson I’m going to keep having to learn, as I just can’t resist a lovely pattern. Or a novelty print… I really want to make another dress with those elephants now!

A quiet month

1970s dress

Oh dear, I do seem to have got out of the habit of blogging again lately. I’ve just been feeling a bit… quiet. Which anybody who knows me will be aware, isn’t very much like me at all. I’m somewhat lacking in creative inspiration, and I’m feeling a bit fed up about it, and not really sure quite what to do with myself.

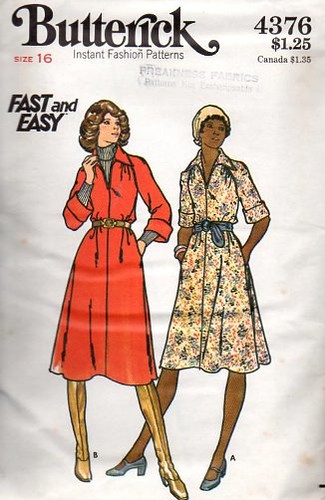
Still, the odd bit of making is happening. This is the result of Butterick 4736, the 1970s dress pattern I mentioned last time. I’ve been wearing it quite a lot, and it’s really comfortable. One person did ask me whether it was vintage or reproduction (both, I guess?), thanks to the enormous collars, but I have to admit I rather like them.

1970s Butterick 4376

I made the shorter length which, being a not-very-tall person, is pretty much spot on. I keep half wondering whether I could cut it off at hip level to make a blouse, but I’m not quite sure that would work. I need to dig out a piece of fabric that’s not quite long enough to make a whole dress, and see how it comes out.

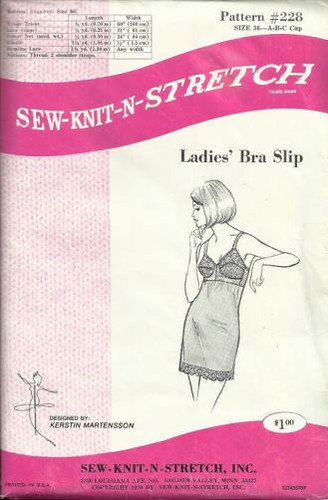
1960s Sew Knit N Stretch 228

I have also made this bra slip, and against all odds it fitted perfectly! Straight out of the packet! While I was rummaging around in the sewing room I found a forgotten bra-making kit, which had just enough fabric and elastic to make the top half. A quick dash to the fabric shop later (the princely sum of £2.14 having exchanged hands) and I had a metre and a half each of polyester habutae and nylon lace to make the bottom half. It’s the perfect length to go underneath the 1970s dress, and now that I’ve established the fit I can make more in some nicer fabrics. I’m thinking stretch silk, and maybe some soft jersey versions to wear as vests.

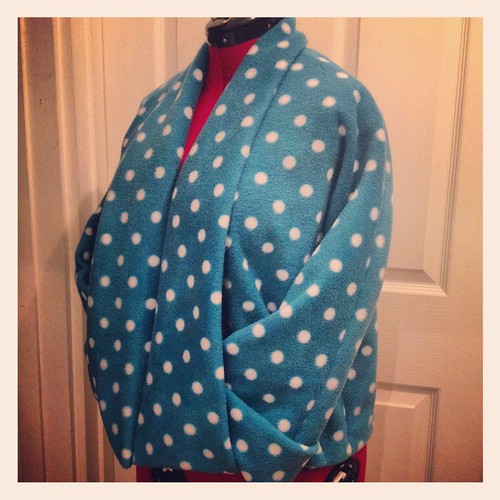
fleece jacket

Oh, and then there’s this. Inspired by a knitting pattern I saw on Etsy, where the collar folds back to make pockets, I put together this fleecy jacket. It looks a bit too much like a dressing gown in this spotty fleece, but once I’ve ironed out some technical hitches (I made a mistake on one of the lining pieces, so it doesn’t fit together quite right) I can feel quite a few versions of this one coming on too. It has wide kimono sleeves, which means that the sleeves of my dresses will actually fit down it – currently a problem, as all of my existing cardigans were bought or made to go over t-shirts!

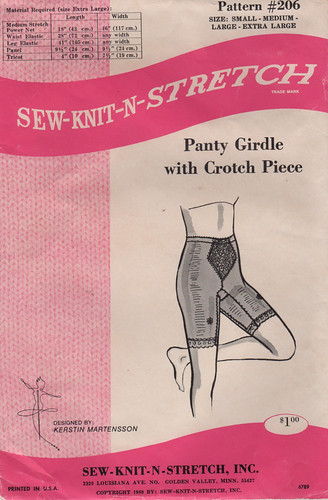
Sew-Knit-N-Stretch 206, 1969

And then, to add to my increasingly glamorous collection of old-fashioned underthings, there’s this. Currently on its way to me from the US, it’s a 1969 pattern for a long-leg panty girdle “with crotch piece”. This is important, as the opposite of “with crotch piece” is not “crotchless”, it is in fact “with a godawful seam in a terrible place”. Which is why I don’t wear ordinary cycling shorts underneath my dresses. So uncomfortable! These shorts can be made from a variety of materials, depending on how restrictive you want them to be. I’m aiming more for comfort than shapewear, so I’m thinking about cotton jersey, and maybe just the faintest whiff of lycra for the front panel. I’m quite interested to see the instructions for these, as the directions for the bra slip were quite minimal. I’m hoping this one’s a bit more thorough.

I think I’m finally starting to get somewhere with my new-old wardrobe though. I’m still very tempted by beautiful 1950s dresses, but it’s looking very much as though the 1970s are actually much more me!

Vintage Pattern Round-Up

Advance 8065

For a while now I’ve been buying a vintage sewing pattern each month, with a view to expanding my wardrobe into the realms of Things I Actually Want To Wear, rather than Things I Wanted To Sew. Apparently those two things are not the same, and it’s resulted in a very full wardrobe, and Nothing To Wear.

I made one of these to wear to the Vintage Night at work, and I’ve actually worn it rather a lot over the summer. Lightweight, cool, smart for work or all the parties that I never go to – I love this one, and have fabric set aside for another. It simply screams NOVELTY PRINT at me, and I have a huge list of fabrics that I want to buy from eQuilter, once I’ve saved up enough to pay the customs fees. (Bonus: their Lorax prints are all on organic cotton!)

1960s Sew Knit N Stretch 228

During my adventures in Me-Made May, I discovered that the key to making these dresses look properly smart is having the appropriate underwear to go with them. As the fibromyalgia simply won’t allow me to wear 1950s-style girdles on a daily basis (nor will my budget, sadly!), I thought this bra slip would be a good alternative. Fitted at the top, but not too constricting around the waist. Making it myself also means that I can choose fabrics such as cotton or silk, which will be much kinder to my skin than the expected nylon and polyester knits. This one will require a shopping spree to acquire the right fabrics before I can start, although I probably have enough powernet left over from my Structured Lingerie course to make a prototype first.

1960s Simplicity 5890

This lovely pattern, very sadly, didn’t work out. I used the blouse pattern with the last of the My Little Pony fabric, and it just didn’t fit me right, so it’s now sitting in the Etsy shop waiting to find a good home. I did make the dress, in a nice grey suiting, but when I tried it on to check the fit… it was awful. A perfectly nice outfit (I made the gored skirt version), just really not for me. It looked very uniform-ish… which it’s supposed to, I guess. It’s a smart working-woman’s outfit. It’s just that apparently I am not a smart working woman! Thankfully, at the Museum, I don’t have to be. The dress code is “smart-casual”, so there is absolutely no requirement for me to turn up in a blouse and a pinafore dress if I don’t want to. Phew.

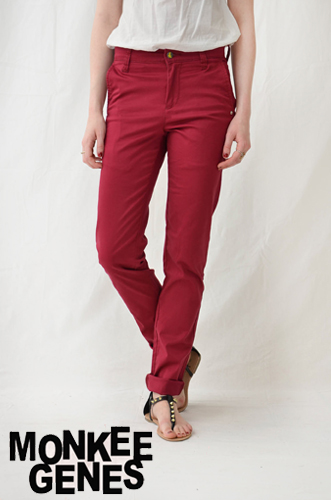
Monkee Genes Slim Fit Chinos

A few months ago I did decide that I should probably head slightly towards the smarter end of the smart-casual spectrum, especially as I’m the first person that most visitors to the Museum see when they come in. To that end, it was time for my too-small and rather frayed old jeans to be retired – which meant new jeans. I could have sewn them myself, but I don’t much like sewing trousers or heavy fabrics, so I decided to go shopping. I’m very determined that everything I buy should (as far as possible) be handmade, organic, or at the very least ethically produced, and with jeans this is easier said than done. Eventually I’d saved up £130 to treat myself to two pairs of Monkee Genes. However, they’re described as “slim fit”, which I’m most definitely not, so I wanted to try them on before I spent my money. I discovered that my local branch of Sports Direct (a shop I’d never normally venture into!) was a stockist, so I wandered in and discovered two things. One: Monkee Genes Slim Fit Chinos were my perfect trousers, and Two: they were in the sale. For £8-£10 per pair. Not £65 each. (In fact, the last few pairs of these chinos are currently on the Sports Direct website for SIX POUNDS A PAIR!!)

So, I did what any sensible person would do – I bought every pair in the shop in my size, then came home and bought every pair on the Sports Direct website, until I found myself with NINE PAIRS of ridiculously-coloured organic cotton chinos, for less than the price of the two pairs of jeans I’d originally intended to buy. I’d say “oops”, but do you know what? I’d budgeted the money for this purpose, I spent less than I’d planned, and given that my last two pairs of jeans saw me through five years of wear, I can’t imagine myself needing to buy trousers again for a very long time! These chinos fit well, they’re very comfortable, they’re organic cotton, and they’re ethically produced. Perfect!

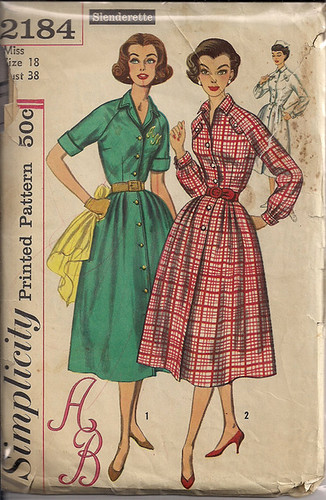
Simplicity 2148

Of course, what I need now, is shirts to go with them. I’d thought that Simplicity 5890 would be the solution, but for work the neckline was too low, and I just didn’t like the fit of the resulting blouse. So, I decided to use the top half of this pattern to make a smart short-sleeved shirt. Unfortunately I had a bit of a maths error, resulting in a blouse that was a bit too tight across the shoulders, and a lot too tight around the hips. Back to the drawing board. (I’ve since added the skirt from Advance 8065, to turn it into a dress. That’s now sitting on my pile of Things Awaiting Buttons.)

1970s Butterick 4376

I’ve spent a LOT of time on Etsy and Ebay, searching for the perfect 1950s or 1960s raglan-sleeved shirt pattern. The raglan sleeve thing is important, as it not only suits my very rounded shoulders, but also allows a much greater range of movement than a normal set-in sleeve. (This is one reason why I don’t wear my beautiful T.M. Lewin shirts as much as I’d expected – I always feel as though I can’t lift my arms.) I did find some lovely patterns, but never in my size, and after one failed shirt incident I lost my nerve at the thought of trying to draft one from scratch. So, I broadened my search to include 1970s patterns, which is when I spotted this.

Granted, it’s not a button-through shirt, which is what I was originally looking for. But, it has raglan sleeves, it’s styled with layers, which I like, as a dress it has the all-important pockets, and I can just imagine it as either a tunic length worn over the top of all of my ridiculous trousers, or as a blouse length that I can wear tucked in. I have to admit that I was also sucked in by the promise of “Fast and Easy”, but on reading the instructions it turns out that the way to keep this a fast make is by simply not bothering to finish the inside! So perhaps I won’t go for that approach after all. Slow and Easy’s far more my style.

Back again.


Hello! I seem to be getting into a very lazy habit of only updating the blog about once a fortnight. My excuses are that it’s too frustrating trying to post using the iPad, and it’s so much easier to update Instagram and Facebook. Probably best to follow me there, if you feel like keeping up with me on a more regular basis.

Here you can see me in a fantastically stereotypical Instagram shot – staring whimsically into space as I contemplate how I’m going to get out of this dress when I haven’t added the front placket yet.

I was originally going to make a dress, then I changed my mind and decided to make a shirt. Thanks to a slight maths error (okay, the fact that I didn’t measure my hips properly) the shirt didn’t fit, so I decided to chop off the bottom eight inches and make it into a dress after all. But because I was cobbling together two patterns, I hadn’t quite worked out how I was going to get in and out of the thing. My task for today is to cut into the skirt and add a placket, so I’ve got room for buttons below the waist.

I have quite a few buttonholes in my future – this petticoat needs eight of them. (I just need to find eight matching lingerie buttons from my stash.) The pattern is Butterick 3263, and I made the slip to test the fit of the bodice before I embark on the combinations. Just as well I did, as the petticoat didn’t fit me at all! I took in two inches at the centre back bodice, half an inch at each side, an inch out of each shoulder, and added a dart at the centre back skirt to accommodate my sway back. I’m now slightly paranoid that I’ve made it too tight, but I won’t find out until the buttons are in place. (Cue the traditional cursing of my sewing machine that refuses to make buttonholes unless I’m standing in the sewing machine shop complaining to Sue about it – when of course it makes them perfectly. Git.)

In an attempt to be more organised, and to try and keep both my pattern and fabric stashes under control, I’ve started work on a new system. I’ve printed out a little picture and the fabric details for each of the patterns I sew most often, and glued them down to the pages in a small Filofax that was sitting empty in a drawer. I plan to add swatches for each garment as I make them, so that I can see what I’ve got already and where any gaps might be. The second section will be swatches cut from my fabric stash, so that when I go fabric shopping I can see what I’ve got at home, and make sure I’m not duplicating things. This will also allow me to match up the patterns with the swatches, and hopefully shrink the stash a little bit by actually sewing something from it!

Section three, which you can see poking out on the right, is swatches from clothes that are already in my wardrobe. (These were cut from inexplicable horizontal loops on the back of my jeans.) Having these with me will mean that I can buy fabric (or wool) to match clothes that I have already, thereby creating Actual Outfits rather than a wardrobe full of lovely clothes that bear no relation to one another. (Currently I have nine pairs of smart trousers, and no tops at all to go with them. I’m very bored with black t-shirts already.) I’m also contemplating knitting tiny swatches to match my cardigans, though I think that might be a step too far into madness. Perhaps just sticking in a few strands of yarn would do just as well.

Speaking of madness… the other day I made this little doll face. I found her a bit fiddly (hence the slightly squiffy eyes!), so I enlarged the pattern, thinking I’d try making a doll on a slightly larger scale. Except that when I really looked at the photocopied pieces, I realised that “slightly larger” is actually going to turn out about three feet tall! Do I really want to make a doll at that kind of size? Well, I’ve got a big enough piece of felt, so why not?! We’ll see how long it takes for me to get bored of stuffing all the pieces. (I predict: Not Very.)

In Other News… 

I’ve been clearing out my pattern stash into the Etsy shop.
There are a few vintage patterns that turned out not to fit me, a few that I bought and then changed my mind about, and a few that are cut out to sizes that I now can’t fit into. More to come over the next week or so.

My zipped pouches were reviewed over at Blonde Ambition.
Thank you Katie, for the lovely review!

The Vintage Haberdashery Mystery Boxes have disappeared from Etsy
…but I do still have one left. Let me know if you’d like it, and I can pop the listing back up just for you. Otherwise it’ll sit on my shelf feeling lonely, until I can find a good home for it.

And now? Buttonholes. Lots of buttonholes.

(And hoping that it doesn’t rain on the four loads of washing currently drying in the garden, because I’ve got no room for all that laundry in the house if the weather decides to chuck it down!)

Milly’s 2013 Christmas Dresses

Milly's Christmas Dresses 2013

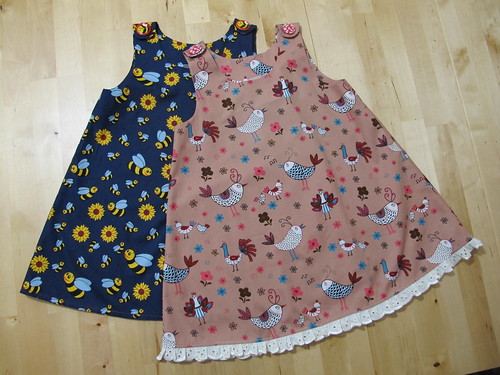
Today I have been mostly making Christmas dresses. Yes, I only have the one niece… but I got a bit carried away in the fabric shop! The pattern is Butterick 3772, again. This time it’s in the largest size I have, so I want to get a few more made before they’re outgrown.

Milly's Christmas Dresses 2013

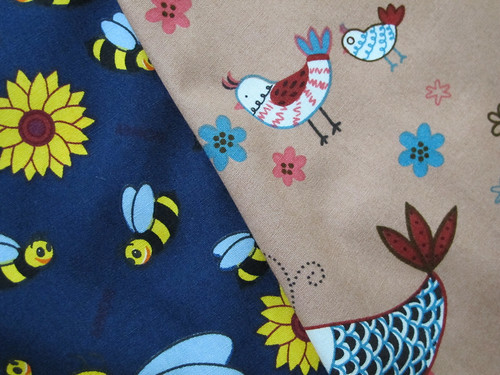
I didn’t deliberately buy birds and bees… in fact I didn’t even notice the combination until Paul pointed it out to me! But given that birds and bees are two of my favourite things, it’s probably no surprise that I was smitten with these fabrics.

Milly's Christmas Dresses 2013

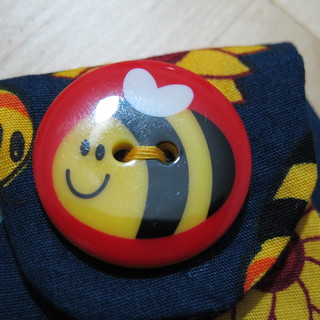
I was waiting in line to pay for the fabric when I spotted this button across the store. How perfect is that? I kind of want to knit myself a cardigan now, and put great big BEE BUTTONS all down the front.

Milly's Christmas Dresses 2013

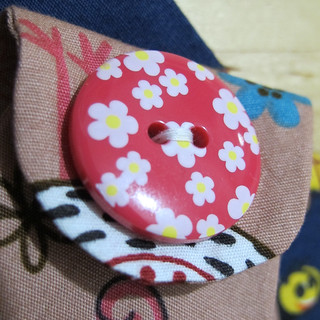
Not wanting the birdy dress to feel left out, and in the absence of a matching bird button, I thought these little pink flowers would do very nicely. In case the super-observant amongst you are wondering why you can’t see any buttonholes, it’s because the buttons have great big snap fasteners sewn underneath.

I haven’t added any pockets to these dresses, as I want to use the leftovers to do the same thing as last year and make a couple of matching outfits for her rag doll. I’ll make a start on those tomorrow, and if there are still any scraps big enough then these two dresses might end up with pockets after all.

(Note to self: Don’t wrap them up just yet!)

Scary Little Pumpkin

Scary Pumpkin!

I was going to whinge on about how poorly I’m feeling (working day seven of nine today, half term holidays, should have taken the opportunity not to work the weekend when my boss offered it to me but I’m a sucker for agreeing to stuff), how frustrating the house move continues to be (blocked drains, compost heap full of dog waste, where have the removal men hidden my laundry?!), or how I haven’t knitted anything or checked my email for nearly two weeks (argh!!), but instead I thought I’d show you this lovely picture of my little niece being a scary pumpkin.

As mentioned when I made it, this is Butterick 3772, and I have to say it’s been a brilliantly versatile little pattern!

Milly's First Birthday Party

I made one for her first birthday, which she wore as a dress, and then as a top, until the armholes got too tight.

Milly & Me

I made another one for her second birthday, this time with an enormous pocket on the front.

The pattern has loads of cute variations, although I’ve only ever made the simplest version, with a bit of lace or an improvised pocket. (Or a puffball hem and a pumpkin face. As you do.) Up to age 3 you only need a metre of 44″ wide fabric which, given the size of my stash, is pretty easy to come by. You can squeeze the smallest size out of half a metre, if you use a different fabric for the facings. In fact, I only used a metre for the pumpkin version, which is fully lined.

To be honest, it’s such an easy dress to make that I feel like a very bad aunty for not making more! Maybe once I’ve unearthed my sewing machine, I can have a rummage through the fabric mountain and make a few more.

Milly’s Pumpkin Dress

Milly's Pumpkin Dress

It’s two years since I last made a hallowe’en costume for Milly, so I thought I’d better fulfil my role of Aunty Who Sews, and make another one!

My Mum spotted a knitted pumpkin hat in a magazine, which is what gave me the idea to make a matching pumpkin dress.

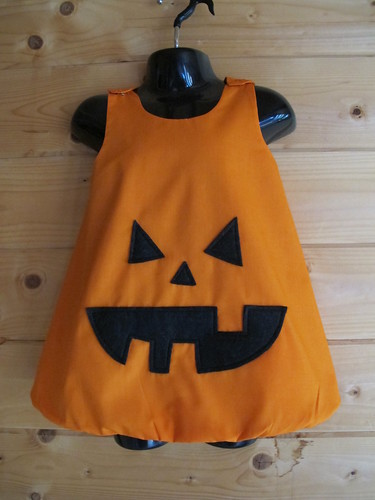
This is Butterick 3772, in orange polycotton, with black felt for the face. I think it’s the third one of these that I’ve made now. This one’s fully lined, partly because the fabric’s quite thin, and partly because I wanted to bag out the hem to create a puffball effect. The lining was cut about an inch shorter at the hem, and about an inch narrower on each side. The top layer was then gathered to match, and the difference in length between the inside and the outside pulls the seam underneath. It’s not quite as puffy as I’d have liked, but I think it will look very cute!

And now, at long last, we have a moving date! After months of waiting, we’re making the move next Friday! Eek! So, this is the last thing I’ll sew (by machine, at any rate) before we move. My task for this afternoon is to pack up the machines, and start shoving the rest of the contents of the Shed into boxes. Wish me luck!

Velvet coat – almost finished…

Butterick 5266

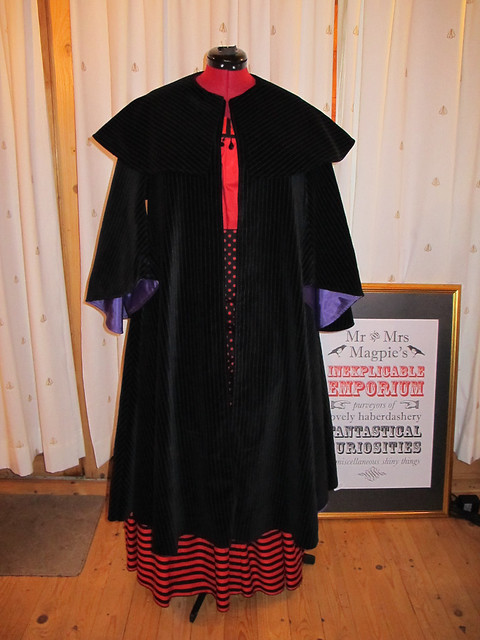
Not the greatest photo ever – the combination of black velvet and a dark Shed is not the best – but I think you can see the progress on this coat! It has a body now, which is a big improvement on last week’s cape and sleeves. It’s still not quite finished – the hem needs, well, hemming, and it needs front fastenings of some kind. It also needs overlocking around the sleeves, and a jolly good pressing around the collar.

(Before anybody says anything, yes, I know the purple lining doesn’t go with the red outfit underneath. I wasn’t about to go out and buy another five metres of lining when I already had this purple in the stash.)

The saving grace of this project has been its simplicity. If it had been more complicated, there would probably be a lot more swear words in this post. As it is, I simply left out most of the tricky parts to make my life easier. The sleeves will be overlocked to the body instead of slip stitched. The fronts and neck and sleeve hems are topstitched rather than understitched. Where the lining came out a quarter of an inch bigger than the coat (at the sleeve heads and the hem, don’t ask me why!), I simply chopped off the difference and stopped worrying about it. I haven’t bothered with the fourteen metres of braided trim, or the openings in the front panels. Oh, and I left out the side seam vents too. Simple!

Having moaned on about the frustrating parts, I will concede that the sleeve heads eased into place beautifully, as did the collar. I’m now deciding how I want the front to fasten, and whether I’m going to add any kind of trimmings at all. I think I might need at least a little bit of detail on the ends of the collar, to make them stand out against the front a bit more. Paul’s suggested black frog fasteners and sequin trims, and I think he might be right.

Oh, and the poster in the frame, behind the dressform? That’s a little idea we had, that we’re hoping to turn into a reality!