“Fun-time Ensemble” part one…

Advance 8990

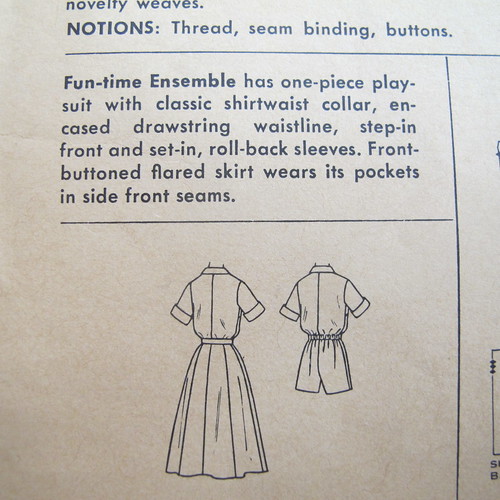
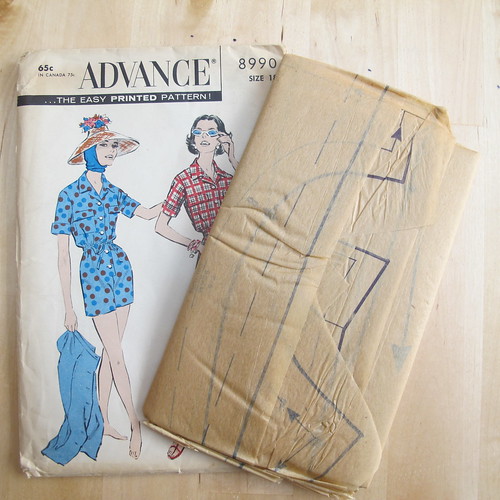
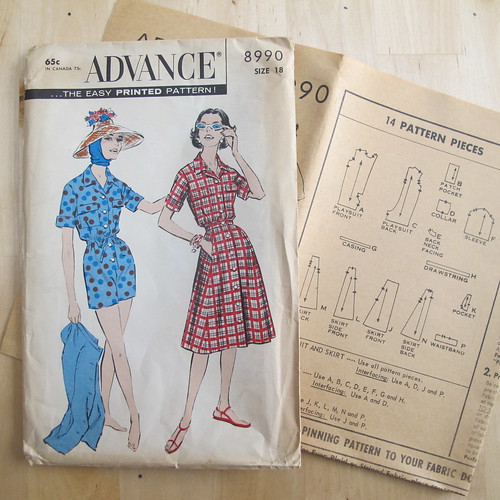
Say hello to the lovely ladies of Advance 8990 – a 1959 pattern for a playsuit and skirt. I did have a momentary pause about making what is, after all, a glorified onesie, but it looked like a useful garment for wearing in the heat. I like that it’s quite a formal-looking romper, what with the collar and turned-back sleeves, but I particularly like the idea of popping a matching skirt over the top so that you’ve instantly got a nice smart dress!

Advance 8990

I asked for Paul’s opinion (as I usually do) before I bought the pattern, and was met with an emphatic shaking of the head. Oh dear. To be honest, I think he was put off by the rather alarming hat-and-balaclava combination, which I definitely won’t be attempting to carry off! But honestly. How could I possibly resist a pattern that describes itself as a “Fun-time Ensemble”? I’m only disappointed that it doesn’t list “novelty prints” amongst the suitable fabrics. (Rest assured though – a novelty print version will be forthcoming at some stage.) It could only be better if it had a raglan sleeve.

Advance 8990

I was quite excited to discover that the pattern, despite being 56 years old, was actually brand new and still in its factory folds! Unfortunately, it looks as though it perhaps hasn’t been stored in the best conditions, because the paper was incredibly fragile – more so than any other vintage pattern I’ve come across so far. I managed to tear the pieces several times as I was unfolding them and cutting them out, so I think drastic measures are going to be called for. I expect to be using this pattern more than once, so I think I’m going to iron the pieces onto some lightweight interfacing to stabilise them. I know this will effectively destroy the original pattern, but it’s in such poor condition that it’s pretty much ruined anyway. Normally I’d trace the pieces onto stronger paper, but the originals are just going to fall apart in the envelope, so I might as well make sure that I can use them for the purpose for which they were intended.

(The museum/conservation person in me is writhing in horror at the prospect of ironing these pattern pieces onto adhesive interfacing. But I do believe that these things are made to be used, and this particular example is no longer of a quality worth trying to preserve in its original state. So, I’m doing it anyway.)

Advance 8990

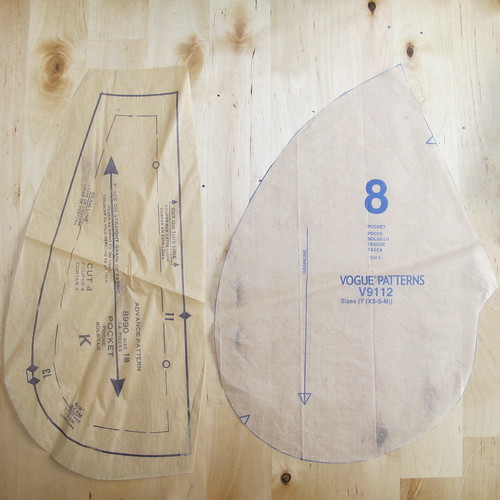
According to the envelope, the “Front-buttoned flared skirt wears its pockets in side front seams.” I spent ages looking for the pocket pattern, thinking that the piece on the left was some kind of cuff or trim. Nope – it’s the pocket. But it’s tiny! The innermost dashed line marks the seam allowance, which will be the finished size of the pocket – and I can’t even get my hand inside it! What were the designers thinking?! I don’t know what the lady of 1959 was expecting to be able to keep in there, but it must have been very small.

When I make the skirt, I’m going to substitute the pockets from my new Marcy Tilton pattern, Vogue 9112. You know, ones I can actually fit my hands into. I’ll probably add slightly smaller pockets to the playsuit as well, just because. You can never have too many pockets.

Advance 8990

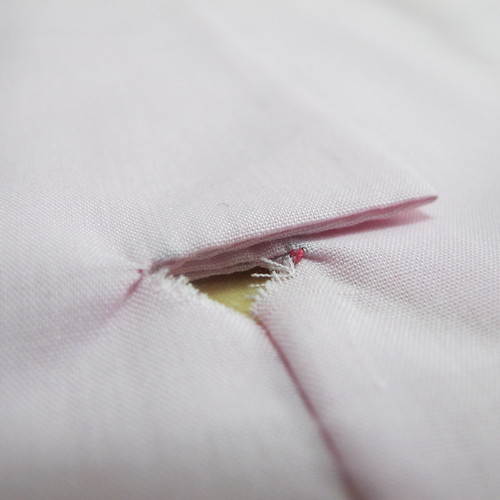
I have to say that the instructions for this pattern are pretty sparse. They basically say “cut out pieces; make playsuit”. So when I followed an instruction that said “clip to small dots”, I did so… but apparently in the wrong direction. This extremely neat little triangular hole is at the bottom of the front placket. I can patch it so that it looks deliberate, but it’s not the best place for a hole in a pair of shorts, really! I will now be annotating the instructions on a separate piece of paper, as I go along.

Advance 8990

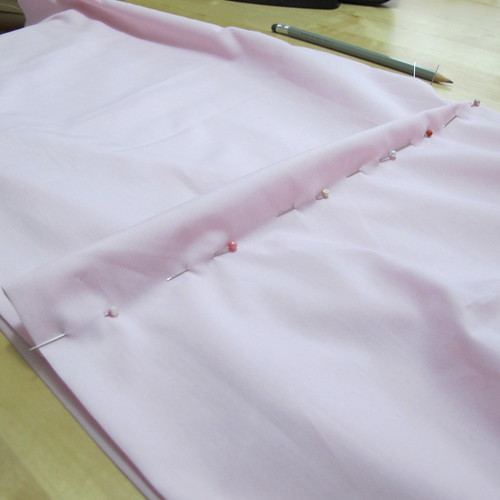
This attractive pale pink poly-cotton was just a piece of left-over fabric sitting in the stash, and I’m very glad that I decided to use it to try out the pattern before cutting it out in decent fabric! These pins represent a slightly unusual alteration, in that I’m taking 6cm out of the length at the too-long centre front, and then tapering it out to nothing at the side seams because the back is the perfect length.

I was a bit confused about this at first – how could the back length be fine, but the front be far too long? However, I think what I’m actually doing here is making a sway back/big bum alteration in reverse. Normally I’d expect to lengthen the centre back to create extra room, but I’d also expected the playsuit to be too long overall, because I’m very short in the body. As a result, the back is fine as it is, which makes the front too long by comparison. It’s all very complicated!

The only other alteration I’m going to need to make is to add a couple of inches of width at the hips. The shorts fit, but they’re quite snug, and it looks a bit out of balance with the rest of the garment being so loose. Adding a little bit of extra ease will give me the space to include the pockets, too.

I have to admit that the temptation to run down to the local fabric shop and snap up five metres of lots of different cheap novelty-print cottons is very high. But I do have some fabric in the stash that I can use up first, and I’m still trying as hard as I can not to buy non-organic cottons. We’ll see how long my resolve lasts.

Thinking about dresses

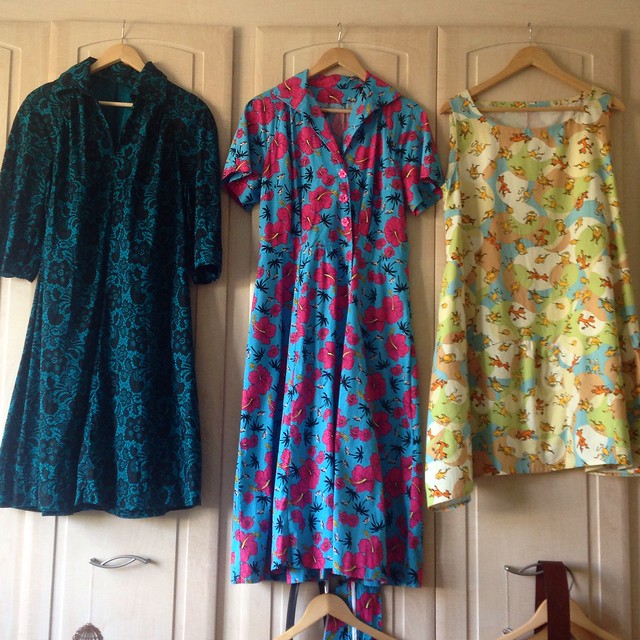
Three dresses

I’ve had these three dresses hanging over my wardrobe doors for a couple of weeks now, trying to decide which is my favourite, and which I should therefore make again.

Trouble is, I haven’t really been wearing dresses lately, as I tend to reach for them only in the heights of summer and winter. Last winter was so mild we didn’t see a single flake of snow, and so I didn’t need my usual winter outfits of leggings (or bloomers and knee socks), a long petticoat, a long sleeve t-shirt, a long flowing dress, and a jumper. This summer… well, we haven’t quite reached it yet, and so I’m in a limbo of chinos and t-shirts, or ancient jeans that I really should have thrown out already.

IMG_4183

I wore the dress on the right (Vogue 9112, Marcy Tilton’s “Cirque” dress) to visit a friend, and it turned out to be perfect for having a picnic on the lawn, followed by having a small plastic car driven over my knees on the sofa. What more could I ask of a dress? I wore it with yoga pants, as it was always my intention for this one to be more of a tunic style. (I am also eagerly awaiting the release of the Dottie Angel Dress pattern, for tunic-making purposes.)

17/5/14

The middle dress, Advance 8065, a 1956 pattern, I wore to work on my last day at the Museum. It was comfortable, but I do need a slightly longer slip to wear underneath it, to stop it from catching on my bloomers and going all bunchy around the knees. (Either that or I need to start making my bloomers in silk rather than cotton!)

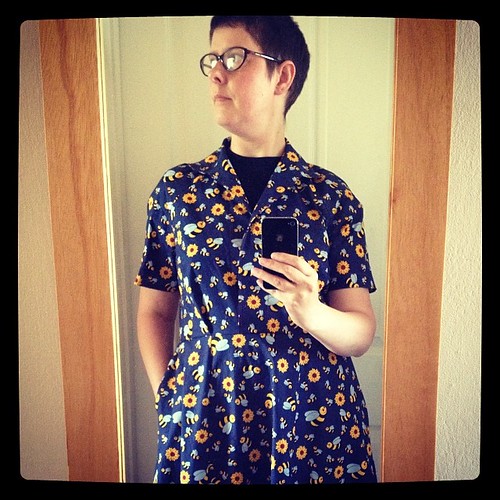
Bee dress, July 2014

I’d had the same issue the day before, when I wore a not-quite-finished dress, which had started life as a shirt but ended up with the skirt from the pattern above added to the bottom. It still needs a placket and buttons, but although it was a bit tricky to get off again, it held together okay with a big brooch at the collar!

But did I enjoy wearing it enough to finish this one and make another? At the moment I’m not sure. I feel as though a dress should be an easy option for an outfit. One garment, pop it on, add a cardigan, and away you go. Somehow the reality of having to pair a dress with a bra slip and bloomers makes it seem like more trouble than it’s worth.

1970s dress

As for this one, the dress on the left in the top photo (Butterick 4637, a 1970s pattern), I haven’t worn it more than a few times since I made it, and most of those times were as soon as it came off the machine. Even having it hanging around in full view simply isn’t tempting me to put it on. Maybe because the fabric’s quite dark, so it feels like a winter dress. Perhaps it would be better with leggings and a long sleeved t-shirt underneath. It just doesn’t feel right for summer, somehow.

I still haven’t had a proper sort-out of the side of the wardrobe that hides all of my dresses, so perhaps I need to do that before I decide anything. This year I definitely feel more drawn towards novelty prints and vintage styles than I do towards my long floppy linen dresses and long petticoats. But maybe that’s just because the weather hasn’t warmed up yet, and it’ll be tunics and petticoats and bloomers all the way once the sun comes out.

All I know is that I currently have so much stuff that I’m feeling totally overwhelmed by it. I definitely need to make a concerted effort to sew things that I’m actually going to wear, rather than being tempted by interesting patterns and pretty fabrics. Either that, or actually stop sewing for a while, and concentrate on wearing the things I have already. We’ll see.

Vintage Pattern Round-Up

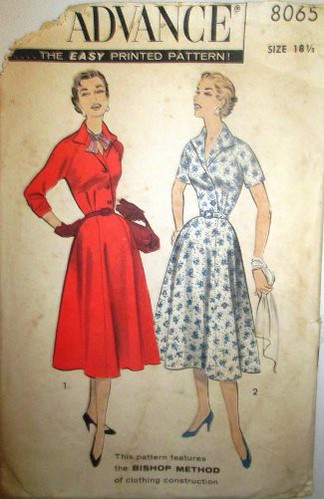
Advance 8065

For a while now I’ve been buying a vintage sewing pattern each month, with a view to expanding my wardrobe into the realms of Things I Actually Want To Wear, rather than Things I Wanted To Sew. Apparently those two things are not the same, and it’s resulted in a very full wardrobe, and Nothing To Wear.

I made one of these to wear to the Vintage Night at work, and I’ve actually worn it rather a lot over the summer. Lightweight, cool, smart for work or all the parties that I never go to – I love this one, and have fabric set aside for another. It simply screams NOVELTY PRINT at me, and I have a huge list of fabrics that I want to buy from eQuilter, once I’ve saved up enough to pay the customs fees. (Bonus: their Lorax prints are all on organic cotton!)

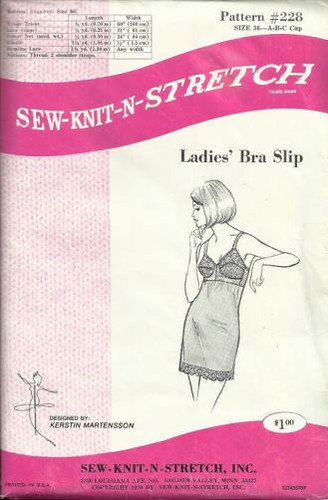
1960s Sew Knit N Stretch 228

During my adventures in Me-Made May, I discovered that the key to making these dresses look properly smart is having the appropriate underwear to go with them. As the fibromyalgia simply won’t allow me to wear 1950s-style girdles on a daily basis (nor will my budget, sadly!), I thought this bra slip would be a good alternative. Fitted at the top, but not too constricting around the waist. Making it myself also means that I can choose fabrics such as cotton or silk, which will be much kinder to my skin than the expected nylon and polyester knits. This one will require a shopping spree to acquire the right fabrics before I can start, although I probably have enough powernet left over from my Structured Lingerie course to make a prototype first.

1960s Simplicity 5890

This lovely pattern, very sadly, didn’t work out. I used the blouse pattern with the last of the My Little Pony fabric, and it just didn’t fit me right, so it’s now sitting in the Etsy shop waiting to find a good home. I did make the dress, in a nice grey suiting, but when I tried it on to check the fit… it was awful. A perfectly nice outfit (I made the gored skirt version), just really not for me. It looked very uniform-ish… which it’s supposed to, I guess. It’s a smart working-woman’s outfit. It’s just that apparently I am not a smart working woman! Thankfully, at the Museum, I don’t have to be. The dress code is “smart-casual”, so there is absolutely no requirement for me to turn up in a blouse and a pinafore dress if I don’t want to. Phew.

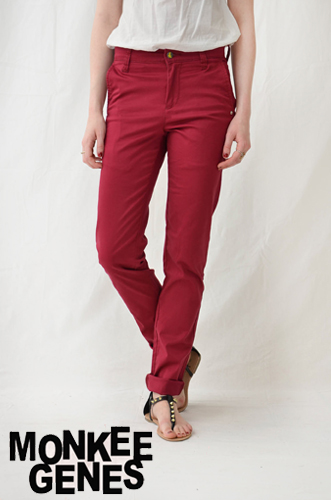
Monkee Genes Slim Fit Chinos

A few months ago I did decide that I should probably head slightly towards the smarter end of the smart-casual spectrum, especially as I’m the first person that most visitors to the Museum see when they come in. To that end, it was time for my too-small and rather frayed old jeans to be retired – which meant new jeans. I could have sewn them myself, but I don’t much like sewing trousers or heavy fabrics, so I decided to go shopping. I’m very determined that everything I buy should (as far as possible) be handmade, organic, or at the very least ethically produced, and with jeans this is easier said than done. Eventually I’d saved up £130 to treat myself to two pairs of Monkee Genes. However, they’re described as “slim fit”, which I’m most definitely not, so I wanted to try them on before I spent my money. I discovered that my local branch of Sports Direct (a shop I’d never normally venture into!) was a stockist, so I wandered in and discovered two things. One: Monkee Genes Slim Fit Chinos were my perfect trousers, and Two: they were in the sale. For £8-£10 per pair. Not £65 each. (In fact, the last few pairs of these chinos are currently on the Sports Direct website for SIX POUNDS A PAIR!!)

So, I did what any sensible person would do – I bought every pair in the shop in my size, then came home and bought every pair on the Sports Direct website, until I found myself with NINE PAIRS of ridiculously-coloured organic cotton chinos, for less than the price of the two pairs of jeans I’d originally intended to buy. I’d say “oops”, but do you know what? I’d budgeted the money for this purpose, I spent less than I’d planned, and given that my last two pairs of jeans saw me through five years of wear, I can’t imagine myself needing to buy trousers again for a very long time! These chinos fit well, they’re very comfortable, they’re organic cotton, and they’re ethically produced. Perfect!

Simplicity 2148

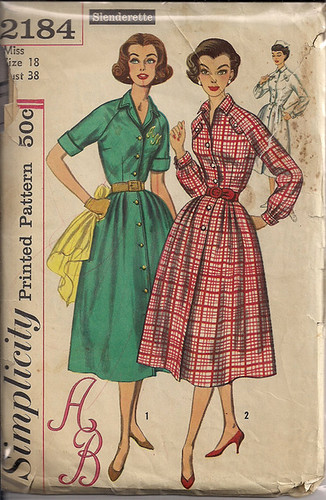
Of course, what I need now, is shirts to go with them. I’d thought that Simplicity 5890 would be the solution, but for work the neckline was too low, and I just didn’t like the fit of the resulting blouse. So, I decided to use the top half of this pattern to make a smart short-sleeved shirt. Unfortunately I had a bit of a maths error, resulting in a blouse that was a bit too tight across the shoulders, and a lot too tight around the hips. Back to the drawing board. (I’ve since added the skirt from Advance 8065, to turn it into a dress. That’s now sitting on my pile of Things Awaiting Buttons.)

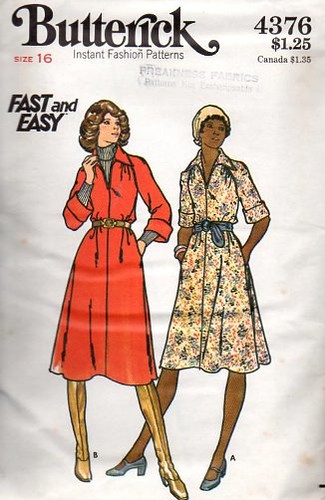
1970s Butterick 4376

I’ve spent a LOT of time on Etsy and Ebay, searching for the perfect 1950s or 1960s raglan-sleeved shirt pattern. The raglan sleeve thing is important, as it not only suits my very rounded shoulders, but also allows a much greater range of movement than a normal set-in sleeve. (This is one reason why I don’t wear my beautiful T.M. Lewin shirts as much as I’d expected – I always feel as though I can’t lift my arms.) I did find some lovely patterns, but never in my size, and after one failed shirt incident I lost my nerve at the thought of trying to draft one from scratch. So, I broadened my search to include 1970s patterns, which is when I spotted this.

Granted, it’s not a button-through shirt, which is what I was originally looking for. But, it has raglan sleeves, it’s styled with layers, which I like, as a dress it has the all-important pockets, and I can just imagine it as either a tunic length worn over the top of all of my ridiculous trousers, or as a blouse length that I can wear tucked in. I have to admit that I was also sucked in by the promise of “Fast and Easy”, but on reading the instructions it turns out that the way to keep this a fast make is by simply not bothering to finish the inside! So perhaps I won’t go for that approach after all. Slow and Easy’s far more my style.

Improving on Me-Made May

28/5/14

You may have spotted that I didn’t post very many photos from my Me-Made May escapades. This is partly because I mostly look like some kind of strange triangular bag lady (I like layers, and most of my clothes are comfortable-shaped), and partly because it turns out that I only wear about four outfits, over and over again, with very minor variations. How boring!

28/5/14

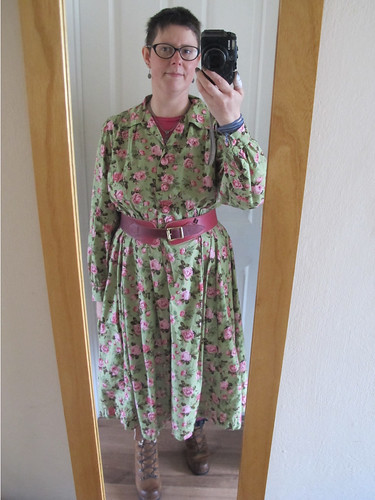
Towards the end of the month I made a last-ditch effort to wear some of the smarter clothes in my wardrobe, only to discover that when I put them on… well, suddenly they’re not so smart any more. This dress is now very firmly on the “waiting to be chopped up and turned into something that doesn’t look like a giant floral sack” pile. There’s just no point in wasting time and fabric making clothes that require waist shaping in order to look nice, when waist shaping isn’t something that I actually have myself. Although, having said that, my other vintage dress (also made from an Advance size 18½ pattern without alterations) fitted really well and looked lovely!

17/5/14

See? I still don’t have a waist, but the dress looks smart, not like a huge great cushion’s attacked me while I wasn’t looking. I think this is partly down to the fact that this dress has a smooth skirt rather than miles of pleats. (Also: not a selfie, vintage-style foundation garments, not layered with t-shirts and bloomers and giant boots on account of it being freezing at work.)

Lace crop top

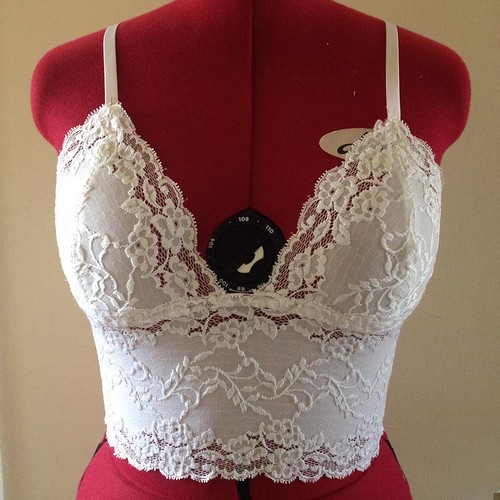
Sadly, even if I did have the budget to wear lovely things from Kiss Me Deadly every day, the fibromyalgia simply wouldn’t allow it. But, the whole Me-Made May experiment did reveal that I am very much lacking in the Me-Made underwear department – despite the fact that I spent plenty of time and money on the London College of Fashion’s Structured Lingerie course back in 2011. I bought this lace when I came back, in a fit of enthusiasm, and it’s been untouched in a box ever since, along with a metre and a half of pink, and four metres of a prettier-than-it-sounds grey. This particular lingerie is about as unstructured as you can get (no wires, no fastenings, nothing), but I used a lot of the skills I learned on the course to make it. The pattern itself is from Sewing Lingerie, a Singer reference book, where it’s described as a “sleep bra”.

The wide stretch lace that I used to make this is actually really affordable, and comes in lots of different colours and patterns. If this one (and the pink one I’ve just finished, and the two or three grey ones I’m going to make next) turn out to be comfortable, I can feel a drawer full of these coming on before Me-Made May next year!

Dress Success!

17/5/14

You remember that whole work/life balance thing that I was talking about the other week? It seems to have toppled over slightly. It happened not least because I was working towards an Inexplicable Emporium stall that took place at work, at our Museums at Night event. The combination of making sure I had enough stock ready on time, coupled with staying out long past my bedtime, and then compounded by an extremely hectic day off, have led to me hobbling to work today with my walking stick, because I was simply too exhausted to stand up all by myself. Oops.

But! The event itself was a fantastic night out, we sold enough stock to make all the effort worthwhile, and I managed to finish my new dress in time to wear it. Phew!
(Note to self: NEVER wear those shoes again. Beautiful, but so uncomfortable. Ouch.)

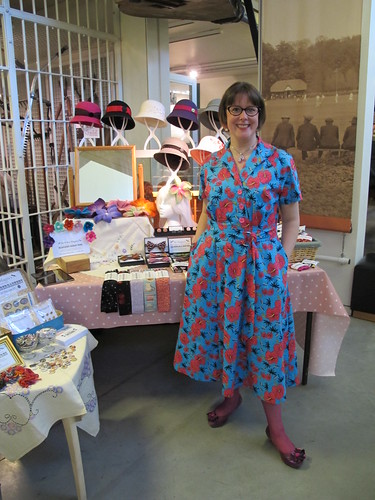
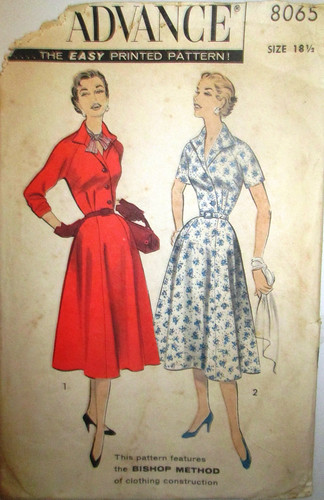
Advance 8065, 1956 dress pattern

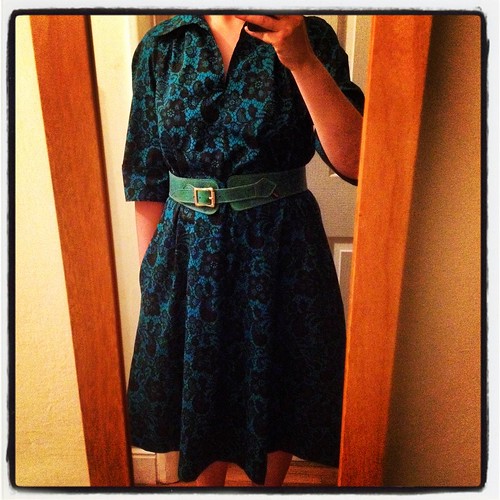
The pattern is Advance 8065, a shirtwaist dress from 1956, in an extremely modern-proportioned size 18½. Next time I need to shorten the back bodice ever so slightly, but otherwise it’s an absolutely perfect fit. And after wondering whether I’d ever wear it again after the Vintage Night, the answer is a very definite yes! The dress was so comfortable, and so easy to wear, that it’s actually going into my work wardrobe rather than my Special Occasions pile.

I only made one alteration to the pattern, and that was to eliminate the side zip. Because the bodice front matches up with the side front skirt seam, it was easy to simply leave that seam open a few inches, add a placket, and then close it again with snap fasteners. Next time I’ll add two more buttons, but I needed to get this one finished in a hurry and didn’t have time to hand-stitch two more buttonholes!

In fact, I enjoyed wearing this dress so much that I may have already bought the fabric for another one… to match my niece’s Christmas dress. Because honestly, how could I resist a navy blue dress that’s COVERED IN BEES, with buttons to match?