New shoes in progress…

Felt shoes

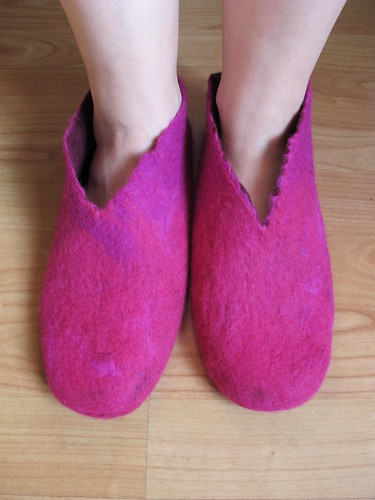
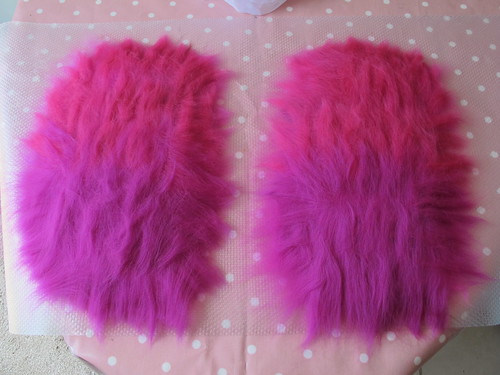
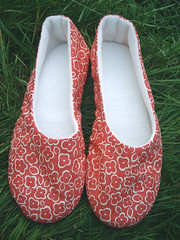
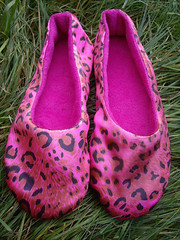
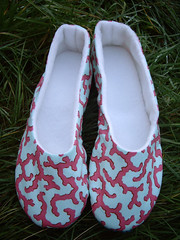
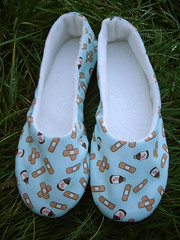
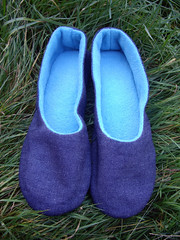
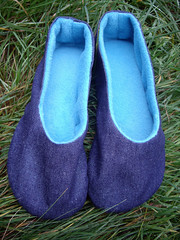
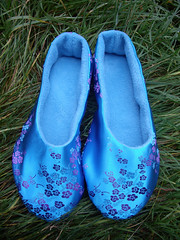
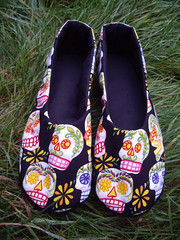
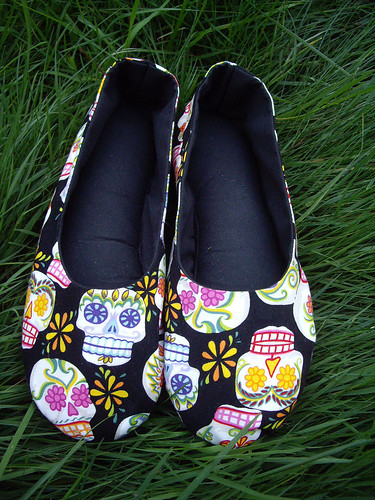
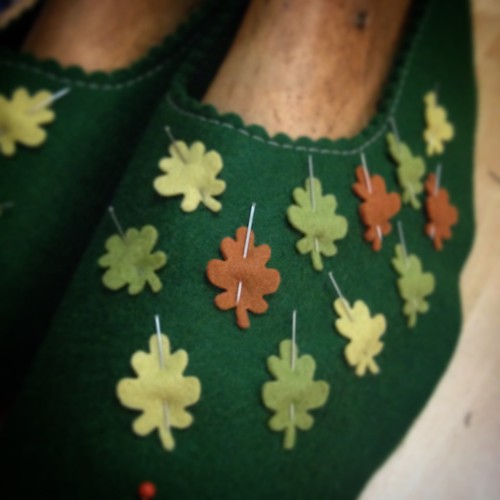
Did I mention that I was making some new shoes? I suspect that might be one of those things that I only mentioned on Facebook and Instagram, while I was having a bit of a break from the blog. I started working on them back in April, with some lovely wool felt from Cloud Craft.

Embroidered felt leaves

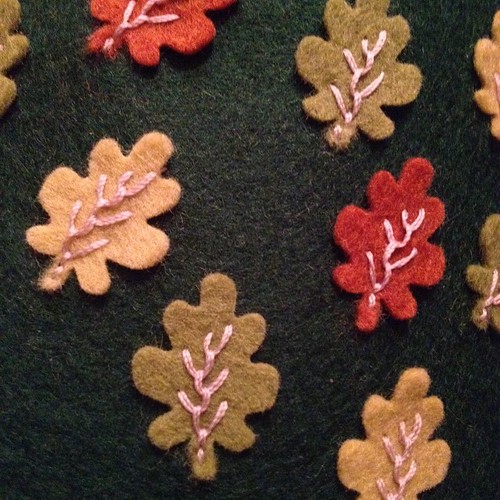
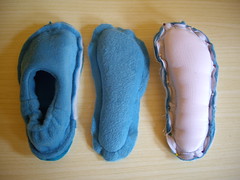
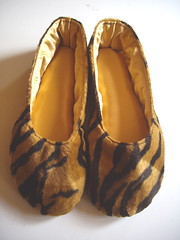
I’d originally wanted to make my own felt, but my hands and shoulders haven’t been well enough to allow that, so I decided to bite the bullet and buy some. I love the combination of felt and embroidery (I seem to be doing that a lot these days!), and I figured that I could use the techniques from my original fabric shoes to make something a bit more robust.

Felt shoes

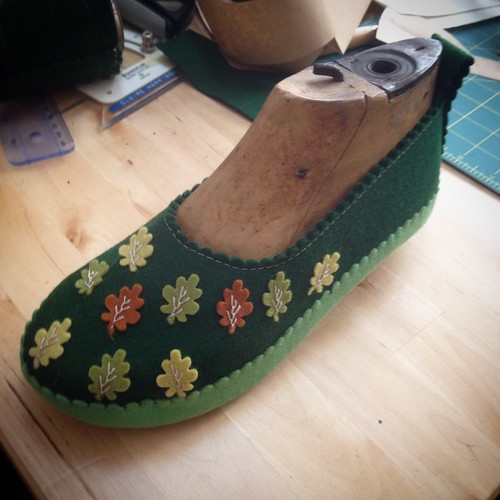
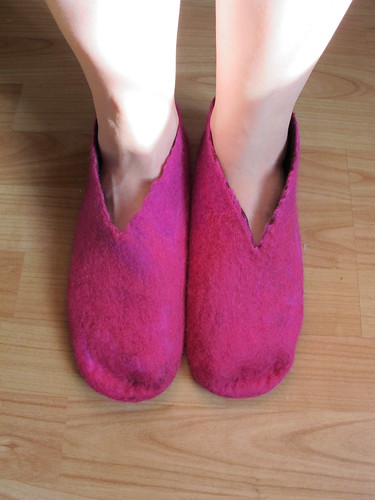
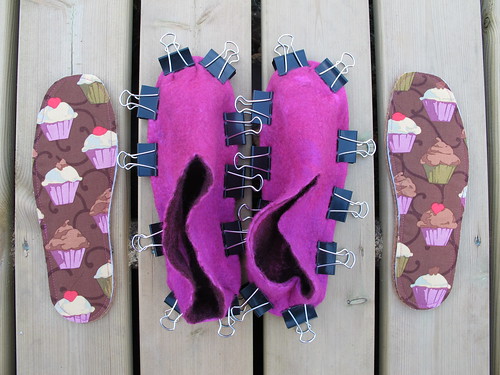
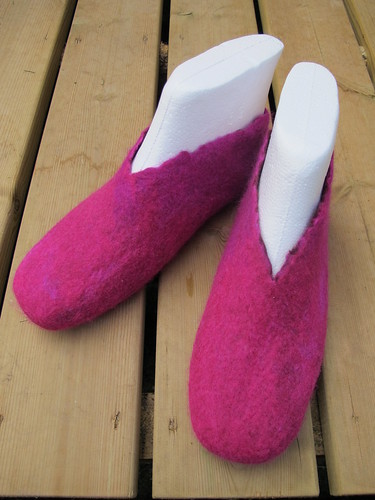
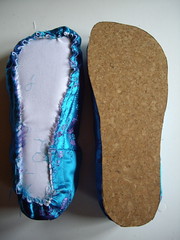
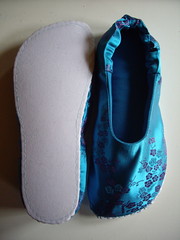
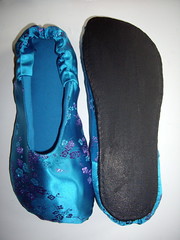
This turned out to be very nearly the case. These are just lacking their rubber outdoor soles, and they look really good on the lasts – if I do say so myself!

Felt shoes

Unfortunately something went a bit peculiar in the sizing department. When I took them off the lasts and put them on my feet, they were enormous! By this time I’d already taken orders for ten prototype pairs, so I could thoroughly test the techniques before letting them loose in my Etsy shop. Obviously I couldn’t make ten pairs of shoes that didn’t fit their recipients, so I decided to bite the bullet and borrow enough money to allow me to order some lasts.

Ballet Flats lasts from shoe-last-shop.com, ordered in sized 32-45!

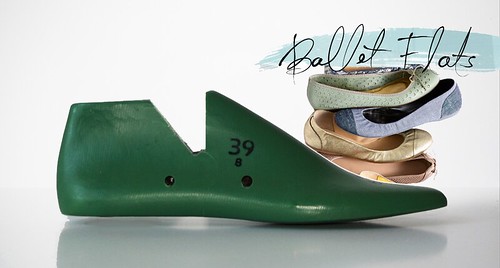
I found the perfect style at Shoe Last Shop, a company which specialises in selling small quantities of lasts to shoemakers without factories, who aren’t mass-producing thousands of pairs. I’ve ordered a full set of these, in European sizes 32 to 45. I suspect that the smallest and largest sizes will get a lot of use (which is why I wanted them), as most commercial shoe ranges only include sizes 36 to 41, sometimes up to a 43 if you’re lucky.

I was expecting to have ten finished pairs of shoes to show you by now, as the lasts were scheduled to arrive just over a month ago! Sadly there have been some production delays at the factory, and I’m going to have to keep people waiting a while longer, which I really don’t like. It’s bad customer service on my part, even though there’s nothing I could have done to fix it. (Well, except for not having taken the shoe orders, even for prototypes, until I had the lasts in my hands.)

Thankfully, I received an email yesterday to say that the production backlog had been caught up, and my lasts should be shipping in the next couple of days. I have a huge pile of felt read and waiting, so as soon as they turn up I can make new upper patterns to fit them, and get a move on with the shoes!

Felted slippers – part two

Too big!

Awww. They’re too big! I knew the lasts would be quite roomy around the top, and I do plan to cut these away to more of a ballet pump shape. But still. Too big.

Too big!

Look how much room there is in front of my toes! The lasts were a size 38/39, but I’d say these have come out around a 40/41. I did toy with the idea of chucking them in the washing machine, to take the hard work out of shrinking them a little bit more, but was so worried about them coming out the right size to fit my two year old niece that I decided against. (Not that I begrudge her a pair of pink felted slippers, but I want these to be mine!)

Soles and insoles

So, I went back to my long-neglected shoemaking supplies, and have given them rubber soles along with cork-and-fleece insoles. These are now sitting on the deck waiting to dry, while I’m recovering from the fumes from the glue. Wow, that stuff is disgusting. Even wearing a respirator and eye protection, you can still smell it a bit, and it still makes my eyes water. That, along with the terrifying health and safety warnings, makes me think that there must be a better solution than glue. I mean, what’s the point of painstakingly hand crafting a pair of slippers from natural materials… and then whacking four layers of highly toxic rubber cement all over them?

They do need some kind of sole though. On laminate flooring and tiles they’re slippery enough to be absolutely lethal, and of course without soles they can’t be worn outside. Time to go back to my shoemaking books (and maybe a few museums with non-leather shoes?) to come up with some more ideas.

Lots and lots of tea bags...

Meanwhile… this is the scene in my kitchen at the moment. Remember I said I was going to take all my frozen tea bags out of the freezer, to make room for ice cubes? Well, I did that, and I left them all out on a table in the garden to dry overnight. Except that, for the first time in weeks and weeks, it rained. It rained A LOT. So now they’re on the kitchen table, drying off again.

I have no idea whether they’ll have any dyeing properties left whatsoever, after the amount of water that landed on them last night! Hopefully they’ll still leave at least a little trace. I’m still not entirely sure what I’m going to dye with them yet, but after a few experiments with the leftovers in the tea urn filled with assam, I’m thinking it needs to be silk for the best results. Which is the one thing, of course, that I don’t have a great deal of in my fabric stash! I might need to make a bit of extra room by sewing up some of the cottons first…

Pink Felted Slippers

Felted Slipper Tutorial

Today I spent about three and a half hours transforming this…

Felted Slipper Tutorial

…into these!

I have to say that, although they’re not quite finished yet, and there are definitely things I’d do differently next time, I’m really pleased with my first attempt at resist felting!

I’m currently impatiently waiting for them to dry. I was hoping it would take less than 24 hours in this heat, but the humidity’s so high at the moment I think they might actually be getting wetter the longer I leave them out in the garden.

Whilst they look toasty warm, I think these will turn out to be summer slippers. I only used four layers of merino to make the felt, and really they need to be a lot more sturdy than this if they’re going to last any length of time. I’d also like to be able to glue a rubber sole onto future slippers, and this pair are much too thin for that. Perhaps I’ve really made myself some nice warm socks? (In the middle of a heatwave! Brilliant!)

I spent about an hour this morning searching for a good tutorial, with lots of pictures, explaining how to use the polystyrene lasts without taking the (altogether too risky for me) option of just chucking them in the washing machine. I couldn’t find one, so I’ve written my own. Because this was my first attempt, it will no doubt be edited as I go along and find ways to improve things. In the meantime, you can read it here!

Lithuanian Felted Slippers

Aren’t these felted slippers absolutely magical? If I accidentally found my way through the back of a wardrobe and ended up in a mythical land where it was always winter and never Christmas, these are exactly what I’d want to keep my feet warm while I was there.

They’re hand made in Lithunania by ing00te, who sells them on Etsy.

She also has a blog (which is partially translated into English for those of us who can’t read Lithuanian!), and you can see her beautiful pictures on Flickr.

Some of ing00te’s slippers have cork soles, so that you can wear them outside. I love the detail of the little heel on this pair, the way it echoes the felted swirls on top. Just gorgeous!

Now I have to fight the urge to learn how to make felt slippers, because I need another hobby like a hole in the head. But if you don’t want to fight that urge, you can buy polystyrene lasts and all the wool you’ll need from Wingham Wool Work. There are lots of tutorials online to get you started, but this video from Ray Reynolds seems pretty comprehensive.

I’m just going to look through ing00te’s photostream again. So pretty…

This is what I’ve been up to:

I hope this doesn’t spoil a surprise for anybody whose gift hasn’t arrived in the post yet, but this is why I’ve been a little bit busy and stressed out over the past few weeks.

There’s only one item missing from the photo call, and that’s a hat that I knitted for Paul, mostly in the middle of the night. I ended up resorting to knitting it inside a carrier bag, when he arrived home earlier than I’d expected from his work leaving do! (Thankfully he was slightly drunk and far too tired to wonder what on earth I was doing.)

Most of these are gifts that I gave, but a few were things that I made to be given as gifts by other people.

Oh, and I did finish Bryan’s second sock, but I forgot to take a picture of the pair before I wrapped them up!

Black and white skull & crossbones slippersYellow Flea Market Fancy slippers
Red Katie Jump Rope slippersPink leopard slippers
Pink leopard slippersCoral slippers
Sock Monkey Medicine slippersBryan's Slippers
Dad's slippersMum's slippers
Stef's beaded wrap jacketPaul's eco-hoody
Thelwell tote bagMore skull slippers...
Flower Arranging ApronJo's hat & scarf
Slither glovesA sock and an ex-sock.

Thinking about shoes.

It has to be said that I used to do an awful lot of thinking about shoes – not to mention an awful lot of buying!

I had a hip operation a few years ago, and ever since I’ve had to be a bit more sensible about these things. I wear orthotics inside all my shoes, and I am now the proud (if rather financially-challenged) owner of four pairs of MBTs. They may be expensive, but they are absolutely the best shoes that I’ve ever bought.

However, MBTs are only available in a limited range of styles, and most of them are, let’s face it, not what I would be looking for in terms of a funky or indeed a fashionable shoe.

Being the sort of person who follows a train of thought to its logical if ridiculous conclusion, I’ve spent a while this year investigating the possibilities of designing and making my own shoes.

Skull slippers!

I’ve got as far as making a few pairs of funky slippers (guess what everyone’s getting for Christmas?!), but sadly not a great deal further.

The sticking point is turning out to be the soles.

The uppers can be made from pretty much anything that can be wrapped around your foot. The soles, on the other hand… they need to cushion your entire skeleton, protect you from the cold and wet, preferably be light and flexible… and this is something which is apparently quite difficult to accomplish without access to a convenient shoe factory.

I’ve started to do a little bit of research into how shoes were made in pre-industrial societies, and the answer mostly seems to be, “using skills and tools which nobody has access to any more”. I’m not about to take up wood carving in order to develop a pair of clogs, and I don’t fancy weaving myself a new pair of papyrus sandals every time it rains. In terms of something hard-wearing, I think the Romans had the right idea with their hobnailed soles – the entire underside of the shoe was covered in short metal nails, hammered directly into thick leather.

I’m not certain I want to be clip-clopping about on hobnailed sandals though, so I’m currently investigating cork and rubber soling. Because I’m doing this on a very small scale, I was thinking of buying some rubber floor tiles to go with the cork ones that I have already.

At the moment I have no idea how I’m going to fix these layers to the bottom of my shoes, but I’m sure I’ll figure something out…

Experimental slipper-shoes…

So, I’ve made a few pairs of slippers now, and they seemed to go quite well. I thought I would attempt the next stage in the experiment towards being able to make my own shoes.

Blue brocade slippers - an experiment! Blue brocade slippers - an experiment!

In the left hand photo, the slippers have completely finished uppers. At this point I would normally attach a felt sole, and that would be it! I decided to try a cork sole (made from an old floor tile!), so you can see it laid on top of the slipper.

I tried to sew the cork directly to the upper, which did work, but it left me with several rather painful holes in my fingers from pushing the needle through the cork! Eventually I reasoned that if I could sew through cork by hand, surely my sewing machine would make a better job of it. I sewed the cork sole to a piece of drill, and used heavy thread to turn over the edges.

Blue brocade slippers - an experiment! Blue brocade slippers - an experiment!

This gave me a strong sole which could then be sewn by hand directly on to the upper. I removed the plain cork sole, and made them both this way.

The soles are now black, having been covered with a coating of liquid latex. This makes them non-slip, and also fairly waterproof. Several more coats will be needed if they’re going to be suitable for walking around outside – and of course the uppers aren’t waterproof at all, being brocade!

There turned out to be quite a few problems with this pair, although now I’ve identified the difficulties I should hopefully be able to avoid them next time:

  • The slippers are too small.
    I hadn’t allowed for the fact that so many layers would take up quite a lot of space. I also hadn’t allowed enough depth in the pattern for my toes. I can easily amend this for the next pair, by adding extra allowance into the pattern, particularly at the heel and toe.
  • The slippers are uncomfortable at the heel and toe.
    In the first picture, you can see where the seam allowances from the upper are folded round under the sole, and stitched in place. Even though I graded the seams, you can still feel a ridge under your foot from this extra fabric. I need to grade the seams more closely next time, and trim a little more away around the curved areas.
  • The sole was difficult to sew into place.
    Even after I’d given up on trying to hand sew though the cork layer, it was still quite tricky to sew the sole into place neatly. I now understand the purpose of a welt. It bridges the gap between the upper and the sole, and gives you a neat way of finishing the join which avoids having stitching on the bottom of the shoe which would eventually wear away. However, adding a welt might compound the problem of having too many layers of seam allowance between the upper and the sole.

Whilst it’s frustrating to have spent time making an uncomfortable pair of slippers which don’t even fit, I’ve definitely learnt enough from this process to be looking forward to making the next pair!

That’s better!

After the slight technical difficulty with Daniel’s slippers I did a bit of unpicking and attached the soles in a slightly different way.

Here they are, with big brother Edward’s skull slippers, enjoying the sunshine:

Slippers for Daniel & Edward

Both of these pairs were made from drawings of the boys’ feet.
I’m slightly concerned that Daniel and Edward won’t be heavy enough to compress the 1″ foam inside the soles, and that the slippers will be a bit tight as a result. They’re only little! At least their slippers will be nice and squashy though.

Next up is a pair for myself, following a flash of inspiration that I had whilst watching a documentary about Riverdance over the weekend. Would anybody be the slightest bit surprised if I told you that I spent the entire programme watching the dancers’ shoes?

A Slight Technical Difficulty.

Today I’ve been making slippers for Daniel, my colleague’s smallest son.

I’ve been following the instructions from Kwik Sew pattern 3323.

The Kwik Sew pieces are simple ovals, which can be worn on either foot, so I drew out my own pattern pieces to make them the same shape as Daniel’s feet. I then assembled all the pieces in the right order, and things seemed to be going pretty well!

Daniel's slippers

On the left is one completed upper, and in the middle its matching sole. The upper is two layers of fleece, with a layer of batting in between. The sole is made from 1″ foam, sandwiched between a layer of fleece and a layer of drill. On the right is what happens when you pin the upper and sole together, right sides in. The idea is that you sew most of the way around the edges, leaving a gap at the heel to turn the slippers through.

Admittedly I did use slightly thicker foam than called for in the pattern, and I had been thinking that maybe the layer of batting was a bit superfluous with the fleece. I could see that the sole/upper piece was quite thick, even after I’d trimmed the seam allowances off the foam. I was expecting this part of the sewing to be a little tricky…

Daniel's slippers

…and I was right. Oops.

The needle’s not only snapped, it’s also curved! This is apparently what happens when you try to squash six layers of fabric, plus an inch of foam, through your average domestic sewing machine. I don’t recommend it!

Next time I think I’m going to leave out the batting layer, and I definitely need to use only &frac12″ foam if I want to go with this particular construction method!

For this pair, I’m going to do a bit of unpicking, and then use the method where the final outer layer of the sole is sewn on by hand. Sometimes a bit of good old-fashioned hand sewing is the best way after all.

More slippers, and an exhibition!

, your slippers are finished! I hope you like them. 🙂

This pair were made to fit a drawing of ‘s feet, which she sent to me using the Power of the Internet. I now need to post them across the Atlantic, and hope that they fit when they get there!

Tiger slippers!

These are made in the same way as the monkey slippers. The uppers are made from plush tiger fabric lined with gold satin, and interfaced with a layer of batting for extra softness. The inner soles are made from gold satin and white cotton, with a layer of 1″ foam and a piece of buckram sandwiched in between. The outer soles are felt, edged with blanket stitch in a strong buttonhole thread.

I learnt a few things while making this pair – namely when it’s better to use a curved upholstery needle, and when a straight one is more effective.

Next up will be two little pairs for Daniel and Edward, my colleague’s sons. They’ll both be made of polar fleece, so they should be really squashy and cute!

Oh yes, the art exhibition!

I’ve received an email via Etsy, from a local ceramic artist. She’s asked me whether I’d like to have some of my badges included in an exhibition that she’s putting on in Henley in July.

I’ve mailed back to ask for more information, but this is the first time I’ve been invited to take part in anything like this, so I’m very excited about it!