Meet Lucinda

Pronuptia Lucinda, 1983

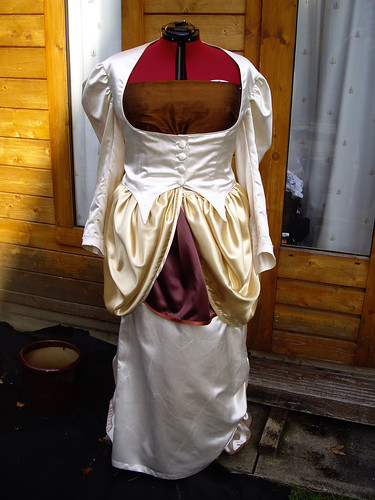
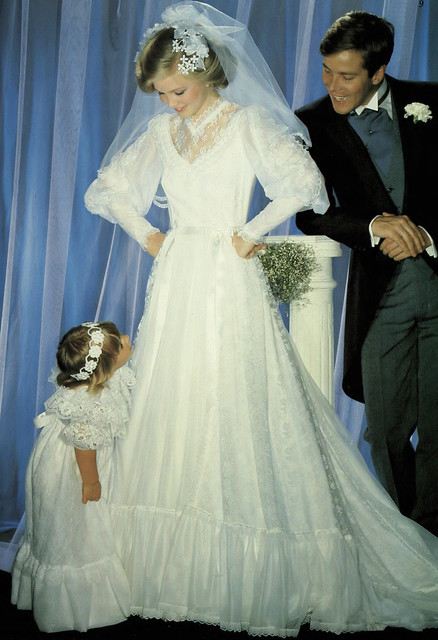
Say hello to “Lucinda”, one of Pronuptia‘s finest wedding dresses of 1983.

I’d been looking on Ebay for a while for a stereotypically 1980s wedding dress, the bigger and the pouffier the better, but somehow I always seemed to end up being outbid by 15p at the very last minute. I had a look in charity shops, but everything they had was too nice, or too far out of my very limited budget.

So, I asked around on Facebook, and a photographer friend said he thought he might have something appropriate lurking around in the garage, from a project that had never come to fruition. He sent it over to me, and it turned out to be perfect!

Pronuptia Lucinda, 1983

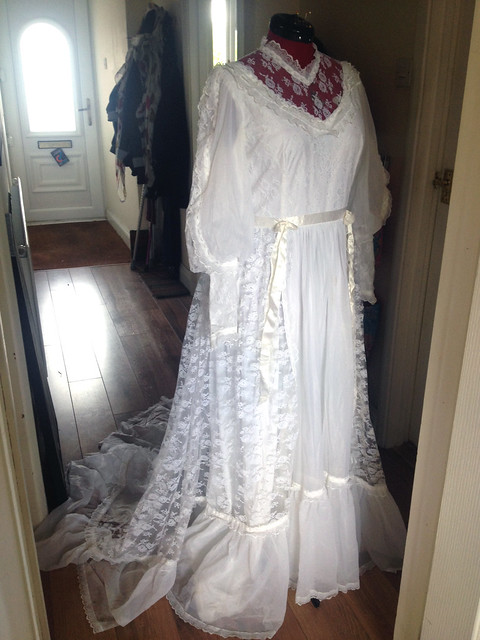
It’s a perfect example of 1980s-does-Edwardian, and being a Pronuptia gown it’s really well made. Okay, yes, it’s really well made from 100% nylon (lovely!), but that means it’s survived a trip through the washing machine, and has come out looking great. And best of all, as you can see by the mannequin, the dress is an absolutely perfect fit. I couldn’t have asked for anything better!

There’s a little bit of damage to the bottom ruffle – a hole at the back, and a couple of places where the lace is coming away. There’s also some staining on the lining of the train, where the dress has obviously been wet at some stage… and there’s a mark on the front of the skirt, that might be wine, or might be gravy!

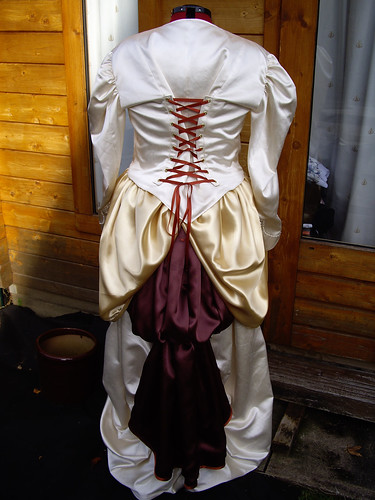
Clearly this dress has had one very good day in its life, but considering the dated style and the damage, I can’t say I feel too bad about making some slight alterations. Details will follow later, but what I will say is that this is for a photo project of my own, mainly involving messing about in the woods in a big white dress. After I’ve taken the scissors to it, that is.

(Oh, and if you fancy a bit of a giggle, Pronuptia have digitised 60 years’ worth of their catalogues, and made them available online!)

The right tools for the job.

Upholstery & Lampshade Needles

No, I haven’t been sewing upholstery or lampshades. But I did find myself in need of a curved sewing needle today, and I knew I had a packet somewhere. I hadn’t realised that they’d be older than I am! They’re in perfect condition, and they were just what I needed to sew through multiple layers of fabric that couldn’t be done by machine.

Pleats & Pins

I’m in the process of making a costume, which is going to be an extremely sumptuous ball gown. The starting point was my (first) wedding dress, which has been sitting in my loft for almost fifteen years. Thanks to an extremely generous seam allowance, I was able to let it out enough to make it fit again! I’m replacing the ivory skirt with a matching burgundy one, but  rather than dismantling the original dress I’m simply adding an extra layer of fabric. So this is five metres of satin, draped and pleated into place.

Clearly there was no way I could have even considered doing this kind of alteration using the sewing machine, but working by hand directly on the dressform (to maintain the shape of the draping as I worked) was rather awkward. Thankfully the curved needles were strong enough to push through all those layers as I sewed down the pleats, and the perfect tool for this kind of fiddly work.

Time permitting, I’m intending to make a matching hat. I have a feeling that these curved needles are going to come in handy again!

Steampunk Silk

Steampunk Silk

This is a costume that I made for a friend, way back last October for a Hallowe’en event. She already had a corset and a mask, so they dictated the copper, gold and brown accent colours.

The ivory silk had a previous incarnation as her wedding dress. The slightly distressed texture is a result of putting it through the washing machine, but it left the fabric amazingly soft and a joy to work with. There was enough to make a jacket and a bustled skirt, with some left over for accessories.

Steampunk Silk

The jacket is a modification of two Simplicity steampunk patterns – 2172 and 2207. The back and sleeves were taken from 2207, with the front from 2172. I added lacing into the princess seams at the back, and beading to the cuffs. The buttons were from the original dress, as were the Swarovski crystal beads.

Steampunk Silk

The bustle and swags are in sections, all interchangeable so they can be worn in lots of different ways. They simply tie at the waist with ribbons. The skirt itself is bustled at the back, using ribbons sewn through channels in the centre back seam. This can be let down into a train. There’s a little bit of ruching at the front too, conveniently placed to disguise a stain that wouldn’t come out! (Shhh, don’t tell…)

I also made a petticoat to go underneath, to give  the skirt a little bit of extra fullness. I don’t know why I didn’t take a photograph of that, but you can just see the ruffle peeking out, here. There are better photos of the outfit being worn to stunning effect, but I need to get permission before I post them here. Thankfully it was well received, and looked absolutely fabulous!

As always, I wish I’d had a bit more time to make this. The bustle and swags were a bit rushed, and I would have liked to add much more beading to the cuffs. But I absolutely loved making it. It was a real treat to work with such sumptuous silk duchess satin, and to swap creative ideas with a friend. In fact, it’s inspired me to modify my own wedding dress for an event I’m attending in May.  You’ll have to wait and see how it turns out!