Prototype Shoes: Making Progress!

Felt shoes: First Prototype

Well, it feels as though it’s taken absolutely FOREVER, but I have just completed my first pair of prototype shoes made on my new lasts! After much waiting and worrying and more waiting, the lasts finally arrived at the beginning of August, and it’s taken me about three weeks to get the first pair made. Now that I know what I’m doing (and what changes I need to make), the next nine pairs should come about a lot more quickly!

The lasts have arrived!

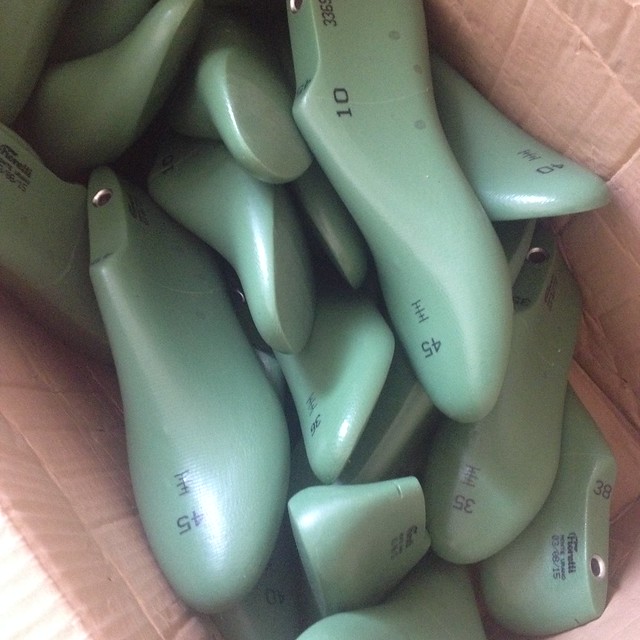
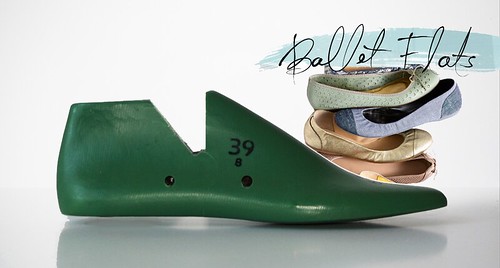
I have twelve pairs of lasts in total, in European sizes from 34 to 45. They’re solid plastic (with a hinge for getting the lasts out of the shoes without stretching the uppers), and they’re really, really heavy! Thank goodness I didn’t choose the option with the metal sole plates!

Felt shoes: First Prototype

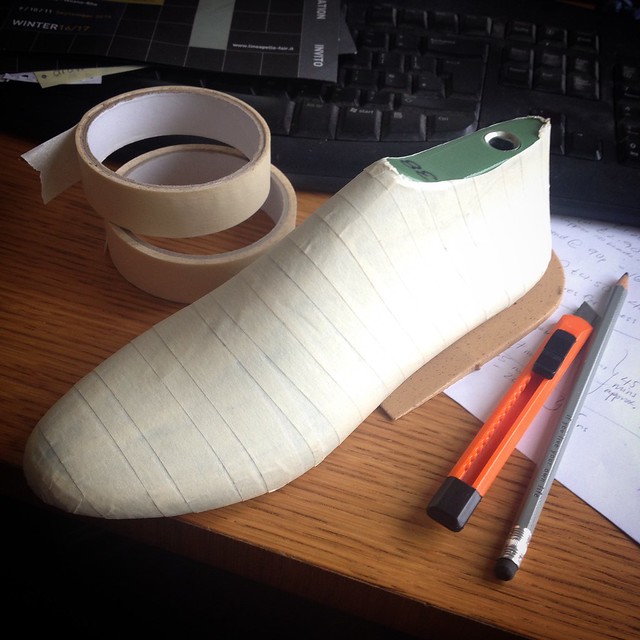
Most of the work I’ve been doing so far has been distinctly un-photogenic. It starts with mummifying the lasts in two layers of masking tape.

Felt shoes: First Prototype

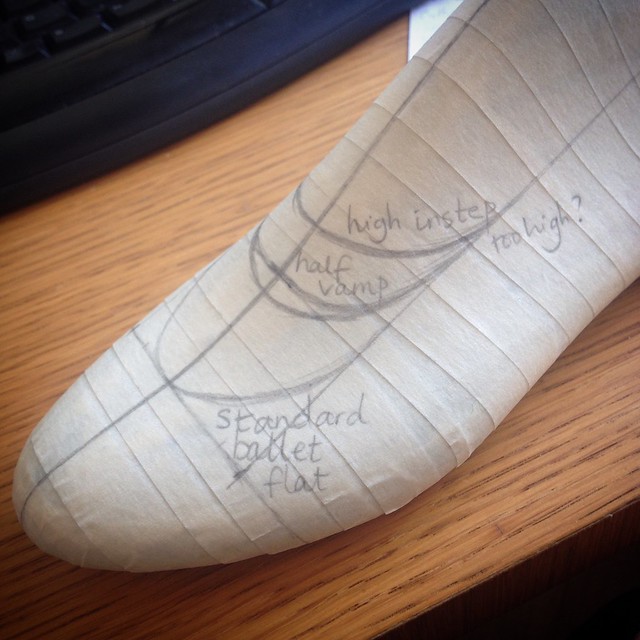
Then comes the design, which you can now draw directly onto the last.

Felt shoes: First Prototype

Repeat for every size you want to make…

Felt shoes: First Prototype

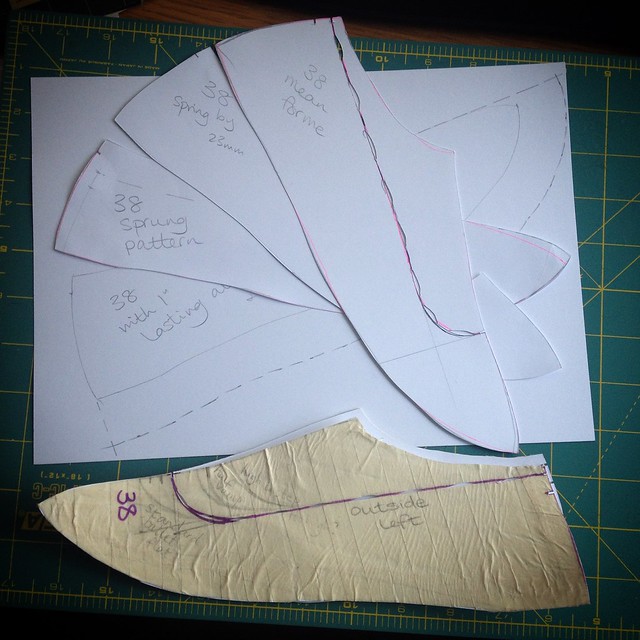
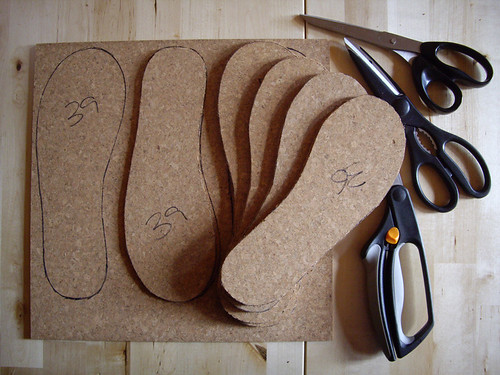
And then you can peel off the tape and create the actual patterns.

Felt shoes: First Prototype

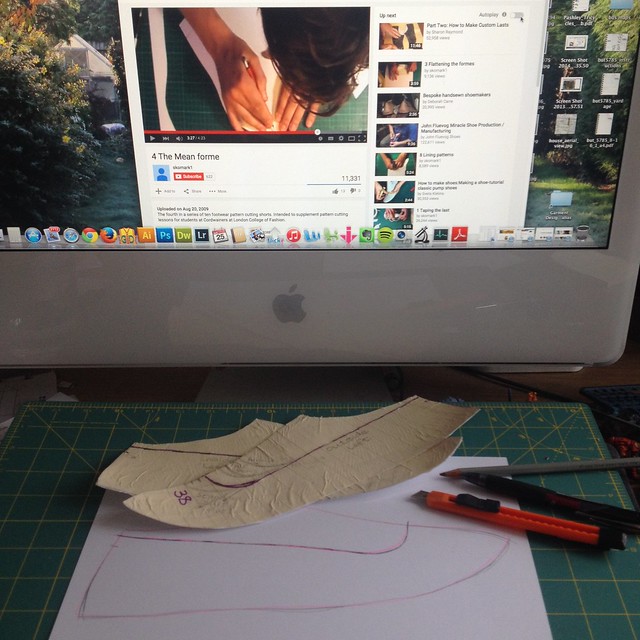
This takes a bit of technical wizardry (okay, it’s just technical drawing), so I turned to some shoemaking videos produced by Cordwainers at the London College of Fashion. (They helped a bit, but I think my shoemaking books and years of research were of more use at this point.)

Felt shoes: First Prototype

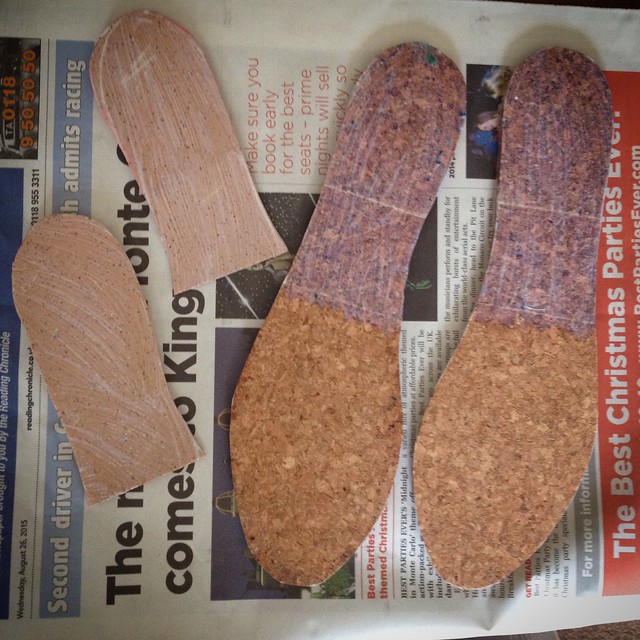
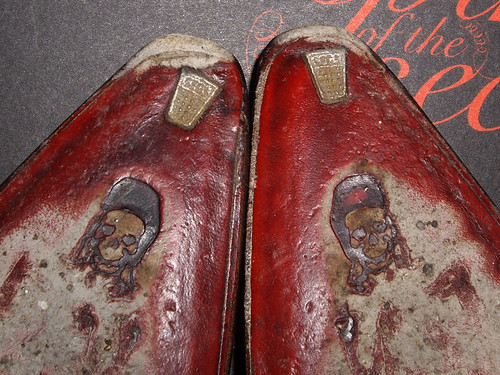
As uninviting as it looks, this photo represents my favourite part of the new shoes. I was able to find a good strong water-based glue, which means no more solvents and no more breathing equipment! No more shoemaking migraines! Hooray! I do still need to make sure I’ve got good ventilation, and I’ll probably wear a face mask anyway, but this stuff is so much nicer than the rubber cement I was using before. Here you can see the little wedge pieces (just 5mm deep) waiting to be glued to the cork midsoles.

Felt shoes: First Prototype

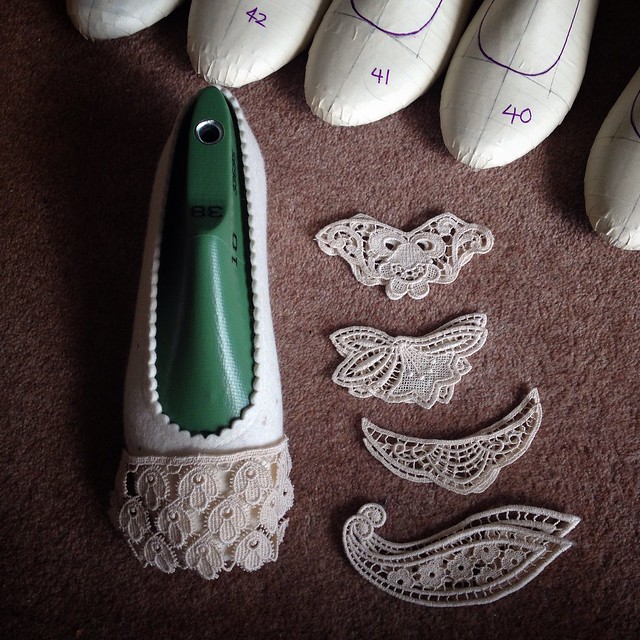
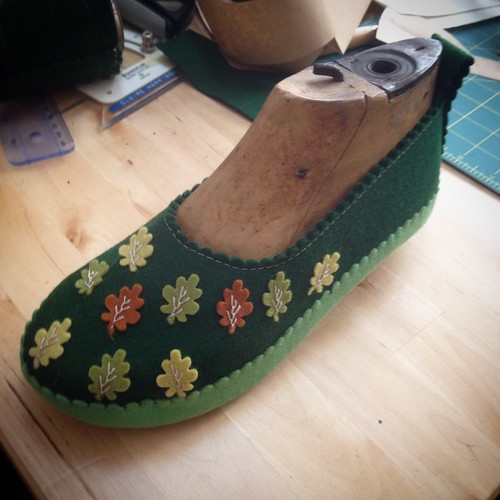
While I was waiting for the glue to dry, I cut and stitched the first pair of uppers from the new patterns. I can see some pretty bridal versions in the future, although most of my prototype pairs are going to be made in fantastically bright colours!

Felt shoes: First Prototype

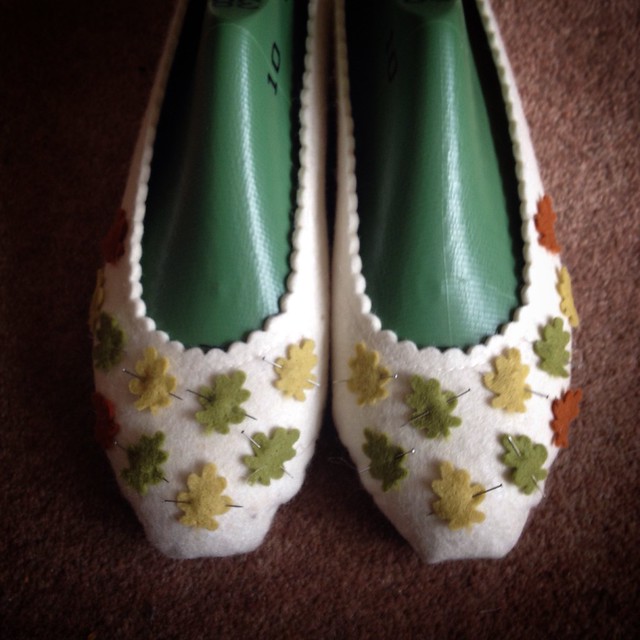
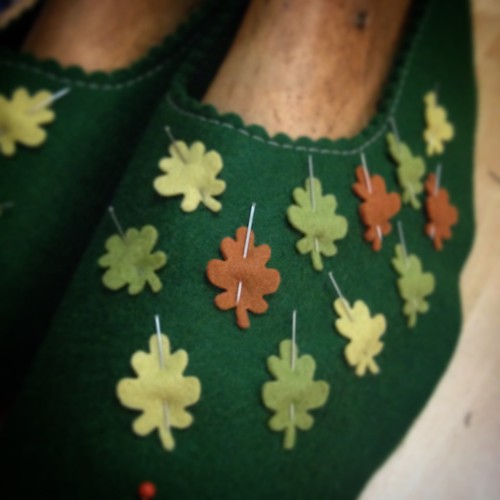
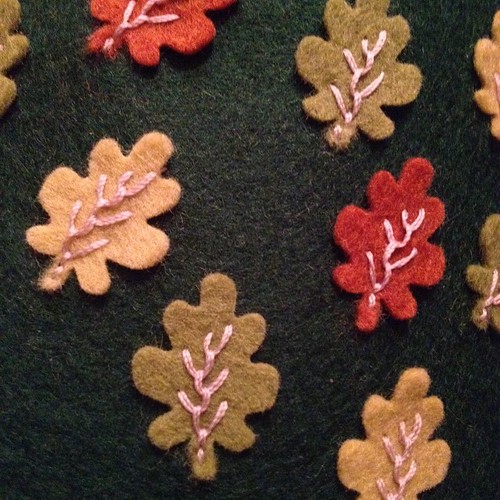
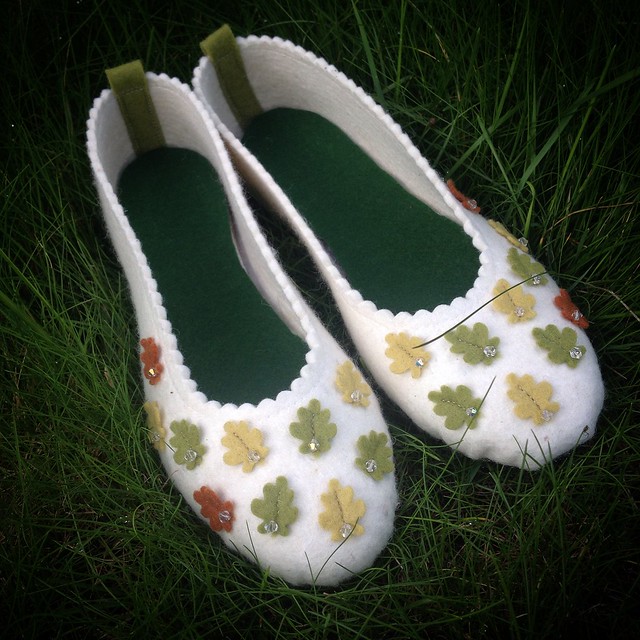
This first pair is for me to test, and I decided to re-use the little felt oak leaves from the pair of green felt shoes that didn’t fit. (I managed to re-use the midsoles from those too, so I’m glad they weren’t too much of a waste.)

Felt shoes: First Prototype

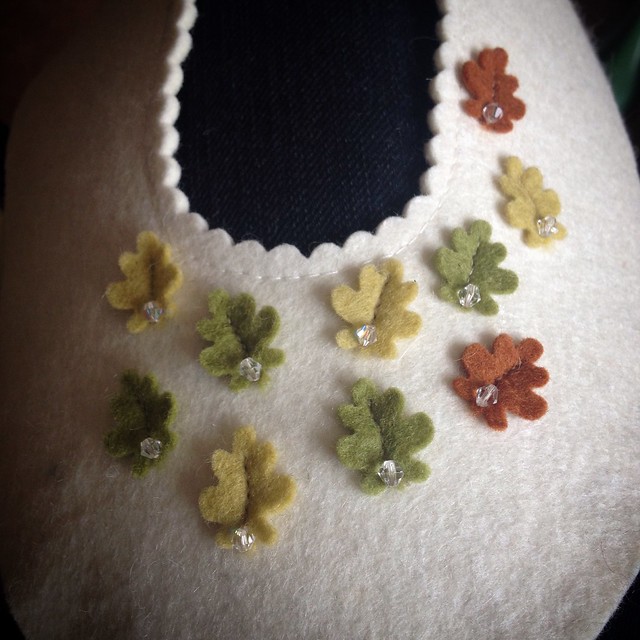
They’re stitched into place by hand, and embellished with Swarovski crystals. It’s impossible to photograph how sparkly they are, but they glitter like little raindrops on the leaves. So pretty! Felt shoes: First Prototype

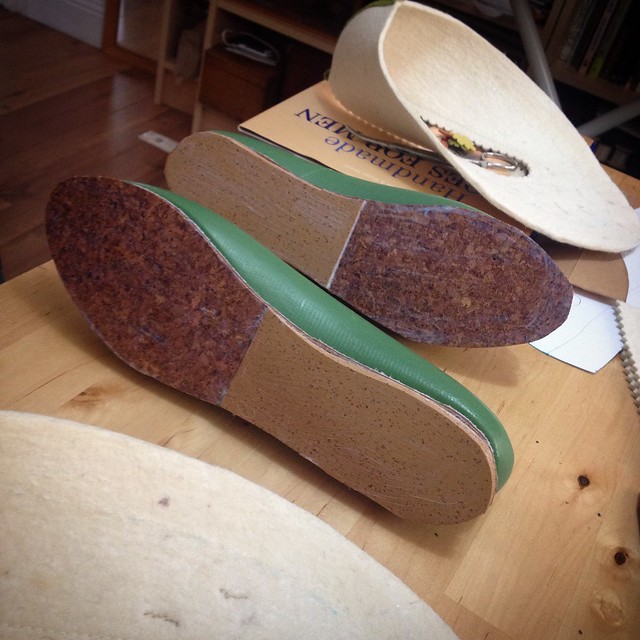
More waiting for glue… this time to attach the uppers to the midsoles. The only down side of this glue is that it takes thirty minutes to be ready to stick, as opposed to the ten minutes required by the horrible old stinky stuff. This is a very small price to pay, but it’s a bit of a trial for a very impatient person. (Who, me?)

Felt shoes: First Prototype

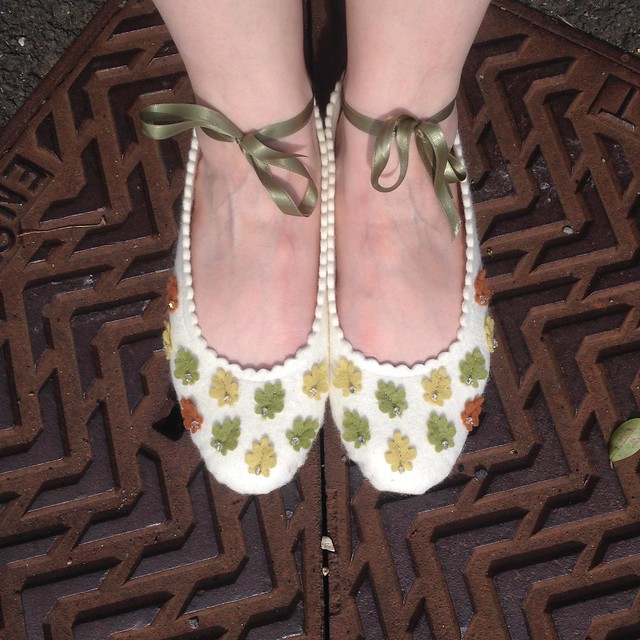
Once the glue had dried, I took them for their first walk! I definitely need to swap the ribbons for wider ones, as these have a tendency to slip around my ankles, but otherwise they seem great so far. I’ll wear them as much as possible over the next few weeks while I continue to make the rest of the prototypes. I should end up with ten pairs to show you altogether, and then I can pop them into the Etsy shop for you!

New shoes in progress…

Felt shoes

Did I mention that I was making some new shoes? I suspect that might be one of those things that I only mentioned on Facebook and Instagram, while I was having a bit of a break from the blog. I started working on them back in April, with some lovely wool felt from Cloud Craft.

Embroidered felt leaves

I’d originally wanted to make my own felt, but my hands and shoulders haven’t been well enough to allow that, so I decided to bite the bullet and buy some. I love the combination of felt and embroidery (I seem to be doing that a lot these days!), and I figured that I could use the techniques from my original fabric shoes to make something a bit more robust.

Felt shoes

This turned out to be very nearly the case. These are just lacking their rubber outdoor soles, and they look really good on the lasts – if I do say so myself!

Felt shoes

Unfortunately something went a bit peculiar in the sizing department. When I took them off the lasts and put them on my feet, they were enormous! By this time I’d already taken orders for ten prototype pairs, so I could thoroughly test the techniques before letting them loose in my Etsy shop. Obviously I couldn’t make ten pairs of shoes that didn’t fit their recipients, so I decided to bite the bullet and borrow enough money to allow me to order some lasts.

Ballet Flats lasts from shoe-last-shop.com, ordered in sized 32-45!

I found the perfect style at Shoe Last Shop, a company which specialises in selling small quantities of lasts to shoemakers without factories, who aren’t mass-producing thousands of pairs. I’ve ordered a full set of these, in European sizes 32 to 45. I suspect that the smallest and largest sizes will get a lot of use (which is why I wanted them), as most commercial shoe ranges only include sizes 36 to 41, sometimes up to a 43 if you’re lucky.

I was expecting to have ten finished pairs of shoes to show you by now, as the lasts were scheduled to arrive just over a month ago! Sadly there have been some production delays at the factory, and I’m going to have to keep people waiting a while longer, which I really don’t like. It’s bad customer service on my part, even though there’s nothing I could have done to fix it. (Well, except for not having taken the shoe orders, even for prototypes, until I had the lasts in my hands.)

Thankfully, I received an email yesterday to say that the production backlog had been caught up, and my lasts should be shipping in the next couple of days. I have a huge pile of felt read and waiting, so as soon as they turn up I can make new upper patterns to fit them, and get a move on with the shoes!

Cork Midsoles

cork soles

These are some of the cork midsoles for the prototype shoes – and those are the three pairs of scissors that have hurt my wrist, hurt my thumb and given me a blister while I’ve been cutting them out. Ouch!

I’ve discovered that scissors are easier (for me) than a knife, for making a nice clean cut and leaving my fingertips intact.

The cork itself is in the form of floor tiles. They’re 4mm thick, nice and dense, and will eventually mould a little to the shape of your feet as you wear the shoes. They’re also much easier to store than enormous great sheets of shoemaking cork, and I can take advantage of discount days at local DIY stores.

Speaking of which… I’m off to Wickes, to give my poor old hands a break from cutting, and to buy myself a stronger pair of scissors!

These boots weren’t made for walking.

At the end of December I received an email that I just couldn’t resist – a message about the Jeffery~West sale. I went to their website, just to have a look, you understand, and discovered that the Rochester Rafael boots were now half price. Even better – there were several colours left in my size! After much deliberation I decided that I couldn’t live without this fabulous red mock-croc pair.

They arrived really quickly, were a perfect fit, and I was thrilled to bits. I wore them once, took them off when I got home, turned them over to show the design on the sole to my husband… and was horrified to discover that they looked as though they were falling apart!

A worried email and a couple of phone calls to Jeffery~West later, and a lovely lady called Kirsty was able to reassure me that this is not the case.

I knew that the soles of these shoes were blake stitched rather than Goodyear welted, but I hadn’t realised what difference this type of construction would actually make. Because the soles are stitched directly to the uppers without a welt, you get a shallow channel around the very edge of the sole. To stitch the upper in place, the leather is cut with a knife and peeled back. Once the stitching is complete, the leather is pressed back into place. If the sole of the shoe gets damp, this channel can open up. Thankfully it can also be pressed back down again – and once I’d done that and worn the shoes a second time, you’d never know that this had happened.

What I will need to keep in mind is that these shoes won’t be as robust as my Sylvians, and I should probably save them for summer. I’d never go out in the rain in leather soled shoes anyway, but this is England, and sometimes you just can’t avoid walking on a wet pavement!

For anybody interested in the technical details of the differences between blake stitched and Goodyear welted shoes, W. Sanford (bespoke tailors and shoemakers in Shanghai) have a really interesting article, with diagrams. I’ll be studying this for future reference…