Thinking about dresses

Three dresses

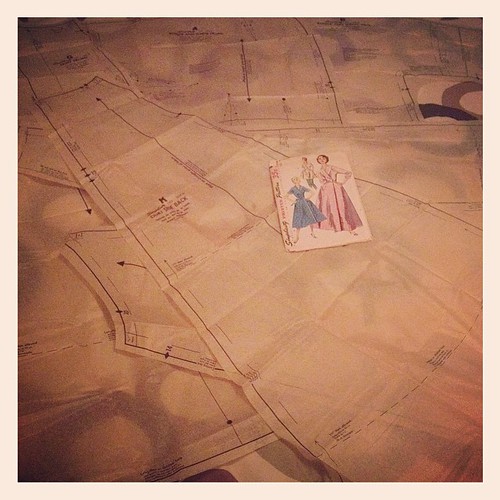
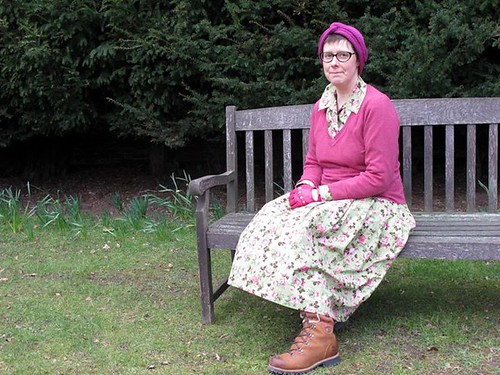
I’ve had these three dresses hanging over my wardrobe doors for a couple of weeks now, trying to decide which is my favourite, and which I should therefore make again.

Trouble is, I haven’t really been wearing dresses lately, as I tend to reach for them only in the heights of summer and winter. Last winter was so mild we didn’t see a single flake of snow, and so I didn’t need my usual winter outfits of leggings (or bloomers and knee socks), a long petticoat, a long sleeve t-shirt, a long flowing dress, and a jumper. This summer… well, we haven’t quite reached it yet, and so I’m in a limbo of chinos and t-shirts, or ancient jeans that I really should have thrown out already.

IMG_4183

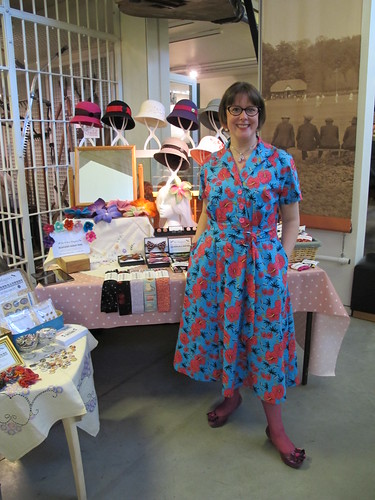
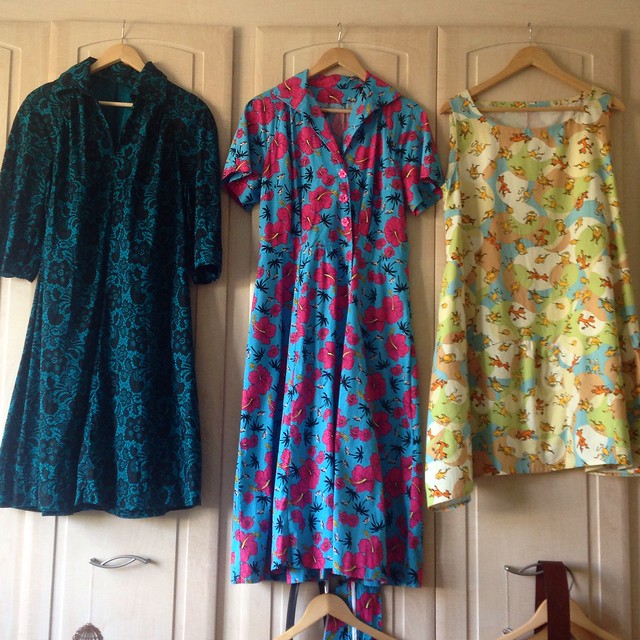
I wore the dress on the right (Vogue 9112, Marcy Tilton’s “Cirque” dress) to visit a friend, and it turned out to be perfect for having a picnic on the lawn, followed by having a small plastic car driven over my knees on the sofa. What more could I ask of a dress? I wore it with yoga pants, as it was always my intention for this one to be more of a tunic style. (I am also eagerly awaiting the release of the Dottie Angel Dress pattern, for tunic-making purposes.)

17/5/14

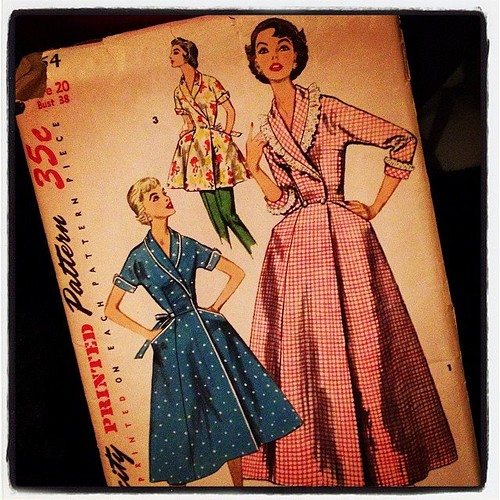
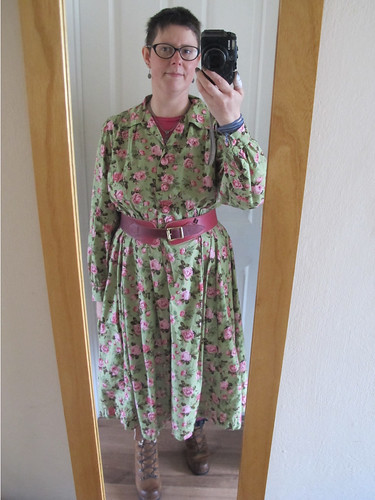
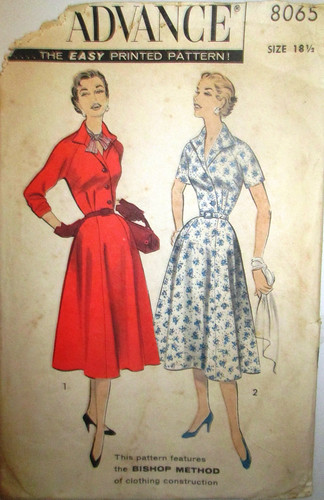
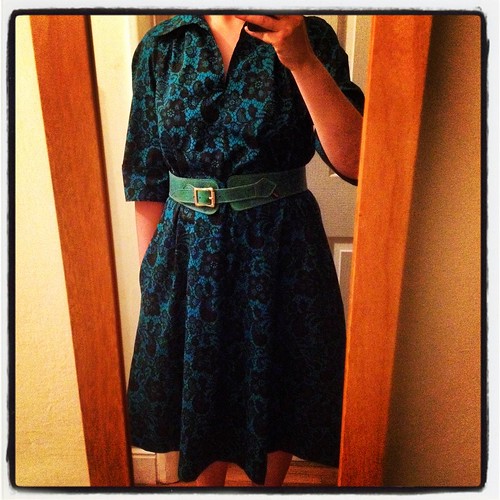
The middle dress, Advance 8065, a 1956 pattern, I wore to work on my last day at the Museum. It was comfortable, but I do need a slightly longer slip to wear underneath it, to stop it from catching on my bloomers and going all bunchy around the knees. (Either that or I need to start making my bloomers in silk rather than cotton!)

Bee dress, July 2014

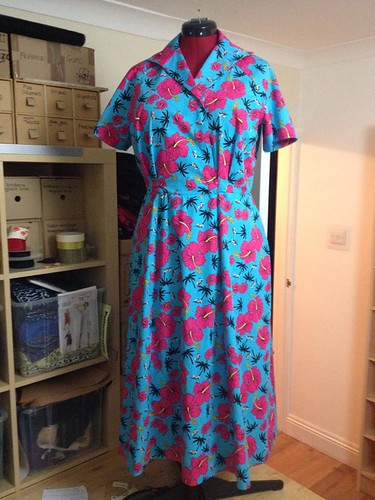
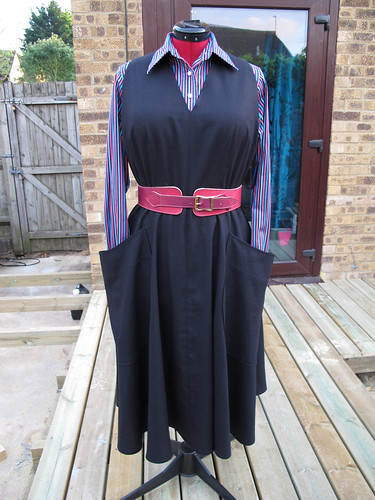
I’d had the same issue the day before, when I wore a not-quite-finished dress, which had started life as a shirt but ended up with the skirt from the pattern above added to the bottom. It still needs a placket and buttons, but although it was a bit tricky to get off again, it held together okay with a big brooch at the collar!

But did I enjoy wearing it enough to finish this one and make another? At the moment I’m not sure. I feel as though a dress should be an easy option for an outfit. One garment, pop it on, add a cardigan, and away you go. Somehow the reality of having to pair a dress with a bra slip and bloomers makes it seem like more trouble than it’s worth.

1970s dress

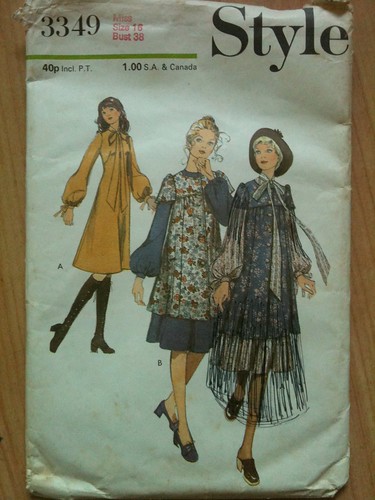
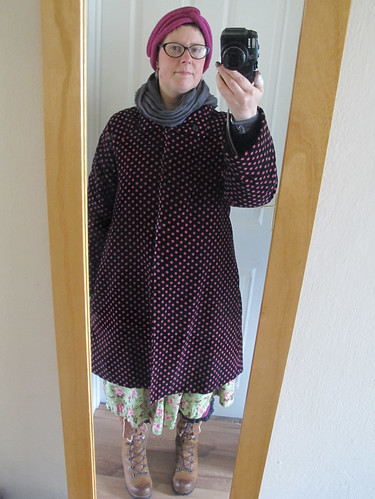
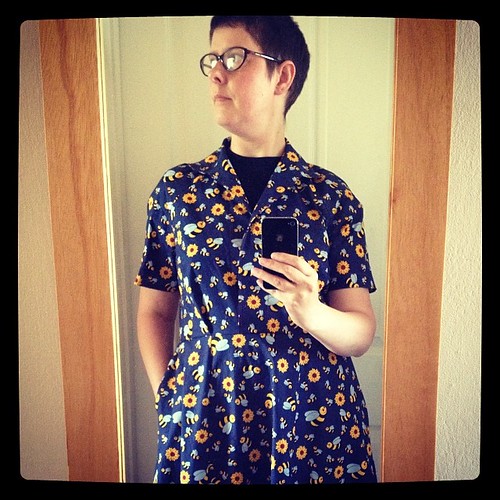
As for this one, the dress on the left in the top photo (Butterick 4637, a 1970s pattern), I haven’t worn it more than a few times since I made it, and most of those times were as soon as it came off the machine. Even having it hanging around in full view simply isn’t tempting me to put it on. Maybe because the fabric’s quite dark, so it feels like a winter dress. Perhaps it would be better with leggings and a long sleeved t-shirt underneath. It just doesn’t feel right for summer, somehow.

I still haven’t had a proper sort-out of the side of the wardrobe that hides all of my dresses, so perhaps I need to do that before I decide anything. This year I definitely feel more drawn towards novelty prints and vintage styles than I do towards my long floppy linen dresses and long petticoats. But maybe that’s just because the weather hasn’t warmed up yet, and it’ll be tunics and petticoats and bloomers all the way once the sun comes out.

All I know is that I currently have so much stuff that I’m feeling totally overwhelmed by it. I definitely need to make a concerted effort to sew things that I’m actually going to wear, rather than being tempted by interesting patterns and pretty fabrics. Either that, or actually stop sewing for a while, and concentrate on wearing the things I have already. We’ll see.

Birthday Dress and a Thank You

Thank You card

Last month we sent my niece, Milly, a box full of arty and crafty things for her fourth birthday. Paul picked out lots of stickers that he thought Milly would like (the wobbly eyes were especially popular), and we’ve just received this fantastic Thank You card. Isn’t it cute?

Milly's 4th Birthday Dress

There was also a Birthday Dress, of course, as well as a little pile of tote bags made in Frozen fabric, for everyone at her birthday party.

This year’s dress is McCalls 6022, another one with finishing techniques far more complicated than I would have expected for an “everyday” kind of dress like this – and especially one marked “Easy”! I had one metre of fabric, and only just managed to squeeze the dress out of it by cutting the yokes, pockets, and the “contrast” band at the bottom on the cross. I think this works quite well, as it gives all of the different characters a chance to appear the right way up!

The thing I like about these dresses is that they last for quite a long time. Even though Milly’s quite tall, she can carry on wearing this as a tunic or top over jeans or leggings, long after she’s outgrown it as a dress. I have this pattern up to age 6, so I expect I’ll be making a few more versions of it over the next couple of years. I will be re-writing the instructions though, to make the finishing a bit less fiddly. (And buying a little bit more fabric next time!)

Dr Seuss Cirque Dress

IMG_4114

No sooner had I blogged about Marcy Tilton’s new dresses than I found an online store with a sale, and bought both of the patterns! As you do…

I decided that I had just enough of my precious organic cotton Lorax fabric from eQuilter to make the Cirque dress (Vogue 9112), if I left off the collar. To be honest I would have left off the collar anyway, as it’s much easier to wear a necklace or a scarf with a flat neckline, and it was the shape of the rest of the dress that I was particularly drawn to.

IMG_4125

Unfortunately I faltered at the first hurdle, which was finding a space big enough to lay the fabric out flat in a single layer in order to cut it out! Because every single piece is a different shape, nothing’s cut on the fold and duplicated, so you really do need to be able to lay out the pieces as shown. I tried the bed, but it made my husband nervous (let us not mention the Snipping Of The Duvet Cover incident from a  few years ago) and it made my back hurt. Plus trying to cut on a squashy surface is very inaccurate, which is the last thing you need with a dress like this! I did eventually find success on the living room floor, but my back and knees were really not at all happy about it.

IMG_4160

Once I’d got it to a state where it was try-on-able, I could see that it’s going to be a really great summer dress! I went down a size, as I often do with patterns that are generous in the waist and hips, so this is a Vogue/Marcy Tilton size M. It’s the tiniest bit tight across the shoulders when worn with a t-shirt underneath, but I need to make some minor alterations to the centre back seam anyway, so I can easily fix that next time around.

I made very few alterations to the pattern, as it was my first time making this dress, and I wanted to make sure that I understood it before I started messing about with it! I left off the collar, but that was very straightforward. I also changed the construction order very slightly, to attach the four pocket pieces before joining the front and back of the dress at the shoulders. It was just easier to manoeuvre it through the machine that way, and it made no difference whatsoever to the outcome of the dress.

IMG_4161

The only other thing I did differently from the instructions was to sew the bottom hem and the neck and armhole bindings by hand, as I didn’t particularly fancy cream topstitching on this very multi-coloured fabric. It took a while, but the finish was worth it.

IMG_4183

I’m not 100% convinced that these pale colours actually suit me very well (a difficulty of buying fabric online!), but I plan to wear this dress with an obnoxiously bright green long sleeve t-shirt underneath it, so I think it’ll look fine. I’m very pleased with the fit, and only plan to make two alterations next time. The first will be to curve the centre back seam to match the curve of my spine, and the second will be to cut away the armholes just a tiny fraction more at the front, and also raise them a little bit as they’re quite deep.

IMG_4197

I wore this dress for a day of mooching about when my parents visited, and found it really comfortable to wear. The pockets are nice and big, I think the dress will be a great length to wear either with or without leggings underneath, and I have at least five pieces of fabric earmarked to make more! It seemed to fit together much more easily than the Marcy Tilton dresses I made last year, but it still has the lovely piecing and asymmetrical styling that I really like.

Top marks to this one, I can’t wait to sew it again!

I finally finished something!

Style 3349, 1971

I bought this sewing pattern for the grand total of £2 in my local Sue Ryder charity shop, although the general consensus of the internet was that I’d overpaid. Charming! A few weeks ago – or is it actually months now? – I started making the 1970s smock-style overdress, and was distracted half way through by other things.

All it needed was the top stitching and the buttonholes, which I’d been putting off because making them by hand (oh, and doing the hemming by hand too) was going to take so long. In the end I bit the bullet and risked making the buttonholes on my notoriously uncooperative sewing machine. They’re not perfect, but they’re lot better (and involved a lot less swearing) than I expected, which was a pleasant surprise!

Untitled

Unfortunately this is the best picture I could get of me wearing it. This house is so dark, the mirror’s propped up in my sock drawer because there’s nowhere to actually hang it on a wall… and I’ve found out today that we’re not going to be building the beautiful new sewing room that we’ve been planning for the year since we moved in here, because the quote from the architect was rather a lot more money than we can afford. So, until the clocks change again and we start getting a bit more daylight into the house, crappy pictures of sewing (or Instagram filters) it is!

Untitled

This is my newest old pattern (dating from 1955), and I bought it specifically for view 3, the short one at the top. When I unfolded the pattern pieces I was amused to note that it’s not actually mid-thigh length, as shown in the illustration, it actually reaches almost to my knees. But that’s what I want – something to wear over my many pairs of coloured trousers, that’s a bit smarter than a t-shirt. (Whether my colleagues will consider the 1970s smock top an improvement over a t-shirt remains to be seen, in fact I’m a bit nervous about wearing it, but it’s rather a waste of time and fabric if I don’t!)

Untitled

The pattern only gives fabric requirements for non-directional prints, so I had to work out the yardage that I’d need for a fabric which can only go one way up. Because the skirt is made up of six very wide gores, the answer turned out to be A LOT! Five yards for a knee-length dress, in fact! I didn’t have enough of the fabric I’d had in mind (I suspect that will now become another 1970s smock), so I’ve started it off in a lovely organic cotton check. I’m currently deciding whether it needs a contrast trim (collar, cuffs, pocket yoke and tie belt), or whether it would be better in just the one fabric. In fact, as I haven’t actually traced the skirt pieces yet, I’m wondering whether to make the most of having quite a lot of this cotton, and actually making the calf-length version instead. I’m leaving the bodice on the dress form while I have a bit of a think about it.

Given my current sewing speed, you’ll probably see it again next year!

An unexpected venture.

Oh, good grief. It’s a month since I last posted here, and I haven’t made a single one of the buttonholes I mentioned in my last post! I have made four in this blouse, though I accidentally made them on the left instead of the right. I decided it didn’t matter too much, as the blouse was for me… but then it didn’t fit, and now the blouse is sitting in the Etsy shop, waiting to find its new home. What you may or may not be able to tell from this little snippet, is that the print is covered with My Little Ponies!

I made the executive decision to split my Etsy shop into two, although at the moment they’re both selling a mishmash of the same things. Once the listings start to expire in one place I’ll re-list them in the other, and hopefully it should all be sorted out over the next couple of months.

The eternal magpie Etsy shop will sell bits and bobs that I’m clearing out from my stash, organic cotton clothing and zipped pouches as I make them, and the more “everyday” styles of felt hat. Oh, and my own sewing patterns, more of which in a moment.

Mr & Mrs Magpie’s Inexplicable Emporium has become a little bit too explicable lately, so I want to have a bit of a tidy-up. This is where I’ll be offering some gemstone jewellery pieces, some of the more complicated-to-make styles of hat, and some corset belts and felt work, once I get around to making them.

So, I mentioned sewing patterns…

A little while ago, a customer who I’d made one of these tunic dresses for (way back in 2009!) got in touch. She wanted to know whether it was possible, as I no longer made these tunics for sale, for her to have a copy of the pattern. I thought about it for a minute, said yes, and set about writing up the instructions.

Since sending off the pattern, Maria has already made not just one, but three tunics – and in the absolutely most fantastic choice of fabrics! And proving that word of mouth is absolutely the best way to sell things, Maria has been very kindly sending everyone who’s admired her tunics over to the eternal magpie Etsy shop, where you can now buy the pattern!

It’s a bit of an experiment at the moment – I’m drawing out the patterns by hand onto brown paper, as I don’t quite have the technology to get them into the computer. I drew them by hand in the first place, and haven’t yet managed to replicate them accurately with my pattern drafting software, which is very frustrating. Also, my greatest bugbear about printing out patterns is having to spend ages sticking all the pages together, so I thought that sending out the patterns complete would be a nice way of saving other people from having to do that.

So, I’ll see what kind of feedback I get about the patterns – whether they’re the right sizes, whether people can understand the instructions, that kind of thing – and decide after a little while whether this is something I want to carry on with or not.

I seem to be pulled in so many different directions these days… I’ll have to see what starts pulling me most strongly.

Back again.


Hello! I seem to be getting into a very lazy habit of only updating the blog about once a fortnight. My excuses are that it’s too frustrating trying to post using the iPad, and it’s so much easier to update Instagram and Facebook. Probably best to follow me there, if you feel like keeping up with me on a more regular basis.

Here you can see me in a fantastically stereotypical Instagram shot – staring whimsically into space as I contemplate how I’m going to get out of this dress when I haven’t added the front placket yet.

I was originally going to make a dress, then I changed my mind and decided to make a shirt. Thanks to a slight maths error (okay, the fact that I didn’t measure my hips properly) the shirt didn’t fit, so I decided to chop off the bottom eight inches and make it into a dress after all. But because I was cobbling together two patterns, I hadn’t quite worked out how I was going to get in and out of the thing. My task for today is to cut into the skirt and add a placket, so I’ve got room for buttons below the waist.

I have quite a few buttonholes in my future – this petticoat needs eight of them. (I just need to find eight matching lingerie buttons from my stash.) The pattern is Butterick 3263, and I made the slip to test the fit of the bodice before I embark on the combinations. Just as well I did, as the petticoat didn’t fit me at all! I took in two inches at the centre back bodice, half an inch at each side, an inch out of each shoulder, and added a dart at the centre back skirt to accommodate my sway back. I’m now slightly paranoid that I’ve made it too tight, but I won’t find out until the buttons are in place. (Cue the traditional cursing of my sewing machine that refuses to make buttonholes unless I’m standing in the sewing machine shop complaining to Sue about it – when of course it makes them perfectly. Git.)

In an attempt to be more organised, and to try and keep both my pattern and fabric stashes under control, I’ve started work on a new system. I’ve printed out a little picture and the fabric details for each of the patterns I sew most often, and glued them down to the pages in a small Filofax that was sitting empty in a drawer. I plan to add swatches for each garment as I make them, so that I can see what I’ve got already and where any gaps might be. The second section will be swatches cut from my fabric stash, so that when I go fabric shopping I can see what I’ve got at home, and make sure I’m not duplicating things. This will also allow me to match up the patterns with the swatches, and hopefully shrink the stash a little bit by actually sewing something from it!

Section three, which you can see poking out on the right, is swatches from clothes that are already in my wardrobe. (These were cut from inexplicable horizontal loops on the back of my jeans.) Having these with me will mean that I can buy fabric (or wool) to match clothes that I have already, thereby creating Actual Outfits rather than a wardrobe full of lovely clothes that bear no relation to one another. (Currently I have nine pairs of smart trousers, and no tops at all to go with them. I’m very bored with black t-shirts already.) I’m also contemplating knitting tiny swatches to match my cardigans, though I think that might be a step too far into madness. Perhaps just sticking in a few strands of yarn would do just as well.

Speaking of madness… the other day I made this little doll face. I found her a bit fiddly (hence the slightly squiffy eyes!), so I enlarged the pattern, thinking I’d try making a doll on a slightly larger scale. Except that when I really looked at the photocopied pieces, I realised that “slightly larger” is actually going to turn out about three feet tall! Do I really want to make a doll at that kind of size? Well, I’ve got a big enough piece of felt, so why not?! We’ll see how long it takes for me to get bored of stuffing all the pieces. (I predict: Not Very.)

In Other News… 

I’ve been clearing out my pattern stash into the Etsy shop.
There are a few vintage patterns that turned out not to fit me, a few that I bought and then changed my mind about, and a few that are cut out to sizes that I now can’t fit into. More to come over the next week or so.

My zipped pouches were reviewed over at Blonde Ambition.
Thank you Katie, for the lovely review!

The Vintage Haberdashery Mystery Boxes have disappeared from Etsy
…but I do still have one left. Let me know if you’d like it, and I can pop the listing back up just for you. Otherwise it’ll sit on my shelf feeling lonely, until I can find a good home for it.

And now? Buttonholes. Lots of buttonholes.

(And hoping that it doesn’t rain on the four loads of washing currently drying in the garden, because I’ve got no room for all that laundry in the house if the weather decides to chuck it down!)

Improving on Me-Made May

28/5/14

You may have spotted that I didn’t post very many photos from my Me-Made May escapades. This is partly because I mostly look like some kind of strange triangular bag lady (I like layers, and most of my clothes are comfortable-shaped), and partly because it turns out that I only wear about four outfits, over and over again, with very minor variations. How boring!

28/5/14

Towards the end of the month I made a last-ditch effort to wear some of the smarter clothes in my wardrobe, only to discover that when I put them on… well, suddenly they’re not so smart any more. This dress is now very firmly on the “waiting to be chopped up and turned into something that doesn’t look like a giant floral sack” pile. There’s just no point in wasting time and fabric making clothes that require waist shaping in order to look nice, when waist shaping isn’t something that I actually have myself. Although, having said that, my other vintage dress (also made from an Advance size 18½ pattern without alterations) fitted really well and looked lovely!

17/5/14

See? I still don’t have a waist, but the dress looks smart, not like a huge great cushion’s attacked me while I wasn’t looking. I think this is partly down to the fact that this dress has a smooth skirt rather than miles of pleats. (Also: not a selfie, vintage-style foundation garments, not layered with t-shirts and bloomers and giant boots on account of it being freezing at work.)

Lace crop top

Sadly, even if I did have the budget to wear lovely things from Kiss Me Deadly every day, the fibromyalgia simply wouldn’t allow it. But, the whole Me-Made May experiment did reveal that I am very much lacking in the Me-Made underwear department – despite the fact that I spent plenty of time and money on the London College of Fashion’s Structured Lingerie course back in 2011. I bought this lace when I came back, in a fit of enthusiasm, and it’s been untouched in a box ever since, along with a metre and a half of pink, and four metres of a prettier-than-it-sounds grey. This particular lingerie is about as unstructured as you can get (no wires, no fastenings, nothing), but I used a lot of the skills I learned on the course to make it. The pattern itself is from Sewing Lingerie, a Singer reference book, where it’s described as a “sleep bra”.

The wide stretch lace that I used to make this is actually really affordable, and comes in lots of different colours and patterns. If this one (and the pink one I’ve just finished, and the two or three grey ones I’m going to make next) turn out to be comfortable, I can feel a drawer full of these coming on before Me-Made May next year!

Dress Success!

17/5/14

You remember that whole work/life balance thing that I was talking about the other week? It seems to have toppled over slightly. It happened not least because I was working towards an Inexplicable Emporium stall that took place at work, at our Museums at Night event. The combination of making sure I had enough stock ready on time, coupled with staying out long past my bedtime, and then compounded by an extremely hectic day off, have led to me hobbling to work today with my walking stick, because I was simply too exhausted to stand up all by myself. Oops.

But! The event itself was a fantastic night out, we sold enough stock to make all the effort worthwhile, and I managed to finish my new dress in time to wear it. Phew!
(Note to self: NEVER wear those shoes again. Beautiful, but so uncomfortable. Ouch.)

Advance 8065, 1956 dress pattern

The pattern is Advance 8065, a shirtwaist dress from 1956, in an extremely modern-proportioned size 18½. Next time I need to shorten the back bodice ever so slightly, but otherwise it’s an absolutely perfect fit. And after wondering whether I’d ever wear it again after the Vintage Night, the answer is a very definite yes! The dress was so comfortable, and so easy to wear, that it’s actually going into my work wardrobe rather than my Special Occasions pile.

I only made one alteration to the pattern, and that was to eliminate the side zip. Because the bodice front matches up with the side front skirt seam, it was easy to simply leave that seam open a few inches, add a placket, and then close it again with snap fasteners. Next time I’ll add two more buttons, but I needed to get this one finished in a hurry and didn’t have time to hand-stitch two more buttonholes!

In fact, I enjoyed wearing this dress so much that I may have already bought the fabric for another one… to match my niece’s Christmas dress. Because honestly, how could I resist a navy blue dress that’s COVERED IN BEES, with buttons to match?

Me-Made May 2014

1956 Shirtwaist

This dress (a 1956 Advance pattern) is almost complete, it just needs buttons and buttonholes. (And a placket and a couple of snap fasteners.) I’m making it for a purpose – there’s a 1950s night coming up at work, and I wanted to be properly attired. It’s got me thinking though (always dangerous) – once it’s been out to the Vintage Night, will I actually wear this dress again? Of course I want to say yes. I love the fabric, I love the style, it fits me very well… but my dressmaking history reveals that there’s a strong chance of it just living in the wardrobe and only coming out for Dressing Up Occasions.

October 2012

This one (Simplicity 1755) was made in October 2012, for a friend’s wedding. It’s been worn precisely once since then, to a smart-ish occasion at work. It’s comfortable, it’s soft (I saved up for ages to buy the bamboo and cotton blend fabric), it has my favourite raglan sleeves, it even has pockets. It would take me precisely two minutes to replace the annoying hook and eye at the front collar with a few stitches that would prevent it from popping open all the time. And yet it sits in the wardrobe, unloved.

March 2013

I made this dress specifically to wear to a 1940s event (although it’s from a 1950s pattern), but the combination of the fabric being a bit too stiff and Paul telling me that the print looks like curtains has put me off it entirely. I don’t think this one’s ever been out of the wardrobe except for this single occasion, and it’s currently hanging on the back of the sewing room door waiting to be chopped up and turned into zipped pouches and headscarves. Particularly frustrating, as I went out of my way to find a vintage pattern in my size (1950s 18½, as it turns out), and I put a lot of effort into the hand-stitched buttonholes, covered buttons, and french cuffs. The knitted turban though, which I was still sewing together minutes before we left the house for the day, has actually been worn a lot.

Simplicity 3968 (1952)

Even this 1952 pinafore, which I absolutely LOVE for its frankly ridiculous pockets, has only been out of the wardrobe a couple of times. In this instance it’s because the fabric is a linen blend, and there’s miles and miles of skirt to iron before it looks smart enough for work. (And then I sit on the bus for half an hour to get there, and immediately scrunch it up again!)

So what do I actually wear, if I’m not wearing these? Well, mostly I go to work wearing a pair of cord trousers, a jumper and a big scarf. Maybe leggings and a jersey dress. (And a big scarf.) At home I usually pootle about in the World’s Oldest Jeans, and one of the very long jumpers that my Mum knitted for me about twenty years ago.

February 2011

Otherwise, I wear this. Admittedly I’m not usually festooned with small parrots, but I made this coat in the summer of 2009, and it’s been worn endlessly since then. The silk yarn for the hat was a wedding gift, and the resulting Wurm (Silk Wurm, get it? *groan*) has barely left my head. Also featured: the ubiquitous hoody, and of course a scarf. Every now and then I think I should make myself a new coat, but the thought of not having this one is somehow a bit too much. I think I’m going to have to look out for some more pink spotty needlecord, so that I can replicate it when it finally does wear out.

So, back to ME MADE MAY, which was allegedly the point of this post!

I do actually wear at least one item of clothing that I’ve made myself (even if it’s only a knitted hat) almost every day, so that in itself won’t be the challenge for me. What I want to do is pay more attention to the handmade items that I do and don’t wear, and to try and understand why.

Is it too uncomfortable? Did I make it for an occasion that simply doesn’t come around very often? It is too cold to wear for work, too restrictive to wear for a long time, does it make me feel as though I’ve accidentally left the house in fancy dress? Did I make it for myself, or for the Imaginary Claire in my head who’s twenty years younger, two stone lighter, and at least four inches taller than me? Did I actually want to wear this garment, or did I see the construction process as an interesting challenge?

Hopefully by the end of May I’ll have a clearer idea of the things I do and don’t wear, and the reasons why. Perhaps it’ll give me a good reason to get rid of some of the least likely to be sewn patterns from my stash… although it seems more likely that I’ll be inspired to buy some new ones!

Doll Dresses & Dad’s Shirt

Doll dresses and Dad's shirt

A bit of nice easy sewing today – or so I thought! Well, okay, the doll dresses weren’t exactly difficult, but good grief they’re fiddly! I know I say this every time I make one, you’d think I’d be used to it by now. The first couple of doll dresses I made for Milly were fastened with velcro. These two fasten with poppers, which I’m hoping she should be able to get the hang of herself. I’d like to make future dresses with buttons, but that depends on whether I can convince myself to work hand-sewn buttonholes on doll’s clothes. (I’m not fighting my sewing machine for it, it’s not worth the swearing.)

The shirt, on the other hand, really was easy. My Dad picked it up in a charity shop, and it wasn’t until he got it home and tried it on that he discovered the sleeves were far too long! There’s no easy way to shorten shirt sleeves (you can do it, but involves taking the cuff off and re-working the placket, which is a pain in the proverbials), so the really easy thing to do is simply to chop the sleeves off at the elbow, hem them neatly, and call it a short sleeved shirt. Much better.

Even though it was only a small refashioning job, the quality of the fabric was very noticeable. The labels are very faded so this shirt’s obviously been washed a lot, and the cotton is densely woven and incredibly soft. It’s an Yves Saint Laurent shirt, so I guess it must have been quite expensive originally. Another reason why I often haunt charity shops – if you can get past all the Primark items being sold for more than they cost new, you can quite often find a piece that might be old, but is of a much higher quality than you might ordinarily be able to afford. Thanks to a very simple alteration, my Dad should get plenty of wear out of this – once the weather warms up enough for summer shirts, that is!