“Fun-time Ensemble” part one…

Advance 8990

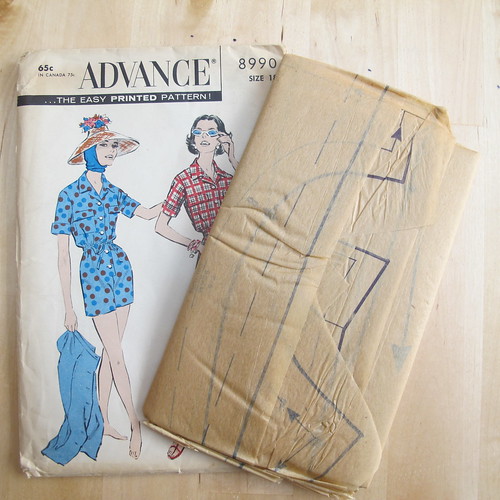
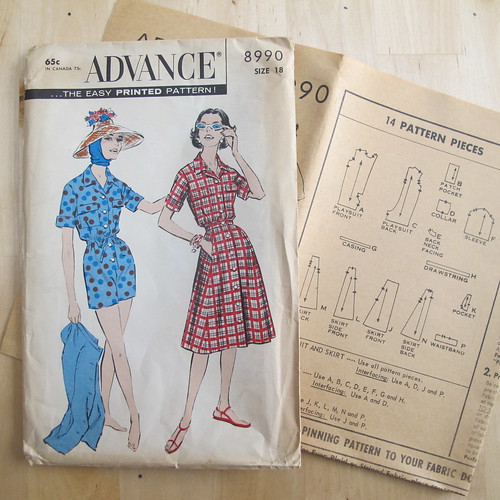
Say hello to the lovely ladies of Advance 8990 – a 1959 pattern for a playsuit and skirt. I did have a momentary pause about making what is, after all, a glorified onesie, but it looked like a useful garment for wearing in the heat. I like that it’s quite a formal-looking romper, what with the collar and turned-back sleeves, but I particularly like the idea of popping a matching skirt over the top so that you’ve instantly got a nice smart dress!

Advance 8990

I asked for Paul’s opinion (as I usually do) before I bought the pattern, and was met with an emphatic shaking of the head. Oh dear. To be honest, I think he was put off by the rather alarming hat-and-balaclava combination, which I definitely won’t be attempting to carry off! But honestly. How could I possibly resist a pattern that describes itself as a “Fun-time Ensemble”? I’m only disappointed that it doesn’t list “novelty prints” amongst the suitable fabrics. (Rest assured though – a novelty print version will be forthcoming at some stage.) It could only be better if it had a raglan sleeve.

Advance 8990

I was quite excited to discover that the pattern, despite being 56 years old, was actually brand new and still in its factory folds! Unfortunately, it looks as though it perhaps hasn’t been stored in the best conditions, because the paper was incredibly fragile – more so than any other vintage pattern I’ve come across so far. I managed to tear the pieces several times as I was unfolding them and cutting them out, so I think drastic measures are going to be called for. I expect to be using this pattern more than once, so I think I’m going to iron the pieces onto some lightweight interfacing to stabilise them. I know this will effectively destroy the original pattern, but it’s in such poor condition that it’s pretty much ruined anyway. Normally I’d trace the pieces onto stronger paper, but the originals are just going to fall apart in the envelope, so I might as well make sure that I can use them for the purpose for which they were intended.

(The museum/conservation person in me is writhing in horror at the prospect of ironing these pattern pieces onto adhesive interfacing. But I do believe that these things are made to be used, and this particular example is no longer of a quality worth trying to preserve in its original state. So, I’m doing it anyway.)

Advance 8990

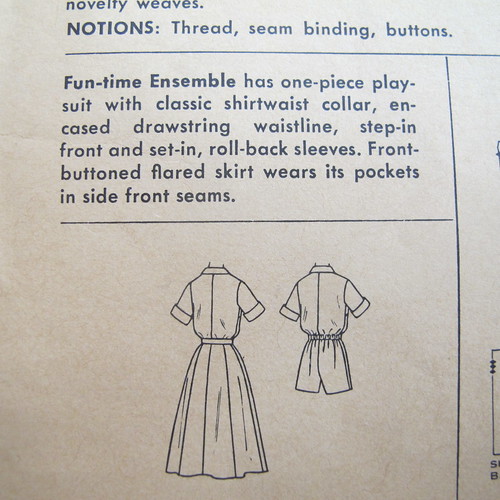
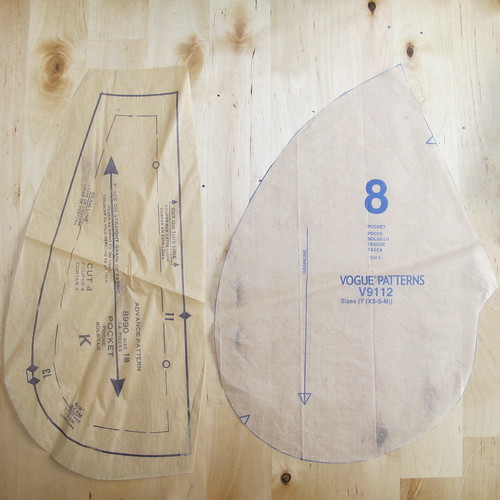
According to the envelope, the “Front-buttoned flared skirt wears its pockets in side front seams.” I spent ages looking for the pocket pattern, thinking that the piece on the left was some kind of cuff or trim. Nope – it’s the pocket. But it’s tiny! The innermost dashed line marks the seam allowance, which will be the finished size of the pocket – and I can’t even get my hand inside it! What were the designers thinking?! I don’t know what the lady of 1959 was expecting to be able to keep in there, but it must have been very small.

When I make the skirt, I’m going to substitute the pockets from my new Marcy Tilton pattern, Vogue 9112. You know, ones I can actually fit my hands into. I’ll probably add slightly smaller pockets to the playsuit as well, just because. You can never have too many pockets.

Advance 8990

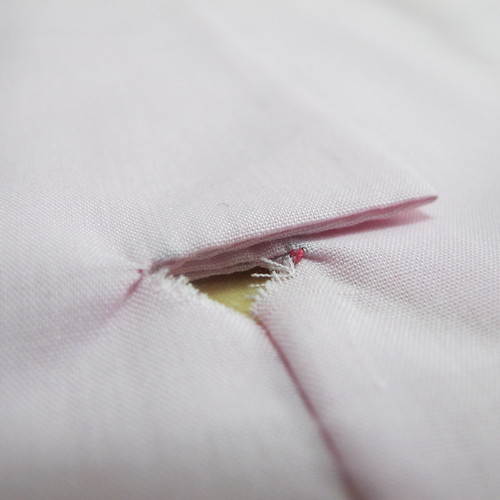
I have to say that the instructions for this pattern are pretty sparse. They basically say “cut out pieces; make playsuit”. So when I followed an instruction that said “clip to small dots”, I did so… but apparently in the wrong direction. This extremely neat little triangular hole is at the bottom of the front placket. I can patch it so that it looks deliberate, but it’s not the best place for a hole in a pair of shorts, really! I will now be annotating the instructions on a separate piece of paper, as I go along.

Advance 8990

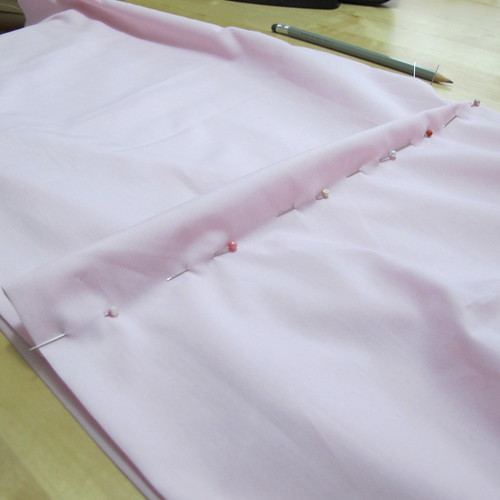
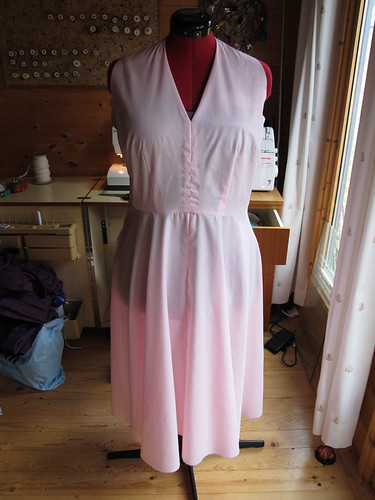
This attractive pale pink poly-cotton was just a piece of left-over fabric sitting in the stash, and I’m very glad that I decided to use it to try out the pattern before cutting it out in decent fabric! These pins represent a slightly unusual alteration, in that I’m taking 6cm out of the length at the too-long centre front, and then tapering it out to nothing at the side seams because the back is the perfect length.

I was a bit confused about this at first – how could the back length be fine, but the front be far too long? However, I think what I’m actually doing here is making a sway back/big bum alteration in reverse. Normally I’d expect to lengthen the centre back to create extra room, but I’d also expected the playsuit to be too long overall, because I’m very short in the body. As a result, the back is fine as it is, which makes the front too long by comparison. It’s all very complicated!

The only other alteration I’m going to need to make is to add a couple of inches of width at the hips. The shorts fit, but they’re quite snug, and it looks a bit out of balance with the rest of the garment being so loose. Adding a little bit of extra ease will give me the space to include the pockets, too.

I have to admit that the temptation to run down to the local fabric shop and snap up five metres of lots of different cheap novelty-print cottons is very high. But I do have some fabric in the stash that I can use up first, and I’m still trying as hard as I can not to buy non-organic cottons. We’ll see how long my resolve lasts.

Thinking about dresses

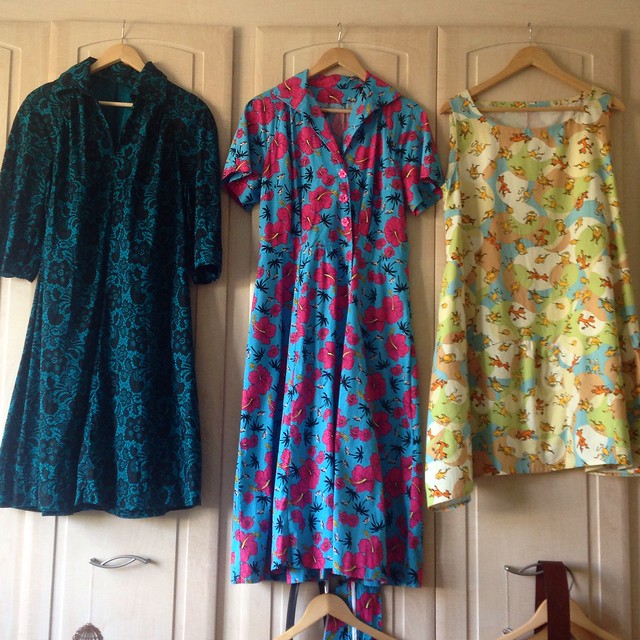
Three dresses

I’ve had these three dresses hanging over my wardrobe doors for a couple of weeks now, trying to decide which is my favourite, and which I should therefore make again.

Trouble is, I haven’t really been wearing dresses lately, as I tend to reach for them only in the heights of summer and winter. Last winter was so mild we didn’t see a single flake of snow, and so I didn’t need my usual winter outfits of leggings (or bloomers and knee socks), a long petticoat, a long sleeve t-shirt, a long flowing dress, and a jumper. This summer… well, we haven’t quite reached it yet, and so I’m in a limbo of chinos and t-shirts, or ancient jeans that I really should have thrown out already.

IMG_4183

I wore the dress on the right (Vogue 9112, Marcy Tilton’s “Cirque” dress) to visit a friend, and it turned out to be perfect for having a picnic on the lawn, followed by having a small plastic car driven over my knees on the sofa. What more could I ask of a dress? I wore it with yoga pants, as it was always my intention for this one to be more of a tunic style. (I am also eagerly awaiting the release of the Dottie Angel Dress pattern, for tunic-making purposes.)

17/5/14

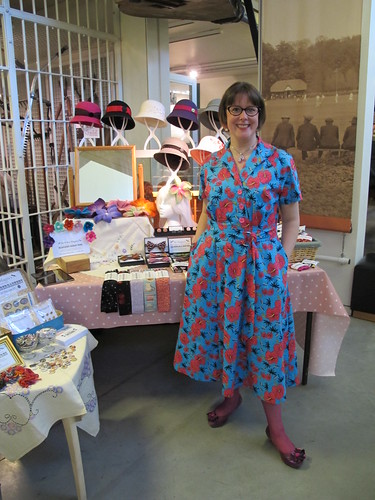
The middle dress, Advance 8065, a 1956 pattern, I wore to work on my last day at the Museum. It was comfortable, but I do need a slightly longer slip to wear underneath it, to stop it from catching on my bloomers and going all bunchy around the knees. (Either that or I need to start making my bloomers in silk rather than cotton!)

Bee dress, July 2014

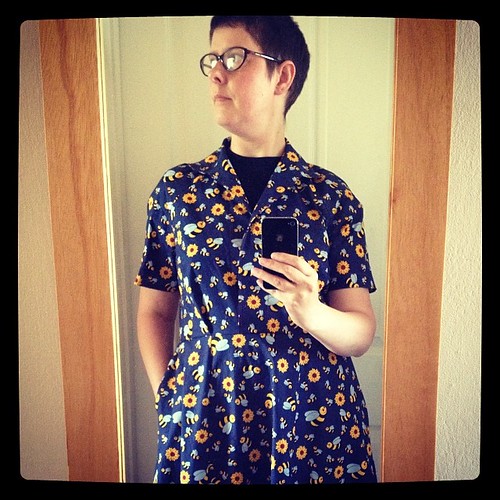
I’d had the same issue the day before, when I wore a not-quite-finished dress, which had started life as a shirt but ended up with the skirt from the pattern above added to the bottom. It still needs a placket and buttons, but although it was a bit tricky to get off again, it held together okay with a big brooch at the collar!

But did I enjoy wearing it enough to finish this one and make another? At the moment I’m not sure. I feel as though a dress should be an easy option for an outfit. One garment, pop it on, add a cardigan, and away you go. Somehow the reality of having to pair a dress with a bra slip and bloomers makes it seem like more trouble than it’s worth.

1970s dress

As for this one, the dress on the left in the top photo (Butterick 4637, a 1970s pattern), I haven’t worn it more than a few times since I made it, and most of those times were as soon as it came off the machine. Even having it hanging around in full view simply isn’t tempting me to put it on. Maybe because the fabric’s quite dark, so it feels like a winter dress. Perhaps it would be better with leggings and a long sleeved t-shirt underneath. It just doesn’t feel right for summer, somehow.

I still haven’t had a proper sort-out of the side of the wardrobe that hides all of my dresses, so perhaps I need to do that before I decide anything. This year I definitely feel more drawn towards novelty prints and vintage styles than I do towards my long floppy linen dresses and long petticoats. But maybe that’s just because the weather hasn’t warmed up yet, and it’ll be tunics and petticoats and bloomers all the way once the sun comes out.

All I know is that I currently have so much stuff that I’m feeling totally overwhelmed by it. I definitely need to make a concerted effort to sew things that I’m actually going to wear, rather than being tempted by interesting patterns and pretty fabrics. Either that, or actually stop sewing for a while, and concentrate on wearing the things I have already. We’ll see.
Sewing Bee Show-Off

the-original-1950s-walkaway-dress

Hands up, who watched last night’s Great British Sewing Bee? I must confess to getting a bit over-excited when they announced that the challenge was going to be the Walk-away dress! The idea was that the dress was so simple to make that you could, as the ad above says, “cut it out at 9 o’clock… wear it out at noon!”

The illustrations also show the use of a binding foot to make all that trimming easier. We may think of all these gadgets as new and modern, but they’re really not. The machines may have only been able to do one straight stitch, but the amount of extra presser feet that came with them was phenomenal. Bias binding, lace insertion, quilting, ruffles… all sorts of things!

Hallowe'en dress

I thought it was ridiculously popular when the pattern was re-issued a few years ago (seriously, the dratted thing was everywhere), but during the 1950s according to Butterick, “Sales of the pattern were so great, that at one point manufacturing of all other patterns ceased, and only the ‘walk-away’ dress was produced until all back-orders for this dress could be filled.”

20061028_00003_5.jpg

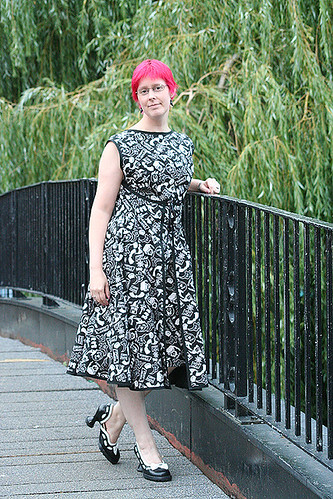
I’ve certainly made my fair share of these dresses, although I don’t think I ever followed the pattern exactly, and I certainly never made one in only three hours! The Hallowe’en version, above, tied with ribbons at the front because my weight used to fluctuate a lot, so I knew buttons would be no good. This skull print one had a deep lace trim around the bottom of the circle skirt, which I was really pleased with. I seem to remember that I also added a layer of net inside the skirt, to give it a bit of extra body.

Nicola's Katie Jump Rope walk-away dress

This one’s in a lovely Denyse Schmidt quilting cotton, with the binding continued all the way around the hem, and three gorgeous little flower buttons…

Nicola's Buddha's Cloud walk-away dress

…and this one has a contrast front section in a plain cotton. One thing it is important to note if you’re making this dress from a printed fabric, is that you need to choose a design that’s non-directional. If your print only works one way up, it will turn out to be upside down at some point on a circular skirt! Thankfully nobody was caught out by that on last night’s sewing bee, but it’s something I had to learn the hard way…

20070606_00020_15.jpg

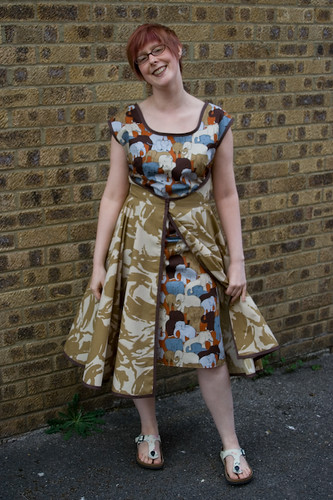
And of course, I’ve saved my favourite version for last – my “camouflaged elephants” dress. You can see that I’ve modified the neckline to make it lower (boat necks really don’t suit my narrow shoulders), and I’ve also shortened the bodice. Unfortunately I eventually had to resign myself to the fact that no matter how many alterations I made, this dress simply didn’t suit me, and was a nuisance to wear as a result. If it doesn’t fit very tightly around the waist, the heavy circle skirt pulls the much lighter inner layer up and back, and it’s really annoying to keep fiddling with it all day!

For me, this was a lesson in being seduced by the popular pattern of the day, regardless of whether it actually suits your body type or will be comfortable to wear. Turns out this is a lesson I’m going to keep having to learn, as I just can’t resist a lovely pattern. Or a novelty print… I really want to make another dress with those elephants now!

New Old Knitting

lister-lavenda-lady-s-cardigan-knitting-pattern-c1277-1960s-5424-p

I was absolutely convinced I’d blogged about this last summer, but apparently not! Anyway, way back in July or August, my friend Chris sent me a parcel full of knitting patterns. Some I kept, some I passed on to my Mum, but the one that really stood out to me was this one. A probably-1960s raglan cardigan, with a smart cable detail, that should fit over the top of the 1950s dresses I’d been making at the time. One of the problems with new knitting patterns, even vintage-style ones, is that they tend to be very fitted. When you’ve got a dress or a blouse with quite wide sleeves, you need a roomier cardigan to go over the top!

2007BM6318_jpg_ds
Image © Victoria & Albert Museum

The pattern calls for 18 ounces of double knitting yarn, in my size. That translates to roughly 525 grams, which seemed a little on the light side. I wanted to check on the yardage in those 18 ounces, as it varies from yarn to yarn, and I wanted to make sure I’d have enough. The yardage wasn’t stated in the pattern, so I went online to have a look. I didn’t find much in the way of helpful information, as it turned out – although the V&A do have this lovely shade chart. Remember those? I used to love choosing wool with my Mum, from the little tufty shade charts that she used to keep in the sideboard. Wouldn’t it be nice to have those again now, so that we could see what we were getting before we ordered online?

Anyway, I digress.

10414450_10153106962778829_244072257356306818_n

What I did find, eventually, was this. The exact wool called for in the pattern, a grand total of 18 ounces, all in the same dye lot, and in absolutely perfect condition! And to top it off, a rummage in the button stash turned up the perfect set. I still can’t believe the serendipity of it!

The thing I still don’t know, sadly, is the yardage of each of those tiny one ounce balls of wool. It’s not stated on the label, so the only thing I can do now is unravel one, and measure it. I might also, for the first time in my knitting life, actually make a gauge swatch and measure that too. Given that I have precisely the amount of yarn called for, I can’t even entertain the possibility of running out. After all, it’s not as though I can pop down to the shops and buy some more!

I finally finished something!

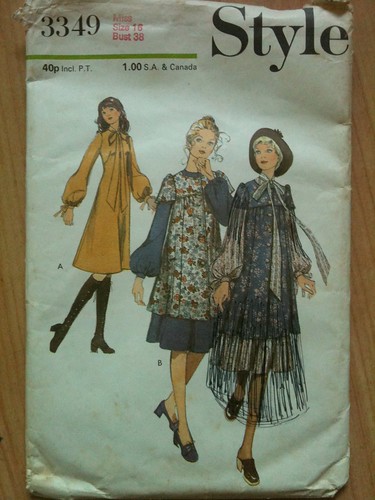
Style 3349, 1971

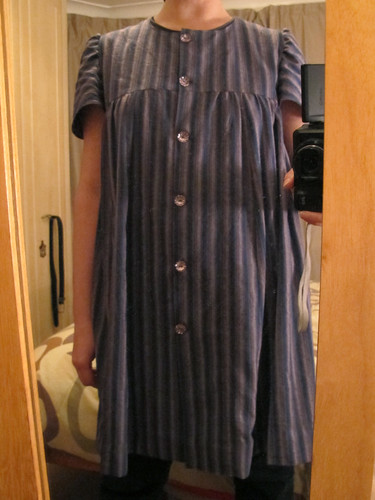
I bought this sewing pattern for the grand total of £2 in my local Sue Ryder charity shop, although the general consensus of the internet was that I’d overpaid. Charming! A few weeks ago – or is it actually months now? – I started making the 1970s smock-style overdress, and was distracted half way through by other things.

All it needed was the top stitching and the buttonholes, which I’d been putting off because making them by hand (oh, and doing the hemming by hand too) was going to take so long. In the end I bit the bullet and risked making the buttonholes on my notoriously uncooperative sewing machine. They’re not perfect, but they’re lot better (and involved a lot less swearing) than I expected, which was a pleasant surprise!

Untitled

Unfortunately this is the best picture I could get of me wearing it. This house is so dark, the mirror’s propped up in my sock drawer because there’s nowhere to actually hang it on a wall… and I’ve found out today that we’re not going to be building the beautiful new sewing room that we’ve been planning for the year since we moved in here, because the quote from the architect was rather a lot more money than we can afford. So, until the clocks change again and we start getting a bit more daylight into the house, crappy pictures of sewing (or Instagram filters) it is!

Untitled

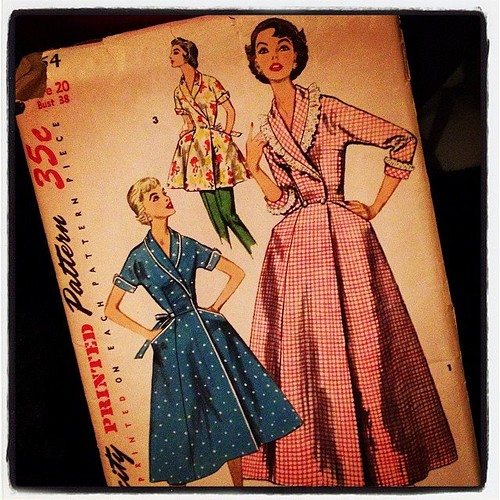
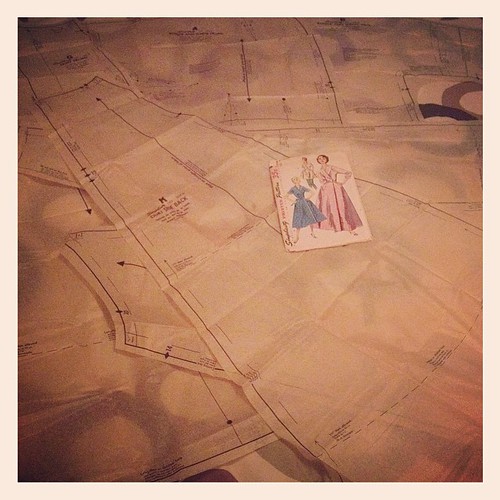
This is my newest old pattern (dating from 1955), and I bought it specifically for view 3, the short one at the top. When I unfolded the pattern pieces I was amused to note that it’s not actually mid-thigh length, as shown in the illustration, it actually reaches almost to my knees. But that’s what I want – something to wear over my many pairs of coloured trousers, that’s a bit smarter than a t-shirt. (Whether my colleagues will consider the 1970s smock top an improvement over a t-shirt remains to be seen, in fact I’m a bit nervous about wearing it, but it’s rather a waste of time and fabric if I don’t!)

Untitled

The pattern only gives fabric requirements for non-directional prints, so I had to work out the yardage that I’d need for a fabric which can only go one way up. Because the skirt is made up of six very wide gores, the answer turned out to be A LOT! Five yards for a knee-length dress, in fact! I didn’t have enough of the fabric I’d had in mind (I suspect that will now become another 1970s smock), so I’ve started it off in a lovely organic cotton check. I’m currently deciding whether it needs a contrast trim (collar, cuffs, pocket yoke and tie belt), or whether it would be better in just the one fabric. In fact, as I haven’t actually traced the skirt pieces yet, I’m wondering whether to make the most of having quite a lot of this cotton, and actually making the calf-length version instead. I’m leaving the bodice on the dress form while I have a bit of a think about it.

Given my current sewing speed, you’ll probably see it again next year!

Improving on Me-Made May

28/5/14

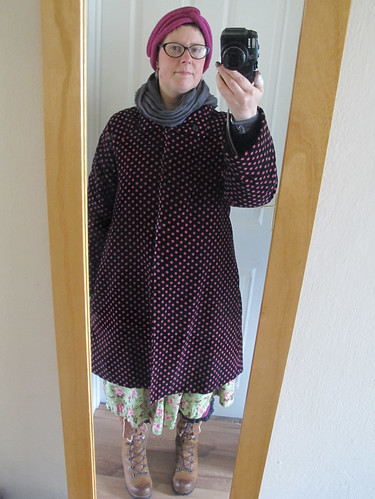
You may have spotted that I didn’t post very many photos from my Me-Made May escapades. This is partly because I mostly look like some kind of strange triangular bag lady (I like layers, and most of my clothes are comfortable-shaped), and partly because it turns out that I only wear about four outfits, over and over again, with very minor variations. How boring!

28/5/14

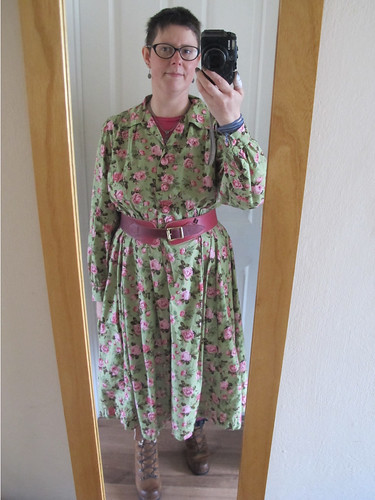
Towards the end of the month I made a last-ditch effort to wear some of the smarter clothes in my wardrobe, only to discover that when I put them on… well, suddenly they’re not so smart any more. This dress is now very firmly on the “waiting to be chopped up and turned into something that doesn’t look like a giant floral sack” pile. There’s just no point in wasting time and fabric making clothes that require waist shaping in order to look nice, when waist shaping isn’t something that I actually have myself. Although, having said that, my other vintage dress (also made from an Advance size 18½ pattern without alterations) fitted really well and looked lovely!

17/5/14

See? I still don’t have a waist, but the dress looks smart, not like a huge great cushion’s attacked me while I wasn’t looking. I think this is partly down to the fact that this dress has a smooth skirt rather than miles of pleats. (Also: not a selfie, vintage-style foundation garments, not layered with t-shirts and bloomers and giant boots on account of it being freezing at work.)

Lace crop top

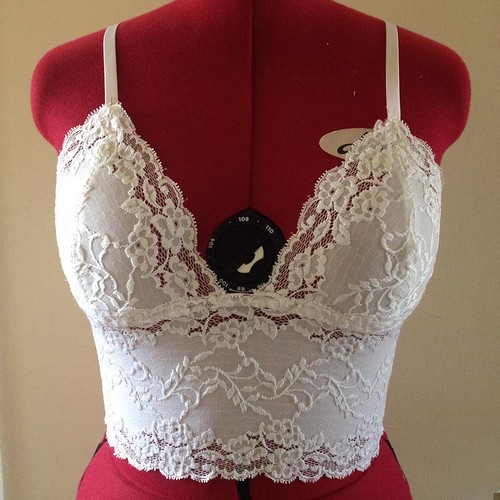
Sadly, even if I did have the budget to wear lovely things from Kiss Me Deadly every day, the fibromyalgia simply wouldn’t allow it. But, the whole Me-Made May experiment did reveal that I am very much lacking in the Me-Made underwear department – despite the fact that I spent plenty of time and money on the London College of Fashion’s Structured Lingerie course back in 2011. I bought this lace when I came back, in a fit of enthusiasm, and it’s been untouched in a box ever since, along with a metre and a half of pink, and four metres of a prettier-than-it-sounds grey. This particular lingerie is about as unstructured as you can get (no wires, no fastenings, nothing), but I used a lot of the skills I learned on the course to make it. The pattern itself is from Sewing Lingerie, a Singer reference book, where it’s described as a “sleep bra”.

The wide stretch lace that I used to make this is actually really affordable, and comes in lots of different colours and patterns. If this one (and the pink one I’ve just finished, and the two or three grey ones I’m going to make next) turn out to be comfortable, I can feel a drawer full of these coming on before Me-Made May next year!

Vintage Haberdashery

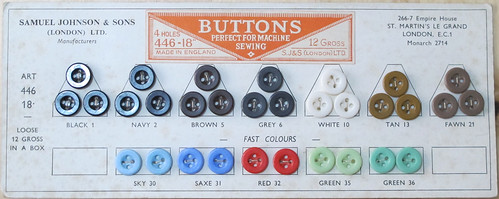
button sample card

Today I came to the startling realisation that my mountain of vintage haberdashery isn’t going to sell itself whilst sitting in a box in my sewing room, so I thought it was about time I listed at least some of it on Etsy!

Above you can see a lovely button sample card, and there’s also another sample card with metal buttons, hooks and buckles.

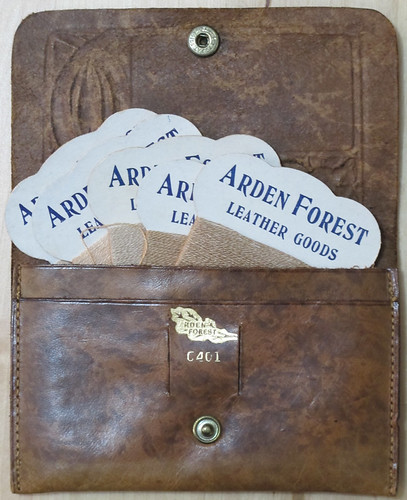
stockings darning kit

This is the one thing that I was really tempted to keep – a gorgeous little leather pouch with five cards of thread especially for mending stockings! The front of the pouch is embossed with gold writing which says “troubles are ended when they are mended”. I did keep one card which has multiple shades of stocking-thread on it in actual stocking colours (like the ones above), and one which has the most gorgeous pastel colours for mending your silk lingerie. Some things are just too lovely to part with!

Also on the “I can’t believe I’m letting this go” list are an enormous folding needle case, and two pretty little card ones.

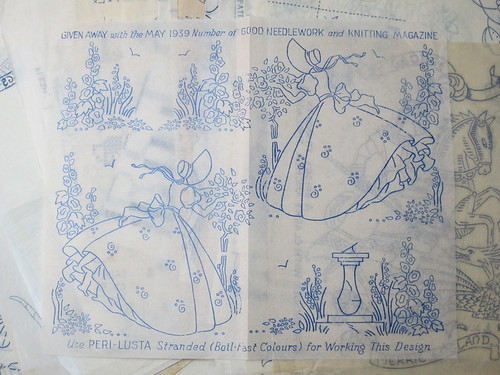
embroidery transfers

My enormous stash of embroidery transfers are also looking for a good home – this time as a job lot of around 100 sheets. The oldest one in the collection is the lovely Crinoline Lady above, who is conveniently marked May 1939. The rest are a mixture of 40s, 50s and 60s, mostly pulled out of an assortment of needlework magazines. I’ve been taking them out to craft stalls in an enormous great folder, to very little interest, and to be honest I just couldn’t face the thought of listing every single transfer individually. So a job lot it is! I have kept an envelope full of transfers for myself – mostly the ones that had been torn or cut out in places, or written on, or traced. I also kept a few of the smaller designs, as well as the drunken chickens, of course. I’m never going to part with those!

embroidery transfer booklet

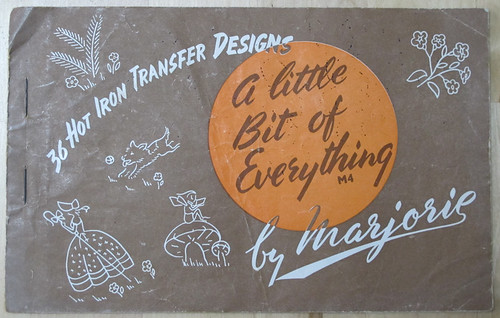
Also on the embroidery front, there are two little books of transfers, and a catalogue for already-printed linens. The booklet above features designs for children, so there are Nursery Rhyme characters and little cartoon animals. There’s another which was free with “People’s Friend” magazine, which is also tiny designs but mostly florals.

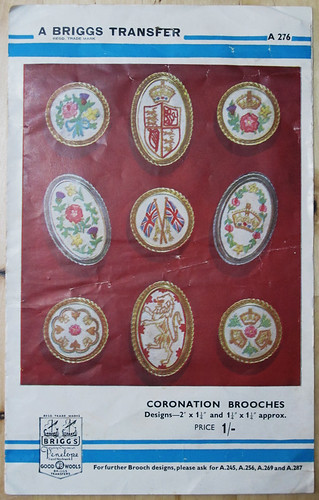
embroidered coronation brooches

This one, if I’d been organised, probably would have been snatched up in seconds flat if I’d managed to get around to selling it last year in time for the Jubilee! It’s a really gorgeous 1953 transfer set for making Coronation Brooches, never even been unfolded. I couldn’t get a proper photo of the actual transfer sheet, because it seemed a shame to take it out of the original staple for the sake of a picture! Hopefully it’ll be appreciated in its pristine state.

If you’re not terribly interested in royalty, but happen to like dogs, birds, flowers or yachts, there’s another set containing exactly those designs.

And of course, there’s just one Mystery Haberdashery Box left, just waiting for somebody to be brave enough to snap it up! Mind you, if the thing you really wanted from the box was the slightly frightening plastic doll face, you can now buy the last remaining few all in one go.

I’ve got a couple of stalls coming up over the next couple of months, and I’ve been doing a lot of thinking about the INEXPLICABLE EMPORIUM and what I do and don’t want to include in it. Just for once I haven’t been doing that thinking out loud (hence my somewhat sporadic appearances here), but I can tell you that I’m hoping to be around a bit more often from now on.

Simplicity 3968 – complete!

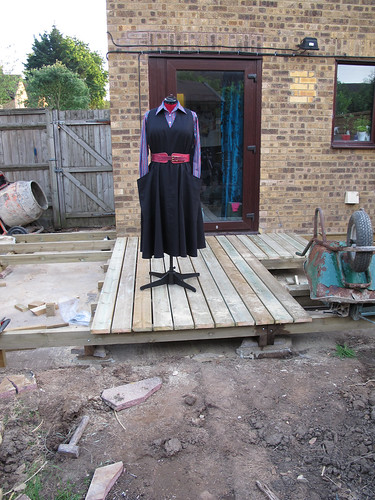
Simplicity 3968 (1952)

Please excuse the state of my garden. We’re in the process of moving house, so we finally had to do something about the terrible mess. The move has come about a little bit suddenly, so our plans for the garden have changed, but it’s all coming along very quickly which is nice.

Simplicity 3968 (1952)

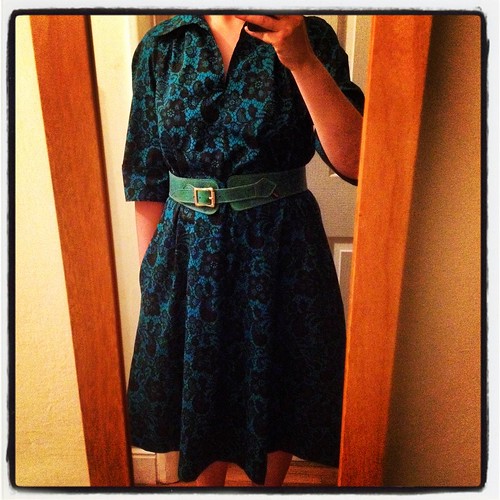
So, you saw the toile of Simplicity 3968 the other day, and since then I’ve been hunting in my fabric stash to find something appropriate. This is a linen blend – I thought it was blended with wool, but the more I’ve handled it, the more I think it might be polyester. I obviously bought it before my self-imposed ban on man-made fibres. It makes a pretty nice dress though!

Simplicity 3968 (1952)

I’m pleased with the v-neck. It’s nice and neat, if you ignore the little wiggle on the right – that’ll press out with a bit of steam. I think it shows off the collar of the shirt underneath very nicely. I was a bit concerned that the neck would be so high that you would barely see the shirt at all.

Simplicity 3968 (1952)

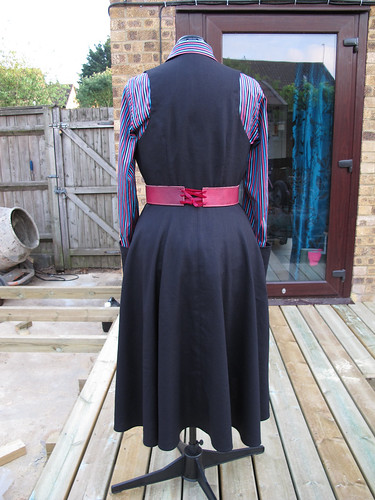
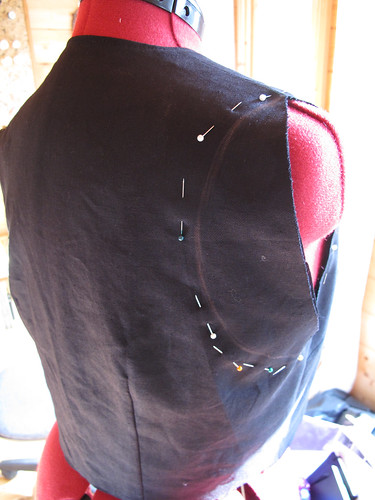
The back, however, was nowhere near as cut away as I’d expected from a dress described as a “halter”. Once I had the neckline finished and the bodice and lining basted together, I decided to make an alteration to the armscye to make it much deeper at the back. I took the plunge and drew this freehand. I then used the piece I’d cut away to make the identical alteration on the other side.

Simplicity 3968 (1952)

The change was then translated to the pattern, so I can make the next one the same.

Simplicity 3968 (1952)

Much better! I like the waistcoat effect, which shows off more of the shirt fabric underneath, and allows for a greater range of arm movement without pulling across the back of the dress.

Simplicity 3968 (1952)

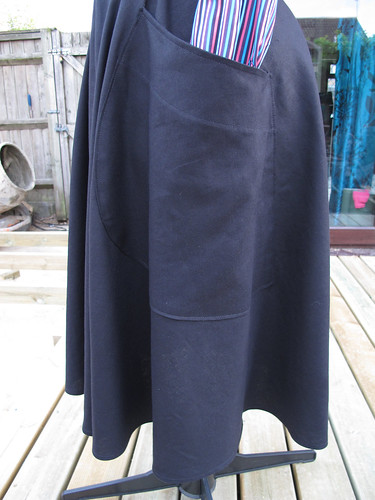
My absolute favourite part of this pattern though – in fact the entire reason I bought it – is the pockets. Look at them! They’re absolutely ENORMOUS. Despite that, I don’t think they draw an unnecessary amount of attention to themselves. They do stand slightly away from the skirt, which was an oversight on my part. I made the four panels of the skirt slightly narrower (to make the pattern pieces fit more easily on my sewing table!), but forgot to change the placement of the markings for the pockets. Next time I’ll try and remember to sew them on flat!


HEPZIBAH image © Fairysteps

The belt, for anyone who’s wondering, is the fabulous Hepzibah, courtesy of Fairysteps. I might have accidentally bought a turquoise one as well.

I plan to wear this dress to work tomorrow, so I’ll be able to see straight away whether it’s the right length, and is easy to wear. There’ll be the usual amount of sitting on the floor, rummaging about in cupboards and generally making a mess, so anything I wear to work has to be able to cope with a lot of abuse! I’m hoping this will turn out to be the dress equivalent of jeans – comfortable, but hard-wearing and practical.

Simplicity 3968 – Toile

This is Simplicity 3968, a pinafore (jumper) dress pattern from 1952. You may guess that I bought it solely because of the hilariously large pockets, and of course you’d be absolutely right!

I plan to wear it for work, over the top of my smart TM Lewin shirts. I needed the fit to be right, so I pulled out some plain polycotton fabric and made a test version. The added complication was that this pattern doesn’t actually exist in a size that’s quite big enough for me (a 1952 size 18 being significantly smaller than a modern one), so I had to make some alterations as I was going along.

Simplicity 3968 - toile

I’m very pleased to say that it’s come out really well! All the pieces fitted back together once I’d finished fiddling about with them, which is always a good start. The main change I need to make is to balance the front of the bodice, between the darts, so that the waist seam sits flat instead of curving upwards. The next challenge will come when I have to put in the zip at the side. The skirt panels are on the bias at the side seams, so there’s potential for it all pulling out of shape and going horribly wrong. I think a little bit of seam binding at that point, or perhaps a small facing, might help everything to stay in place.

Now I just need to decide on the perfect fabric. I have a few lightweight options in the stash, but nothing heavier. I know it’s supposed to be nearly summer, but somehow this lovely Harris Tweed from Merchant & Mills, or an organic cotton corduroy, seem much more appropriate than a shirt weight cotton right now.

Mr & Mrs Magpie’s Marvellous Mittens

Floral and lace gloves

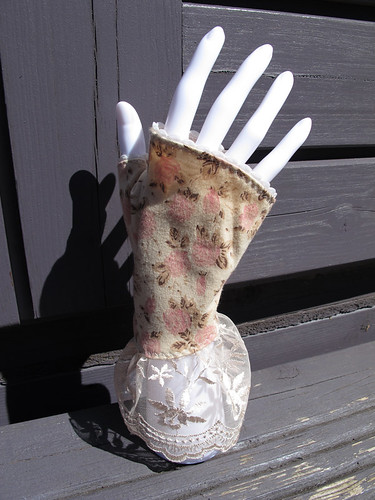
Ta-daa! A glove that actually fits onto my disembodied hand! I spent most of Saturday making the left glove, which involved a lot of fiddly seams, unpicking things, wonky elastic, and a certain amount of swearing. Once I’d got the left glove worked out though, the right one came out lovely! So this first pair will be mine, to wear and to display on the very shiny hand.

Three more pairs in the making

Once I was happy with the first pair, I cut out all the pieces for another three. (Pairs, not gloves.) I have plenty of this pretty floral jersey left over, but I’ve used up all of the lace edging, so future pairs will have a different trim. By the end of Saturday afternoon I’d managed to sew up six little thumbs, with the rest set aside for today.

Marvellous Mittens

And here they are, finished and packaged – three more pairs of fingerless gloves ready for the Frome Steampunk Extravaganza!

I have plans for some slightly more “masculine” (by which I simply mean “less frilly”) fingerless gloves to go alongside these. I have some gorgeous organic cotton pointelle fabrics in brown and purple, which should go perfectly with cuffs made from the remnants of the organic cotton stripes I used for the bow ties. I’m going to make a start on those tomorrow, so watch this space…