Vintage Pattern Round-Up

Advance 8065

For a while now I’ve been buying a vintage sewing pattern each month, with a view to expanding my wardrobe into the realms of Things I Actually Want To Wear, rather than Things I Wanted To Sew. Apparently those two things are not the same, and it’s resulted in a very full wardrobe, and Nothing To Wear.

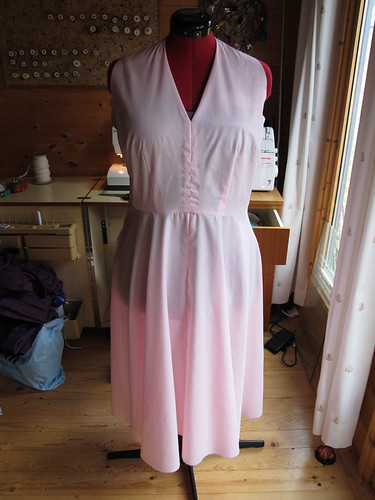
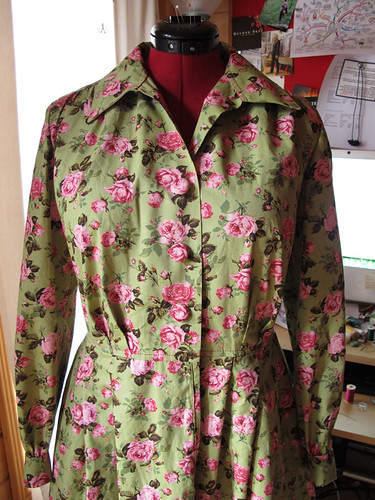
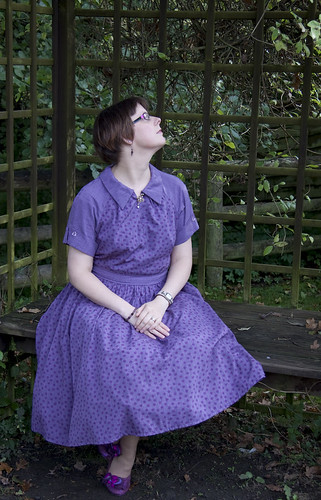
I made one of these to wear to the Vintage Night at work, and I’ve actually worn it rather a lot over the summer. Lightweight, cool, smart for work or all the parties that I never go to – I love this one, and have fabric set aside for another. It simply screams NOVELTY PRINT at me, and I have a huge list of fabrics that I want to buy from eQuilter, once I’ve saved up enough to pay the customs fees. (Bonus: their Lorax prints are all on organic cotton!)

1960s Sew Knit N Stretch 228

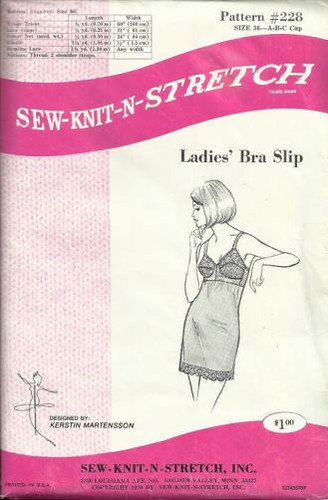
During my adventures in Me-Made May, I discovered that the key to making these dresses look properly smart is having the appropriate underwear to go with them. As the fibromyalgia simply won’t allow me to wear 1950s-style girdles on a daily basis (nor will my budget, sadly!), I thought this bra slip would be a good alternative. Fitted at the top, but not too constricting around the waist. Making it myself also means that I can choose fabrics such as cotton or silk, which will be much kinder to my skin than the expected nylon and polyester knits. This one will require a shopping spree to acquire the right fabrics before I can start, although I probably have enough powernet left over from my Structured Lingerie course to make a prototype first.

1960s Simplicity 5890

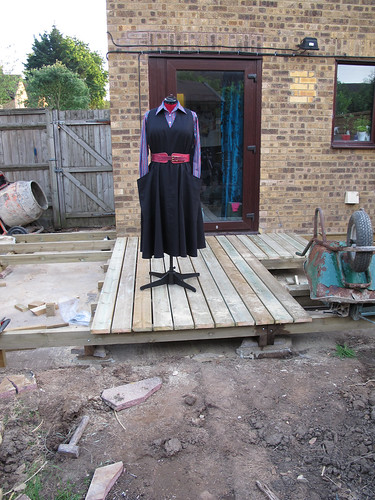
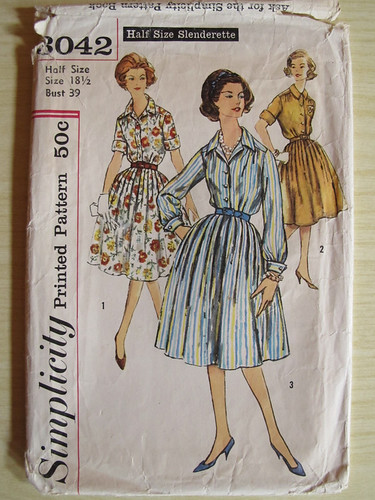
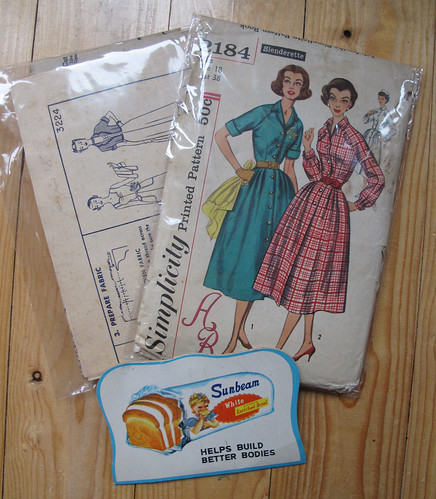
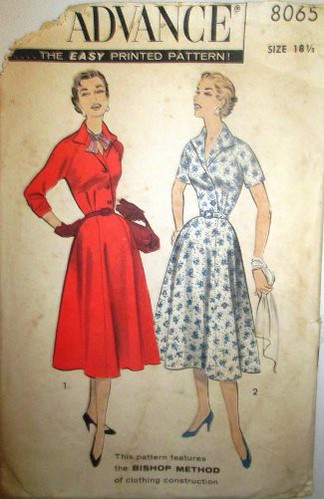
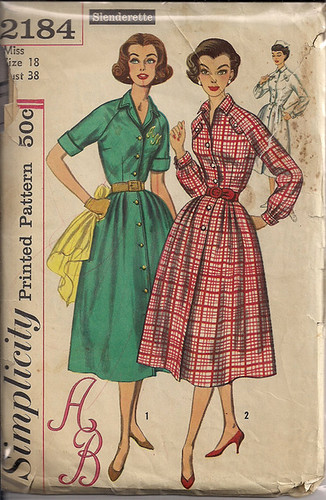
This lovely pattern, very sadly, didn’t work out. I used the blouse pattern with the last of the My Little Pony fabric, and it just didn’t fit me right, so it’s now sitting in the Etsy shop waiting to find a good home. I did make the dress, in a nice grey suiting, but when I tried it on to check the fit… it was awful. A perfectly nice outfit (I made the gored skirt version), just really not for me. It looked very uniform-ish… which it’s supposed to, I guess. It’s a smart working-woman’s outfit. It’s just that apparently I am not a smart working woman! Thankfully, at the Museum, I don’t have to be. The dress code is “smart-casual”, so there is absolutely no requirement for me to turn up in a blouse and a pinafore dress if I don’t want to. Phew.

Monkee Genes Slim Fit Chinos

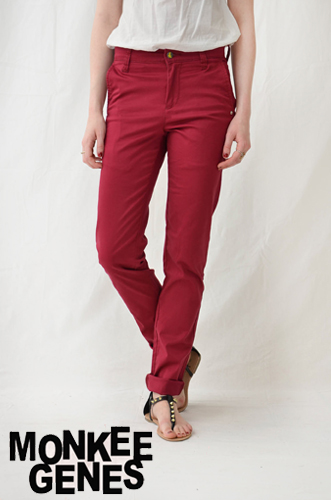
A few months ago I did decide that I should probably head slightly towards the smarter end of the smart-casual spectrum, especially as I’m the first person that most visitors to the Museum see when they come in. To that end, it was time for my too-small and rather frayed old jeans to be retired – which meant new jeans. I could have sewn them myself, but I don’t much like sewing trousers or heavy fabrics, so I decided to go shopping. I’m very determined that everything I buy should (as far as possible) be handmade, organic, or at the very least ethically produced, and with jeans this is easier said than done. Eventually I’d saved up £130 to treat myself to two pairs of Monkee Genes. However, they’re described as “slim fit”, which I’m most definitely not, so I wanted to try them on before I spent my money. I discovered that my local branch of Sports Direct (a shop I’d never normally venture into!) was a stockist, so I wandered in and discovered two things. One: Monkee Genes Slim Fit Chinos were my perfect trousers, and Two: they were in the sale. For £8-£10 per pair. Not £65 each. (In fact, the last few pairs of these chinos are currently on the Sports Direct website for SIX POUNDS A PAIR!!)

So, I did what any sensible person would do – I bought every pair in the shop in my size, then came home and bought every pair on the Sports Direct website, until I found myself with NINE PAIRS of ridiculously-coloured organic cotton chinos, for less than the price of the two pairs of jeans I’d originally intended to buy. I’d say “oops”, but do you know what? I’d budgeted the money for this purpose, I spent less than I’d planned, and given that my last two pairs of jeans saw me through five years of wear, I can’t imagine myself needing to buy trousers again for a very long time! These chinos fit well, they’re very comfortable, they’re organic cotton, and they’re ethically produced. Perfect!

Simplicity 2148

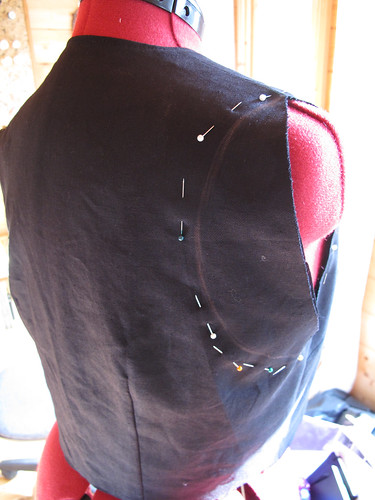
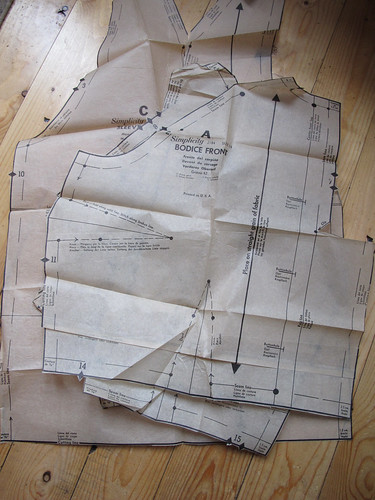
Of course, what I need now, is shirts to go with them. I’d thought that Simplicity 5890 would be the solution, but for work the neckline was too low, and I just didn’t like the fit of the resulting blouse. So, I decided to use the top half of this pattern to make a smart short-sleeved shirt. Unfortunately I had a bit of a maths error, resulting in a blouse that was a bit too tight across the shoulders, and a lot too tight around the hips. Back to the drawing board. (I’ve since added the skirt from Advance 8065, to turn it into a dress. That’s now sitting on my pile of Things Awaiting Buttons.)

1970s Butterick 4376

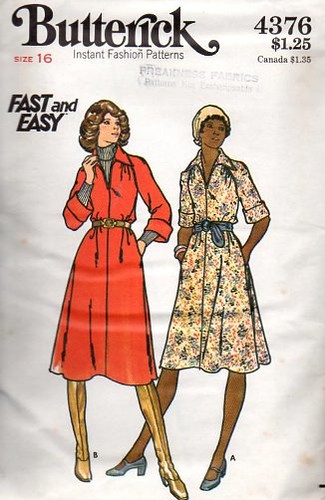
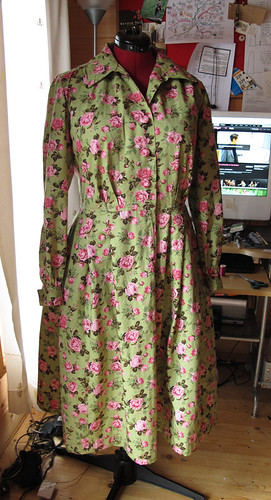
I’ve spent a LOT of time on Etsy and Ebay, searching for the perfect 1950s or 1960s raglan-sleeved shirt pattern. The raglan sleeve thing is important, as it not only suits my very rounded shoulders, but also allows a much greater range of movement than a normal set-in sleeve. (This is one reason why I don’t wear my beautiful T.M. Lewin shirts as much as I’d expected – I always feel as though I can’t lift my arms.) I did find some lovely patterns, but never in my size, and after one failed shirt incident I lost my nerve at the thought of trying to draft one from scratch. So, I broadened my search to include 1970s patterns, which is when I spotted this.

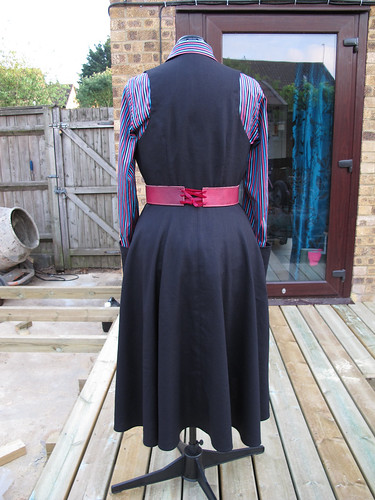
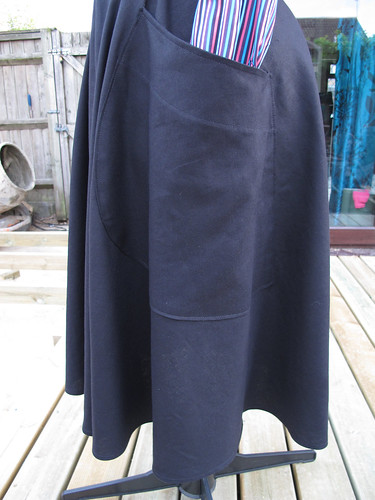
Granted, it’s not a button-through shirt, which is what I was originally looking for. But, it has raglan sleeves, it’s styled with layers, which I like, as a dress it has the all-important pockets, and I can just imagine it as either a tunic length worn over the top of all of my ridiculous trousers, or as a blouse length that I can wear tucked in. I have to admit that I was also sucked in by the promise of “Fast and Easy”, but on reading the instructions it turns out that the way to keep this a fast make is by simply not bothering to finish the inside! So perhaps I won’t go for that approach after all. Slow and Easy’s far more my style.

Simplicity 3968 – complete!

Simplicity 3968 (1952)

Please excuse the state of my garden. We’re in the process of moving house, so we finally had to do something about the terrible mess. The move has come about a little bit suddenly, so our plans for the garden have changed, but it’s all coming along very quickly which is nice.

Simplicity 3968 (1952)

So, you saw the toile of Simplicity 3968 the other day, and since then I’ve been hunting in my fabric stash to find something appropriate. This is a linen blend – I thought it was blended with wool, but the more I’ve handled it, the more I think it might be polyester. I obviously bought it before my self-imposed ban on man-made fibres. It makes a pretty nice dress though!

Simplicity 3968 (1952)

I’m pleased with the v-neck. It’s nice and neat, if you ignore the little wiggle on the right – that’ll press out with a bit of steam. I think it shows off the collar of the shirt underneath very nicely. I was a bit concerned that the neck would be so high that you would barely see the shirt at all.

Simplicity 3968 (1952)

The back, however, was nowhere near as cut away as I’d expected from a dress described as a “halter”. Once I had the neckline finished and the bodice and lining basted together, I decided to make an alteration to the armscye to make it much deeper at the back. I took the plunge and drew this freehand. I then used the piece I’d cut away to make the identical alteration on the other side.

Simplicity 3968 (1952)

The change was then translated to the pattern, so I can make the next one the same.

Simplicity 3968 (1952)

Much better! I like the waistcoat effect, which shows off more of the shirt fabric underneath, and allows for a greater range of arm movement without pulling across the back of the dress.

Simplicity 3968 (1952)

My absolute favourite part of this pattern though – in fact the entire reason I bought it – is the pockets. Look at them! They’re absolutely ENORMOUS. Despite that, I don’t think they draw an unnecessary amount of attention to themselves. They do stand slightly away from the skirt, which was an oversight on my part. I made the four panels of the skirt slightly narrower (to make the pattern pieces fit more easily on my sewing table!), but forgot to change the placement of the markings for the pockets. Next time I’ll try and remember to sew them on flat!


HEPZIBAH image © Fairysteps

The belt, for anyone who’s wondering, is the fabulous Hepzibah, courtesy of Fairysteps. I might have accidentally bought a turquoise one as well.

I plan to wear this dress to work tomorrow, so I’ll be able to see straight away whether it’s the right length, and is easy to wear. There’ll be the usual amount of sitting on the floor, rummaging about in cupboards and generally making a mess, so anything I wear to work has to be able to cope with a lot of abuse! I’m hoping this will turn out to be the dress equivalent of jeans – comfortable, but hard-wearing and practical.

Simplicity 3968 – Toile

This is Simplicity 3968, a pinafore (jumper) dress pattern from 1952. You may guess that I bought it solely because of the hilariously large pockets, and of course you’d be absolutely right!

I plan to wear it for work, over the top of my smart TM Lewin shirts. I needed the fit to be right, so I pulled out some plain polycotton fabric and made a test version. The added complication was that this pattern doesn’t actually exist in a size that’s quite big enough for me (a 1952 size 18 being significantly smaller than a modern one), so I had to make some alterations as I was going along.

Simplicity 3968 - toile

I’m very pleased to say that it’s come out really well! All the pieces fitted back together once I’d finished fiddling about with them, which is always a good start. The main change I need to make is to balance the front of the bodice, between the darts, so that the waist seam sits flat instead of curving upwards. The next challenge will come when I have to put in the zip at the side. The skirt panels are on the bias at the side seams, so there’s potential for it all pulling out of shape and going horribly wrong. I think a little bit of seam binding at that point, or perhaps a small facing, might help everything to stay in place.

Now I just need to decide on the perfect fabric. I have a few lightweight options in the stash, but nothing heavier. I know it’s supposed to be nearly summer, but somehow this lovely Harris Tweed from Merchant & Mills, or an organic cotton corduroy, seem much more appropriate than a shirt weight cotton right now.

Prototype hat

Prototype fleece cloche hat

If you follow me on Facebook (hint, hint!), you’ll have already seen that I spent Sunday making a prototype hat. I used Simplicity 1736 as a starting point, because I thought the cloche-like style and piped details made it an interesting Steampunk-Casual (if such a thing exists) type of hat.

I learned a few things while I was making it, not least how to make my own piping and then insert it into the seams – two things that I’d somehow managed to avoid in all my years of sewing. Turns out it’s much easier if you coincidentally manage to make the flange on the piping 15mm wide, then you can use it as a guide for sewing the seams.

I also learned that you need to trim the piping cord out of the way of the seam allowances, that three piped seams coming together in one place is extremely awkward, and that my machine won’t sew through three layers of fleece without skipping stitches.

Next time round I’ll be altering the pattern so that the crown pieces don’t come together into one point at the sides. You can’t see that detail anyway, it’s hidden under the brim, so why not make the whole thing easier to sew? I also want to alter the brim itself, as I’m not very fond of the way it stops half way round. I’d also like it to be more curved, and much larger at the front. Taking the brim all the way around the hat will also mean that I can attach it in a different way, eliminating the need to sew through so many layers of fleece in one go. In fact I might face the brim with something lighter, and get rid of one layer of fleece altogether.

Having said all of that, I am actually very pleased with this hat! It’s going to be my daywear hat for the Steampunk Extravaganza, hence the red and black colour scheme, and the combination of spots and stripes. It’s extremely comfortable and warm, and fits beautifully over my very short hair. I might try out the next iteration in black and pink, so that it goes with my spotty coat. Or maybe a brown and blue version to go with my long winter coat… yes, I can see myself making quite a few of these!

Simplicity 3042

Simplicity 3042

Yes, I’m still here, just about. The last few weeks at work have been somewhat stressful, and I’ve spent a lot more time out of the Shed than I normally prefer, so things have been a bit quiet on the sewing front.

So, this is Simplicity 3042, a pattern from the late 1950s or early 1960s, in a Slenderette size 18½. Not my Holy Grail sewing pattern, because I wanted to make a test version in a size that should theoretically be absolutely perfect for me, so I could make the relevant alterations without too much guesswork.

Simplicity 3042

So, on the plus side, the fit of a Simplicity Slenderette size 18½ is indeed absolutely perfect! I didn’t make a single alteration to the pattern, the waist is in the right place (and the right size), and the length is spot on too.

On the minus side, I don’t really like this fabric now it’s a dress (maybe Paul was right about it looking like a sofa?), and there are quite a lot of mistakes that happened when I thought I already knew how to make a dress and so didn’t read the instructions properly.

Simplicity 3042

To begin with, I simply didn’t read the instructions for the front facing. That had implications for the collar, which now looks nothing like the illustration. I didn’t bother to unpick that, because I don’t plan to walk around with the pattern envelope pinned to my chest, so I don’t think it matters too much. Annoying, though.

The skirt, on the other hand… I knew I was going to need to make alterations to the pleats, because the side front/back panel piece was slightly larger than the fabric I had left… because I didn’t follow the layout given with the pattern. On top of that I somehow managed to sew the skirt to the top in such a way that it didn’t fasten properly, so I unpicked the waist seam and started again. I thought I’d done really well to get it to all fit back together again… and then I noticed that the left front (as you wear it, so on the right in the picture) has three pleats in the skirt, while the right front only has two. I also didn’t turn the binding of the skirt placket to the inside, so a) you can see it, and b) the skirt front doesn’t sit quite right.

Simplicity 3042

I am quite pleased with these cufflinks though. Two pairs of covered buttons, linked together by several strands of thread that’s covered with a simple buttonhole stitch. Now I just need to make the eight buttonholes in the french cuffs to fasten them through. Sadly I think that’s going to have to wait until tomorrow. The amount of hand sewing I can do in one day is gradually getting less and less. Making seven covered buttons and the three buttonholes in the front of the dress is all that I can manage for now.

This dress will be worn, mainly because I don’t want to waste four metres of fabric and two days’ work. I have a pink v-necked pullover that will go nicely over the top, and enough wool to knit a pink cardigan too. I’m also waiting for the arrival of another pattern, Simplicity 4838, which is a pinafore (jumper) dress.

Simplicity 4838

I’d planned to make a couple of these in wool or suiting fabrics, to wear over my smart shirts for work. Conveniently, it will also cover up the botched centre front of the dress I’ve just made, and lessen the impact of the sofa-like fabric. I think I even have some dusky green suiting which will go perfectly.

Next time, I might even read the instructions, too.

Simplicity 2184 – it’s here!

Patterns from HoneymoonBus

Wow, that was quick. It took less than ten days for my PERFECT PATTERN to reach me, all the way from Canada! Bless her, Zoe from HoneymoonBus had already sent me a lovely convo via Etsy, to say thank you for mentioning her on my blog, and to let me know that she’d included a little gift. I didn’t know it was going to be a second pattern! That one’s Simplicity 3224, a sundress from 1950 with the options of fantastically enormous pockets and a matching bolero jacket. Fantastic! That one doesn’t have its original envelope, but thanks to The Magic of the Internet I’ve been able to track one down, so I can see how much fabric I’ll need to make it.

And just look at this simply gorgeous promotional needle case from Sunbeam Bread:

Vintage needle case

Isn’t it a beauty? Almost completely intact, you can just see where a couple of needles are missing from the right-hand green panel. On the back is a little paragraph explaining that adding vitamins to bread doesn’t affect its taste or texture, and reassuring us that it’s the best way of staying healthy.

The Pattern!

And here’s the pattern itself! I’m really pleased that Simplicity patterns were printed ones by the 1950s, as unprinted dress patterns tend to confuse me a bit. This one seems to have been made up as a short-sleeved blouse – the long sleeve and skirt pieces remain uncut. The previous owner had also done exactly what I was going to do, which is to take about an inch out of the bodice length to make it smaller – her original folds are still in place!

Once I’ve given all the pieces a gentle smoothing with the iron, I’ll trace them to keep the original safe for future use. I also need to make a few alterations, and it’ll be much better for me to scribble all over a new brown paper pattern than on this original one.

I popped into town yesterday to buy some frog fastenings and sequin trim to finish off my velvet cape, but both were out of stock and I had to order them in. Now I don’t feel so bad about putting the coat to one side while I start work on these lovely dresses!

Oh, and the reason I ended up buying from HoneymoonBus, rather than one of the many other vintage pattern sellers out there? Her Etsy store is arranged by size. I appreciate that if you’re looking for a pattern from a particular decade, that might be a bit annoying. But I’ve spent so many hours looking at vintage pattern sites, finding something I like, and discovering it’s too small, that to be able to go a place where I could just look in one section and find something in my own size was such a relief! So thanks again to Zoe, I can’t wait to get sewing!

Spotty bolero and apron…

Spotty bolero

Here’s what I’ve been up to this week – making a spotty bolero from Simplicity 1819. I was intending to make a stripy one, to match the red and black outfit I wore to the Wild Boy’s Ball at Kensington Palace a couple of years ago. Unfortunately the fabric shop was out of stripes and, being too impatient to wait for an order to arrive, I decided to go with spots instead. As you do. This had a knock-on effect as the matching black trim (also unavailable) would have been invisible on the spotty fabric, so I had to go with red. I think it stands out rather nicely! It’s the first time I’ve done this sort of decoration, and although it was a bit fiddly in places, I’m pleased with the way it looks.

(I have to confess that I also love the way it looks with this yellow skirt. The temptation to wear these together is now almost irresistible.)

Spotty bolero and apron

And here’s what it’s supposed to look like, complete with matching spotty apron. That’s only pinned into place because I still haven’t decided whether it’s actually going to be an apron or a bustle. I think an apron though, as I rather fancy tying it with a ridiculously oversized bow at the back. As you do. The apron is also made from Simplicity 1819, a rather loose interpretation of the overskirt.

I think during the day I’ll probably wear this with a plain black shirt, and I have just enough spotty fabric left over to make a matching tie or bow tie. Then for the evening I’ll switch to the dress shown above, and swap the bolero for the black taffeta coat. If I’m feeling fancy, I might put the feather collar back on.

Then, of course, all I’ll need to make is a MASSIVE HAT. I have Lynn McMasters‘ top hat/riding hat pattern, some spare black taffeta, and a magpie skull on order. Watch this space…

Simplicity 2184: Vintage dress pattern holy grail!

Well, it’s taken me almost five years to find it, but here it is – my vintage dress pattern holy grail, in the form of Simplicity 2184.

Raglan sleeves. Short and long sleeve options. FRENCH CUFFS. Convertible collar. In a size that I don’t have to re-draft too much. HALLELUIA! All I need to do is add pockets in the side seams (and 3″ to the waist) and it will be PERFECT! It even still includes the embroidery transfers for the monogram. *swoons*

It’s probably just as well that I need to wait for it to arrive all the way from Canada (I bought it on Etsy, from HoneymoonBus), hopefully that will ensure that I’ve calmed down a little bit by the time it arrives. I’ve already mentally sewn it in about 153 different fabric combinations, and thrown out every other item of clothing in my wardrobe. I need to slow down.

I posted the link on Facebook, and several people were somewhat boggled by the term “Slenderette”. Thankfully a friend discovered that Gertie (whose blog I am now reading obsessively) had contacted Simplicity to find out what on earth. Apparently the term was used for patterns that were specifically designed to make you look more slender. Not that this is going to work for me, as I’m going to have to let out the waist by at least three inches to make the dress fit – or invest in some fairly serious underwear.

Yes, underwear is still an ongoing issue. This stupid annoying fibromyalgia thing that I’ve got going on means that wearing a bra is absolutely excruciating, so I haven’t done it for the best part of a year. (And the Fashion Police didn’t arrest me or anything! It’s been a revelation!) Those “secret support” vests – sorry – camisoles with a soft bra hidden inside are a bit better, but they still have a constricting band of elastic around the body, so they’re not ideal. I did make a lovely soft teddy from bamboo fabric, but there were some issues with the fit (which is why I haven’t blogged about it yet), and Paul said it looked “like Victorian underwear – in a bad way”. Clearly some improvement needed there!

I keep looking at Kiss Me Deadly, whose vintage-inspired underwear would be perfect underneath this type of dress. But sadly their pretty things are outside the realms of my budget at the moment (anybody want to buy me a Vargas dress? Go on, you know you want to!), and I’m not 100% certain that my body will tolerate being squished by powernet all day.

So perhaps while I’m waiting for this pattern to arrive and fill me with wonder and glee, I should concentrate on doing some experiments with underwear. I’ve only made a couple of bras since I went on LCF’s Structured Lingerie course, and that was two years ago. Now I really want to do their Lingerie Workshop, but again, budget, and the courses take place in the school holidays, which is when I tend to be doing extra hours at work. Hey ho.

In the meantime, I’ve been reading blogs such as Ohhh Lulu, and reading my 1970s and 1980s lingerie-sewing books, in the hope that these might encourage me to get over my terrible fear of wasting fabric, and actually cut something out. I think now’s the time!

Merry Christmas!

Milly's Christmas Doll

This little lady is my niece’s Christmas present, dressed in a very festive outfit!

The pattern is Simplicity 1900, and I’m pretty pleased with how she’s turned out. It was a little bit fiddly though – I don’t know whether I sewed the doll together with too-large seam allowances, but the arms were impossible to turn through and I had to re-draw them and try again. Some of the clothes are also coming out too big, which suggests that I’ve sewed the doll a bit too small. She’s also a bit wonky – I managed to sew one arm on about a centimetre higher than the other. Oops.

Turquoise Dress

This outfit’s a bit of a sentimental one. The fabric is a tiny remnant left over from a dress that was made for my Mum when she was a child. Hopefully she’ll enjoy seeing it being worn by her granddaughter’s doll.

I also made a pair of little doll-sized bloomers, trimmed with lace, as the pattern didn’t come with any pants. How rude!

Milly opened her presents yesterday while we were visiting, and the doll seemed to go down well. Her current favourite game is getting everyone to take a jumper on and off a teddy bear, so a doll whose dresses and shoes (and pants!) could be taken on and off was pretty good.

Although five little pairs of socks (for Milly, not for the doll!) were even more popular – they were tried on by the doll, the bear, a bunny and a hippo. Who knew socks could be so much fun?

New dress, new jacket

Untitled

I made Simplicity 1755 to wear to a wedding. Then I realised I didn’t have a smart little jacket to wear with it, so I thought I’d better make one. This is a short bolero hoody, with long bell sleeves. (I drafted the pattern myself.) I couldn’t get any bias binding to match, and I didn’t have time to make any with the left over fabric from the dress, so I bought the least-clashing colour and went with that. What you can’t see in these pictures is the machine embroidery that I added over the top. I thought it would help to tone down the very pale lilac, so there are little leaves embroidered all over the binding. Definitely a finishing touch that I’m going to use again, I’m really pleased with it.

Untitled

Here I am, looking wistful in a gazebo. As you do. No matter how hard he tries, Paul just doesn’t seem able to take a decent photo of me, so you’ll often find me staring away from the camera looking a bit grumpy. (Any suggestions that perhaps I’m just not very photogenic will be met with derision. And then crying.)

I’m pleased with the dress, but my lack of a 1950s-style well-defined waist does make it look a bit frumpy. I do need to change the collar though. As you can see, the hook and eye kept coming undone, and that made my brooch wonky, which annoyed me all day. I’m wearing a huge floofy petticoat in these pictures, but I took that off half way through the reception because it was just too damned big and annoying. I have a very low tolerance for uncomfortable clothes, so anything that I have to fiddle with or which makes a nuisance of itself will very quickly be consigned to the charity shop pile. (Or the boot of the car, in the case of the petticoat.)

I will make another of these dresses though, just with a slight alteration to the front neck. And I’ll definitely be making more of these little jackets. The only change I need to make to this one is the hooks and eyes on the front. I think I’ve sewn the eyes on back-to-front (I didn’t realise it mattered!), and the jacket won’t stay closed. But once I’ve sorted out the fastening, I want to make another one with narrower sleeves, and one with a printed cotton lining, and a longer one with pockets, and a fancy one with needle felting… I have a lot of plans for this design!