Sea Glass & Silver

Sea Glass & Silver

Whenever I can, I like to go on courses to learn something new. I’m very lucky that my local high school has a Community Arts programme, which runs evening and weekend classes and a Summer School. For several years I wasn’t able to attend the Summer School (the summer holidays being one of my busiest times at work), but this year I was really pleased to be able to go back. I’ve learnt lots of different things there, from ceramics to watercolours, but the thing I’ve enjoyed doing most is making silver jewellery. This year’s Sea Glass & Silver course with Cathy Newell Price offered a range of techniques that I was really interested in learning.

Sea Glass & Silver

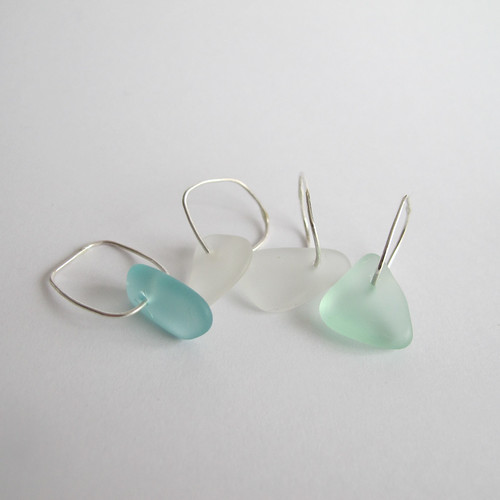
First up – drilling holes in sea glass, using that exciting combination of electricity and water! I managed to drill through four pieces, with only one (on the left) cracking slightly where I hadn’t lined up the hole very well. We also learnt how to solder the silver rings in place, whilst being very careful not to shatter the glass. I’ve never been particularly good at soldering, but working on something this fiddly definitely forced me to improve!

Sea Glass & Silver

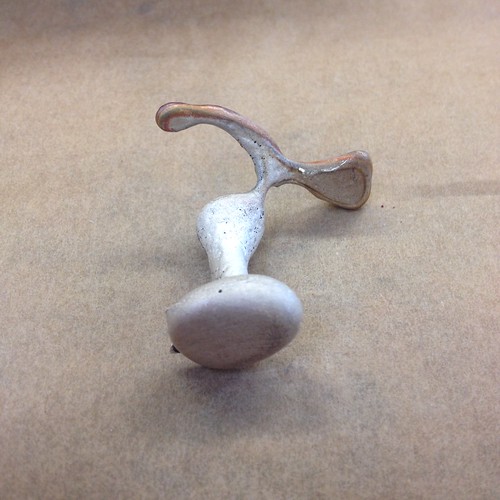
One technique that I was particularly excited about was learning to cast objects using a special type of sand called delft clay. I brought in a nice smooth pebble to cast, which in retrospect was a bit boring. I was very impressed by the person who decided to cast an almond, which came out wonderfully! In case you’re wondering, the pebble part is at the bottom – the sticky-out bits are the sprue (where the molten silver pours into the cast), and a splashy dribbly bit where I was a bit wobbly with the pouring.

Sea Glass & Silver

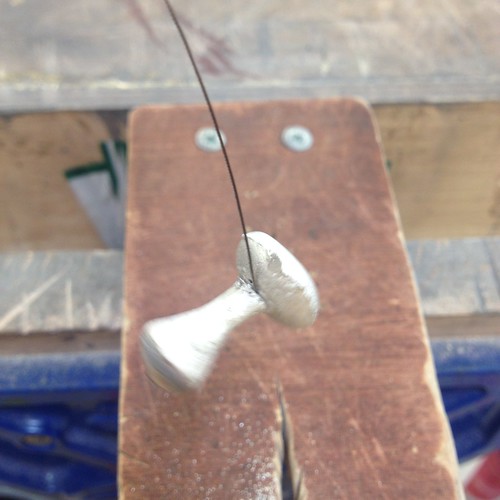
Once the cast is done, then comes the hard part – sawing off the sprue and filing off all the wonky bits where you didn’t quite line up the two halves of the mould correctly. (There’s less of that as you get better at the technique, obviously.) I have to say that I wouldn’t recommend snapping a piercing saw blade half way through your sprue – it’s really difficult to get out again. Oops.

Sea Glass & Silver

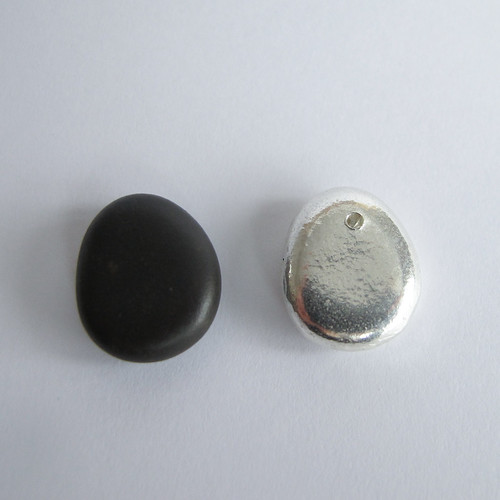
But here it is, all polished and lovely, alongside the original pebble used to make the mould. I like that you can see the very fine texture on the silver pebble, that’s barely visible on the original one. The little crater at the top is where I was trying to drill it through so that I could hang it as a pendant. Sadly, by the end of the course we’d collectively worn out all of the drill bits, so I had to give up! I’ve got a piece of silver wire set aside though, and I’ll use that to cover up the hole and make a bail to hang it from instead.

Sea Glass & Silver

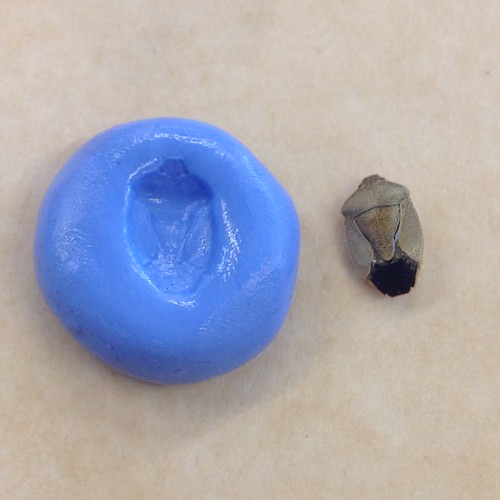
Next up – precious metal clay! I’ve used PMC before, by rolling out flat pieces and stamping them with an impression. I’d never used a mould to make a piece though, so that was fun to try. I brought in a shield bug that I’d found sadly expired in the greenhouse, but again, it perhaps wasn’t the best choice for this technique. Looking at everybody else’s shells, buttons and seed heads, I should have gone for something with more depth and texture for a better result. I also found the clay itself quite difficult to work with – it dried out very quickly, and started to crack.

Sea Glass & Silver

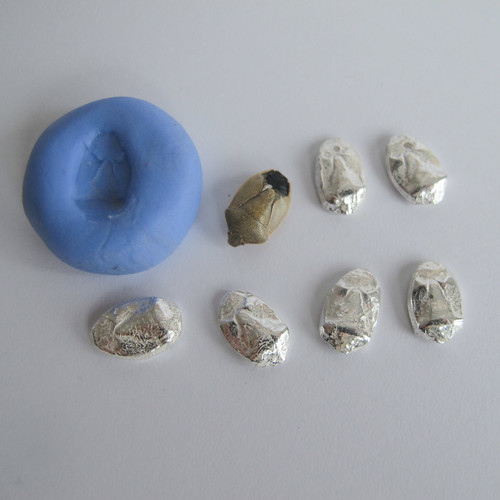
I must confess I was disappointed with my silver clay shield bugs right up until the moment they came out of the tumbler at the end of the day. As soon as they were polished up you could see the details more clearly – although some of the texture is from the drying clay, not from the original beetle. The top two have been drilled, and I’ll add ear wires to those at some point. I’m not sure yet what I’ll do with the other four – suggestions are very welcome!

Sea Glass & Silver

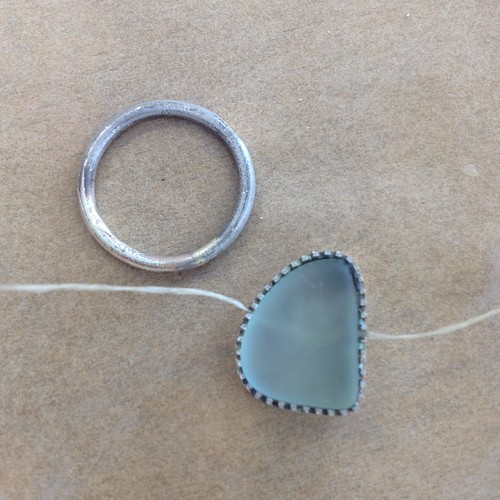
Towards the end of the second day, I started work on setting a piece of sea glass to mount onto a ring. I’d taken the little piece of gallery wire with me “just in case”, and was really pleased to have the opportunity to use it. I had to work at lightning speed to get it finished, and made a potentially catastrophic soldering error (using the same grade of solder for two joins very close together), but thankfully I got away with it!

Sea Glass & Silver

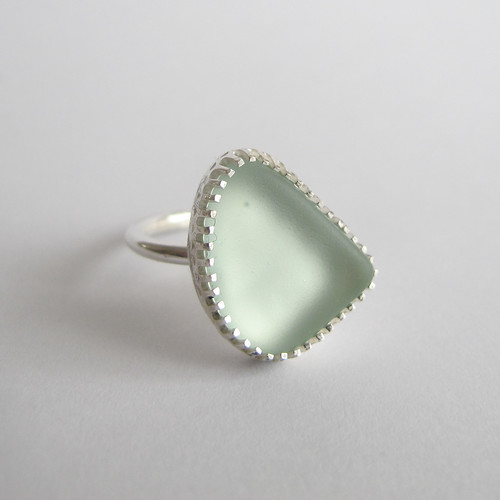
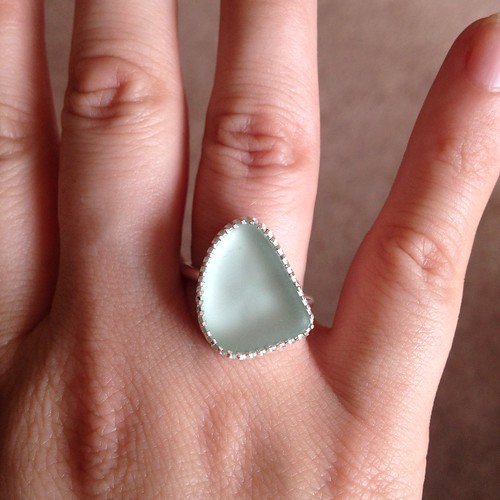
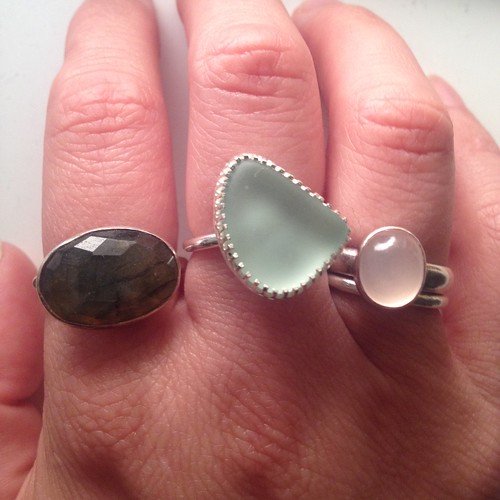
And here it is! Isn’t it pretty? I’m really, really pleased with how it’s come out. Yes, the finishing leaves a lot to be desired – there’s lumpy solder, lots of file marks, and a bit of fire stain that I didn’t have time to polish out. And the angle of the setting isn’t even slightly what I’d intended – the ring moved as I was soldering, and I didn’t have the time (or the skills, let’s face it!) to try and correct it.

Sea Glass & Silver

But, it looks nice on the hand at this jaunty angle, and nobody but us knows that I didn’t set it this way on purpose!

I have to say that I really, really enjoyed this course. It was great to come home with such a quantity and variety of work at the end of just two days, and as always it was fascinating to see what everybody else had put together using exactly the same materials and techniques.

Having the opportunity to try out the sand casting was brilliant, as that’s something you’d never be able to achieve at home with a domestic blowtorch – you simply wouldn’t be able to generate enough heat. I’ve decided that the more I try and use PMC, the less I like it, so I’ve decided to sell my hoarded metal clay stash so that I can use the money to buy some silver sheet and wire. That way I can concentrate on doing the thing I enjoyed most – setting stones.

Now I need to look out for more courses featuring different stone-setting techniques, I think. There’s one on Saturday at South Hill Park, on tube setting, which I hope will come around again, and one of my fellow students mentioned a gypsy setting course that she’d been to, I think in Oxford. Ideally I’d like to be able to go back to Cathy’s evening classes, but at the moment my budget won’t allow a whole term’s worth of sessions plus materials. Time to clear a suitable space, and be brave about firing up the blowtorch at home, perhaps!

Improving on Me-Made May

28/5/14

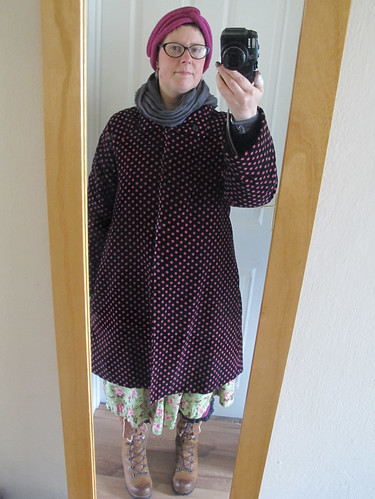
You may have spotted that I didn’t post very many photos from my Me-Made May escapades. This is partly because I mostly look like some kind of strange triangular bag lady (I like layers, and most of my clothes are comfortable-shaped), and partly because it turns out that I only wear about four outfits, over and over again, with very minor variations. How boring!

28/5/14

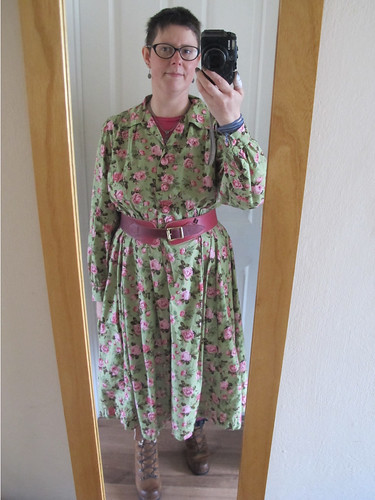
Towards the end of the month I made a last-ditch effort to wear some of the smarter clothes in my wardrobe, only to discover that when I put them on… well, suddenly they’re not so smart any more. This dress is now very firmly on the “waiting to be chopped up and turned into something that doesn’t look like a giant floral sack” pile. There’s just no point in wasting time and fabric making clothes that require waist shaping in order to look nice, when waist shaping isn’t something that I actually have myself. Although, having said that, my other vintage dress (also made from an Advance size 18½ pattern without alterations) fitted really well and looked lovely!

17/5/14

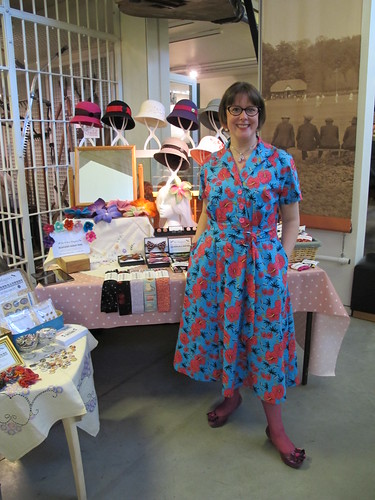
See? I still don’t have a waist, but the dress looks smart, not like a huge great cushion’s attacked me while I wasn’t looking. I think this is partly down to the fact that this dress has a smooth skirt rather than miles of pleats. (Also: not a selfie, vintage-style foundation garments, not layered with t-shirts and bloomers and giant boots on account of it being freezing at work.)

Lace crop top

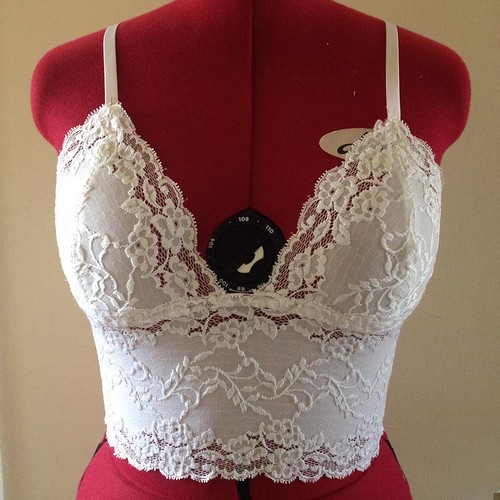
Sadly, even if I did have the budget to wear lovely things from Kiss Me Deadly every day, the fibromyalgia simply wouldn’t allow it. But, the whole Me-Made May experiment did reveal that I am very much lacking in the Me-Made underwear department – despite the fact that I spent plenty of time and money on the London College of Fashion’s Structured Lingerie course back in 2011. I bought this lace when I came back, in a fit of enthusiasm, and it’s been untouched in a box ever since, along with a metre and a half of pink, and four metres of a prettier-than-it-sounds grey. This particular lingerie is about as unstructured as you can get (no wires, no fastenings, nothing), but I used a lot of the skills I learned on the course to make it. The pattern itself is from Sewing Lingerie, a Singer reference book, where it’s described as a “sleep bra”.

The wide stretch lace that I used to make this is actually really affordable, and comes in lots of different colours and patterns. If this one (and the pink one I’ve just finished, and the two or three grey ones I’m going to make next) turn out to be comfortable, I can feel a drawer full of these coming on before Me-Made May next year!

Unravelling

27/05/2012

Starting today, and for the next eight weeks, I’ll be taking part in Susannah Conway’s “Unravelling” e-course. A bunch of women from all over the world will be getting together online, to share photos and respond to writing prompts, with the aim of getting in touch with our “real selves”.

See, I’m already so nervous about what anybody who might be reading this will think about it, that I’ve put “real selves” in inverted commas as an act of self defence. To show I’m not taking it too seriously. Except I am. I’m taking it very seriously indeed.

There are a lot of things going on in my life at the moment. You’re aware of the surface details – my job has changed, I’m struggling with my health, we’re moving house. I’m also going to be 40 this year, and phrases such as “mid life crisis” are being thrown around. After we’ve moved, Paul and I want to change some of our routines, improve the way we live. I certainly want to improve and change the work I do outside of my “proper job”, and to think more deeply about why I’m doing it, and what it means to me.

I won’t be sharing everything I do for the course here, although I will certainly share some of the thoughts that come out of it. The first assignment will be posted later today, and I’m both nervous about it and looking forward to it at the same time. Let the unravelling begin… I can only hope that I don’t fall apart in the process.

Structured Lingerie (Part Four)

Structured Lingerie

This is the fourth and final bra from the Structured Lingerie short course at the London College of Fashion.

It’s made from a pattern that I drafted from one of my own bras, which sadly had to be sacrificed for the occasion. Each of us had to unpick a bra in our own size, writing down the order that we’d taken it apart so that we’d know how to assemble the new one.

I got a little bit too ambitious with mine, making a few alterations to the style of the original bra. This turned out to mean that some mistakes crept in along the way, so this bra doesn’t actually fit as well as the other three.

My main mistake was to take my pattern from the foam cup rather than the fabric that had been covering it. This seemed like a good idea at the time, as I could make a more accurate pattern from the stable foam than from the stretchy fabric. Unfortunately I forgot to add the seam allowance to the bottom of the lower cup, which makes the bra smaller than it ought to be. This was compounded by an error in the boning – I hadn’t realised that the boning channels we were using at the College were quite a bit wider than the ones on the original bra. This took an extra few millimetres out of the bottom cup, making it even smaller!

Still, I have my pattern, I know what changes I need to make, and I think I have just enough fabric left over from the course to have another try.

All in all, I had an absolutely brilliant week!
The facilities at the college were absolutely excellent (I’m coveting an industrial bar-tacking machine), the tutor was very experienced and helpful, and I learned a lot of things that I can now put into practice as I continue in my mission to make fiddly things from awkward fabrics.

You can actually do an entire degree in underwear if you want to, but I’m currently extremely tempted by another of their short courses. The Lingerie Workshop is another full week, but this time concentrating on “the skills of traditional couture lingerie, especially the feminine 1930s bias-cut styles and other similar themes and updating these into 21st-century lingerie.”

Doesn’t that sound absolutely perfect?

Structured Lingerie (Part Three)

Structured Lingerie

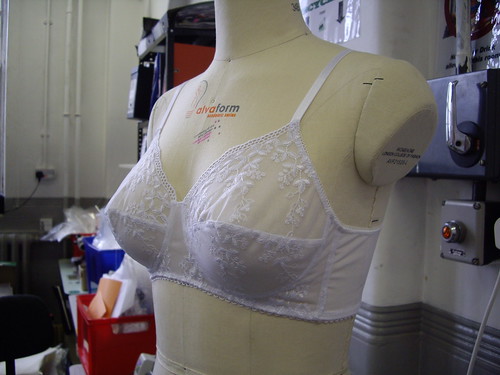
This is the third bra from the Structured Lingerie short course at the London College of Fashion.

As you can see, this one is a much fuller style than the previous two. Despite also being an “industry standard” 34B, the cups were slightly roomier than the other styles.
This bra isn’t underwired – instead it has a “cradle” for support, which goes underneath and in between the cups. (The underwired styles have a little “bridge” piece that sits in between the cups.) The cups are made in two pieces which, like the first bra, allows for a scalloped or lacy edge at the top. The cradle and the the lower part of the cups are lined with stabilised nylon for reinforcement.
The wings are much deeper on this bra than the others, and this actually makes it really comfortable to wear. Despite its somewhat old-fashioned styling, having tried them all on, this is actually my favourite of all the bras I made on the course.

Structured Lingerie (Part Two)

Structured Lingerie

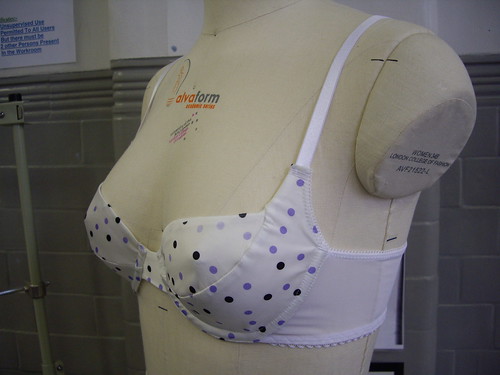
This is bra number two from the Structured Lingerie short course at the London College of Fashion.

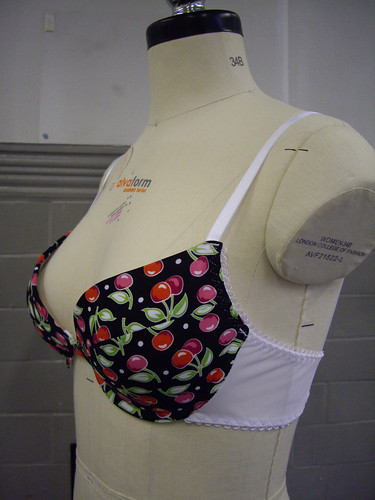
The cups on this one are made from foam, a couple of millimetres thick, to make something resembling a t-shirt bra. You can’t easily buy the foam moulded cups that these are made from (unless you’re Marks & Spencer and want to order thousands at a time), so we learned how to join the foam pieces together without creating bulky seams, and then we covered them with a stretch fabric.

(This photo makes it look as though I’ve sewn the cherry fabric upside down, but I haven’t, honest!)

The wings on all the bras (that’s the bit that comes out from the sides and turns into the strap at the back) are made from plain white powernet. The elastic’s attached with a three-step zig-zag which I conveniently happen to have on my own sewing machine, which is nice, as that’s one of the things that makes a bra look more professionally made. This one just needs a little bow where the straps join to the cups, and it almost looks like the real thing!

Structured Lingerie (Part One)

Structured Lingerie

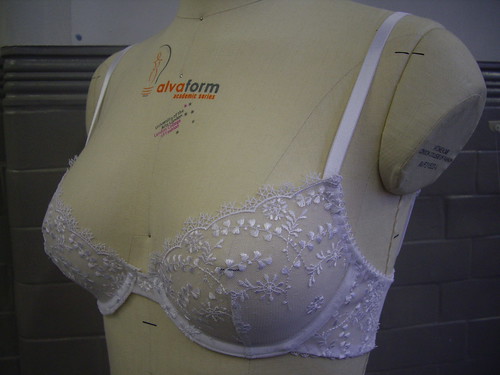
At the beginning of April I went to London for a week, to do the Structured Lingerie short course at the London College of Fashion. The aim of the week was to make three bras of differing styles, to an industry-standard size (34B). After that there would be the opportunity to take apart a bra of your own size, draft a pattern from it, and make a new one!

This is the first bra of the week – a lace underwired bra. Each cup is made from a single piece of lace, and darted to create shape. This means you can use fabrics with a scalloped edge, as you’re cutting a straight piece at the top of the cup. Pretty, isn’t it?

Thatcham Nature Discovery Centre

Thatcham Nature Discovery Centre

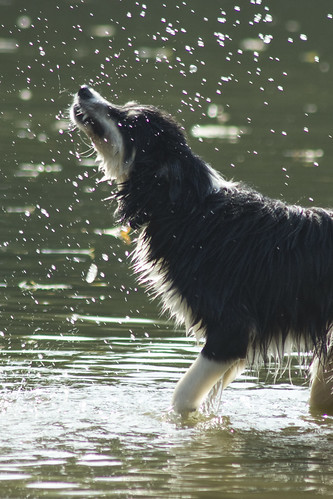
Today we went to the Thatcham Nature Discovery Centre, for a wildlife photography course.

I learnt far more on this course than I did at the Twilight Photography one. I think the course and the teacher were just better suited to the way I like to learn.

I’m really pleased with today’s pictures (which are here, on Flickr), plus I had a lovely day out with Paul. We’re really looking forward to our holiday now, and contemplating buying another big zoom lens that we can fight over!

Twilight Photography

Twilight Photography, South Hill Park

Yesterday Paul and I went to South Hill Park, for a workshop in twilight and low light photography.

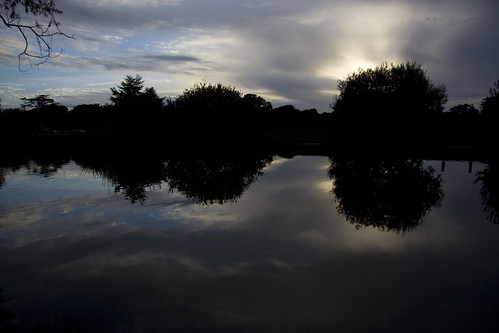
While it was still light, we went for a walk around the lake and staked out a good spot to take photos of the sunset. We then set the cameras to Manual (scary!) and started playing around with the settings to see what would happen.

Twilight Photography, South Hill Park

Once it had gone completely dark, we played around with artificial light. This is Paul, waving an LED torch around (mostly) in front of the camera. We also played with candles, sparklers, glow sticks and very long exposures.

You can see the rest of my photos on Flickr.
This is an extremely edited selection – most of the pictures I took by the lake were identical, just changing one setting each time until I’d found the best one.

I don’t think I’m going to take up photographing sunsets or waving torches around any time soon, but I do feel as though I understand my camera a little bit better than I did before. We’re going on holiday in November, when it will be dark for quite a lot of the time, so hopefully I now have enough knowledge to be able to take better photos while we’re away.

Precious Metal Clay

Silver jewellery

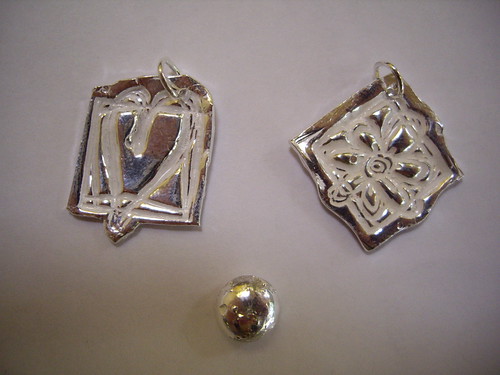
These two little pendants are made from Precious Metal Clay. I’ve had the clay for almost a year, but was a bit afraid to make anything with it in case I ruined it. Janet (the silversmithing tutor) said that if I wanted to make something at home and bring it in, she’d show me how to fire it. I very gratefully took her up on the offer, and here are the results.

The pendants were made very simply by pushing a rubber stamp into the rolled-out clay. They’ve been through the barrel polisher, but I need to get into the indentations with a brash brush to bring up the shine. Another technique I’ve read about is to push polymer clay into the pendant, to add a bit of colour.

The silver blob is what happens when you melt silver clay completely to a liquid. I wanted to do that with the leftovers, so that I could see what the various stages of melting look like. Theoretically this should help me to avoid disaster in the future.

Silver jewellery

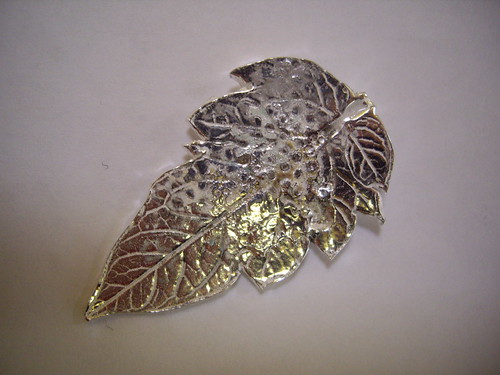
Sadly it didn’t help me to avoid this little disaster!

This is what happens when you’re firing your metal clay piece from the back (so you don’t squash the bail), but you let it get a little bit too hot. The honeycomb texture on this leaf is because I accidentally melted it ever so slightly into the firing block. Oops.

Unfortunately there’s not a great deal I can do about that, but I can at least clean it up with the brass brush and see how noticeable it is when the whole thing’s nice and shiny. Such a shame, because the delicate texture of the leaf was beautiful!

My next step is to book myself onto one of Janet’s Precious Metal Clay courses. I think I need a little bit more help…