Spotty bolero and apron…

Spotty bolero

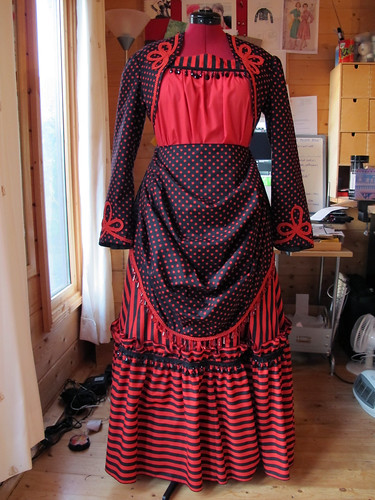
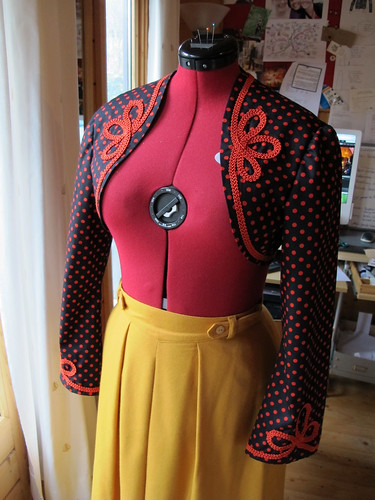
Here’s what I’ve been up to this week – making a spotty bolero from Simplicity 1819. I was intending to make a stripy one, to match the red and black outfit I wore to the Wild Boy’s Ball at Kensington Palace a couple of years ago. Unfortunately the fabric shop was out of stripes and, being too impatient to wait for an order to arrive, I decided to go with spots instead. As you do. This had a knock-on effect as the matching black trim (also unavailable) would have been invisible on the spotty fabric, so I had to go with red. I think it stands out rather nicely! It’s the first time I’ve done this sort of decoration, and although it was a bit fiddly in places, I’m pleased with the way it looks.

(I have to confess that I also love the way it looks with this yellow skirt. The temptation to wear these together is now almost irresistible.)

Spotty bolero and apron

And here’s what it’s supposed to look like, complete with matching spotty apron. That’s only pinned into place because I still haven’t decided whether it’s actually going to be an apron or a bustle. I think an apron though, as I rather fancy tying it with a ridiculously oversized bow at the back. As you do. The apron is also made from Simplicity 1819, a rather loose interpretation of the overskirt.

I think during the day I’ll probably wear this with a plain black shirt, and I have just enough spotty fabric left over to make a matching tie or bow tie. Then for the evening I’ll switch to the dress shown above, and swap the bolero for the black taffeta coat. If I’m feeling fancy, I might put the feather collar back on.

Then, of course, all I’ll need to make is a MASSIVE HAT. I have Lynn McMasters‘ top hat/riding hat pattern, some spare black taffeta, and a magpie skull on order. Watch this space…

Striped Tie

Stripy tie

Paul decided the day before the event that he would come with me after all.

Thankfully I managed to get him a ticket, and I had just enough striped fabric left over to make him a tie to match my outfit.

The diagonal stripe is because I didn’t have a big enough scrap of fabric to make the front of the tie in one piece, so I had to make a join. The stripes didn’t quite match up as precisely as I’d have liked, so I ran a piece of leftover braid across the seam.

Not bad for a last minute dash and a few bits of leftovers!

Steampunk Petticoat

Petticoat

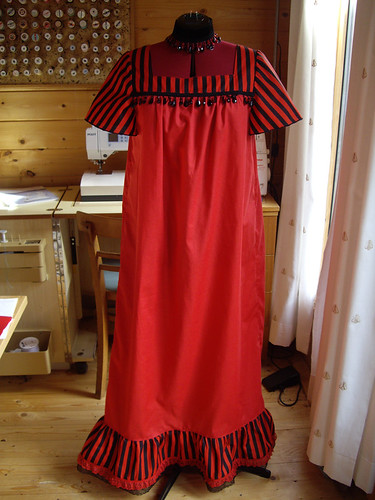
You might have noticed that this is made to roughly the same pattern as the black linen dress. This time the ruffle’s a bit shorter, but that was mostly because I’d almost run out of stripy fabric. The body of the dress is a little longer to compensate. The hem is trimmed with one layer of wide flat lace, and another of red gathered lace to provide a little bit of extra fullness. The butterfly sleeves are simply overlocked at the edges, and the beaded trim matches the skirt.

Petticoat and skirt

Here’s how they look together – rather smart, I think! The plain red doesn’t exactly match the stripes, but I think they’re close enough that it doesn’t matter too much. The petticoat doesn’t make the slightest bit of difference to the fullness of the skirt because it’s much too narrow, so you probably won’t even see the two layers of lace. The attention to detail makes me feel better about the outfit though, so it’s worth the effort.

Simplicity 2207 – Striped Steampunk Skirt

Simplicity 2207

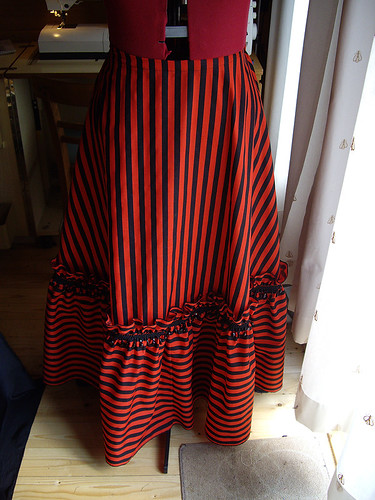
The title says is all really – this is Simplicity 2207, my striped steampunk skirt!

Somewhat eye-bending, but I knew the stripes on the skirt would end up going in all directions, so I deliberately placed them vertically on the front and horizontally on the ruffle.

Both edges of the ruffle are finished on the overlocker, with the “raw” edges left visible. Over the gathered join is four metres of beaded trim, with four metres of braid stitched over the top. I think I spent more on the trimmings than I did on the fabric!

(This was sadly evident as I was sewing – the black stripes are printed rather than woven, and I ended up with very grubby hands. Yuk.)

Simplicity 2207

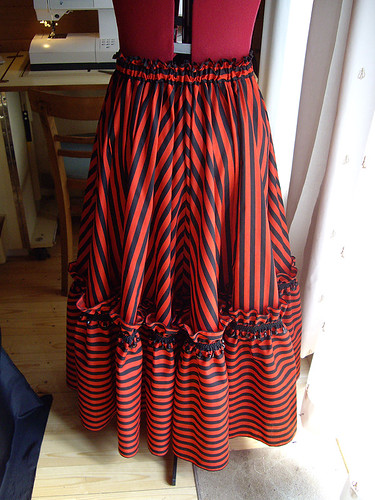
I attempted to put pockets in the side seams, but that turned out to be a lesson in reading the entirety of the instructions before you start. The waistband has a somewhat unusual construction, so the two sides of my pockets didn’t match. Not wishing to rip out all the overlocking and start again, I simply chopped off the pocket pieces and pretended I didn’t want pockets after all.

The back of the skirt is twice as full as the front, and has an elasticated waist. I have a horrible suspicion that, despite measuring, I’ve cut the elastic a little bit too short. Thanks to the waistband construction I can’t easily get in and change it, so for now I’ve adjusted my dress form to be a little bit bigger than me, in the hope that it’ll stretch out a bit before I wear it. Fingers crossed.