Leaf rubbings on silk

Leaf rubbings on silk

This is another little experiment with natural materials and silk – this time some leaf rubbings. I did this activity with the children at work a couple of weeks ago, with crayons and sugar paper, when it occurred to me that it would probably work just as well with silk. A couple of leaves from the garden later, and what do you know? It does!

The rubbings are done with Derwent Inktense pencils, with varying degrees of water applied to the silk to see what would work best. I also used this little sample to practice my hand-rolled hemming. I think you can see that I started on the right and finished on the left! A finer needle and thread are called for, I think, to keep the stitching properly invisible. I also need to do a bit more practice to get the leaf rubbings just right, so I think I’ve just found a handy use for all the dye samples.

There’s a bigger piece of silk steeping in tea at the moment, waiting to be turned into a scarf. It’s two metres long and half a metre wide, so that’ll give me five metres of hem, and a nice big space to practice on.

Turmeric dyeing experiment

Turmeric dyeing

It seems as though I’ve been bitten by the dyeing bug rather badly. I can’t stop thinking about plants I could grow in my garden (coreopsis, safflower, weld, marigolds), or plants I could forage (walnuts, elderberries, sumac), or plants I could ask friends-and-relations to save for me (onion skins, rhubarb leaves).

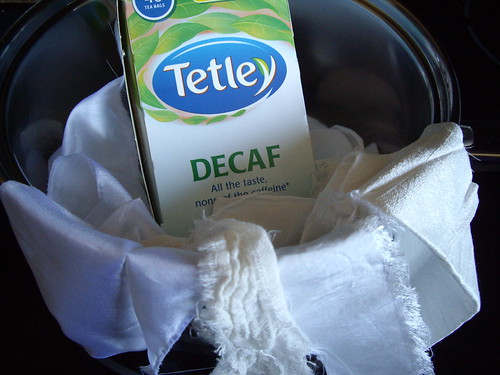
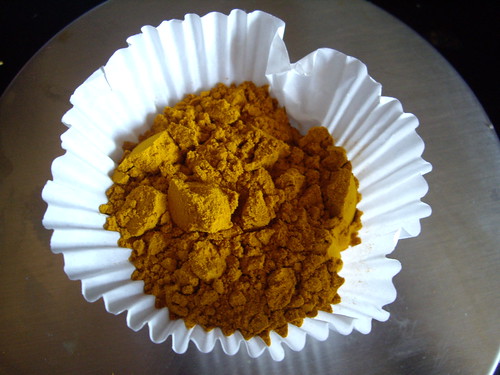
I’m still working in the kitchen without mordants, so the next obvious step was turmeric. A quick trip to the corner shop procured a nice big bag of spice, and I found these instructions online. I used them as more of a guideline than a rule, as I don’t have a thermometer, and I don’t have any coffee filters to strain out the turmeric powder.

Turmeric dyeing

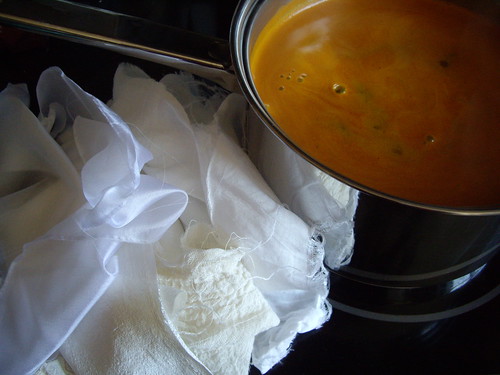
I cut slightly larger pieces of fabric this time, with a total dry weight of 30g. I used 25g of turmeric powder, and the water looked extremely yellow! As before, all the fabric’s been pre-treated by a quick trip through a hot wash, and it was all dampened under the hot tap before putting it in with the turmeric.

Turmeric dyeing
Left to right: silk paj, silk dupion, bamboo, cotton muslin

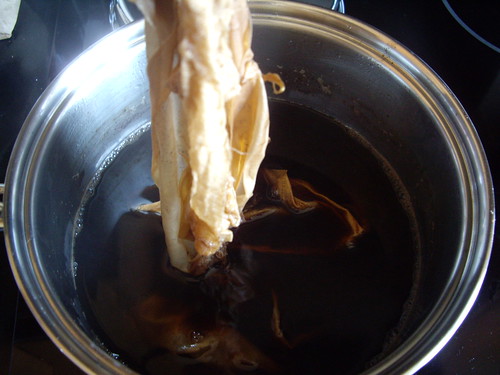
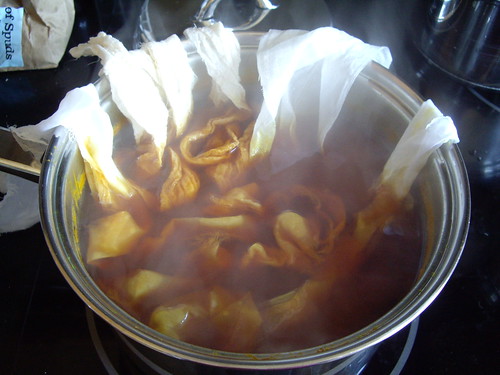
The fabrics started to take up the colour immediately, a beautiful rich yellow. Apparently you can modify this to red with the addition of baking soda, but I wanted to see what colour the pure turmeric would result in first.

As before, I simmered the turmeric for an hour, then added the fabric and simmered for another hour. Finally the heat was turned off and the water left to cool before rinsing the turmeric out of the fabric. I could probably have kept the dye and used it again to create a paler colour – or perhaps tried to modify it the second time around.

Turmeric dyeing

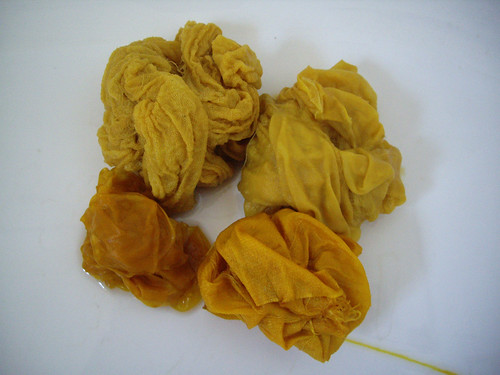
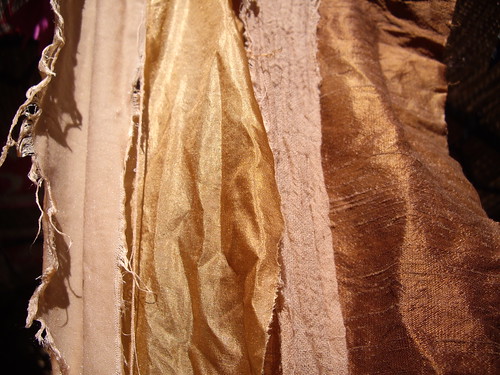
An awful lot of colour leached out of the fabrics as I was rinsing them, particularly the cotton and bamboo, but I was still left with nice bright colours.

Turmeric dyeing
Cotton muslin, silk paj, bamboo, silk dupion

I hung them out on the washing line to dry, loving the fantastically bright yellows, but bearing in mind the warning that turmeric isn’t terribly light fast as a dye. How bad could it be though, really?

Turmeric dyeing

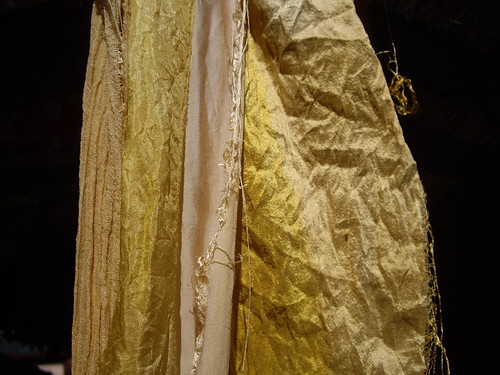
An hour and a half later, I had my answer! You can see the colour change most clearly in the silk dupion (on the right), which has a stripe down it where it was covered by the bamboo as it dried. As a friend pointed out, when you want to shift a turmeric stain it seems to stay for ever, so perhaps the answer is to leave the stained garment out in the sun for a bit…

The colours are still lovely, if nowhere near as bright as they were to begin with. This photosensitivity does limit what I can do with the finished fabric though. I don’t want to go out  on a summer day wearing a bright yellow scarf, and come home wearing a white one!

Tea dyeing experiment

Out of date decaf

I’ve been reading a lot of books and blogs about dyeing fabric with plants lately, and I wanted to do a little experiment. But chemical mordants seemed a bit complicated and scary, and I don’t yet have a dedicated saucepan just for dyeing, and I wanted to get started straight away. So, inspired by Tiina Teaspoon, I decided to start with tea!

Tiina recommends freezing your used teabags until you’ve got enough to dye with, which I’m going to start doing from now on, but tucked away in the back of the cupboard I knew I already had a box of decaffeinated tea bags that had gone out of date. I started with 16g of dry fabric (silk paj, cotton muslin, bamboo and silk dupion) and 17g of tea, or five tea bags.

Fabric swimming in the tea

I filled a saucepan with hot water, and simmered the tea bags for an hour. Our water here is very hard and full of lime, and there was a lot of scum on the top of the tea. I did wonder whether I should have used distilled water, but not having any to hand, tap it had to be. I took out the tea bags before adding the fabric. All of the fabrics had previously been through the washing machine to remove any starches or other treatments left over from the manufacturing process (including the silk), and I soaked them in warm water before putting them into the tea.

Taking up the colour

The resulting brew was very dark, and the fabric began to take up the colour immediately. If I just wanted to dull down a piece of cotton, or create an “antique” look, I wouldn’t have needed to do much more than just dip the fabrics into the tea.

Almost finished

In the end I let the pot simmer for another hour, by which time almost all of the water had evaporated. Possibly I should have left the lid on the pot, and turned the temperature down even lower. The water really only needs to be kept hot for this, not actually boiling. After the hour I turned off the heat and left the fabrics in the tea dye to cool down. I kept stirring the fabrics around throughout the entire process, maybe every fifteen to twenty minutes or so. (Every time I walked through the kitchen. I wasn’t very precise about it!)

Tea dyed fabrics
From left to right: bamboo, silk paj, cotton muslin, silk dupion

I rinsed the fabrics under the shower until the water ran clear, which was actually very quickly. I didn’t use any detergents, just warm water. I knew the cellulose fibres (bamboo & cotton) would take the colour differently from the protein (silk) ones, but I’m suprised at the depth of colour and the variations between them all. The fabrics are still a little bit damp in this photo, so the dupion has dried a little bit paler, but the two silks have kept their shine, and the colours are just lovely.

I’m now on the lookout for more plant dyes that can be used without any additional chemicals to fix the colour or release the dye. In the meantime I have plenty of tea in the house, so I can feel an experiment coming on!

Swarovski & Silk

Beaded Collar

This is what reminded me that I hadn’t shown you the silk steampunk outfit – I finally found the time to make one of the accessories to go with it!

In our original sketches, we’d talked about a beaded silk collar and matching wrist cuffs. I haven’t made those yet (I’ve run out of gold eyelets!), but I did manage to make the collar.

The silk is an offcut from the original dress, lined with an offcut of the bodice lining which was heavily interfaced. The Swarovski crystal beads were all unpicked from the original dress, and then sewn onto the collar in two sessions in front of the telly – taking a total of seven and a half hours. That’s just the beading, not the original unpicking, or the sewing of the collar itself. I knew all that time I spent sewing on beads in the bridal shop would come in useful eventually!

I deliberately didn’t take the beads all the way up to the edge, partly to allow a little bit of the lovely fabric to show through, and partly so that there was nice soft silk against the skin.

Beaded Collar

When the collar catches the light, it really sparkles. These photos really don’t do it any kind of justice at all – you really need to see it move. The silk has a beautiful lustre of its own, and with the beads on top… wow. I know that sounds as though I’m blowing my own trumpet, but really, it’s the materials doing all the hard work!

Beaded Collar

And this is how it fastens – three eyelets on each side at the back, and a simple ribbon. Nice and long, so you can just skip it off over your head rather than having to re-lace it every time.

I’ve still got loads of beads left over, more than enough for the matching cuffs. I might ask to borrow the jacket, so I can use up the remaining beads on the sleeves.

I’m really tempted to make one of these for myself… although where I’d go wearing a sparkly crystal collar I’m not too sure! Maybe I’ll just wear it to work.

Steampunk Silk

Steampunk Silk

This is a costume that I made for a friend, way back last October for a Hallowe’en event. She already had a corset and a mask, so they dictated the copper, gold and brown accent colours.

The ivory silk had a previous incarnation as her wedding dress. The slightly distressed texture is a result of putting it through the washing machine, but it left the fabric amazingly soft and a joy to work with. There was enough to make a jacket and a bustled skirt, with some left over for accessories.

Steampunk Silk

The jacket is a modification of two Simplicity steampunk patterns – 2172 and 2207. The back and sleeves were taken from 2207, with the front from 2172. I added lacing into the princess seams at the back, and beading to the cuffs. The buttons were from the original dress, as were the Swarovski crystal beads.

Steampunk Silk

The bustle and swags are in sections, all interchangeable so they can be worn in lots of different ways. They simply tie at the waist with ribbons. The skirt itself is bustled at the back, using ribbons sewn through channels in the centre back seam. This can be let down into a train. There’s a little bit of ruching at the front too, conveniently placed to disguise a stain that wouldn’t come out! (Shhh, don’t tell…)

I also made a petticoat to go underneath, to give  the skirt a little bit of extra fullness. I don’t know why I didn’t take a photograph of that, but you can just see the ruffle peeking out, here. There are better photos of the outfit being worn to stunning effect, but I need to get permission before I post them here. Thankfully it was well received, and looked absolutely fabulous!

As always, I wish I’d had a bit more time to make this. The bustle and swags were a bit rushed, and I would have liked to add much more beading to the cuffs. But I absolutely loved making it. It was a real treat to work with such sumptuous silk duchess satin, and to swap creative ideas with a friend. In fact, it’s inspired me to modify my own wedding dress for an event I’m attending in May.  You’ll have to wait and see how it turns out!

Silk Corset

Alice's Silk Corset

This is a little underbust corset which matches the silk waistcoat. It’s made to a pattern that I drafted a couple of years ago. The only alteration I made to the original was that I boned the modesty panel with plastic rather than metal. This makes it much lighter to wear, and as the metal boning isn’t really structural in the modesty panel it’s probably superfluous.

I didn’t have quite enough fabric left to make matching bias binding for the edges, so it’s bound with satin. You can’t see the true shape of the corset on my dressform – it’s much more curvy in real life. Even though it looks very plain and simple, I’m really pleased with the way this corset’s turned out. I hope its new owner is too!

Silk Waistcoat

Scot's Silk Waistcoat

This is Simplicity 4923 again – a waistcoat to go with the pirate shirt.

It took me a whole day to hand-work fifteen buttonholes and then sew on fifteen buttons. Blimey. I know I’m quite slow at hand-sewing, but I didn’t expect it to take so long! It was worth it though. The waistcoat looks really lovely with the matching buttons, and although I had no choice about making the buttonholes by hand (stupid sewing machine), I think they look quite smart.

(I have a horrible sneaking suspicion that I’ve accidentally sewn the buttons on the “women’s” side… but there’s nothing I can do about it now.)

I only made one change to the pattern, and that was to make the pockets functional. I hate pocket-flaps without pockets underneath, and this waistcoat definitely looks better with pockets than without. I broke out my trusty Reader’s Digest Complete Guide to Sewing and learned how to make a bound pocket with a flap. It’s not the neatest sewing I’ve ever done, but the slightly wobbly corners are completely hidden by the flap, and it looks lovely from the outside. Possibly it’s not the best idea to try out a new technique for the first time on somebody else’s clothes… but hooray for functional pockets!

Fifteen silk buttons

Fifteen Silk Buttons

These are fifteen silk-covered buttons, waiting to take their place on a waistcoat to match the pirate shirt. They have to wait until I’ve made all the buttonholes by hand. This could take some time…

Silk Rose

Silk rose

I made this little silk rose a while ago, but forgot to take a photo to show you. It’s backed onto a magnet, so you can wear it as a buttonhole on a smart jacket without making pin holes. Now I’ve seen this larger-than-life picture I think I might add a silk-covered button in the centre, just as an extra little finishing touch.

Bow Ties are (still) Cool.

Waistcoat & bow tie

Back in March I managed to find a lovely TM Lewin women’s shirt for a bargain price in TK Maxx. We were going to see Mr B the Gentleman Rhymer, so I thought it would be a good idea to make a gentlemanly sort of an outfit for the occasion.

The bow tie is Kwik Sew 3183, as usual, and the waistcoat is Butterick 4815, view C. They’re both made from a lovely silk dupion which is turquoise shot with purple. The buttons on the waistcoat have a little flower embossed into them, which is filled with purple enamel.

I also made a pair of trousers (Vogue 1034, view A) and a jacket (Vogue 1132, view B), but I don’t seem to have taken any photos of those. I must grab them out of my wardrobe and pop them onto the dress form for you!