New Year, New Dress!

Vogue 8813

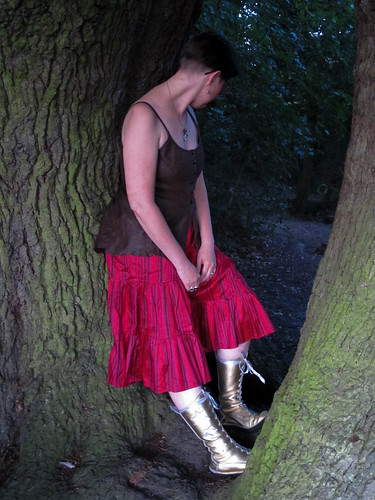
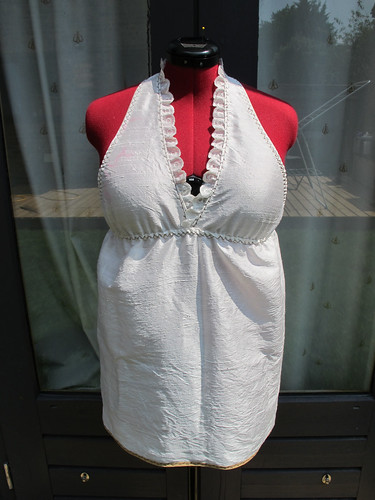
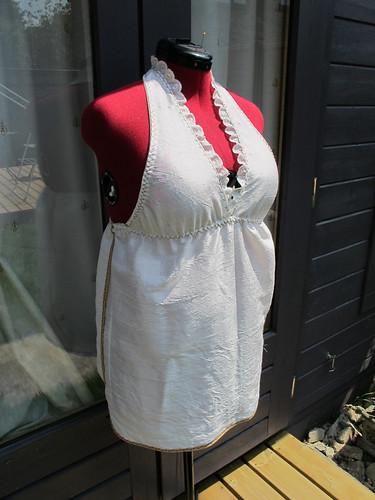
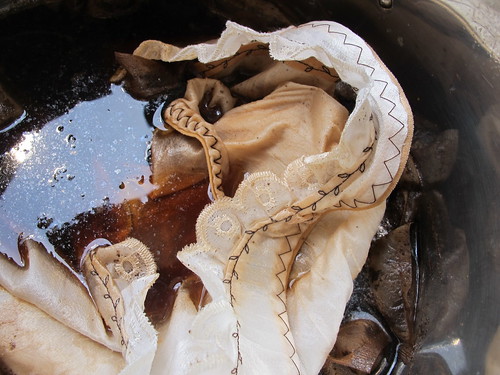
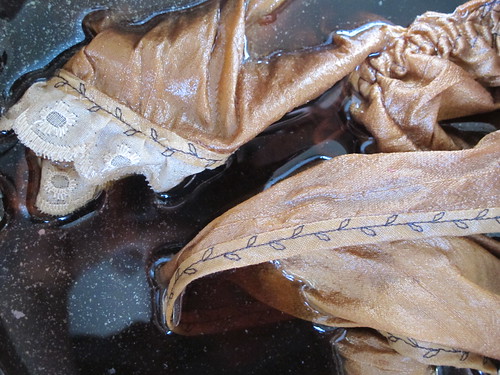
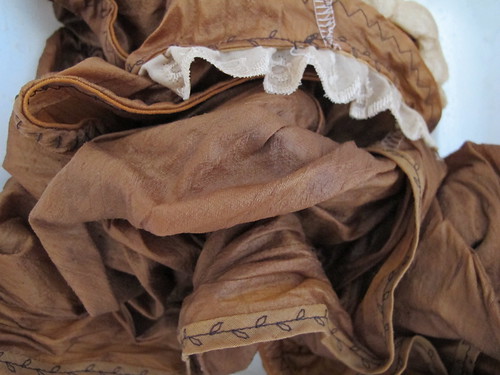
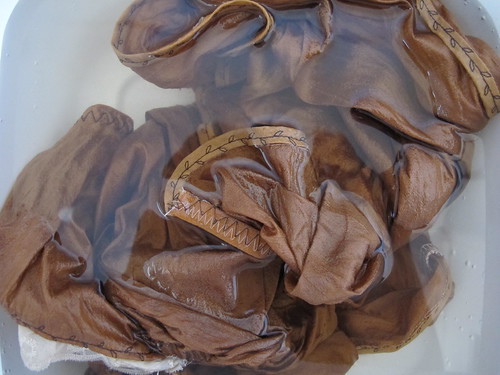
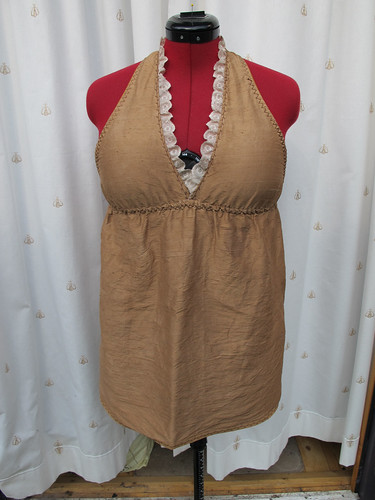
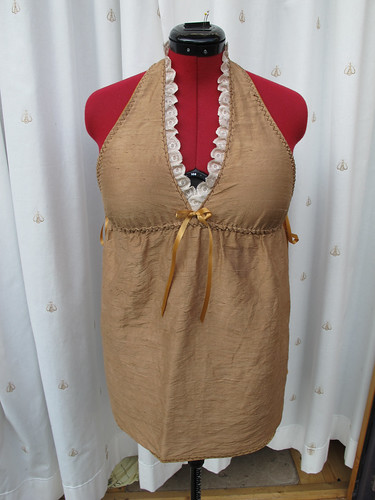
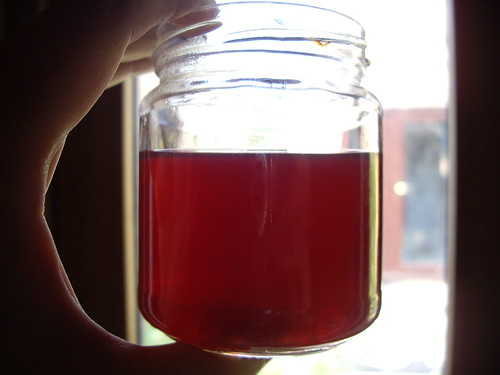
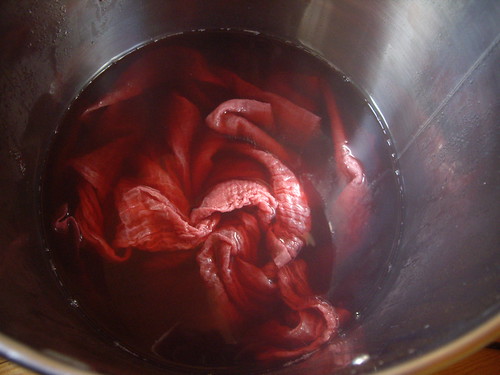
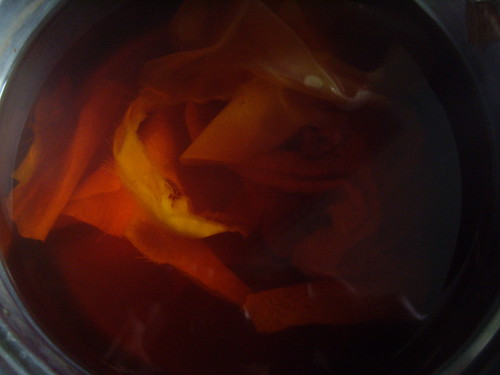
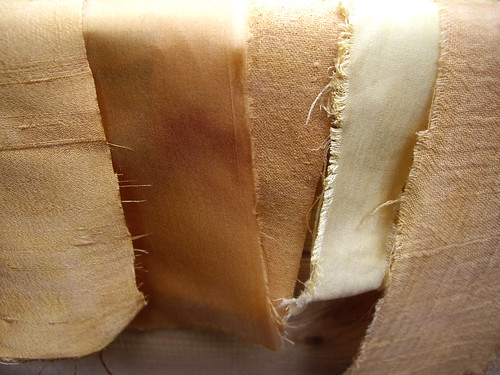
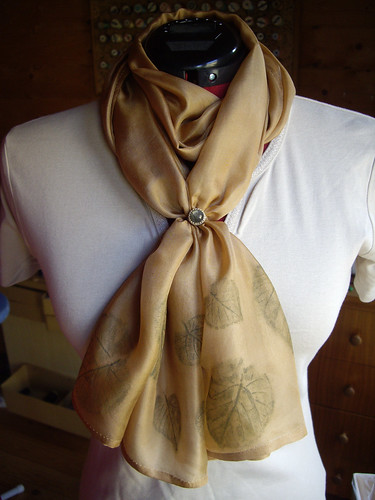
First completed garment of 2014 – this is Marcy Tilton for Vogue, 8813. The fabric is silk noile, dyed in my tea urn with about six months’ worth of saved tea bags. I blogged about my failed attempt at dyeing the fabric and scalding my foot, but apparently I failed to mention the second attempt, which came out looking lovely! Well, I think so, anyway.

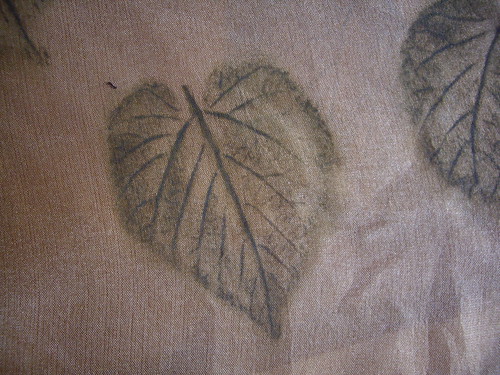
Paul doesn’t much like the black marks, which are iron stains from rusty nails. I’m slightly concerned that people will make “hilarious” jokes about tea stains, but I really love this fabric. I plan to over-dye it every six months or so with the tea bags that I’m still saving. I figure that each successive dye bath will add new stains and patches and colours, which will add lots of depth and texture.

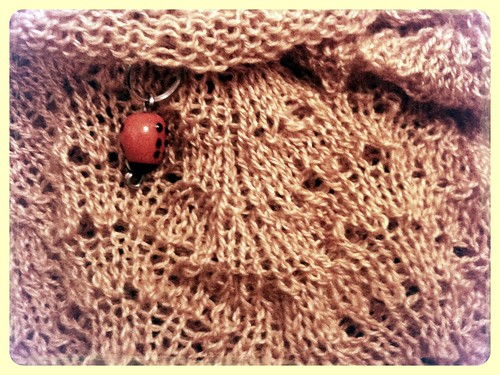
Some of you have been following the progress of the smocking over on Facebook… ta-da!

Vogue 8813

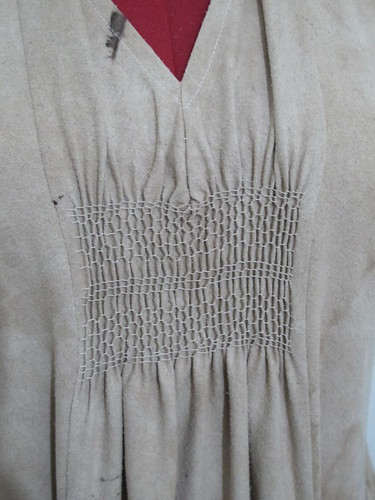
I’m slightly peeved about the wonky bit in the centre, caused by a dart that I added after the smocking rather than before. Note to self: read the instructions all the way through, especially if you’re making changes to the pattern.

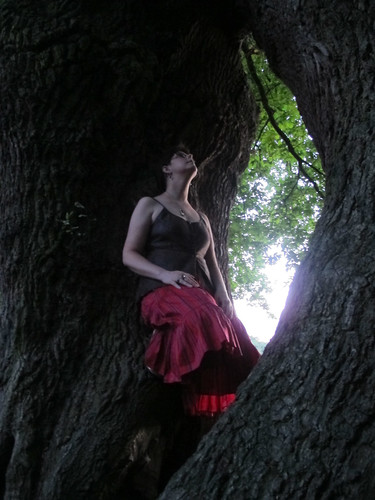
Often when I’ve finished sewing something I’m so sick of the sight of it that I can’t even think about making another one. I enjoyed working on this dress so much that I’m already thinking about different colour combinations, and wondering how many I can get out of the fabrics I’ve already got in my stash. There’s a version suggested with contrasting colour panels, one with buttons on the enormous pockets… and I want to wear them all!

Vogue 8813

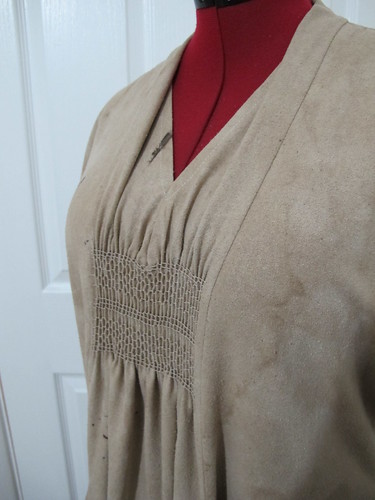
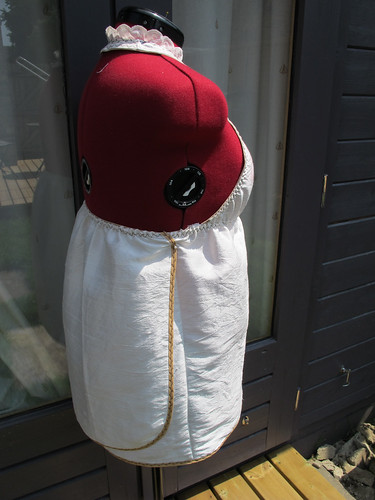
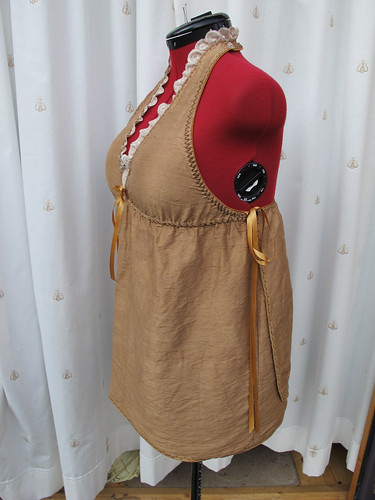
Notes on the pattern: BE CAREFUL. It’s not difficult by any means, but there are a few places where you need to be really accurate otherwise you’ll come unstuck. You also need to read the instructions properly *cough*, as the pocket construction in particular is a bit origami-like. The back, by way of contrast is completely plain and flat.

Fitting-wise, the only measurement you need to worry about is the full bust. If the dress is too tight across the front, it’ll be too tight under the arms and through the cap sleeves. I still went down a size from my usual Vogue Large to a Medium, and there’s plenty of room to breathe.

Vogue 8499

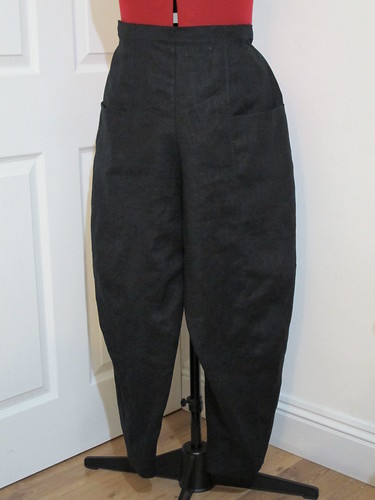
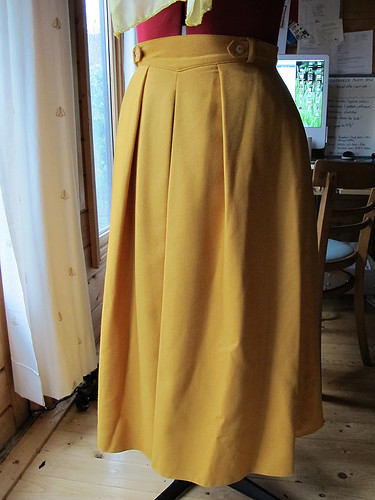
This, as you may be able to tell, is not another dress. It is another Marcy Tilton though, Vogue 8499. These trousers have a flat front and elasticated back, large pockets, and darts at the knees. They’re very wide at the hips, tapered at the ankle, and sit very high at the waist. Perfect!

My only complaint about this pattern is that there are no actual garment measurements given anywhere! If I’d sewn my usual Vogue size 18 or 20, these would have been phenomenally huge, even for a very baggy style like this. After reading a lot of reviews online, I took a gamble and made a size 14. This has turned out spot on, thank goodness. Any smaller and I wouldn’t have been able to pull them over my hips, but thankfully there’s still plenty of ease.

Once again, parts of the pattern require absolute accuracy. I ended up with a tiny hole in the waistband where I sewed past one of the small dots by a couple of stitches, though it was easily fixed.

This picture doesn’t really do them justice, although I think you can get an idea of the shape. I think they’ll also work well in lightweight corduroy, or maybe a nice drapey suit wool. They’re so comfortable that, like the dress, I want to make more already!

Weekend Knitting

Feather & Fan

This weekend so far has been mostly about the knitting. Paul and I are both in the grip of a minor lurgy, and there isn’t a great deal we can do to hurry the house move along, so it seemed like the perfect time to have a quiet day curled up on the sofa.

The picture above is a lovely laceweight cowl, which I thought I’d almost finished… but now I think I might only be halfway through. Because the silk & merino yarn is so fine, it folds down to almost nothing when you wear it. So I’m going to double the length, which will allow it to be pulled up over the head and worn as a snood as well as just a cowl.

I’m really enjoying knitting this, it’s very therapeutic. Only one row in six is patterned, so just as you start to think you might get a bit bored of nothing but plain knitting, a simple patterned row comes along to make you concentrate for a minute or two. Even though I’m quite a slow knitter, this one seems to be coming along quite quickly.Hopefully it’ll carry on that way, because I’ve got quite a lot more knitting to do between now and Christmas!

Silk bloomers & Fairysteps…

Silk bloomers & Fairysteps

You remember the silk bloomers I made yesterday?

Silk bloomers & Fairysteps

This is what happened when we went outside to take some photos of them.

Silk bloomers & Fairysteps

I’m sure the local dog-walkers thought we were bonkers!

Thanks to Fairysteps for the gold boots and leather top, and of course to Paul for patiently taking dozens of photos, most of which I pulled a face at. (Or in.) I am not confident having my photo taken, or trying to climb a tree!

Striped silk bloomers

silk bloomers

Still on a bloomer-making kick, these beauties are made from a silk skirt that I haven’t been able to fit into for years. The leather top is a very rare item of clothing from Fairysteps.

As part of the Unravelling course, I’ve been thinking about the various roles I play, and about alter-ego characters. I’ve still got the Angel Islington’s long white wig, from Progress Theatre’s production of Neverwhere (yes, I know I still haven’t shown you the photos of the costumes!), and I was brushing it out the other day whilst thinking about fairies and other mythical creatures. I’ve recently made white bloomers and a white linen dress, so I could have put together a beautifully ethereal white outfit really easily, and gone down to the woods to take some photos. But my first thought was “but white will just get really dirty”.

Then it struck me that not all mythical creatures are ethereal and fairylike. Some of them are tied to the earth, and fascinated by its processes, and invariably a little bit grubby if not completely covered in mud! So along came a leather top, and a not entirely practical pair of silk bloomers.

What this outfit needs, I think (apart from a good iron), is a little bag or tie-on pocket of some description. I mean, there’s no point going out investigating in the woods if you’ve got nowhere to stash your treasures, is there?

Hopefully I’ll be able to convince Paul to take some photos of me mucking about in the woods in this outfit later in the week. We’ll see.

Assam Tunic

Assam Tunic

Today I decided to take a day off from doing anything I “ought” to be doing (like packing the house ready for the move), or any kind of “useful” sewing (like more bloomers and summer tunics to wear in this ridiculous heat), and make something that had been nagging at the back of my brain for a few weeks.

This is a silk dupion tunic, with broderie anglais trim and bias tape edging, waiting to be dyed in the tea urn. The stitching is brown because it’s polyester and therefore won’t dye, so I wanted to use a colour that would tone in afterwards. (In future I’ll use cotton thread, but right now I’m using up the stash.)

Assam Tunic

The tunic is elasticated all the way around the waist, under the bust, and around the edges of the top. It wraps over at the back. The broderie anglais trim might be polyester, polycotton at best, so it’ll probably stay cream.

Assam Tunic

It has a fixed, ruffled halter neck, and wrapover back detail. The bias trim is polycotton, and won’t take the dye as well as the silk, so I chose a colour that would still look good with whatever dye it did take up.

Assam Tunic

First dip into the tea urn…

Assam Tunic

The tea itself had been brewing for about two hours. This photo was taken after about another two hours in the tea, and the fabric was already much darker than it looks in the photo! You can see that the trim is still very pale, but the bias binding tones in nicely. The machine embroidery on the trim represents the tea leaves in the dye. (Although I used bags in the urn, as they were left over and out of date.)

Assam tunic

Squeezed out of the tea, the bias trim has taken up the dye nicely, but the broderie anglais is still very pale. The white overlocking on the shoulders is unfortunately on the outside. I had a bit of a moment when applying the broderie anglais, so I made the executive decision that two little white seams on the back of the neck wouldn’t matter too much on an experimental piece.

Assam tunic

Rinsed until the water ran clear…

Assam tunic

Here it is dry, and just waiting for finishing touches. I hung it outside, in the shade so it wouldn’t get bleached by the sun, and it dried at record speed. (I suppose the heatwave has its uses.)

Assam tunic

I added gold ribbons at each side to fasten, and another one in the front for decoration.

Assam tunic

Ta-daa!

There is a little bit of a story behind this piece. The assam tea bags were bought specifically for a reunion with a long-lost friend, about three years ago. Said friend then always seemed to be too busy to come and visit me enough times to actually drink the tea, and we’ve since all but lost touch again. It wasn’t until I came to tidy the kitchen cupboards to sell the house, that I realised the teabags have actually been out of date for eighteen months. Rather than waste them, I thought I’d turn them into something pretty for myself.

To shop, or not to shop


Image © Zara

Yesterday I went shopping, and did not buy this silk blouse with hot air balloons and air ships all over it from Zara. I also did not buy two tops with skulls on them from H&M, and a pair of Thundercats Converse from Schuh.

I did buy four pairs of stripy over-the-knee socks, and a bright yellow skirt.

Yellow wool skirt

It’s calf length, 75% wool 25% nylon, fully lined, with pockets in the side seams. Smells a little bit of mothballs now I’ve ironed it (yes, believe it or not I did iron it before I took this picture – clearly not hard enough!), but that’s nothing that a little wash won’t fix. And it shows that somebody’s bothered to look after it. The label says “Yessica” which, if memory serves, is 1980s C&A. It cost a grand total of £6, from the Sue Ryder shop.

I have a sneaky suspicion that this skirt will sit in my wardrobe (along with the tweedy one I bought in May) and be relegated to “vaguely Steampunk dressing-up”. Which would be sad, as it’s a really lovely skirt, great quality, and with details that I really like.

So, why buy the skirt that won’t get worn, and not the blouse that will?

I’ve been trying very hard not to buy mass-produced things from chain stores this year. The biggest exception has been my ever-increasing collection of TM Lewin shirts, but I think I’ve got enough now to last me a good few years. (She says, having just looked at the website and seen a purple flowery one, and a blue one with birds… both reduced from £85 to £20… argh!)

So whilst the hot air balloon blouse is lovely, and silk, and would in fact look great with this yellow skirt… and the skull tops from H&M were just generally awesome (I’m still a sucker for anything with skulls on it)… and the Thundercats Converse were hilarious… they’re all mass-produced, fast fashion, and designed to be disposable. And I don’t want that from my clothes any more.

I’d always thought I wasn’t one to worry about what other people thought of my clothes (see: yellow coat, silly prints, bow ties, gold boots, pink hair, Being A Goth), but I think part of my reluctance to wear skirts like this and my tweedy one is the fear that people might look at me funny. I had a teacher at middle school (anyone remember Mrs Trubshaw?) who was widely ridiculed for wearing unusual clothes, including an a-line skirt with a forest design appliqued round the hem, which a) I would now kill for, and b) was probably actually quite fashionable in the mid 1980s. As kids, we were absolutely horrible to her, and I’m basically afraid of being treated the same way. Which is silly really, because if I coped with people shouting at me in the street when my hair was pink, I’m sure I can deal with a few sideways glances at a yellow skirt.

Perhaps one of my resolutions for 2013 should be to stop falling back into the comfortable trap of jeans and t-shirts, and start putting more effort into wearing the clothes that I really love.

Spoonflower Scarf

Portwrinkle

This is a photo that I took in Portwrinkle, Cornwall, in June 2010.

Spoonflower scarf

This is how a part of it looks printed onto silk crepe, by Spoonflower.

Not as saturated as I would have liked, but given that the original image wasn’t quite at a high enough resolution for me to be able to mess with it too much, I’m really pleased with the way it’s come out!

Next time (and there will be one), I’ll have the image printed onto Spoonflower’s silk cotton blend. It’s much lighter, with a higher sheen, and I think it’ll show the colours better than the crepe which has a matt finish.

The image is 36″ (96cm) square, which is about the smallest size that works as a neck scarf once it’s folded in half. I think this will be better in the silk cotton too, as it’ll drape better around the neck. The silk crepe’s a bit bouncy! If I was a sensible, patient person (stop laughing at the back!) I’d have sent off for swatches first, but then I wouldn’t have had the finished scarf back before Christmas.

Now I just need to decide on the best way to hem it, and then I’ll take some photos of the finished scarf!

Natural Dyeing: Blackcurrant Surprise!

Blackcurrant Dye
silk dupion, silk paj, silk noil, bamboo, cotton muslin

Surprise, because grey really wasn’t the colour I was expecting to get from blackcurrants! I’m completely amazed by the difference between the colours on the protein-based silks, and the cellulose-based bamboo and cotton.

This one was a bit of an experiment using more of Sarah‘s leftovers – this time some blackcurrant pulp that had already been cooked. I decided to try out my new and exciting Ebay-purchased tea urn, so I tipped the blackcurrant mush into a nylon mesh laundry bag and chucked it in. As well as about 6 litres of water, I also added a litre of out-of-date blackcurrant, pear and apple juice. Well, it seemed better than just pouring it away!

Blackcurrant Dye

I left the liquid and the blackcurrants in the tea urn for about two hours – one to warm up, and one to cook the blackcurrants and release the dye. It came out a bit cloudy, because of the fruit juice, but a pretty colour!

At this point I also added some salt, as a fixing agent. The only salt I had in the cupboard included an anti-caking ingredient – E536, or potassium ferrocyanide. I suspect this has affected the colour a little bit, probably pushing it slightly towards the blue end of things.

Blackcurrant Dye

At this point I threw in the fabric, and gave it all a good stir. I left the tea urn switched on for another couple of hours which, in hindsight, was a mistake. The temperature was too hot for the silk, and it’s lost its sheen a little bit. Next time I’ll heat up the plant matter to make the dye, then switch off the urn as soon as the fabric goes in.

Blackcurrant Dye

This is what came out of the urn – exactly what I’d expected! A metre and a half of cotton muslin, in a beautiful pink. So you can imagine my surprise when I turned on the shower, began to rinse the excess dye away, and ended up with this…

Blackcurrant Dye

… a beautiful piece of delicate grey cotton, with no pink left in it whatsoever!

There’s enough here to make three scarves, one of which I will most definitely be keeping for myself. I wear a lot of grey, and I can just imagine decorating the ends of this with some smoky quartz beads for a bit of added sparkle.

It was very peculiar though, watching that beautiful pink colour just wash away. Not a disappointment, by any means, but definitely a surprise!

Onion skin dye

Onion skin dye

This post is for Sarah, who’s very kindly been saving her leftovers! Paul and I don’t eat onions (weirdly, they burn Paul’s mouth – does anyone else have this?), so Sarah’s been hanging on to her onion skins for me. This looked like a lot, but only weighed about 6g, so I only added small pieces of fabric that added up to about 8g. Judging by the colour of the dye bath, I could have added a lot more!

Onion skin dye

As with my previous experiments, I simmered the onion skins in almost-boiling water for about an hour, before removing them and adding the wet fabric. I left the fabric simmering for another hour, then switched off the heat and left the saucepan to cool.

Once again, I didn’t use any kind of mordant for this experiment. The colour of the water led me to hope for some really bright fabrics, but the actual results are a lot more muted. I’m definitely going to need to add mordants to my experiments if I want to explore the full potential of the colours available from plants.

Onion skin dye
Silk dupion, silk paj, silk noil, bamboo, cotton muslin

This time the dye came out rather patchy, and with very marked differences between the fabrics. The silks have once again taken up the colour much better than the vegetable fibres. The bamboo in particular is very pale, especially in contrast to the silk paj!

The next part of this experiment is to keep some of the fabric pieces I’ve dyed so far closed away in a book, and leave others to hang in a window. That will help me to find out how fade-resistant they are. (I suspect not at all.)

Sarah also gave me a big pot full of previously-cooked blackcurrant pulp, which is very exciting! I had intended to try solar dyeing with it, but I don’t think the sun’s come out once today. Maybe at the weekend, when it’s forecast to perk up a little! Failing that it’s back to the big cooking pot, in the hope of coming out with a lovely shade of blue.

Stef’s Silk Scarf

Stef's Silk Scarf

Okay, so I did manage to get a little something done in between my increased hours at work. This was an extra little birthday gift for my mother-in-law.

I dyed the silk with tea, which came out a little bit paler than my previous experiment, but still a lovely colour. Very interesting on the silk too, as the tone seems to change in different light.

Stef's Silk Scarf

I hemmed all four edges by hand, using teeny-tiny slip slitches. Each corner has an equally teeny-tiny briolette bead dangling from it. The gemstones are labradorite, and the facets catch the light beautifully.

Stef's Silk Scarf

Each end of the scarf is embellished with leaf rubbings. Done using Inktense pencils, they picked up the detail of the leaves beautifully. Appropriately for a silk scarf, the leaves came from the mulberry tree at the Museum of English Rural Life.

Stef's Silk Scarf

Because no scarf is complete without a scarf ring, I set a matching faceted labradorite cabochon into one of Kernowcraft’s new easy-to-set rings. Because the band is adjustable, it’s perfect to use as either a scarf ring or to wear on your finger.

Stef's Silk Scarf

And here it is!

I’ve also been working on a tie-dyed turmeric scarf for myself. I did wear it last week, but I haven’t hemmed the long edges yet, so it needs a little bit more work. I’m so pleased with how Stef’s scarf ring turned out, and how incredibly easy it was to make, that I’m thinking I might need a brass and labradorite one for myself…