Natural Dyeing: Blackcurrant Surprise!

Blackcurrant Dye
silk dupion, silk paj, silk noil, bamboo, cotton muslin

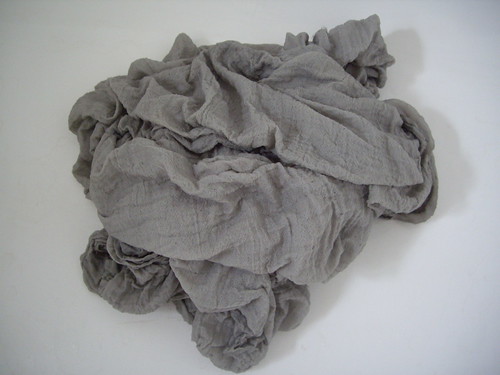
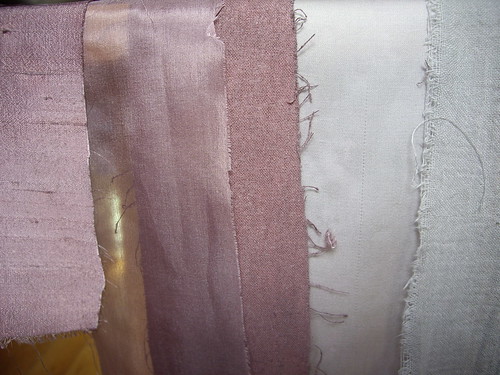
Surprise, because grey really wasn’t the colour I was expecting to get from blackcurrants! I’m completely amazed by the difference between the colours on the protein-based silks, and the cellulose-based bamboo and cotton.

This one was a bit of an experiment using more of Sarah‘s leftovers – this time some blackcurrant pulp that had already been cooked. I decided to try out my new and exciting Ebay-purchased tea urn, so I tipped the blackcurrant mush into a nylon mesh laundry bag and chucked it in. As well as about 6 litres of water, I also added a litre of out-of-date blackcurrant, pear and apple juice. Well, it seemed better than just pouring it away!

Blackcurrant Dye

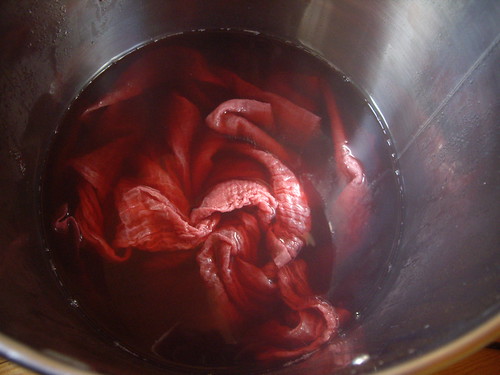
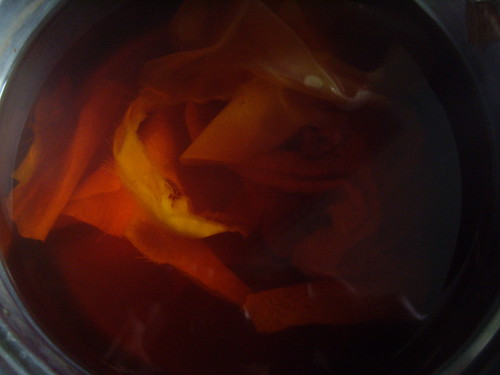
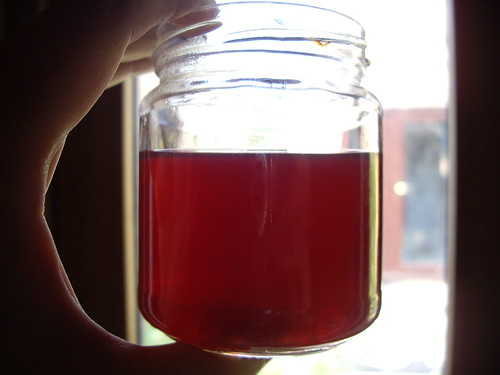
I left the liquid and the blackcurrants in the tea urn for about two hours – one to warm up, and one to cook the blackcurrants and release the dye. It came out a bit cloudy, because of the fruit juice, but a pretty colour!

At this point I also added some salt, as a fixing agent. The only salt I had in the cupboard included an anti-caking ingredient – E536, or potassium ferrocyanide. I suspect this has affected the colour a little bit, probably pushing it slightly towards the blue end of things.

Blackcurrant Dye

At this point I threw in the fabric, and gave it all a good stir. I left the tea urn switched on for another couple of hours which, in hindsight, was a mistake. The temperature was too hot for the silk, and it’s lost its sheen a little bit. Next time I’ll heat up the plant matter to make the dye, then switch off the urn as soon as the fabric goes in.

Blackcurrant Dye

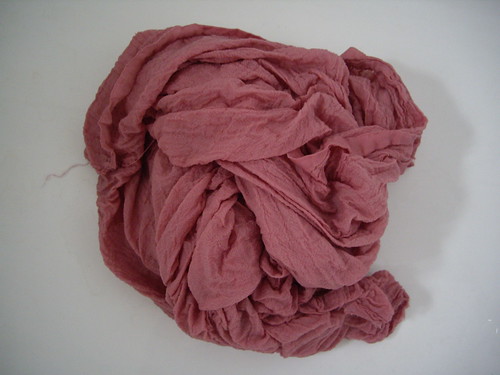
This is what came out of the urn – exactly what I’d expected! A metre and a half of cotton muslin, in a beautiful pink. So you can imagine my surprise when I turned on the shower, began to rinse the excess dye away, and ended up with this…

Blackcurrant Dye

… a beautiful piece of delicate grey cotton, with no pink left in it whatsoever!

There’s enough here to make three scarves, one of which I will most definitely be keeping for myself. I wear a lot of grey, and I can just imagine decorating the ends of this with some smoky quartz beads for a bit of added sparkle.

It was very peculiar though, watching that beautiful pink colour just wash away. Not a disappointment, by any means, but definitely a surprise!

Onion skin dye

Onion skin dye

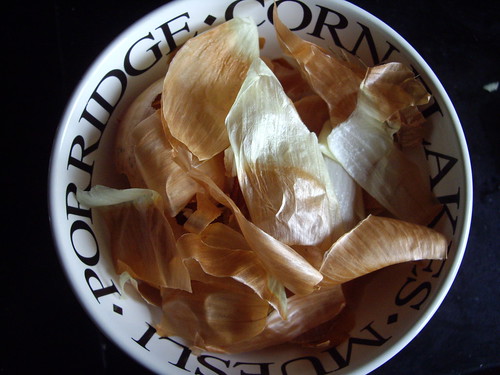
This post is for Sarah, who’s very kindly been saving her leftovers! Paul and I don’t eat onions (weirdly, they burn Paul’s mouth – does anyone else have this?), so Sarah’s been hanging on to her onion skins for me. This looked like a lot, but only weighed about 6g, so I only added small pieces of fabric that added up to about 8g. Judging by the colour of the dye bath, I could have added a lot more!

Onion skin dye

As with my previous experiments, I simmered the onion skins in almost-boiling water for about an hour, before removing them and adding the wet fabric. I left the fabric simmering for another hour, then switched off the heat and left the saucepan to cool.

Once again, I didn’t use any kind of mordant for this experiment. The colour of the water led me to hope for some really bright fabrics, but the actual results are a lot more muted. I’m definitely going to need to add mordants to my experiments if I want to explore the full potential of the colours available from plants.

Onion skin dye
Silk dupion, silk paj, silk noil, bamboo, cotton muslin

This time the dye came out rather patchy, and with very marked differences between the fabrics. The silks have once again taken up the colour much better than the vegetable fibres. The bamboo in particular is very pale, especially in contrast to the silk paj!

The next part of this experiment is to keep some of the fabric pieces I’ve dyed so far closed away in a book, and leave others to hang in a window. That will help me to find out how fade-resistant they are. (I suspect not at all.)

Sarah also gave me a big pot full of previously-cooked blackcurrant pulp, which is very exciting! I had intended to try solar dyeing with it, but I don’t think the sun’s come out once today. Maybe at the weekend, when it’s forecast to perk up a little! Failing that it’s back to the big cooking pot, in the hope of coming out with a lovely shade of blue.

Turmeric dyeing experiment

Turmeric dyeing

It seems as though I’ve been bitten by the dyeing bug rather badly. I can’t stop thinking about plants I could grow in my garden (coreopsis, safflower, weld, marigolds), or plants I could forage (walnuts, elderberries, sumac), or plants I could ask friends-and-relations to save for me (onion skins, rhubarb leaves).

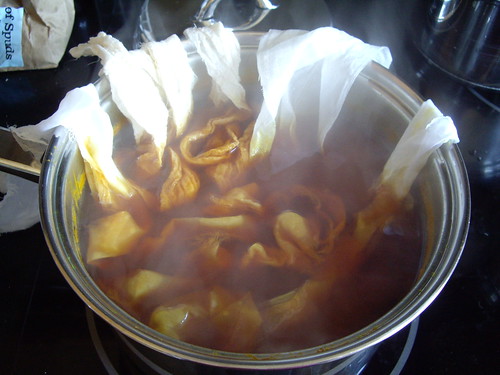
I’m still working in the kitchen without mordants, so the next obvious step was turmeric. A quick trip to the corner shop procured a nice big bag of spice, and I found these instructions online. I used them as more of a guideline than a rule, as I don’t have a thermometer, and I don’t have any coffee filters to strain out the turmeric powder.

Turmeric dyeing

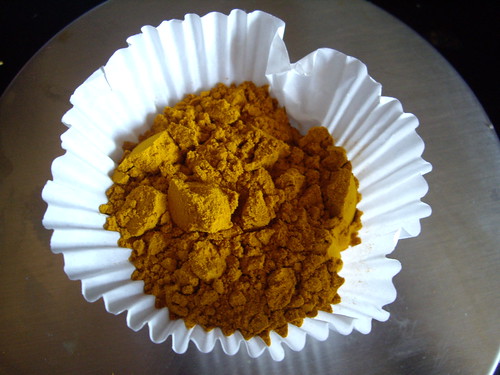
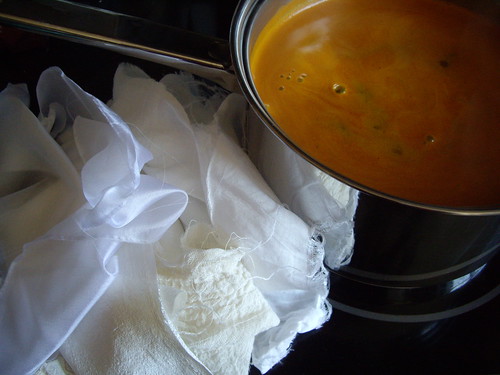
I cut slightly larger pieces of fabric this time, with a total dry weight of 30g. I used 25g of turmeric powder, and the water looked extremely yellow! As before, all the fabric’s been pre-treated by a quick trip through a hot wash, and it was all dampened under the hot tap before putting it in with the turmeric.

Turmeric dyeing
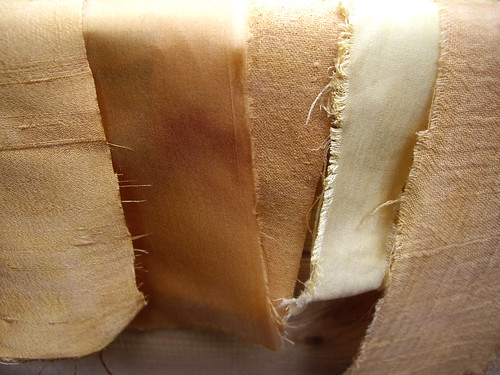
Left to right: silk paj, silk dupion, bamboo, cotton muslin

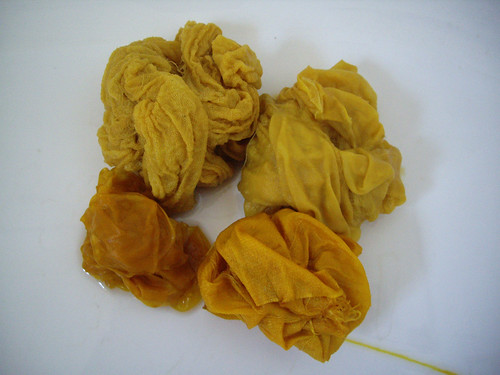
The fabrics started to take up the colour immediately, a beautiful rich yellow. Apparently you can modify this to red with the addition of baking soda, but I wanted to see what colour the pure turmeric would result in first.

As before, I simmered the turmeric for an hour, then added the fabric and simmered for another hour. Finally the heat was turned off and the water left to cool before rinsing the turmeric out of the fabric. I could probably have kept the dye and used it again to create a paler colour – or perhaps tried to modify it the second time around.

Turmeric dyeing

An awful lot of colour leached out of the fabrics as I was rinsing them, particularly the cotton and bamboo, but I was still left with nice bright colours.

Turmeric dyeing
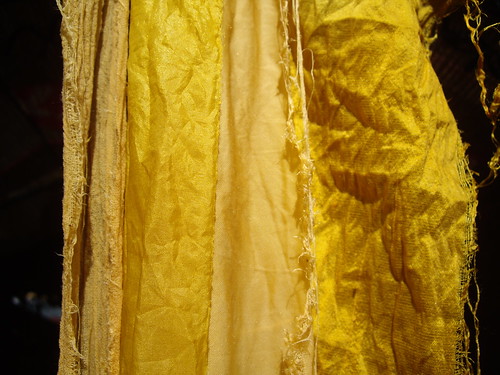
Cotton muslin, silk paj, bamboo, silk dupion

I hung them out on the washing line to dry, loving the fantastically bright yellows, but bearing in mind the warning that turmeric isn’t terribly light fast as a dye. How bad could it be though, really?

Turmeric dyeing

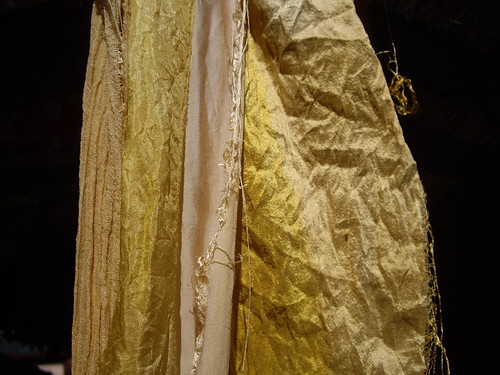
An hour and a half later, I had my answer! You can see the colour change most clearly in the silk dupion (on the right), which has a stripe down it where it was covered by the bamboo as it dried. As a friend pointed out, when you want to shift a turmeric stain it seems to stay for ever, so perhaps the answer is to leave the stained garment out in the sun for a bit…

The colours are still lovely, if nowhere near as bright as they were to begin with. This photosensitivity does limit what I can do with the finished fabric though. I don’t want to go out  on a summer day wearing a bright yellow scarf, and come home wearing a white one!

Tea dyeing experiment

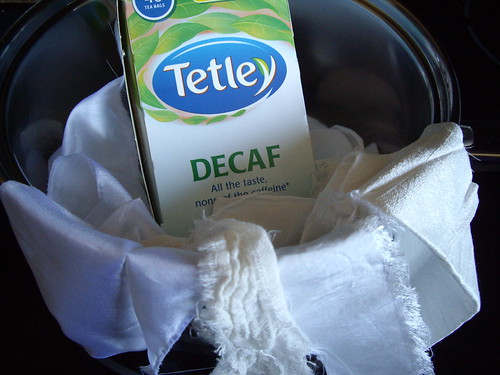
Out of date decaf

I’ve been reading a lot of books and blogs about dyeing fabric with plants lately, and I wanted to do a little experiment. But chemical mordants seemed a bit complicated and scary, and I don’t yet have a dedicated saucepan just for dyeing, and I wanted to get started straight away. So, inspired by Tiina Teaspoon, I decided to start with tea!

Tiina recommends freezing your used teabags until you’ve got enough to dye with, which I’m going to start doing from now on, but tucked away in the back of the cupboard I knew I already had a box of decaffeinated tea bags that had gone out of date. I started with 16g of dry fabric (silk paj, cotton muslin, bamboo and silk dupion) and 17g of tea, or five tea bags.

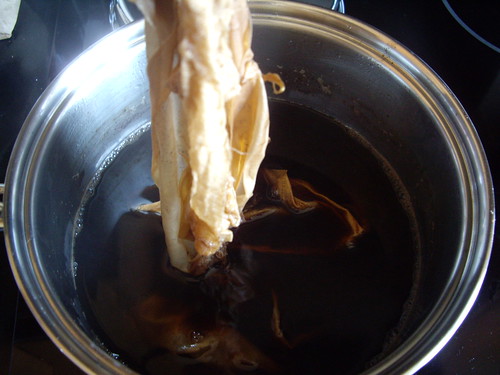
Fabric swimming in the tea

I filled a saucepan with hot water, and simmered the tea bags for an hour. Our water here is very hard and full of lime, and there was a lot of scum on the top of the tea. I did wonder whether I should have used distilled water, but not having any to hand, tap it had to be. I took out the tea bags before adding the fabric. All of the fabrics had previously been through the washing machine to remove any starches or other treatments left over from the manufacturing process (including the silk), and I soaked them in warm water before putting them into the tea.

Taking up the colour

The resulting brew was very dark, and the fabric began to take up the colour immediately. If I just wanted to dull down a piece of cotton, or create an “antique” look, I wouldn’t have needed to do much more than just dip the fabrics into the tea.

Almost finished

In the end I let the pot simmer for another hour, by which time almost all of the water had evaporated. Possibly I should have left the lid on the pot, and turned the temperature down even lower. The water really only needs to be kept hot for this, not actually boiling. After the hour I turned off the heat and left the fabrics in the tea dye to cool down. I kept stirring the fabrics around throughout the entire process, maybe every fifteen to twenty minutes or so. (Every time I walked through the kitchen. I wasn’t very precise about it!)

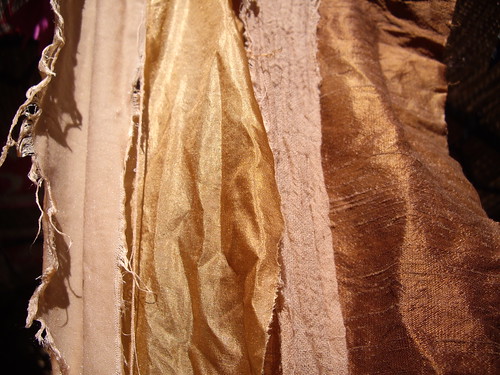
Tea dyed fabrics
From left to right: bamboo, silk paj, cotton muslin, silk dupion

I rinsed the fabrics under the shower until the water ran clear, which was actually very quickly. I didn’t use any detergents, just warm water. I knew the cellulose fibres (bamboo & cotton) would take the colour differently from the protein (silk) ones, but I’m suprised at the depth of colour and the variations between them all. The fabrics are still a little bit damp in this photo, so the dupion has dried a little bit paler, but the two silks have kept their shine, and the colours are just lovely.

I’m now on the lookout for more plant dyes that can be used without any additional chemicals to fix the colour or release the dye. In the meantime I have plenty of tea in the house, so I can feel an experiment coming on!

Silk Waistcoat

Scot's Silk Waistcoat

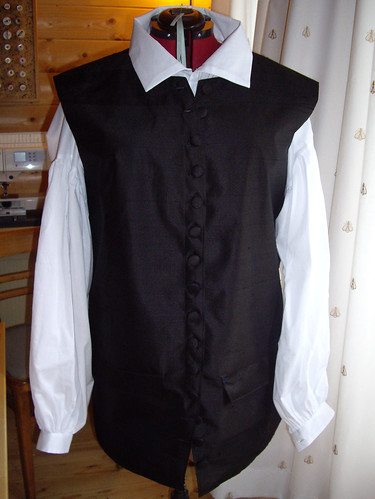
This is Simplicity 4923 again – a waistcoat to go with the pirate shirt.

It took me a whole day to hand-work fifteen buttonholes and then sew on fifteen buttons. Blimey. I know I’m quite slow at hand-sewing, but I didn’t expect it to take so long! It was worth it though. The waistcoat looks really lovely with the matching buttons, and although I had no choice about making the buttonholes by hand (stupid sewing machine), I think they look quite smart.

(I have a horrible sneaking suspicion that I’ve accidentally sewn the buttons on the “women’s” side… but there’s nothing I can do about it now.)

I only made one change to the pattern, and that was to make the pockets functional. I hate pocket-flaps without pockets underneath, and this waistcoat definitely looks better with pockets than without. I broke out my trusty Reader’s Digest Complete Guide to Sewing and learned how to make a bound pocket with a flap. It’s not the neatest sewing I’ve ever done, but the slightly wobbly corners are completely hidden by the flap, and it looks lovely from the outside. Possibly it’s not the best idea to try out a new technique for the first time on somebody else’s clothes… but hooray for functional pockets!

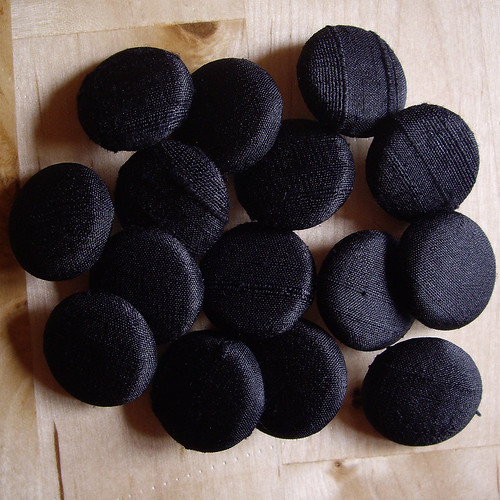
Fifteen silk buttons

Fifteen Silk Buttons

These are fifteen silk-covered buttons, waiting to take their place on a waistcoat to match the pirate shirt. They have to wait until I’ve made all the buttonholes by hand. This could take some time…

Bow Ties are (still) Cool.

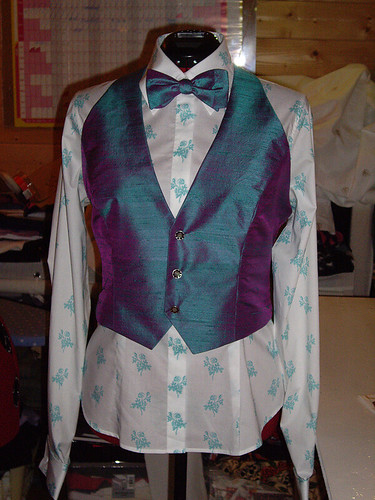
Waistcoat & bow tie

Back in March I managed to find a lovely TM Lewin women’s shirt for a bargain price in TK Maxx. We were going to see Mr B the Gentleman Rhymer, so I thought it would be a good idea to make a gentlemanly sort of an outfit for the occasion.

The bow tie is Kwik Sew 3183, as usual, and the waistcoat is Butterick 4815, view C. They’re both made from a lovely silk dupion which is turquoise shot with purple. The buttons on the waistcoat have a little flower embossed into them, which is filled with purple enamel.

I also made a pair of trousers (Vogue 1034, view A) and a jacket (Vogue 1132, view B), but I don’t seem to have taken any photos of those. I must grab them out of my wardrobe and pop them onto the dress form for you!

Silk summer dress

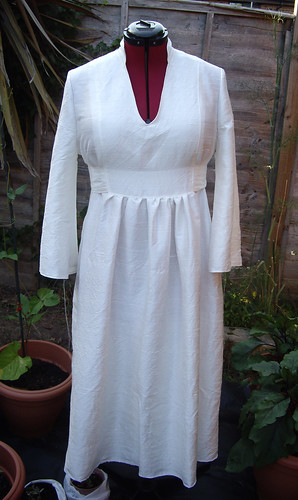
Burda 7808

As promised a couple of days ago, here’s an almost-finished Burda 7808. Just the hand-sewing and thread-neatening to go, and then it’s done.

As it turns out, I followed the instructions more than I expected to – although there are a few things that I’ll change next time. I added extra gathering to both the front and back panels, to make the skirt more full. I also added longer and wider ties, and attached them to the front panel rather than the back. I decided to make the sleeves, but left off the cuffs because I happened to like the shape of the sleeves left loose.

I think the only additional change I’d make is to round off the neckline and also raise it a little. I have a favourite necklace which is my guideline for where a neckline should sit, and this one’s just a little bit too low.

Half way through putting the dress together I had a worrying moment. I looked at the dress and suddenly panicked that I was accidentally making a dress for an eight year old bridesmaid. Thankfully I think the sleeves and the collar have rescued it from looking too much like a child’s party dress. I’m hoping that the ivory dupion looks summery without being too weddingy – although my own wedding dress was bright pink chiffon, so this doesn’t seem terribly bridal to me!

I’m sure that making a dress with a collar and sleeves during the hottest day of the year must seem quite mad, but I have a lot of walking in the sun to do this week, so I need to be cool but covered in order to avoid frying myself. This should do the job very nicely indeed.

Laura’s beaded wedding bag

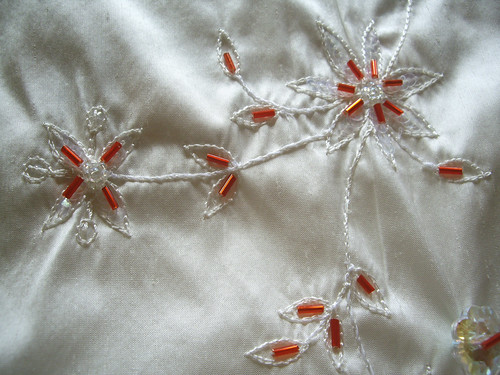
Laura's beaded wedding bag

I don’t like showing other people’s wedding things in their entirety before the wedding, so this is just a little snapshot of Laura’s beaded wedding bag.

The ivory silk dupion was already beaded and embroidered. I removed some of the clear beads, and replaced them with red ones. You can also see the pretty flower shaped iridescent button, there in the bottom right hand corner.

Laura and Rob are getting married in September.

Congratulations!