Dyeing Disaster Averted!

old duvet cover dyed pink with dylon machine dye

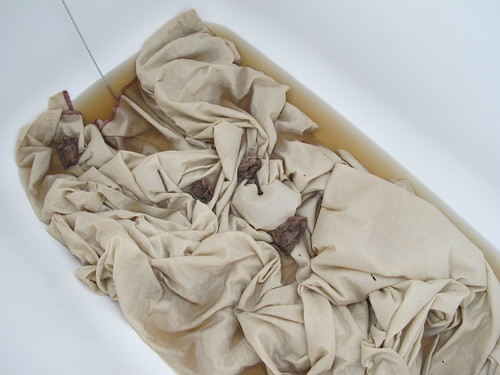
At the weekend I decided to buy some Dylon dye pods to transform some duvet covers from my stash so I could use them to make dresses, rather than buying five metres of brand new fabric that I didn’t really need. This first one was almost a complete disaster that thankfully has turned out well in the end! 

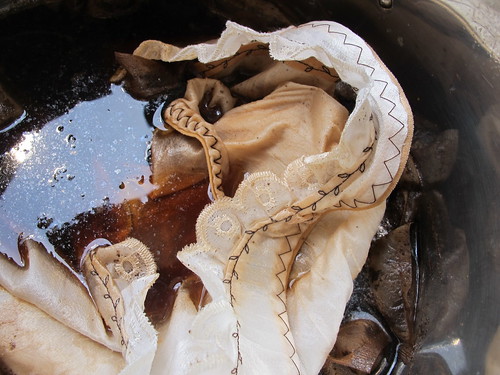
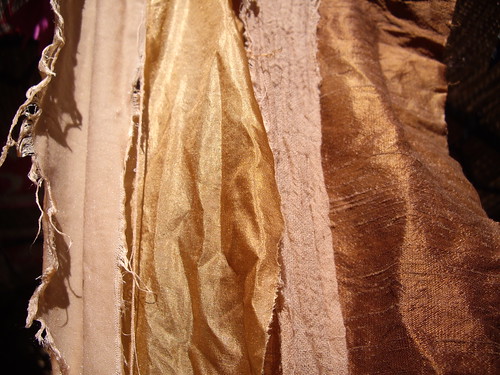
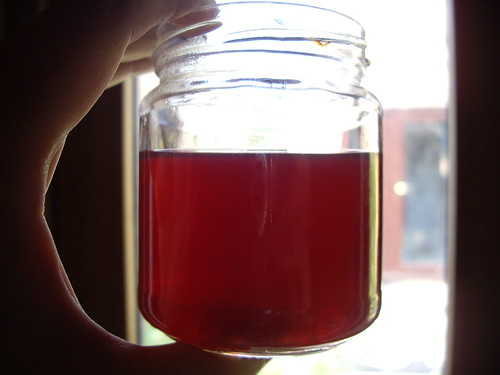
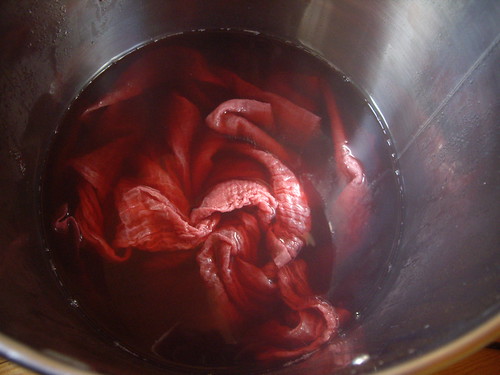
The fabric is poly/cotton, so I knew it wouldn’t dye to a deep colour… but I forgot that I really needed two pods per duvet cover, and I accidentally bought Tulip Red (a bright, blue-toned red) instead of Rosewood Red (a deeper, orangey-red) because I couldn’t remember which one matched my previously-dyed yoga pants. Oops. Thankfully it’s actually turned out a really nice shade of bright pink, so I’m calling that a success! 

(It doesn’t even remotely go with my yoga pants, but it’s turned out beautifully in its own right!)

old duvet cover dyed turquoise with dylon machine dye

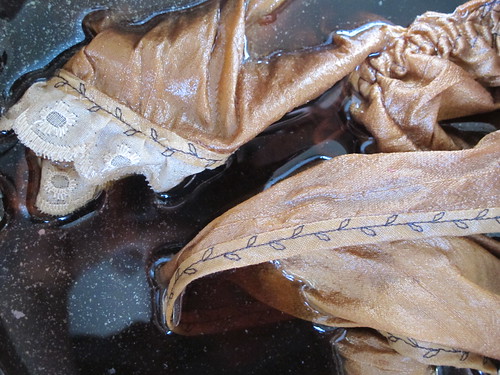
This photo is not terribly accurate colour-wise, it has to be said. It’s Paradise Blue, a lovely shade of turquoise. This duvet cover does seem to be 100% cotton (there was no label), as the dye has taken more deeply. Again, I used one pod instead of two, so it’s dyed to a lighter shade and the original print still shows through. I’m really looking forward to turning this one into a pretty dress for the summer – and hopefully showing you a much better photo of the fabric! 

old duvet cover dyed blue with dylon machine dye

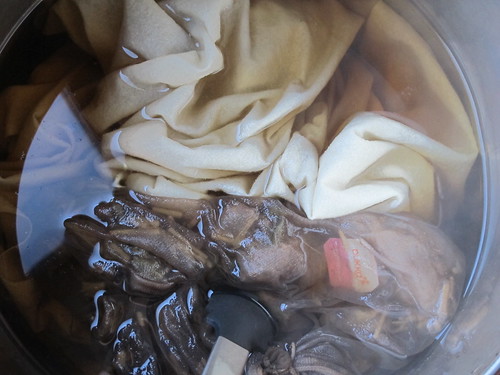
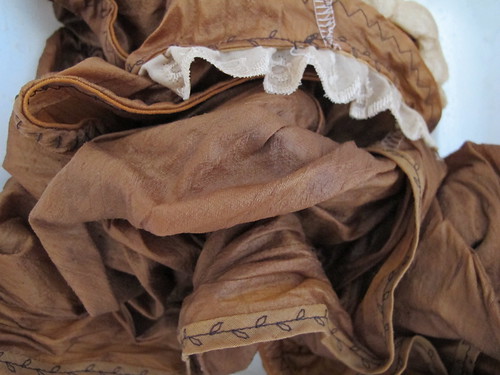
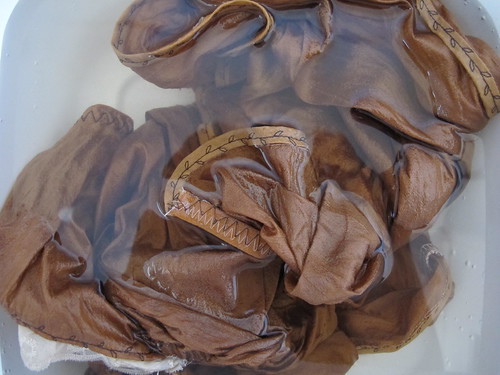
This photo has also come out terrible, and doesn’t give a good impression of the fabric at all! It was white, again a poly/cotton blend, so you get an interesting textured or marled effect where the dye doesn’t stick to the polyester part of the fabric. Believe it or not, it’s dyed with Navy Blue, and in real life it’s a rather nice faded denim colour. All I need to do is decide on the pattern placement for the different print elements, and this one will be a winter shirt dress for wearing over a long-sleeved t-shirt and thick leggings.

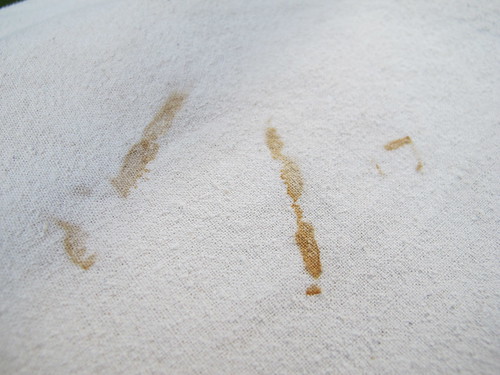
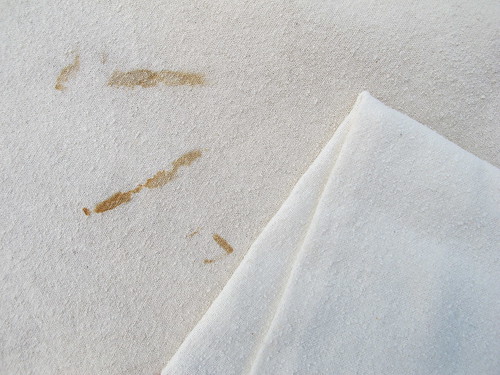
Coincidentally a friend messaged me over the weekend for advice on how to dye her son’s school trousers without ruining her washing machine. All I could say was follow the instructions, and you’ll be absolutely fine! I must admit that, living in a hard water area, you do get dye residue sticking to any limescale that’s on the glass door or the rubber seal, but it washes off if you can be bothered. In all the (many!) years I’ve been using Dylon in the washing machine I’ve never had any kind of incident in terms of the following washes having traces of colour on them, or with dyed garments leaching colour onto anything else. I highly recommend it for breathing a new lease of life into your clothes – and duvet covers!

(PS – Dylon? Still not impressed with the new pods, to be honest. I love that they contain the salt now, I love that you can just chuck them in the machine… but I hate that they’re a big lump of plastic that my local council doesn’t recycle. At least with the old packaging I could recycle the cardboard box, and there was only the small plastic lining sachet to go in the bin. Oh, and they’re an absolute nightmare to store in a cupboard, because they don’t stack, and they take up loads of space!)

A lovely parcel arrived from France!

Cozy Memories goodies

Look at all these lovely goodies! I recently entered a giveaway on Facebook, when Sonia of Cozy Memories reached 500 Likes. I was very surprised to find out that I’d actually won – and here’s my prize!

I was expecting to receive the festive Mug Rug, shown at the bottom – a lovely organic cotton coaster with room for a biscuit on the side. I was also expecting the scarf, which I chose with a voucher that was part of the prize. I wasn’t expecting the matching square coaster, the lovely handwritten card, and the delicious tea bag! The scarf came in a lovely hand-dyed drawstring bag too, which looks to be just the right size for storing my tarot cards.

Cozy Memories Scarf

Best of all – everything is made by hand, with natural materials. The linen scarf is dyed with Sicilian Sumac, sourced locally to Sonia, and the colour is a gorgeous grey-toned purple. I had a really hard time choosing which item I wanted from her shop, as everything is so lovely! I was very taken with this zipped pouch, dyed to the same colour and decorated with a ginkgo leaf.

Cozy Memories scarf

In the end I decided to choose something that I could wear often, and that would fit in with my wardrobe. I have a lot of clothes in variations of black, grey and purple, so this scarf will go with all of them! I especially like the variations in the dye that you can see in the photo above. They add a lovely depth to the fabric, and a reminder of the natural dyeing process.

In the spirit of paying things forward, I’ll be having a giveaway on The Eternal Magpie Facebook page, when I reach 100 Likes. Now I just need to choose something that I think people would actually like to win!

Shopping Spree: Skulls, Skeins and a Spindle

Handmade polymer & gemstone earrings from Honey & Ollie

Look what arrived today – my lovely new earrings from Honey and Ollie! They arrived super quick, all the way from California. So quick that I wasn’t expecting them for about another week! As a recovering goth, I’m still irresistibly drawn to Things With Skulls, and these were so pretty that I couldn’t resist.

Handmade polymer & gemstone earrings from Honey & Ollie

The skulls and flowers are made from polymer clay, with sparkly little gemstones dangling at the top. The findings (all hand made) are copper, which complements the stones beautifully. The hooks are a really lovely shape too, and they stay in place very securely. Despite being quite big, they’re really light to wear, and I’m definitely going to be adding more Honey and Ollie pieces to my wish list.

Handspun and hand dyed yarn from The Outside, with hand carved drop spindle

This is my little haul from the Museum of English Rural Life‘s Traditional Craft Fair.

All from The Outside, on top is a hand-carved drop spindle. It’s made from yew, and it’s a bottom-whorl style. Excuse the red acrylic leader, I was so keen to try it out that I grabbed the first thing I could find! Once I’d figured out how to do a half-hitch to hold the yarn in place, I grabbed some fluff and started to spin straight away. It’s a lovely spindle, and I’m really happy to have one of my own instead of having to borrow from work. Now I can practice at home, and make as much wobbly, lumpy yarn as I like!

Handspun and hand dyed yarn from The Outside

Speaking of yarn… this is neither wobbly, nor lumpy. It’s handspun from blue faced leicester wool, and it’s lovely and soft. The vibrant colours are all from natural dyes, and this should be just enough to make a pair of rainbow-striped mittens.

The colours, from left to right, are:
1) Weld & madder
2) Weld
3) Weld & woad
4) Weld & woad dipped in madder
5) Woad & weld
6) Woad
7) Cochineal (orange oxidised to blue)

I had a lovely chat with Romilly about dyeing, including planting up a dye garden and not being afraid of mordants. There is definitely going to be some experimentation with colour and fluff in my future! For now though, I need to practice my spinning, and think about the perfect pattern for my new rainbow-coloured mittens.

That didn’t go well…

Silk noil dyeing failure!

Last night, in my rush to have a piece of dyed fabric to work with today, I brewed up some tea in the urn and threw in a big piece of silk. Unfortunately, I didn’t really think through how much dyestuff I was using compared to the amount of fabric – and the answer turned out to be not nearly enough.

Silk noil dyeing failure!

The silk had been in the tea urn all night, but you can see that it came out almost exactly the same colour as it went in. The very weak colour of the dye solution is another clue that it simply wasn’t going to work!

Silk noil dyeing failure!

As I was emptying the tea urn into the bath I cleverly managed to kick the spout, which poured scalding water all over the top of my foot. Not my best move ever. It damn well hurts, and I don’t quite know how I’m going to put shoes on to go to work tomorrow. (I don’t have any ballet flats, all my shoes fasten over the instep. Ouch.)

Silk noil dyeing failure!

This is the finished colour of the fabric – almost exactly the same as before I started. It does have some rather nice iron stains (an experiment in modifying the dye with rusty nails), but they’re so spread out that they just look like a bit of an accident. Perhaps another dip in the tea urn with a darker dye will make them look a bit more purposeful. You can see below that the fabric has changed colour a little bit… but it’s far, far too subtle for my liking!

Silk noil dyeing failure!

I do this often – not the dropping scalding water on my foot, thank goodness, but the mad rush to have something prepared for my one day off during the week. Once a month there’s an odd junction in my work rota where I work all weekend and don’t get two days off in a row that week. My following day off always seems extremely precious (and a long away away from the previous one, even though it isn’t really), and I invariably put too much pressure on myself to get lots of creative work done that day. Sometimes that pressure works really well and I get lots of sewing done (such as the orange jacket I made on Thursday and wore to work on Friday), but sometimes… well, sometimes you get days like today.

Emergency Craft Box

The house move is panicking me too, as my new sewing room is also going to be the box room until we can get some flooring put down in the loft, so I don’t know how long it’ll be until I can get everything unpacked. Thankfully my knitting will remain accessible (it’s currently squashed into the storage end of the sofa), and I’ve packed myself an Emergency Craft Box. This contains lots of embroidery, plenty of sketching materials, and lots of small bits and pieces that I never seem to get around to. I might just pop a few bits of needle felting kit in there too. I may not get around to making use of any of it, in all the disruption of the move. But it makes me feel much calmer about it all to know that if I want to, I can.

Felted slippers – part two

Too big!

Awww. They’re too big! I knew the lasts would be quite roomy around the top, and I do plan to cut these away to more of a ballet pump shape. But still. Too big.

Too big!

Look how much room there is in front of my toes! The lasts were a size 38/39, but I’d say these have come out around a 40/41. I did toy with the idea of chucking them in the washing machine, to take the hard work out of shrinking them a little bit more, but was so worried about them coming out the right size to fit my two year old niece that I decided against. (Not that I begrudge her a pair of pink felted slippers, but I want these to be mine!)

Soles and insoles

So, I went back to my long-neglected shoemaking supplies, and have given them rubber soles along with cork-and-fleece insoles. These are now sitting on the deck waiting to dry, while I’m recovering from the fumes from the glue. Wow, that stuff is disgusting. Even wearing a respirator and eye protection, you can still smell it a bit, and it still makes my eyes water. That, along with the terrifying health and safety warnings, makes me think that there must be a better solution than glue. I mean, what’s the point of painstakingly hand crafting a pair of slippers from natural materials… and then whacking four layers of highly toxic rubber cement all over them?

They do need some kind of sole though. On laminate flooring and tiles they’re slippery enough to be absolutely lethal, and of course without soles they can’t be worn outside. Time to go back to my shoemaking books (and maybe a few museums with non-leather shoes?) to come up with some more ideas.

Lots and lots of tea bags...

Meanwhile… this is the scene in my kitchen at the moment. Remember I said I was going to take all my frozen tea bags out of the freezer, to make room for ice cubes? Well, I did that, and I left them all out on a table in the garden to dry overnight. Except that, for the first time in weeks and weeks, it rained. It rained A LOT. So now they’re on the kitchen table, drying off again.

I have no idea whether they’ll have any dyeing properties left whatsoever, after the amount of water that landed on them last night! Hopefully they’ll still leave at least a little trace. I’m still not entirely sure what I’m going to dye with them yet, but after a few experiments with the leftovers in the tea urn filled with assam, I’m thinking it needs to be silk for the best results. Which is the one thing, of course, that I don’t have a great deal of in my fabric stash! I might need to make a bit of extra room by sewing up some of the cottons first…

Assam Tunic

Assam Tunic

Today I decided to take a day off from doing anything I “ought” to be doing (like packing the house ready for the move), or any kind of “useful” sewing (like more bloomers and summer tunics to wear in this ridiculous heat), and make something that had been nagging at the back of my brain for a few weeks.

This is a silk dupion tunic, with broderie anglais trim and bias tape edging, waiting to be dyed in the tea urn. The stitching is brown because it’s polyester and therefore won’t dye, so I wanted to use a colour that would tone in afterwards. (In future I’ll use cotton thread, but right now I’m using up the stash.)

Assam Tunic

The tunic is elasticated all the way around the waist, under the bust, and around the edges of the top. It wraps over at the back. The broderie anglais trim might be polyester, polycotton at best, so it’ll probably stay cream.

Assam Tunic

It has a fixed, ruffled halter neck, and wrapover back detail. The bias trim is polycotton, and won’t take the dye as well as the silk, so I chose a colour that would still look good with whatever dye it did take up.

Assam Tunic

First dip into the tea urn…

Assam Tunic

The tea itself had been brewing for about two hours. This photo was taken after about another two hours in the tea, and the fabric was already much darker than it looks in the photo! You can see that the trim is still very pale, but the bias binding tones in nicely. The machine embroidery on the trim represents the tea leaves in the dye. (Although I used bags in the urn, as they were left over and out of date.)

Assam tunic

Squeezed out of the tea, the bias trim has taken up the dye nicely, but the broderie anglais is still very pale. The white overlocking on the shoulders is unfortunately on the outside. I had a bit of a moment when applying the broderie anglais, so I made the executive decision that two little white seams on the back of the neck wouldn’t matter too much on an experimental piece.

Assam tunic

Rinsed until the water ran clear…

Assam tunic

Here it is dry, and just waiting for finishing touches. I hung it outside, in the shade so it wouldn’t get bleached by the sun, and it dried at record speed. (I suppose the heatwave has its uses.)

Assam tunic

I added gold ribbons at each side to fasten, and another one in the front for decoration.

Assam tunic

Ta-daa!

There is a little bit of a story behind this piece. The assam tea bags were bought specifically for a reunion with a long-lost friend, about three years ago. Said friend then always seemed to be too busy to come and visit me enough times to actually drink the tea, and we’ve since all but lost touch again. It wasn’t until I came to tidy the kitchen cupboards to sell the house, that I realised the teabags have actually been out of date for eighteen months. Rather than waste them, I thought I’d turn them into something pretty for myself.

Tea Dresses

Tea dyed fabrics

It’s a long while since I’ve done any experimenting with natural dyes, but I was thinking about tea dyeing again this morning. This came about because I’ve been saving all of my used tea bags (ordinary black tea and lots of different herbal varieties) and stashing them in the freezer. They’re all in bags, a month’s worth at a time. It turns out that I drink rather a lot of tea, so six months’ tea bags are now taking up rather a lot of space.

The reason I’ve been saving them this way is that I’ve been thinking about a (currently imaginary) project of making “tea dresses”. The dresses would be made from organic cotton, or vintage nightdresses, or maybe old doilies and table linens of various descriptions. Each one would be dyed after its construction, in a month’s worth of tea bags. Theoretically each one would be a different colour, as no two months’ tea combinations would be the same. (Actually, they’ll almost certainly all be beige, but that’s not necessarily a bad thing.)

However, something suddenly occurred to me, after watching a detergent advert on the telly.

How do you wash a dress that’s been dyed with tea, when modern detergents are specifically designed to remove precisely this kind of stain?

The Internets provided me with answers ranging from “add salt to the dye bath” to “rinse with a vinegar solution”, and people also suggested washing at various temperatures and with different kinds of detergents.

Conveniently, a friend’s husband is something of a detergent expert (how useful!), and he had this helpful advice:

“Effectively you’re using a tea as a direct dye so it will be prone to fading. But there are a couple of things you can do to help. After you’ve stained the cotton, let it dry and leave it for a few days. The air will help to set the colour a bit. You could also experiment with a hand wash in bicarbonate of soda which will darken the colour somewhat (alkali does that to tea for the same reason that it gets lighter when you put lemon juice in it). From a detergent point of view, we rely strongly on bleach to get rid of tea so avoid powder detergents and detergent additives such as Vanish. Then wash on a cool short cycle and you will create unfavourable conditions for tea removal. Just don’t spill coffee down yourself ;)”

Fantastic! So another friend’s suggestion of using a rubbish detergent (as she never manages to get stains out of anything, apparently) is a good one, as is only washing in cool water. The bicarb/alkali information is very interesting, and I happen to have some litmus paper in the Shed that I can use to find out what sort of pH produces good results in terms of both colour and fastness.

I know that these dresses will fade over time, and to me that’s going to be part of their charm. I plan to make them fairly plain, and then embellish them as I go along, so they’ll effectively remain a constant work in progress. I might even keep collecting my tea bags, and re-dye them once a year.

You all know what I’m like for getting all excited about a project and then wandering off before it ever gets past the imaginary stage, but I should probably actually try to make a start on this one soon. Not least because I don’t really want to have to explain to the removal men why I’m moving six months’ worth of frozen teabags from one house to another!

Beaded scarf – sneak preview

gemstone beads

Remember the Blackcurrant Surprise fabric I dyed back in August? The one that came out a lovely shade of grey? Well, it turned out to have another surprise in store for me. I’d folded it up and put it away while I decided what I wanted to do with it… and when I got it out, it had changed colour again! It’s now a pretty neutral beigey shade, and it still smells very faintly of blackcurrants.

It’s destined to be divided into three little scarves, each measuring about 50 x 150cm, with beading on the ends. The beads in the photo are all semi-precious stones. Smoky quartz on the left, moonstone in the middle and labradorite on the right. The sterling silver ring in the middle is set with a 12mm labradorite cabochon, and it’s adjustable so the scarf can be styled in different ways.

I chose the smoky quartz because its brown tones blend nicely with the fabric, but now I’m not sure whether or not it’s too dark. Perhaps once the beads are more spread out, with all three colours sprinkled in together, it won’t look quite so dramatic.

These are going to be Christmas presents, so  won’t be able to show you the finished scarves for a little while. In the meantime though, I do have some plans for these pretty little adjustable rings, so watch this space!

Natural Dyeing: Blackcurrant Surprise!

Blackcurrant Dye
silk dupion, silk paj, silk noil, bamboo, cotton muslin

Surprise, because grey really wasn’t the colour I was expecting to get from blackcurrants! I’m completely amazed by the difference between the colours on the protein-based silks, and the cellulose-based bamboo and cotton.

This one was a bit of an experiment using more of Sarah‘s leftovers – this time some blackcurrant pulp that had already been cooked. I decided to try out my new and exciting Ebay-purchased tea urn, so I tipped the blackcurrant mush into a nylon mesh laundry bag and chucked it in. As well as about 6 litres of water, I also added a litre of out-of-date blackcurrant, pear and apple juice. Well, it seemed better than just pouring it away!

Blackcurrant Dye

I left the liquid and the blackcurrants in the tea urn for about two hours – one to warm up, and one to cook the blackcurrants and release the dye. It came out a bit cloudy, because of the fruit juice, but a pretty colour!

At this point I also added some salt, as a fixing agent. The only salt I had in the cupboard included an anti-caking ingredient – E536, or potassium ferrocyanide. I suspect this has affected the colour a little bit, probably pushing it slightly towards the blue end of things.

Blackcurrant Dye

At this point I threw in the fabric, and gave it all a good stir. I left the tea urn switched on for another couple of hours which, in hindsight, was a mistake. The temperature was too hot for the silk, and it’s lost its sheen a little bit. Next time I’ll heat up the plant matter to make the dye, then switch off the urn as soon as the fabric goes in.

Blackcurrant Dye

This is what came out of the urn – exactly what I’d expected! A metre and a half of cotton muslin, in a beautiful pink. So you can imagine my surprise when I turned on the shower, began to rinse the excess dye away, and ended up with this…

Blackcurrant Dye

… a beautiful piece of delicate grey cotton, with no pink left in it whatsoever!

There’s enough here to make three scarves, one of which I will most definitely be keeping for myself. I wear a lot of grey, and I can just imagine decorating the ends of this with some smoky quartz beads for a bit of added sparkle.

It was very peculiar though, watching that beautiful pink colour just wash away. Not a disappointment, by any means, but definitely a surprise!

Hapa-zome

Plaintain leaf
Ribwort plaintain leaf

Today I have been mostly hitting plants with a hammer.

As you do.

It’s a technique called “hapa-zome”, coined by India Flint, that literally means “leaf dye” in Japanese.

Using a few sheets of thin cardboard to cushion my work table, I laid out a small piece of silk paj, and placed the plantain leaf on top. The silk was folded in half, leaving the leaf sandwiched in between. I popped a plain sheet of paper over the top… and hit it with a hammer.

A rubber hammer is advised, but I don’t have one of those, so I used my leather jeweller’s hammer instead. The trick is in hitting the leaf hard enough that the colour transfers onto the fabric, but not so hard that it turns into mush and gets stuck to the silk.

Nasturtium petals
nasturtium petals

The plantain leaf took a fair bit of hammering before I had a nice even print. These nasturtium petals, on the other hand, I barely had to touch. Interestingly, when I peeled them off the fabric they were almost transparent, having been bright orange beforehand. The print they’ve left behind is very soft and faint, almost ghostly.

These prints won’t be light fast, but apparently they should last a good couple of years if they’re not washed too often. I can’t decide whether or not I like them… but I’m keen to bring home some more leaves and have another go.