New Year, New Dress!

Vogue 8813

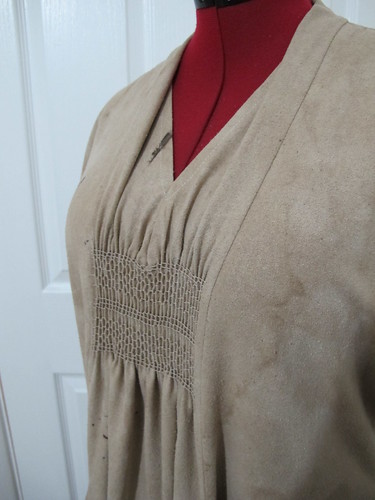
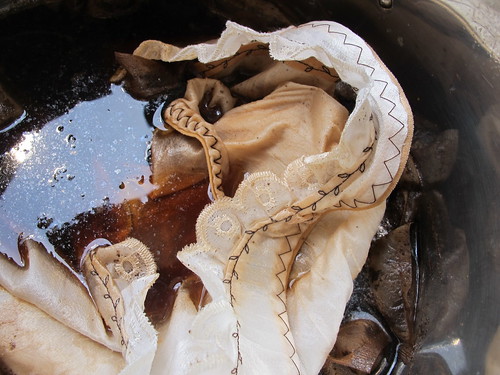
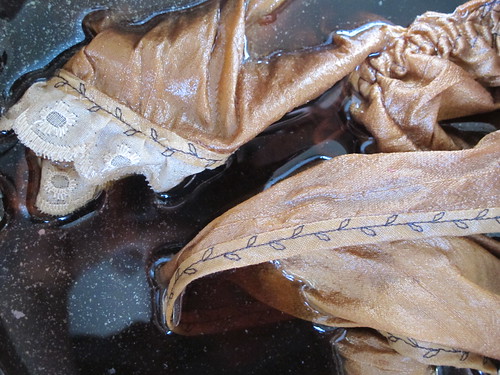
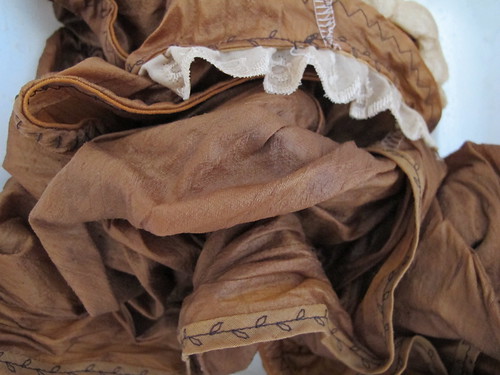
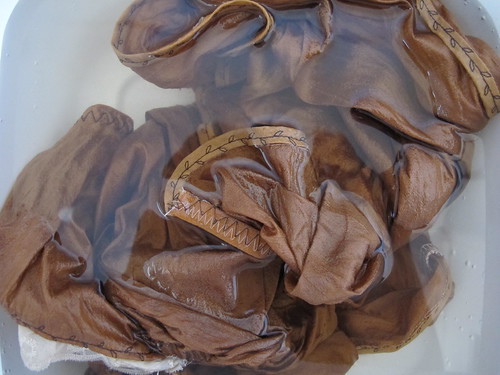
First completed garment of 2014 – this is Marcy Tilton for Vogue, 8813. The fabric is silk noile, dyed in my tea urn with about six months’ worth of saved tea bags. I blogged about my failed attempt at dyeing the fabric and scalding my foot, but apparently I failed to mention the second attempt, which came out looking lovely! Well, I think so, anyway.

Paul doesn’t much like the black marks, which are iron stains from rusty nails. I’m slightly concerned that people will make “hilarious” jokes about tea stains, but I really love this fabric. I plan to over-dye it every six months or so with the tea bags that I’m still saving. I figure that each successive dye bath will add new stains and patches and colours, which will add lots of depth and texture.

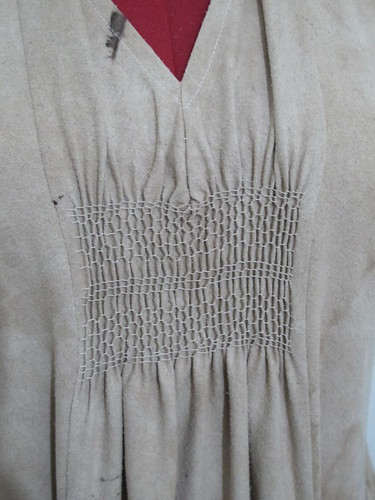
Some of you have been following the progress of the smocking over on Facebook… ta-da!

Vogue 8813

I’m slightly peeved about the wonky bit in the centre, caused by a dart that I added after the smocking rather than before. Note to self: read the instructions all the way through, especially if you’re making changes to the pattern.

Often when I’ve finished sewing something I’m so sick of the sight of it that I can’t even think about making another one. I enjoyed working on this dress so much that I’m already thinking about different colour combinations, and wondering how many I can get out of the fabrics I’ve already got in my stash. There’s a version suggested with contrasting colour panels, one with buttons on the enormous pockets… and I want to wear them all!

Vogue 8813

Notes on the pattern: BE CAREFUL. It’s not difficult by any means, but there are a few places where you need to be really accurate otherwise you’ll come unstuck. You also need to read the instructions properly *cough*, as the pocket construction in particular is a bit origami-like. The back, by way of contrast is completely plain and flat.

Fitting-wise, the only measurement you need to worry about is the full bust. If the dress is too tight across the front, it’ll be too tight under the arms and through the cap sleeves. I still went down a size from my usual Vogue Large to a Medium, and there’s plenty of room to breathe.

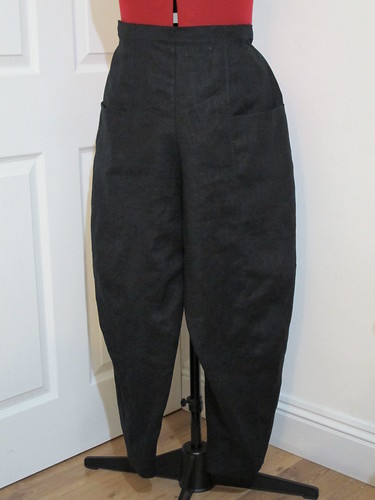
Vogue 8499

This, as you may be able to tell, is not another dress. It is another Marcy Tilton though, Vogue 8499. These trousers have a flat front and elasticated back, large pockets, and darts at the knees. They’re very wide at the hips, tapered at the ankle, and sit very high at the waist. Perfect!

My only complaint about this pattern is that there are no actual garment measurements given anywhere! If I’d sewn my usual Vogue size 18 or 20, these would have been phenomenally huge, even for a very baggy style like this. After reading a lot of reviews online, I took a gamble and made a size 14. This has turned out spot on, thank goodness. Any smaller and I wouldn’t have been able to pull them over my hips, but thankfully there’s still plenty of ease.

Once again, parts of the pattern require absolute accuracy. I ended up with a tiny hole in the waistband where I sewed past one of the small dots by a couple of stitches, though it was easily fixed.

This picture doesn’t really do them justice, although I think you can get an idea of the shape. I think they’ll also work well in lightweight corduroy, or maybe a nice drapey suit wool. They’re so comfortable that, like the dress, I want to make more already!

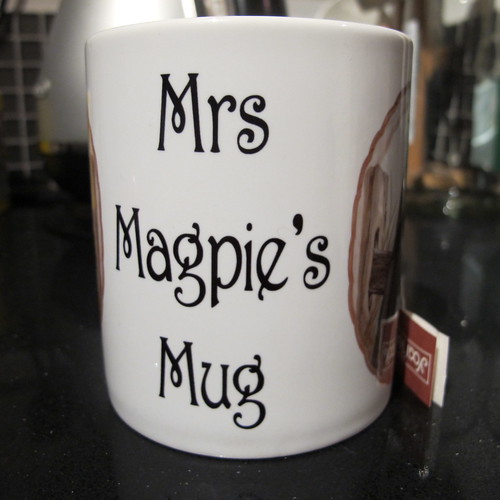
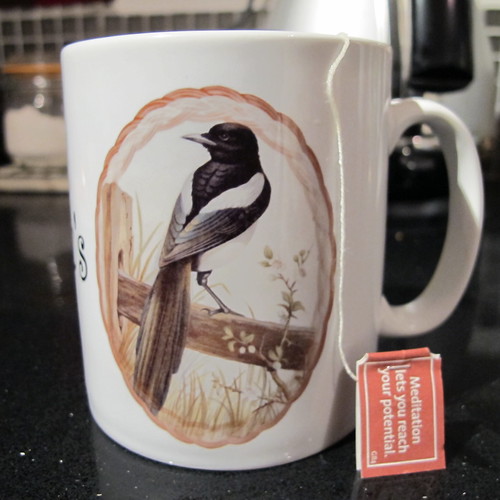
Mrs Magpie’s Mug

Mrs Magpie's Mug

Just enjoying a nice cup of tea from Mrs Magpie’s Mug…

Mrs Magpie's Mug

… a very thoughtful birthday present from Paul’s Aunt!

Felted slippers – part two

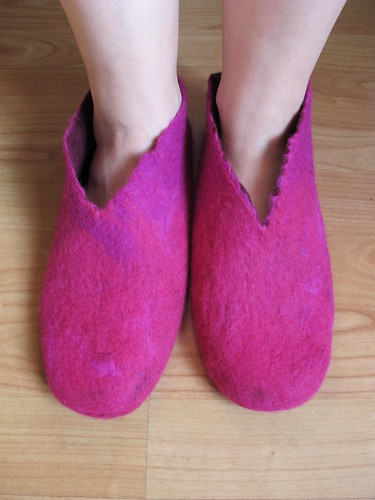
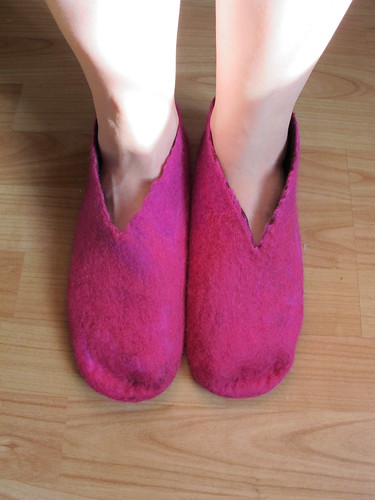
Too big!

Awww. They’re too big! I knew the lasts would be quite roomy around the top, and I do plan to cut these away to more of a ballet pump shape. But still. Too big.

Too big!

Look how much room there is in front of my toes! The lasts were a size 38/39, but I’d say these have come out around a 40/41. I did toy with the idea of chucking them in the washing machine, to take the hard work out of shrinking them a little bit more, but was so worried about them coming out the right size to fit my two year old niece that I decided against. (Not that I begrudge her a pair of pink felted slippers, but I want these to be mine!)

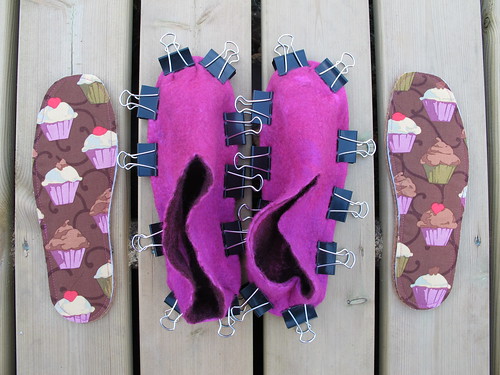
Soles and insoles

So, I went back to my long-neglected shoemaking supplies, and have given them rubber soles along with cork-and-fleece insoles. These are now sitting on the deck waiting to dry, while I’m recovering from the fumes from the glue. Wow, that stuff is disgusting. Even wearing a respirator and eye protection, you can still smell it a bit, and it still makes my eyes water. That, along with the terrifying health and safety warnings, makes me think that there must be a better solution than glue. I mean, what’s the point of painstakingly hand crafting a pair of slippers from natural materials… and then whacking four layers of highly toxic rubber cement all over them?

They do need some kind of sole though. On laminate flooring and tiles they’re slippery enough to be absolutely lethal, and of course without soles they can’t be worn outside. Time to go back to my shoemaking books (and maybe a few museums with non-leather shoes?) to come up with some more ideas.

Lots and lots of tea bags...

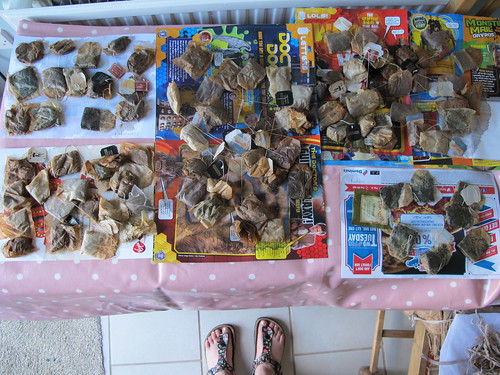
Meanwhile… this is the scene in my kitchen at the moment. Remember I said I was going to take all my frozen tea bags out of the freezer, to make room for ice cubes? Well, I did that, and I left them all out on a table in the garden to dry overnight. Except that, for the first time in weeks and weeks, it rained. It rained A LOT. So now they’re on the kitchen table, drying off again.

I have no idea whether they’ll have any dyeing properties left whatsoever, after the amount of water that landed on them last night! Hopefully they’ll still leave at least a little trace. I’m still not entirely sure what I’m going to dye with them yet, but after a few experiments with the leftovers in the tea urn filled with assam, I’m thinking it needs to be silk for the best results. Which is the one thing, of course, that I don’t have a great deal of in my fabric stash! I might need to make a bit of extra room by sewing up some of the cottons first…

Assam Tunic

Assam Tunic

Today I decided to take a day off from doing anything I “ought” to be doing (like packing the house ready for the move), or any kind of “useful” sewing (like more bloomers and summer tunics to wear in this ridiculous heat), and make something that had been nagging at the back of my brain for a few weeks.

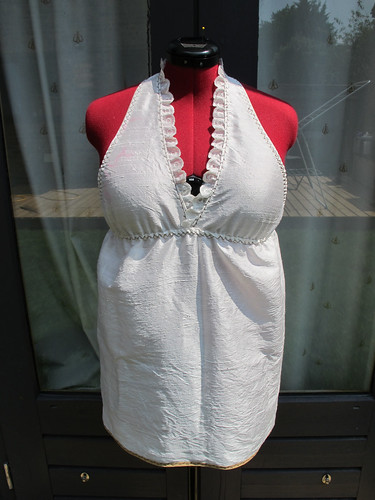
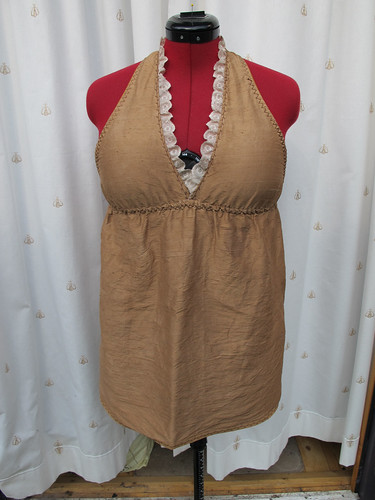
This is a silk dupion tunic, with broderie anglais trim and bias tape edging, waiting to be dyed in the tea urn. The stitching is brown because it’s polyester and therefore won’t dye, so I wanted to use a colour that would tone in afterwards. (In future I’ll use cotton thread, but right now I’m using up the stash.)

Assam Tunic

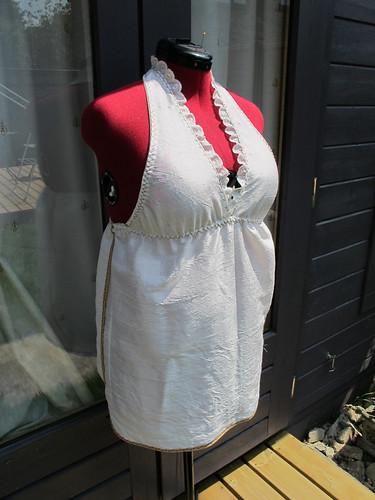
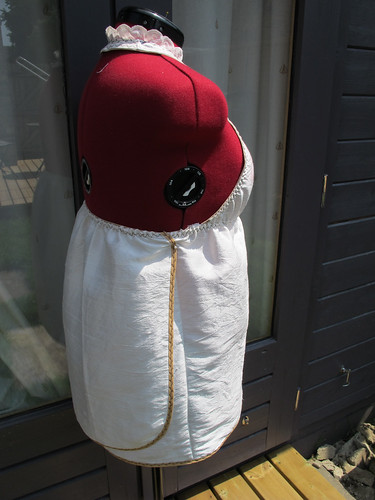
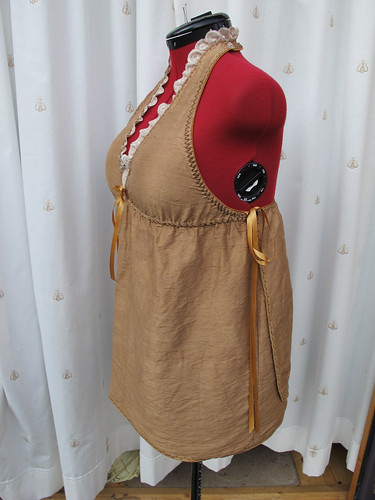
The tunic is elasticated all the way around the waist, under the bust, and around the edges of the top. It wraps over at the back. The broderie anglais trim might be polyester, polycotton at best, so it’ll probably stay cream.

Assam Tunic

It has a fixed, ruffled halter neck, and wrapover back detail. The bias trim is polycotton, and won’t take the dye as well as the silk, so I chose a colour that would still look good with whatever dye it did take up.

Assam Tunic

First dip into the tea urn…

Assam Tunic

The tea itself had been brewing for about two hours. This photo was taken after about another two hours in the tea, and the fabric was already much darker than it looks in the photo! You can see that the trim is still very pale, but the bias binding tones in nicely. The machine embroidery on the trim represents the tea leaves in the dye. (Although I used bags in the urn, as they were left over and out of date.)

Assam tunic

Squeezed out of the tea, the bias trim has taken up the dye nicely, but the broderie anglais is still very pale. The white overlocking on the shoulders is unfortunately on the outside. I had a bit of a moment when applying the broderie anglais, so I made the executive decision that two little white seams on the back of the neck wouldn’t matter too much on an experimental piece.

Assam tunic

Rinsed until the water ran clear…

Assam tunic

Here it is dry, and just waiting for finishing touches. I hung it outside, in the shade so it wouldn’t get bleached by the sun, and it dried at record speed. (I suppose the heatwave has its uses.)

Assam tunic

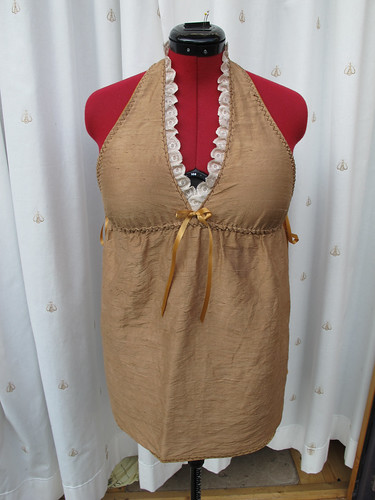
I added gold ribbons at each side to fasten, and another one in the front for decoration.

Assam tunic

Ta-daa!

There is a little bit of a story behind this piece. The assam tea bags were bought specifically for a reunion with a long-lost friend, about three years ago. Said friend then always seemed to be too busy to come and visit me enough times to actually drink the tea, and we’ve since all but lost touch again. It wasn’t until I came to tidy the kitchen cupboards to sell the house, that I realised the teabags have actually been out of date for eighteen months. Rather than waste them, I thought I’d turn them into something pretty for myself.

Tea Dresses

Tea dyed fabrics

It’s a long while since I’ve done any experimenting with natural dyes, but I was thinking about tea dyeing again this morning. This came about because I’ve been saving all of my used tea bags (ordinary black tea and lots of different herbal varieties) and stashing them in the freezer. They’re all in bags, a month’s worth at a time. It turns out that I drink rather a lot of tea, so six months’ tea bags are now taking up rather a lot of space.

The reason I’ve been saving them this way is that I’ve been thinking about a (currently imaginary) project of making “tea dresses”. The dresses would be made from organic cotton, or vintage nightdresses, or maybe old doilies and table linens of various descriptions. Each one would be dyed after its construction, in a month’s worth of tea bags. Theoretically each one would be a different colour, as no two months’ tea combinations would be the same. (Actually, they’ll almost certainly all be beige, but that’s not necessarily a bad thing.)

However, something suddenly occurred to me, after watching a detergent advert on the telly.

How do you wash a dress that’s been dyed with tea, when modern detergents are specifically designed to remove precisely this kind of stain?

The Internets provided me with answers ranging from “add salt to the dye bath” to “rinse with a vinegar solution”, and people also suggested washing at various temperatures and with different kinds of detergents.

Conveniently, a friend’s husband is something of a detergent expert (how useful!), and he had this helpful advice:

“Effectively you’re using a tea as a direct dye so it will be prone to fading. But there are a couple of things you can do to help. After you’ve stained the cotton, let it dry and leave it for a few days. The air will help to set the colour a bit. You could also experiment with a hand wash in bicarbonate of soda which will darken the colour somewhat (alkali does that to tea for the same reason that it gets lighter when you put lemon juice in it). From a detergent point of view, we rely strongly on bleach to get rid of tea so avoid powder detergents and detergent additives such as Vanish. Then wash on a cool short cycle and you will create unfavourable conditions for tea removal. Just don’t spill coffee down yourself ;)”

Fantastic! So another friend’s suggestion of using a rubbish detergent (as she never manages to get stains out of anything, apparently) is a good one, as is only washing in cool water. The bicarb/alkali information is very interesting, and I happen to have some litmus paper in the Shed that I can use to find out what sort of pH produces good results in terms of both colour and fastness.

I know that these dresses will fade over time, and to me that’s going to be part of their charm. I plan to make them fairly plain, and then embellish them as I go along, so they’ll effectively remain a constant work in progress. I might even keep collecting my tea bags, and re-dye them once a year.

You all know what I’m like for getting all excited about a project and then wandering off before it ever gets past the imaginary stage, but I should probably actually try to make a start on this one soon. Not least because I don’t really want to have to explain to the removal men why I’m moving six months’ worth of frozen teabags from one house to another!

Tea dyeing experiment

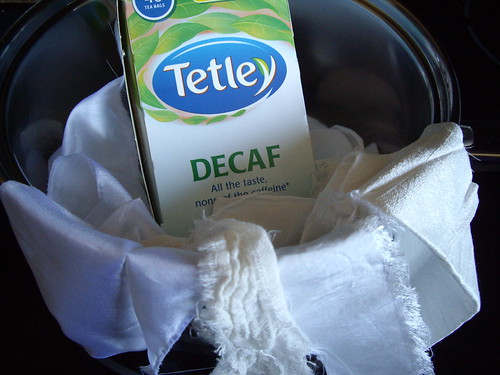
Out of date decaf

I’ve been reading a lot of books and blogs about dyeing fabric with plants lately, and I wanted to do a little experiment. But chemical mordants seemed a bit complicated and scary, and I don’t yet have a dedicated saucepan just for dyeing, and I wanted to get started straight away. So, inspired by Tiina Teaspoon, I decided to start with tea!

Tiina recommends freezing your used teabags until you’ve got enough to dye with, which I’m going to start doing from now on, but tucked away in the back of the cupboard I knew I already had a box of decaffeinated tea bags that had gone out of date. I started with 16g of dry fabric (silk paj, cotton muslin, bamboo and silk dupion) and 17g of tea, or five tea bags.

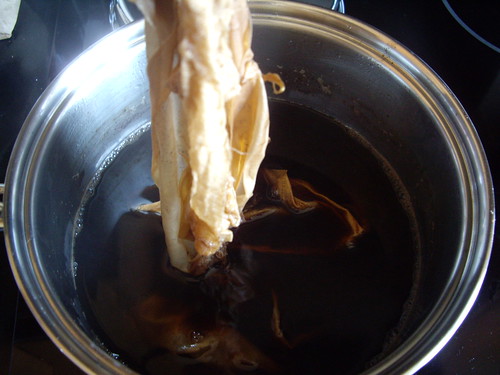
Fabric swimming in the tea

I filled a saucepan with hot water, and simmered the tea bags for an hour. Our water here is very hard and full of lime, and there was a lot of scum on the top of the tea. I did wonder whether I should have used distilled water, but not having any to hand, tap it had to be. I took out the tea bags before adding the fabric. All of the fabrics had previously been through the washing machine to remove any starches or other treatments left over from the manufacturing process (including the silk), and I soaked them in warm water before putting them into the tea.

Taking up the colour

The resulting brew was very dark, and the fabric began to take up the colour immediately. If I just wanted to dull down a piece of cotton, or create an “antique” look, I wouldn’t have needed to do much more than just dip the fabrics into the tea.

Almost finished

In the end I let the pot simmer for another hour, by which time almost all of the water had evaporated. Possibly I should have left the lid on the pot, and turned the temperature down even lower. The water really only needs to be kept hot for this, not actually boiling. After the hour I turned off the heat and left the fabrics in the tea dye to cool down. I kept stirring the fabrics around throughout the entire process, maybe every fifteen to twenty minutes or so. (Every time I walked through the kitchen. I wasn’t very precise about it!)

Tea dyed fabrics
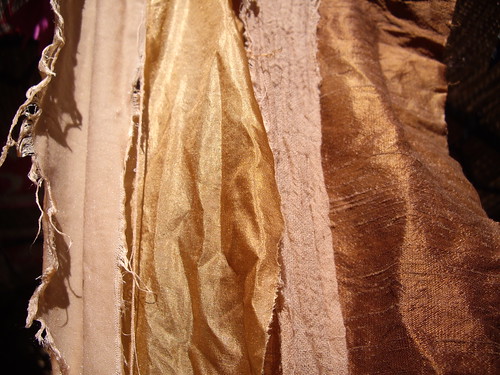
From left to right: bamboo, silk paj, cotton muslin, silk dupion

I rinsed the fabrics under the shower until the water ran clear, which was actually very quickly. I didn’t use any detergents, just warm water. I knew the cellulose fibres (bamboo & cotton) would take the colour differently from the protein (silk) ones, but I’m suprised at the depth of colour and the variations between them all. The fabrics are still a little bit damp in this photo, so the dupion has dried a little bit paler, but the two silks have kept their shine, and the colours are just lovely.

I’m now on the lookout for more plant dyes that can be used without any additional chemicals to fix the colour or release the dye. In the meantime I have plenty of tea in the house, so I can feel an experiment coming on!