Birthday Dress – In Progress

Overdress - in progress

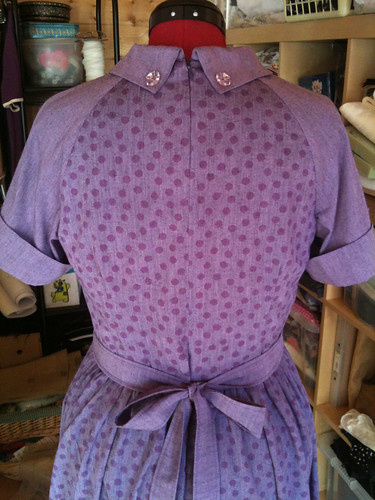
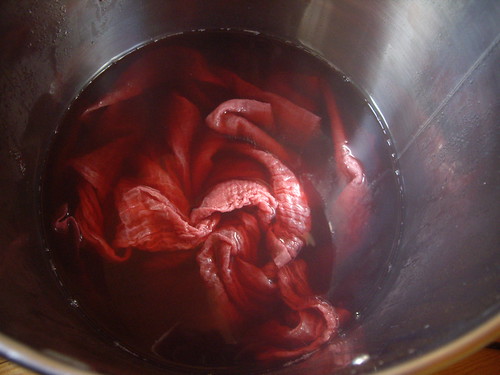
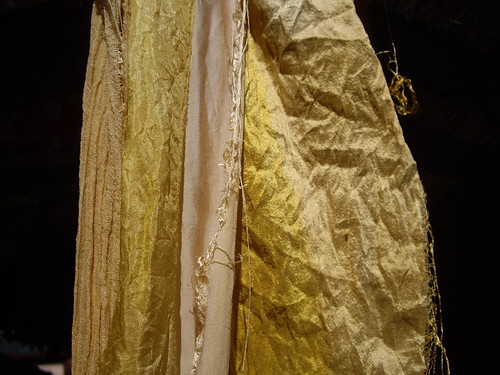
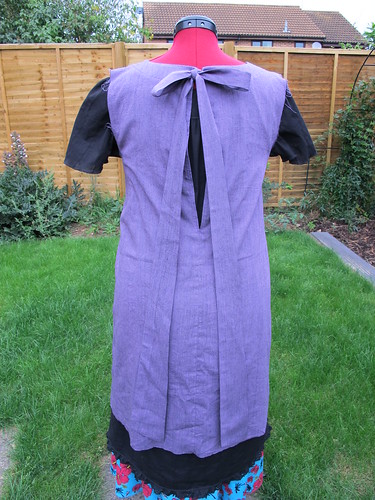
This is the back view of the prototype version of my 40th Birthday Dress. So far, I’m very glad that I made a prototype, and didn’t take the scissors straight to the gorgeous shot silk dupion that I’ve got waiting!

The style of the dress is exactly spot on. The open back designed to give a glimpse of the layer underneath, the ridiculous bow inspired by a 1971 Style pattern (more on this later), and a high round neck at the front, deliberately kept very plain, to show off a big necklace or a pretty scarf.

Overdress - in progress

Unfortunately, I forgot something important. (No, not the ironing. Shush.) You see those drag lines at the sides, underneath the bust? I forgot the all important part where fabric is flat but bodies are curved, and I didn’t leave quite enough breathing room at the top. Fortunately my dress form is somewhat more generously endowed than I am, so the dress does fit. But it is a bit tight, so I’ll need to re-draft the front pattern piece before I make another. (I blame the fact that my pattern drafting books are already packed for the move, so I had to make the pattern up as I went along.)

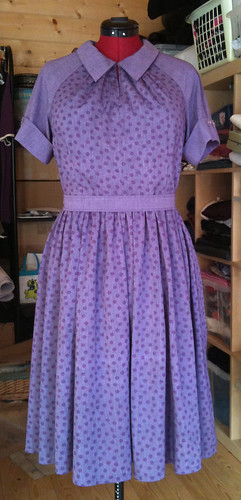
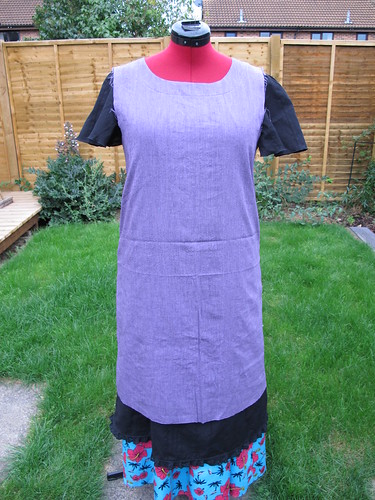
I’ve been adding a lot of “Lagenlook” inspired outfits to Pinterest lately (you can see the board here), and the point is to wear a lot of loose layers, often with plenty of frills and asymmetry thrown in for good measure. The basic silhouette of a Lagenlook outfit is fundamentally triangular. As I am also fundamentally triangular, this seems like a great look for me!

Overdress - in progress

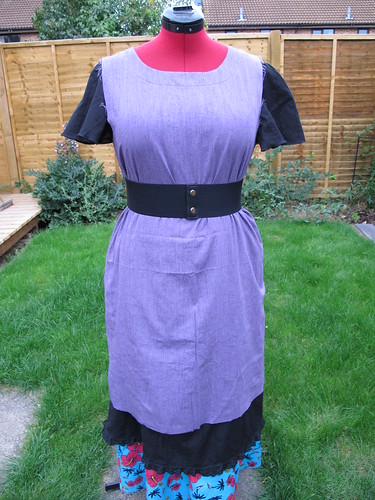
The annoying thing is, I’m so utterly conditioned to the “right” shape for a woman being an hourglass, or at least having some semblance of waist definition, that my immediate thought on adding this belt to the dress form was, “that’s better”.

Except that it’s not better. It’s not better at all. It pretty much guarantees that I’ll have indigestion after an hour, be uncomfortable all day, and generally be distracted by my clothes instead of focussing on whatever it is I’m supposed to be doing. None of which, however you look at it, can possibly be defined as “better”.

I think what I need to do now is take the belt away, make the next version of the dress much more wide and floaty, and try to step away from any and all forms of media that try to tell me that my body shape is fundamentally wrong.

(And work out how best to add the most ENORMOUS pockets to the front of the dress. Obviously.)

Speakeasy

I can’t tell you how excited I am to see these fabrics! I’ve been waiting literally years for these types of prints to be available in the UK, on sustainable fabrics. Once again, the Organic Textile Company have outdone themselves!

The prints and colourways are closely based on designs from a book of 1920s textile patterns, and they’re printed onto a handwoven organic cotton and bamboo blend. I absolutely love their other cotton/bamboo fabrics, so I can’t wait to get my hands on some of these!

The hardest part is going to be deciding which of the prints and colourways to choose. I think the centre print, “Roaring Twenties” in purple, is my absolute favourite, and I think it will go very nicely with some plain purple that I have in the Shed already.

Now all I need is for everyone to head over to the Inexplicable Emporium and buy a few things, so I can afford to buy enough of this gorgeous fabric to make some dresses, which I can then put back into the Emporium!

(Don’t forget coupon code “LIFEBEGINS”, for your 40% discount  throughout September…)

Ghostly pants…

Ghostly pants...

Here I am, showing my underwear to the internet again. Please excuse the glimpse of my horrid garden beyond, I’m far more embarrassed about you seeing that than I am about showing you my knickers!

These started off life as a teddy, but I made a mistake while I was applying the elastic to the top. It didn’t fit right, and the straps kept falling off my shoulders, so I decided to take the scissors to it and try again. This is the result – a pair of french knickers in lovely soft bamboo fabric.

The centre front and back are finished with french seams, but I got a bit lazy at the side seams and just overlocked them. The legs are lazier still – just a lettuce hem run straight through the overlocker.

I wanted to use a soft, wide elastic as I thought that would be more comfortable than a narrow lingerie elastic that might dig in. I deliberately didn’t cut them on the bias, mainly because I didn’t have enough fabric to do that when I was cutting an entire teddy, and also because the fabric has such good drape that I didn’t think it was necessary. I may change my mind as I wear these, but they’re so soft that I think they’ll be fine.

Now all that remains is to wear and wash them a few times, and see how they cope with actually being worn. If they’re as comfortable as they look, I can foresee plenty more pairs of little bamboo shorts in my future wardrobe!

Simplicity 1755

Simplicity 1755

This is Simplicity 1755, my new favourite dress. Fifties-inspired style? Check. Pockets? Check. Raglan sleeves? Check. Pretty collar? Check. Perfect!

Well, sort of.

Although the dress itself has come out lovely, the pattern leaves a fair bit to be desired. To begin with, the instructions for the button loops and sleeves are wrong. Somebody’s had a little centimetres versus inches confusion, because the instructions say to cut the button loops 2cm long, when they actually need to measure 5cm – about 2 inches. And the instructions for the placement of the button loop are wrong as well. In the end I decided to abandon the loops completely, and used a couple of sparkly buttons on each sleeve to hold the cuffs in place.

Simplicity 1755

I also added a couple of sparkly buttons on the back of the collar, because the pattern didn’t seem quite right there either. The instructions call for hooks and eyes to close the two halves of the collar together at the back, but the pattern pieces simply aren’t the right shape for that to happen. So, the sparkly buttons are holding the back of the collar down to the dress, to stop the corners from flying away.

Simplicity 1755

I’m pretty pleased with the invisible zip, considering it’s only the second one I’ve ever put in. It gaps a little bit at the waist, but the belt covers it, and all the seams match which is good. The waist isn’t terribly defined for a 1950s-inspired dress, but that’s because I had to grade it from a size 16 at the top to a size 20 at the waist to make it fit. I only hope that doesn’t make it look too frumpy, but the most important thing for me is that it’s comfortable.

The fabric is an organic cotton and bamboo mix, in heather and heather splash spot. I’ve used this bamboo fabric before, and it’s fantastically soft and luxurious. Bit crinkly though, so I foresee a fair bit of ironing in my future.

I’ll definitely be making this dress again, probably with a couple of modifications. The pockets are a little on the small side, so I’ll replace those with my own pocket pattern. I also have a shirt pattern with the most fantastically enormous raglan sleeves, and I can definitely imagine a long sleeved version of this dress. In fact, I may have just ordered three metres of this lovely stripy bamboo/cotton, to go with the leftover plain purple… perfect!

The Lorax meets Simplicity 1755

This is Simplicity 1755, which I had every intention of beginning to sew this morning. I want to wear it to a wedding next month, and my extra hours at work are continuing, so I need to get a move on in any spare time that I do have. The illustration to the right shows roughly how it will look in the lovely organic cotton and bamboo fabrics that I bought a little while ago.

This morning I received a comment on my post about making a Dr Seuss dress, which sidetracked me a little bit into thinking how good Simplicity 1755 would look in a combination of novelty print fabrics. A little look on eQuilter revealed that lots of Dr Seuss prints are still available

…as are several Beatles prints – although Sea of Holes is sadly gone.

But I’m trying ever so hard to only buy organic or recycled or ethically produced fabric for the clothes that I make for myself, so I was just about to sigh wistfully and close my browser when I noticed something exciting.

The Lorax prints are all on organic cotton!

Wouldn’t this dress look absolutely amazing in a Lorax print?!

And by “absolutely amazing” you know, of course, that I mean “utterly ridiculous”. In a good way.

A further search reveals that eQuilter actually has hundreds of organic cotton fabrics, which is fantastic! Of course there’s then the issue of the airmiles involved in shipping them over from America, but at least there’s only one journey, from their country of origin to me, and the same applies to the (mostly) Indian fabrics I buy.

Uh-oh.

If Simplicity 1755 goes together easily, and it’s comfortable to wear, I can feel a fabric shopping spree coming on…

Natural Dyeing: Blackcurrant Surprise!

Blackcurrant Dye
silk dupion, silk paj, silk noil, bamboo, cotton muslin

Surprise, because grey really wasn’t the colour I was expecting to get from blackcurrants! I’m completely amazed by the difference between the colours on the protein-based silks, and the cellulose-based bamboo and cotton.

This one was a bit of an experiment using more of Sarah‘s leftovers – this time some blackcurrant pulp that had already been cooked. I decided to try out my new and exciting Ebay-purchased tea urn, so I tipped the blackcurrant mush into a nylon mesh laundry bag and chucked it in. As well as about 6 litres of water, I also added a litre of out-of-date blackcurrant, pear and apple juice. Well, it seemed better than just pouring it away!

Blackcurrant Dye

I left the liquid and the blackcurrants in the tea urn for about two hours – one to warm up, and one to cook the blackcurrants and release the dye. It came out a bit cloudy, because of the fruit juice, but a pretty colour!

At this point I also added some salt, as a fixing agent. The only salt I had in the cupboard included an anti-caking ingredient – E536, or potassium ferrocyanide. I suspect this has affected the colour a little bit, probably pushing it slightly towards the blue end of things.

Blackcurrant Dye

At this point I threw in the fabric, and gave it all a good stir. I left the tea urn switched on for another couple of hours which, in hindsight, was a mistake. The temperature was too hot for the silk, and it’s lost its sheen a little bit. Next time I’ll heat up the plant matter to make the dye, then switch off the urn as soon as the fabric goes in.

Blackcurrant Dye

This is what came out of the urn – exactly what I’d expected! A metre and a half of cotton muslin, in a beautiful pink. So you can imagine my surprise when I turned on the shower, began to rinse the excess dye away, and ended up with this…

Blackcurrant Dye

… a beautiful piece of delicate grey cotton, with no pink left in it whatsoever!

There’s enough here to make three scarves, one of which I will most definitely be keeping for myself. I wear a lot of grey, and I can just imagine decorating the ends of this with some smoky quartz beads for a bit of added sparkle.

It was very peculiar though, watching that beautiful pink colour just wash away. Not a disappointment, by any means, but definitely a surprise!

Onion skin dye

Onion skin dye

This post is for Sarah, who’s very kindly been saving her leftovers! Paul and I don’t eat onions (weirdly, they burn Paul’s mouth – does anyone else have this?), so Sarah’s been hanging on to her onion skins for me. This looked like a lot, but only weighed about 6g, so I only added small pieces of fabric that added up to about 8g. Judging by the colour of the dye bath, I could have added a lot more!

Onion skin dye

As with my previous experiments, I simmered the onion skins in almost-boiling water for about an hour, before removing them and adding the wet fabric. I left the fabric simmering for another hour, then switched off the heat and left the saucepan to cool.

Once again, I didn’t use any kind of mordant for this experiment. The colour of the water led me to hope for some really bright fabrics, but the actual results are a lot more muted. I’m definitely going to need to add mordants to my experiments if I want to explore the full potential of the colours available from plants.

Onion skin dye
Silk dupion, silk paj, silk noil, bamboo, cotton muslin

This time the dye came out rather patchy, and with very marked differences between the fabrics. The silks have once again taken up the colour much better than the vegetable fibres. The bamboo in particular is very pale, especially in contrast to the silk paj!

The next part of this experiment is to keep some of the fabric pieces I’ve dyed so far closed away in a book, and leave others to hang in a window. That will help me to find out how fade-resistant they are. (I suspect not at all.)

Sarah also gave me a big pot full of previously-cooked blackcurrant pulp, which is very exciting! I had intended to try solar dyeing with it, but I don’t think the sun’s come out once today. Maybe at the weekend, when it’s forecast to perk up a little! Failing that it’s back to the big cooking pot, in the hope of coming out with a lovely shade of blue.

Spotty cotton & bamboo

Organic cotton & bamboo

Here’s my latest order from my lovely organic cotton people. Three metres each of spotty and plain organic cotton and bamboo blend. Isn’t it lovely? It’s in the washing machine at the moment, and I’m expecting it to be super soft when it comes out. The almost-matching thread’s organic too, and I’m planning to buy a lot more of this in future.

When the pattern eventually turns up in the UK, I’m going to turn it into Simplicity 1755. I might have let out a little squeal when I saw this dress. It’s everything I usually look for in a vintage pattern – cute collar, raglan sleeves, full skirt, pockets… but in a modern size, which means I don’t have to wear terrifying underwear or spend days re-drafting the pattern only to discover that it still doesn’t fit. Marvellous!

The sample swatches are Texweave, which is a lovely heavyweight woven fabric, perfect for coats or upholstery, and Super Jersey, which is another cotton/bamboo blend. It really does feel super too, so soft, and with just enough elastane to make sure it doesn’t go baggy. I can feel some lovely soft pyjamas coming on, or perhaps a vest or two.

I have a lovely big tin full of their fabric samples now – every time they bring out something new I send off for the samples straight away. This means that any time I want to go fabric shopping, I can simply pull down the tin and look at all the little squares. Much easier than just picking something at random from the website and hoping for the best!

Turmeric dyeing experiment

Turmeric dyeing

It seems as though I’ve been bitten by the dyeing bug rather badly. I can’t stop thinking about plants I could grow in my garden (coreopsis, safflower, weld, marigolds), or plants I could forage (walnuts, elderberries, sumac), or plants I could ask friends-and-relations to save for me (onion skins, rhubarb leaves).

I’m still working in the kitchen without mordants, so the next obvious step was turmeric. A quick trip to the corner shop procured a nice big bag of spice, and I found these instructions online. I used them as more of a guideline than a rule, as I don’t have a thermometer, and I don’t have any coffee filters to strain out the turmeric powder.

Turmeric dyeing

I cut slightly larger pieces of fabric this time, with a total dry weight of 30g. I used 25g of turmeric powder, and the water looked extremely yellow! As before, all the fabric’s been pre-treated by a quick trip through a hot wash, and it was all dampened under the hot tap before putting it in with the turmeric.

Turmeric dyeing
Left to right: silk paj, silk dupion, bamboo, cotton muslin

The fabrics started to take up the colour immediately, a beautiful rich yellow. Apparently you can modify this to red with the addition of baking soda, but I wanted to see what colour the pure turmeric would result in first.

As before, I simmered the turmeric for an hour, then added the fabric and simmered for another hour. Finally the heat was turned off and the water left to cool before rinsing the turmeric out of the fabric. I could probably have kept the dye and used it again to create a paler colour – or perhaps tried to modify it the second time around.

Turmeric dyeing

An awful lot of colour leached out of the fabrics as I was rinsing them, particularly the cotton and bamboo, but I was still left with nice bright colours.

Turmeric dyeing
Cotton muslin, silk paj, bamboo, silk dupion

I hung them out on the washing line to dry, loving the fantastically bright yellows, but bearing in mind the warning that turmeric isn’t terribly light fast as a dye. How bad could it be though, really?

Turmeric dyeing

An hour and a half later, I had my answer! You can see the colour change most clearly in the silk dupion (on the right), which has a stripe down it where it was covered by the bamboo as it dried. As a friend pointed out, when you want to shift a turmeric stain it seems to stay for ever, so perhaps the answer is to leave the stained garment out in the sun for a bit…

The colours are still lovely, if nowhere near as bright as they were to begin with. This photosensitivity does limit what I can do with the finished fabric though. I don’t want to go out  on a summer day wearing a bright yellow scarf, and come home wearing a white one!

Tea dyeing experiment

Out of date decaf

I’ve been reading a lot of books and blogs about dyeing fabric with plants lately, and I wanted to do a little experiment. But chemical mordants seemed a bit complicated and scary, and I don’t yet have a dedicated saucepan just for dyeing, and I wanted to get started straight away. So, inspired by Tiina Teaspoon, I decided to start with tea!

Tiina recommends freezing your used teabags until you’ve got enough to dye with, which I’m going to start doing from now on, but tucked away in the back of the cupboard I knew I already had a box of decaffeinated tea bags that had gone out of date. I started with 16g of dry fabric (silk paj, cotton muslin, bamboo and silk dupion) and 17g of tea, or five tea bags.

Fabric swimming in the tea

I filled a saucepan with hot water, and simmered the tea bags for an hour. Our water here is very hard and full of lime, and there was a lot of scum on the top of the tea. I did wonder whether I should have used distilled water, but not having any to hand, tap it had to be. I took out the tea bags before adding the fabric. All of the fabrics had previously been through the washing machine to remove any starches or other treatments left over from the manufacturing process (including the silk), and I soaked them in warm water before putting them into the tea.

Taking up the colour

The resulting brew was very dark, and the fabric began to take up the colour immediately. If I just wanted to dull down a piece of cotton, or create an “antique” look, I wouldn’t have needed to do much more than just dip the fabrics into the tea.

Almost finished

In the end I let the pot simmer for another hour, by which time almost all of the water had evaporated. Possibly I should have left the lid on the pot, and turned the temperature down even lower. The water really only needs to be kept hot for this, not actually boiling. After the hour I turned off the heat and left the fabrics in the tea dye to cool down. I kept stirring the fabrics around throughout the entire process, maybe every fifteen to twenty minutes or so. (Every time I walked through the kitchen. I wasn’t very precise about it!)

Tea dyed fabrics
From left to right: bamboo, silk paj, cotton muslin, silk dupion

I rinsed the fabrics under the shower until the water ran clear, which was actually very quickly. I didn’t use any detergents, just warm water. I knew the cellulose fibres (bamboo & cotton) would take the colour differently from the protein (silk) ones, but I’m suprised at the depth of colour and the variations between them all. The fabrics are still a little bit damp in this photo, so the dupion has dried a little bit paler, but the two silks have kept their shine, and the colours are just lovely.

I’m now on the lookout for more plant dyes that can be used without any additional chemicals to fix the colour or release the dye. In the meantime I have plenty of tea in the house, so I can feel an experiment coming on!