Shopping Spree: Skulls, Skeins and a Spindle

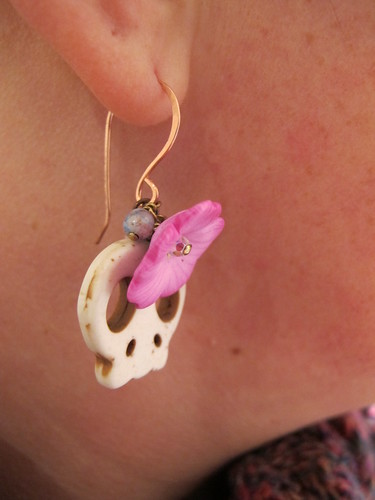
Handmade polymer & gemstone earrings from Honey & Ollie

Look what arrived today – my lovely new earrings from Honey and Ollie! They arrived super quick, all the way from California. So quick that I wasn’t expecting them for about another week! As a recovering goth, I’m still irresistibly drawn to Things With Skulls, and these were so pretty that I couldn’t resist.

Handmade polymer & gemstone earrings from Honey & Ollie

The skulls and flowers are made from polymer clay, with sparkly little gemstones dangling at the top. The findings (all hand made) are copper, which complements the stones beautifully. The hooks are a really lovely shape too, and they stay in place very securely. Despite being quite big, they’re really light to wear, and I’m definitely going to be adding more Honey and Ollie pieces to my wish list.

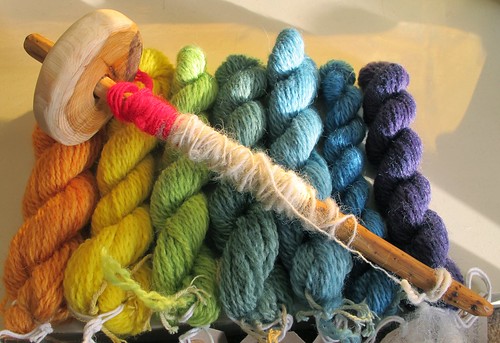
Handspun and hand dyed yarn from The Outside, with hand carved drop spindle

This is my little haul from the Museum of English Rural Life‘s Traditional Craft Fair.

All from The Outside, on top is a hand-carved drop spindle. It’s made from yew, and it’s a bottom-whorl style. Excuse the red acrylic leader, I was so keen to try it out that I grabbed the first thing I could find! Once I’d figured out how to do a half-hitch to hold the yarn in place, I grabbed some fluff and started to spin straight away. It’s a lovely spindle, and I’m really happy to have one of my own instead of having to borrow from work. Now I can practice at home, and make as much wobbly, lumpy yarn as I like!

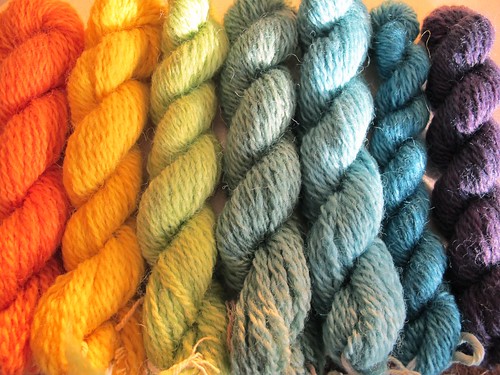
Handspun and hand dyed yarn from The Outside

Speaking of yarn… this is neither wobbly, nor lumpy. It’s handspun from blue faced leicester wool, and it’s lovely and soft. The vibrant colours are all from natural dyes, and this should be just enough to make a pair of rainbow-striped mittens.

The colours, from left to right, are:
1) Weld & madder
2) Weld
3) Weld & woad
4) Weld & woad dipped in madder
5) Woad & weld
6) Woad
7) Cochineal (orange oxidised to blue)

I had a lovely chat with Romilly about dyeing, including planting up a dye garden and not being afraid of mordants. There is definitely going to be some experimentation with colour and fluff in my future! For now though, I need to practice my spinning, and think about the perfect pattern for my new rainbow-coloured mittens.

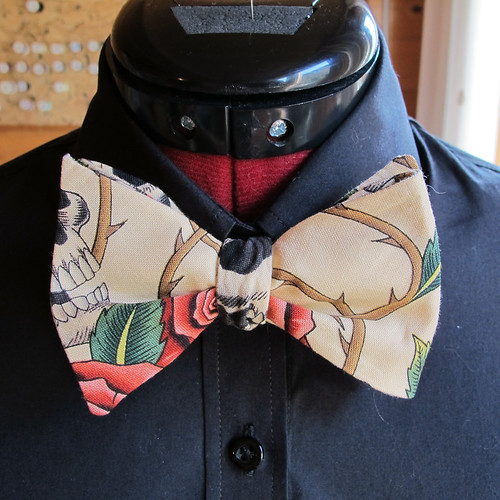
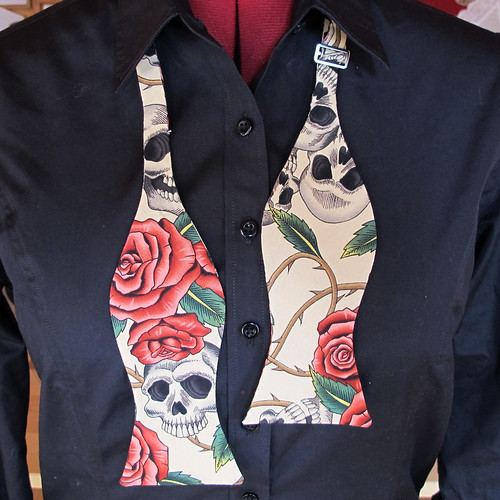
Rose Tattoo bow tie

Rose Tattoo bow tie

I spent yesterday drawing out a new bow tie pattern, and here’s the result! It’s made from quilting cotton, “Rose Tattoo” by Alexander Henry. Not that you’d know it, from the way this one’s folded, but I think it’s rather nice this way.

Rose Tattoo bow tie

As you can see, it’s both freestyle (self-tied) and adjustable. That means you get the classic self-tied look, but you don’t have to tie it yourself every time you put it on. The slider that you can see just below the collar is hidden once the tie’s fastened, and there’s a hook at the back.

This tie’s quite a long one, adjustable to fit 15″ to 21″ collars. (For reference: a ladies’ shirt in a size 12 has a collar around a 15″.) Next time I’ll amend the band a little bit, to make it a bit shorter and ever so slightly wider.

I’ve popped this one into my Etsy shop, and my plan for this afternoon is to start work on a few more to follow it!

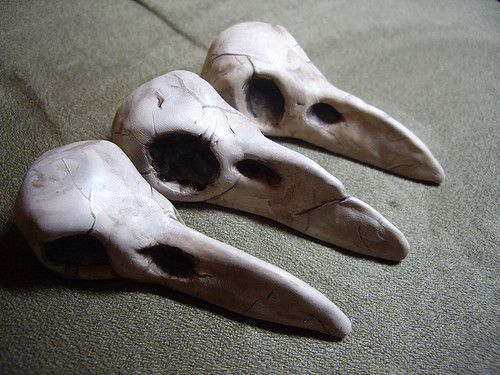
Vandemar’s Raven Skull Rings

Vandemar's Raven Skull RIngs

Oh dear, I’m doing it again. Blogging all enthusiastically, then disappearing for a week. In my defence I’m still working on the costumes for Neverwhere which, as well as doing the odd day or two of overtime at work, is taking up every spare minute of my time and then some.

These are three raven skulls that I made the other day – and in the process of doing so I managed to pull a muscle in my shoulder that trapped a nerve, leaving me wearing my arm in a sling because everything hurt and I couldn’t feel my fingers. Oops. That’s what happens when you spend upwards of seven hours pinching a layer of Fimo into place over an armature of masking tape and paper clip wire, apparently. I won’t be doing that again in a hurry!

You can see the development of the skulls over on Flickr. I did the sculpting and, once the shapes were baked and hardened, I passed them on to Paul who painted them for me. We wanted them to look as though Vandemar had been wearing the rings for years, so Paul’s painted them to look somewhat aged and cracked.

In an ideal world I would have smoothed and sanded out all of those fingerprints, but time was of the essence! If anyone can see the fingerprints from the stage, I’ll be very surprised. Although Louise did spend part of last night’s rehearsal shortening Vandemar’s coat sleeves, otherwise nobody would have been able to see the skulls at all!

They’ve now been mounted onto rings, with glue that I can only hope will be strong enough to last through the entire run. Performances start next week, and I keep thinking that we must be into the final straight with the costumes by now. But Louise and I spent yesterday evening at the theatre and each came back with a to-do list longer than the one we’d started with, despite having sewed our way through the entire rehearsal.

We must be nearly there though, surely?

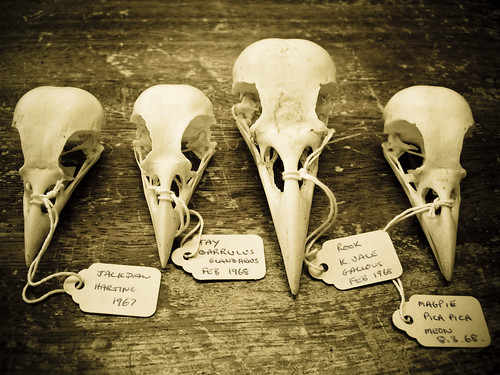
Cole Museum: Corvid Skulls

Cole Museum: Corvid Skulls

Four corvid skulls, waiting to be put away in a little box.

The skulls had been part of a temporary exhibition to illustrate the functionality of differing beak shapes in various species of bird.

It was an absolute joy to get out the boxes of bird skulls again, and to have another little look through them as I was putting away the exhibited pieces. Something as simple as seeing the skull of a heron next to the skull of a wren, so fragile that it’s kept in a sealed glass tube, was just magical.

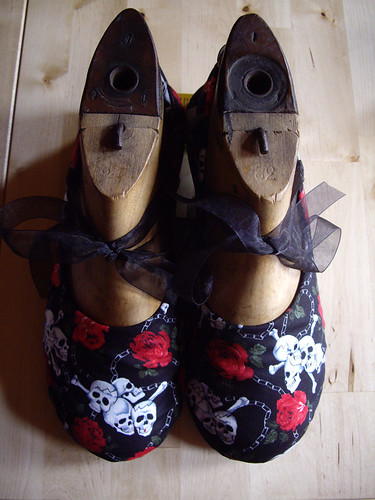
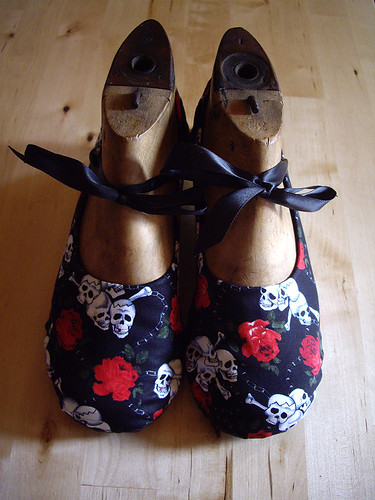
More skull shoes…

Lisa's Skulls & Roses shoes

This is the second pair of skulls & roses shoes – this time with an organza ribbon for a little bit of variety.

Skulls & Roses Shoes

Madeleine's Skull Shoes

This is the next pair of shoes – a pretty gothy pair with skulls and roses. I’ve actually made two pairs of these, and I’m extraordinarily tempted to make a third pair for myself

I don’t want to make eleven identical posts about the prototype shoes, so I’m hoping that the fabulous variety of fabrics will speak for themselves.

(Unless I keep making them in the same fabrics, of course…)

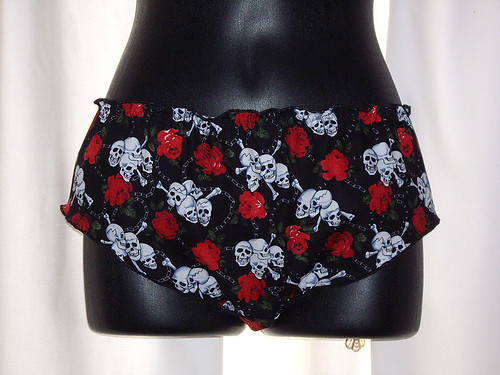
More Prototype Pants

Skulls & roses knicker-shorts

I made these over the weekend, despite the best efforts of my sewing machine and overlocker. I don’t know why both of my machines are still playing up, but it’s driving me mad. The top thread keeps snapping on the overlocker every time I come to sew across a seam, and my ordinary machine has taken an exception to sewing elastic. It doesn’t want to feed evenly, which makes the stitching look terrible.

Anyway. I drafted the pattern as per the instructions in the book, and then I sewed the knickers, and then I tried them on, and now I know what I want to change before I make the next pair. Which is almost everything. Mostly to get around the problems of my machinery, rather than anything much to do with the knickers themselves.

They have elastic around the waist but not around the legs, because I wanted something that was in between ordinary pants and french knickers. Now I can’t decide whether I actually like them or not, because they’re neither one thing nor the other.

I might have to wear them a few times and see how they go.

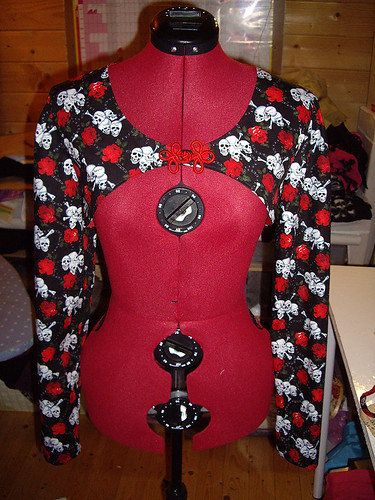
Butterick 4731

Butterick 4731, View A

I know I’ve already made one little jacket in this fabric, but when I looked at the whole outfit together on the dressform I wasn’t sure. S, I had a little browse on the internet, dashed down to the fabric shop, bought another pattern and made another jacket. As you do.

This one’s Butterick 4731. It goes with a very smart evening dress, and there’s also a pattern for another little bolero. The body of the jacket’s lined, but I didn’t line the sleeves as I wanted it to be very light. It was really simple to make, just five pieces, and no darts or anything. If I make this again I might actually add a couple of darts into the lower back to make it a little more fitted, but I want to wear this one first and see how easy it is to move in. It only uses just over a metre of fabric, so I think it would be fun to make lots of these in different colours of silk, and use them to liven up a plain outfit.

The unusual shape of the front of this jacket is really flattering, and I think it will show off the shape of the corset much better than the other one. It was a very quick and easy thing to make, and I’m really pleased with it!

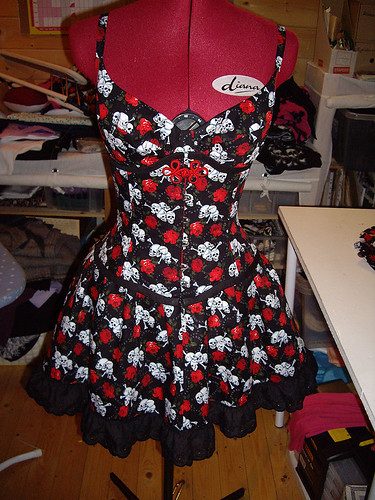
Skulls & Roses Corset

Skulls & Roses Corset

Here’s what I’ve been working on this weekend – a matching corset for the skulls & roses outfit. The intention is that the skirt, bra and corset together should give the overall impression of a dress.

I drafted the corset myself – I needed to update my pattern because all the corsets I made for myself two years ago are now just a little bit too big. The irony is, of course, that I must have made a mistake somewhere in the maths for this one because it’s rather a lot too small!

Still, it looks lovely from the front, which is a good start. I designed the shape to fit the bones that I had already, so it comes up a bit at the centre front and back, and fits perfectly below the underwires of the bra. I only had a short busk, so I placed a full length bone next to it and used another pretty red frog fastener at the top.

A friend who’s also an experienced corset maker suggested adding an extra panel into the gap at the back, and having the corset fasten with two sets of laces instead of one. As luck would have it I do have another corset lace and plenty of eyelets, so I think I might just take up that suggestion. I’ll let you know how it works out!

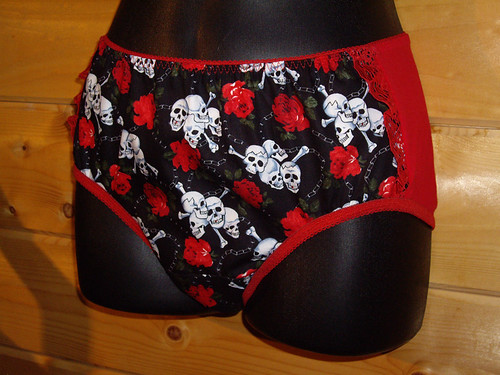
Skull & Rose Print Knickers

Red and black skull print knickers

This is pair of knickers number five. This time I started with Kwik Sew 2100, the most striking aspect of which was the ridiculous width of the gusset, especially as the sizes increase. I modified that part of the pattern to make more anatomical sense, and I was impressed by the instructions for putting together the lined gusset. It’s a bit fiddly but you end up with no raw edges on the inside, which makes these knickers very comfortable to wear.

I didn’t like the way that the original knickers were so puffy, so I decided to combine a stretch and a woven fabric to try and make them a bit flatter. They are more streamlined than they look in the picture (the mannequin’s so small I can’t stretch them right out), but they’re still not how I want them. I really need to buy a lingerie-drafting book, so I can work out how to do this properly.

I’m trying really hard to avoid using entirely stretch fabrics because there’s so much more interesting variety in wovens, but I’ll have to get the pattern absolutely right if this is going to work. These need the print panels to be smaller and the jersey panels to be bigger, to allow more stretch around the legs.

I also tried two different ways of applying the elastic – the waist has the elastic turned to the inside, and around the legs it’s on the outside. Each method is a two-step process, so there’s no time-saving in doing it one way over the other, but I think aesthetically I prefer the elastic on the outside, which I didn’t expect. Maybe because it looks more like something you’d buy from a shop, which is what I usually try to avoid.

[Later…]
In fact, I liked the elastic on the outside so much that I trimmed off the waist elastic and sewed it again to match the legs. Much better.