Shopping Spree: Skulls, Skeins and a Spindle

Handmade polymer & gemstone earrings from Honey & Ollie

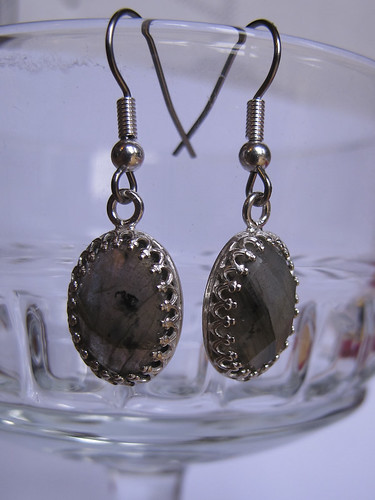
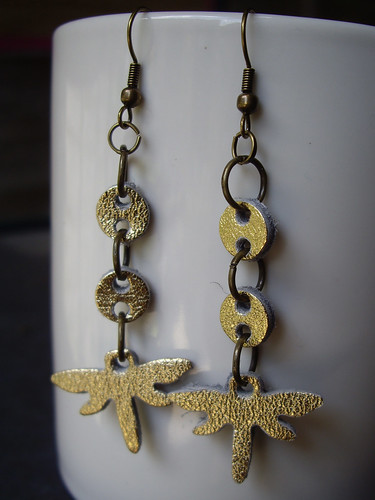
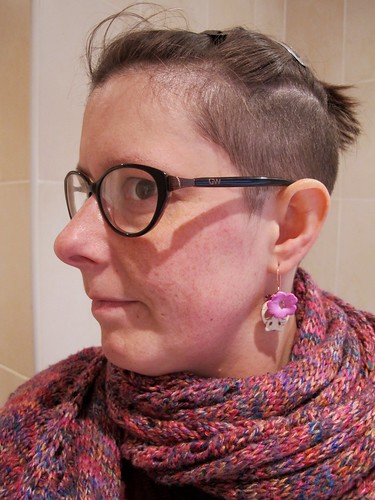
Look what arrived today – my lovely new earrings from Honey and Ollie! They arrived super quick, all the way from California. So quick that I wasn’t expecting them for about another week! As a recovering goth, I’m still irresistibly drawn to Things With Skulls, and these were so pretty that I couldn’t resist.

Handmade polymer & gemstone earrings from Honey & Ollie

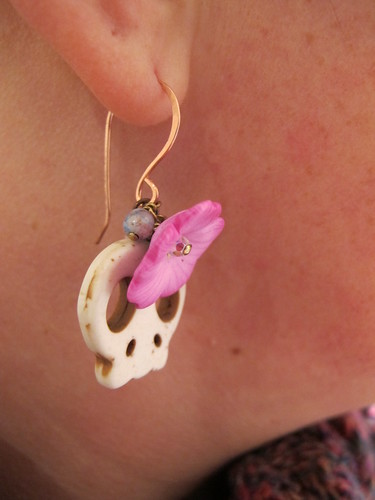
The skulls and flowers are made from polymer clay, with sparkly little gemstones dangling at the top. The findings (all hand made) are copper, which complements the stones beautifully. The hooks are a really lovely shape too, and they stay in place very securely. Despite being quite big, they’re really light to wear, and I’m definitely going to be adding more Honey and Ollie pieces to my wish list.

Handspun and hand dyed yarn from The Outside, with hand carved drop spindle

This is my little haul from the Museum of English Rural Life‘s Traditional Craft Fair.

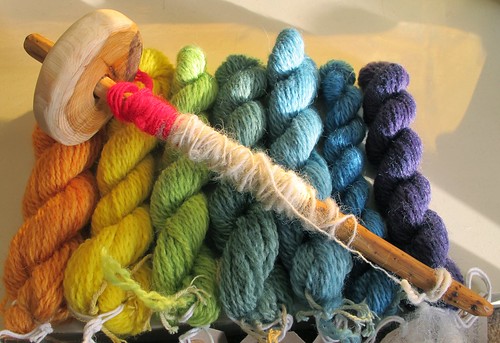
All from The Outside, on top is a hand-carved drop spindle. It’s made from yew, and it’s a bottom-whorl style. Excuse the red acrylic leader, I was so keen to try it out that I grabbed the first thing I could find! Once I’d figured out how to do a half-hitch to hold the yarn in place, I grabbed some fluff and started to spin straight away. It’s a lovely spindle, and I’m really happy to have one of my own instead of having to borrow from work. Now I can practice at home, and make as much wobbly, lumpy yarn as I like!

Handspun and hand dyed yarn from The Outside

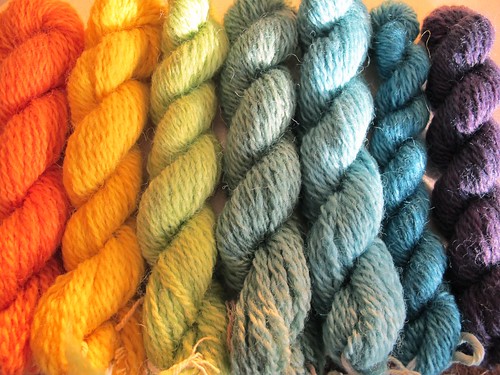
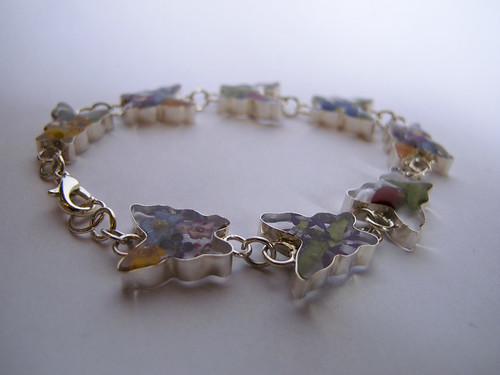
Speaking of yarn… this is neither wobbly, nor lumpy. It’s handspun from blue faced leicester wool, and it’s lovely and soft. The vibrant colours are all from natural dyes, and this should be just enough to make a pair of rainbow-striped mittens.

The colours, from left to right, are:
1) Weld & madder
2) Weld
3) Weld & woad
4) Weld & woad dipped in madder
5) Woad & weld
6) Woad
7) Cochineal (orange oxidised to blue)

I had a lovely chat with Romilly about dyeing, including planting up a dye garden and not being afraid of mordants. There is definitely going to be some experimentation with colour and fluff in my future! For now though, I need to practice my spinning, and think about the perfect pattern for my new rainbow-coloured mittens.

Jewellery Day

Labradorite earrings

Today was going to be Candle Day, but Paul’s at home with some horrible lurgy, so it seemed rude to make the house smell when he’s feeling poorly. They may be nice fragrances once they’re in a candle, but they’re very strong while you’re actually making them!

I’m not feeling too brilliant myself, so I thought I’d start the day gently by making a couple of pieces of jewellery. The earrings above are a little treat for me, and I bought all of the necessary bits from Kernowcraft. They took less than five minutes to put together, and I’m really pleased with them. Despite having three pairs of holes in my ears, I’m always bemoaning my lack of nice earrings – so now I have some lovely faceted labradorite cabochons. They were so easy to put together that I might just have to treat myself to a few more.

Helen's bracelet

This lovely bracelet belongs to my friend Helen, the Bright Lady. It just needed extending a little bit, so I added a couple of extra jump rings, and replaced the original fiddly little fastener with a better one. Again, a simple five-minute job, with all the necessary bits coming from Kernowcraft.

I feel a little bit like a walking advert for them sometimes, but I’ve been shopping from their catalogue since I was a teenager and my Mum had to write cheques for me to send off in the post! Yesterday they announced a job vacancy on their Facebook page, for somebody to design the catalogue and look after the website, and I must admit I spent a little while looking up the price of houses in Perranporth just in case.

Leather earrings

Leather earrings
Pretty little oak leaves, ever so slightly metallic.

Did you know that Ren, she of the incredible Fairysteps, also sells her offcuts of leather? Ever since I bought my amazing gold boots, I’ve been terribly paranoid about scuffing the toes and making a hole in them. Not due to any lack of sturdiness in the boots, I might add – I’m just very clumsy! So when I saw that there was a bag of metallic leather pieces for sale I snapped it up, thinking it would be useful to save a piece for the eventual mending of the boots.

Leather earrings

I think these are my favourite. I might try a pair with the colours the other way round.

And then the parcel got lost in the post, Ren gave me a refund, and I was a little bit sad for a while. No shiny leather for me. Until last week, when the parcel unexpectedly arrived! Hooray!

While the parcel was on its mystery travels, I’d been thinking about what else to make with the little leather bits. The first thing that came to mind was earrings, as leather’s so light.

Leather earrings

I’m not sure about the proportions of these. I think smaller jump rings would be better.

I had some craft punches that Paul’s Mum had given to me, and they turned out to be perfect for cutting out little matching shapes! It was a bit of a faff though, I have to admit. The punches are really designed to be hammered into card, and the thick leather was a little bit of a challenge. The pieces are quite fiddly too – the dragonflies are about an inch across.

The antique gold findings are all from Hobbycraft, made by Beads Unlimited. They say low nickel, so I’m hoping I won’t be allergic to them. I thought they suited the colours of the leather better than a bright gold. Apart from being a little unsure about the proportions of the gold dragonfly pair, which I’ll probably change at some point, I’m really pleased with how these have come out. I don’t think I’ll be making many more – my poor cutting mat can’t stand the hammering – although I do have plenty more ideas for things to make with the leather.

Corsages, doll shoes, perhaps a belt… watch this space!

Silver Jewellery

Silver Jewellery Class

Looking through my photos on Flickr, I realised that I made quite a lot of things towards the end of last year that I didn’t show you! These pieces were all made on a silver jewellery course at Maiden Erlegh School, with tutor Cathy Newell Price.

The piece above is an adjustable ring featuring two smoky quartz cabochons. The top one’s faceted and the bottom one’s smooth. The band is slightly hammered to give it a bit of texture. I bought the fancy bezel strip, I didn’t make all those teeny-tiny prongs from scratch!

Silver Jewellery Class

This was an experiment with reticulating the surface of sterling silver to create a textured effect. You have to heat and re-heat the silver enough times so that the silver and copper begin to separate, with the silver molecules coming to the surface. Once that’s happened, you can use the blowtorch to create ripples – you just need to be very careful not to melt everything!

Silver Jewellery Class

Which, as it turns out, is what happened here. I got a bit carried away with the blowtorch on one of these little pieces, and melted one end. Because I wanted the two pieces to match, I then had to very carefully and deliberately melt the other one until they were sort of similar. I don’t mind that they’re not exactly the same – I quite like having fraternal rather than identical earrings. Shows they’re made by hand.

I’d originally intended to make a pair of cufflinks, using the larger pieces of reticulated silver for the front, and the smaller pieces for the back. Unfortunately I very quickly ran out of patience while trying to make a chain to join the large and small pieces together. All those tiny little links were so fiddly! So I decided to quit while I was ahead, and ended up with two lovely pairs of earrings instead.

Silver Jewellery Class

This was actually the first piece I finished, a labradorite ring. It’s ever so slightly too big for me, but I couldn’t bear to part with it. I wear it with a plain ring over the top to hold it in place, and the large stones prevents it from spinning around on my finger.

The course finished in December, and I promised myself that I’d do more work with silver back in the Shed. I have all the tools, and lots more stones to set… I just haven’t got around to actually buying any more silver. I’d love to make a pendant to match the labradorite necklace though. Kernowcraft have just got in a beautiful teardrop-shaped cabochon that would complement it perfectly!

Reticulated Silver Earrings

Reticulated earrings

Still busy… and getting busier, as I’ve been offered the opportunity to attend an unexpected training session on Thursday. So this is just a quick little picture to show you what I made in last night’s silver jewellery class. It’s a pair of earrings made from reticulated sterling silver. You can’t really see the scale from this picture, but they’re about an inch long.

I did finish two pairs, but when I went to try on the second pair, I managed to snap off one of the wires. Hopefully my tutor will be able to show me how to repair this next week, as I think it must have been a soldering error on my part. Oops!

The surface texture is made by heating the metal several times. Sterling silver is actually an alloy, containing around 7.5% copper for strength. Repeated heating brings the fine silver particles to the surface, and with a bit of careful work from the blowtorch, they’ll transform into this delicate texture. The trick is in knowing when to take the blowtorch away, so that the entire piece doesn’t melt.

Originally they were going to be the front pieces for a pair of cufflinks, but I accidentally melted the back pieces, and then lost patience with the chain I was trying to make. After a bit of a struggle with lots of little links, I made an executive decision that earrings were the way forward. Much nicer!