All hats, all the time…

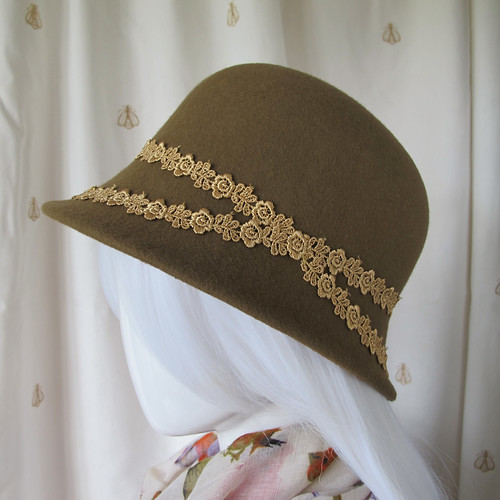
Felt cloche hat

Okay, that’s not strictly true, and I don’t even really know what I’ve been doing with myself over the last fortnight apart from working a lot and feeling a bit ill, but I have just finished a little flurry of hats, so here they are.

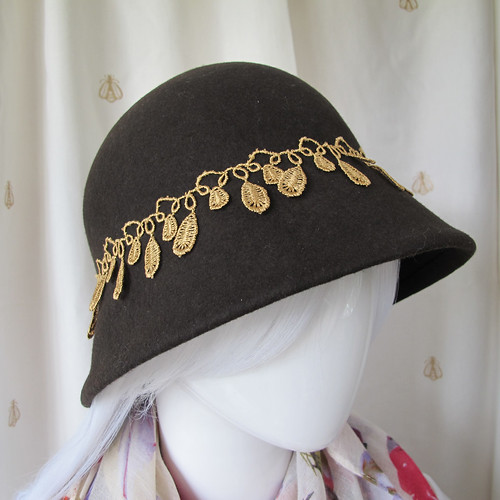
The one above is the colour of a perfect cup of builder’s tea, trimmed with gold lace that took weeks and weeks to arrive from China. I won’t be ordering that lace again, but I’m making good use of it while I’ve got it. This one in particular is very pretty, and I have enough left over for at least one more hat.

Felt cloche hat

This one’s more the colour of coffee, or really good dark chocolate. This is also lace-from-China, which I’ve altered slightly from its original form. It had a segmented piece at the top which is designed to have ribbon woven through it, but in this case I preferred it without. The loopy bits are all couched down securely to the crown of the hat, but the teardrop shapes are left loose to allow a bit of movement.

I’m hesitant to describe these two hats as “Steampunk” just because they happen to be brown and gold, but perhaps they’ll be the perfect addition to somebody’s outfit.

Felt cloche hat

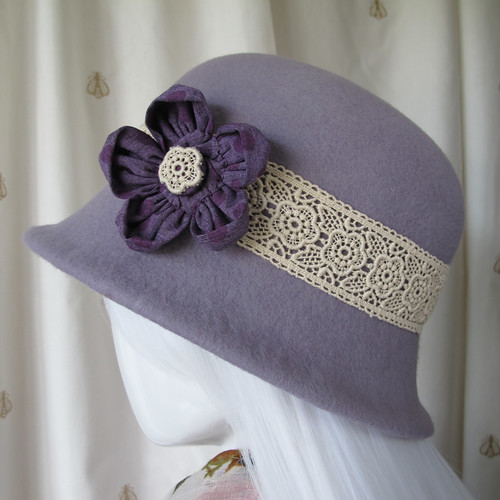
I wasn’t at all sure what I was going to do with this lavender coloured felt, and then I spotted this gorgeous organic cotton lace from Lancaster & Cornish. Okay, so it’s a lot more expensive than the Chinese lace (in this particular instance, fifteen times more expensive!!), but now I’ve worked with it I’m in no doubt that it’s absolutely worth it. The quality is amazing, it’s organically produced, and to be honest it’s just plain gorgeous.

The flower embellishment is also organic – a cotton and bamboo blend from the Organic Textile Company. I have quite a lot of little scraps of this fabric left over from a dress, so I can feel a few more of these flowers coming on – perhaps as brooches.

Felt cloche hat

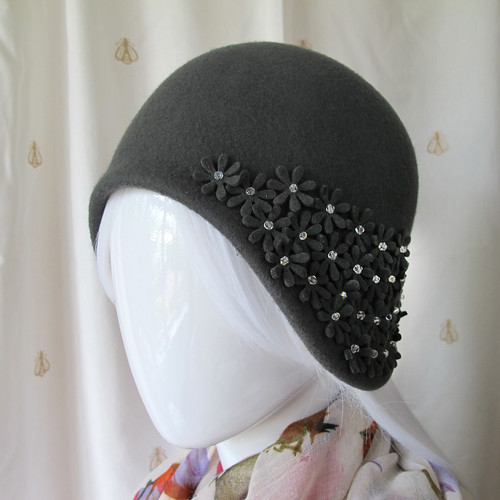
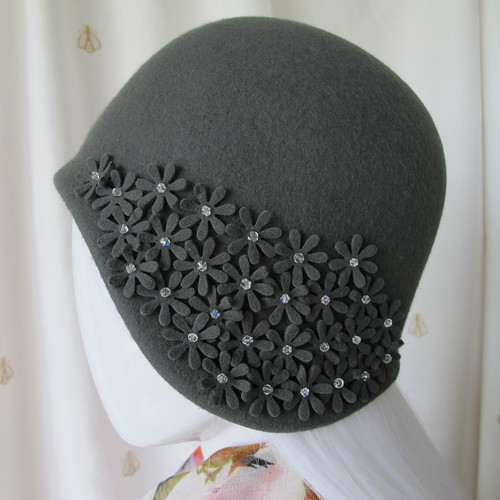
And this… this is what came off my new cloche block from Guy Morse-Brown. Isn’t it just gorgeous? I realise I seem to be singing my own praises here, but really it’s the hat block that does all the hard work, and Owen Morse-Brown (who makes the wooden blocks) has carved an absolute work of art. I’m in love with the asymmetrical shape, the way the crown hugs the head, and the cutaway at the back of the neck which makes it incredibly easy to wear. I’m keeping this one, and I’ll definitely be making more!

Felt cloche hat

The flowers are made from the offcuts of felt that I trimmed away from the brim, and they’re cut out with Sizzix paper punches. It’s quite hard work to hammer the punches through the thick felt – they’re not really designed for that kind of punishment – but the flowers have come out with nice clean edges. The centres are Swarovski crystals. (I’m trying not to think about how much it looks like one of those flowery swimming caps.)

The hats are all on Etsy, should you fancy a closer look.

I’m now at that awkward stage once again where I need somebody to buy a hat (or a bunch of smaller stuff from the Emporium) before I can afford to buy any more felt hoods to make new hats with. It seems unlikely that wool felt hats are going to fly off the shelves in the middle of summer, but at least it’s not as though I have a shortage of other materials to make things from in the meantime. I have some carded wool batts on order to make some felt which will hopefully be heavy-duty enough for slippers or hats, I have lots of organic cotton to turn into tunic tops, and I have plans to make a few things for myself. Summer dresses, perhaps. I certainly won’t be short of things to do!

Surprisingly popular!

A little bouquet of felted flowers. Wet felt for the petals, needle felted in the centre to hold them onto the bobby pins at the back.

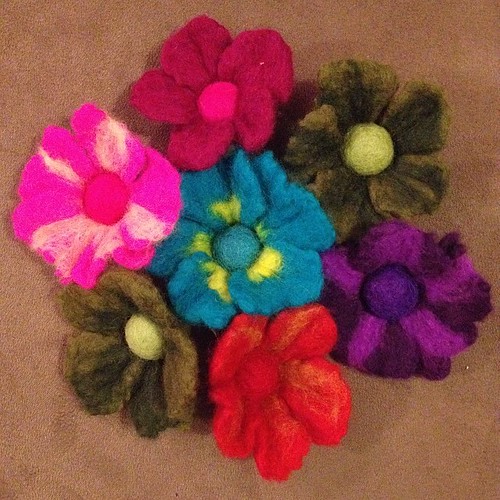
This little pile of felted flowers (complete with grainy Instagram filter – I’m “inexplicableemporium”) is waiting to go to work with me on Saturday evening, where I’ll be having a stall at our Museums At Night event. Well, that was the plan, anyway! The two green were ones were made by request for a friend, and the blue one sold on Facebook this afternoon, to another friend who’s also ordered a waterfall jacket that I’m really looking forward to making. Thankfully I still have seven hair flowers to take with me, plus another nine brooches the same size that are just waiting for the pins to be sewn on.

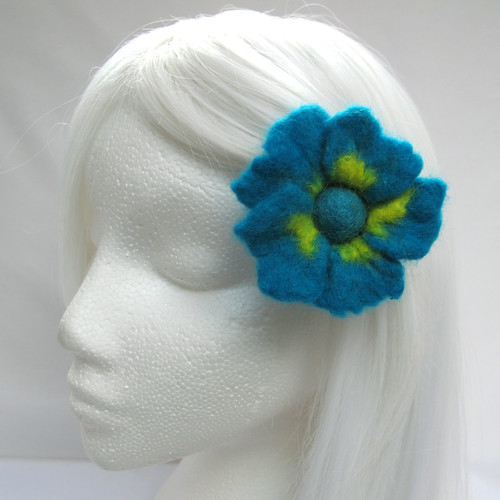
Small felt hair flower on a bobby pin

This is the size of the smaller flowers – about 7-10cm (3-4″) across, and quite deep. It’s attached to a bobby pin that has a little round pad at the top, which holds it firmly in place. The pad sits in between the flower petals and the centre ball, so it’s completely hidden and very secure.

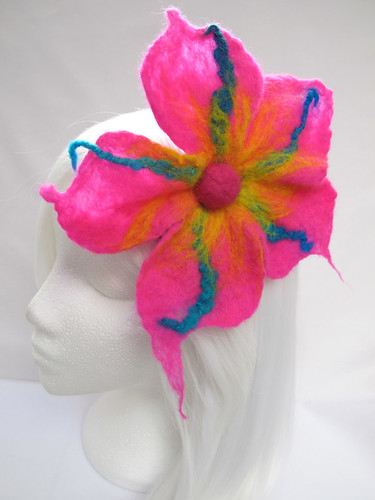
Large felt hair flower on a ribbon-covered comb

This one… well, first I was going to keep it. Then I sewed it onto a comb, and remembered that combs really don’t stay put in my hair. But I was worried that it would be too big, so I popped this photo onto Facebook to ask for some feedback. Apparently it’s not too big at all, a friend has claimed it for her own, and I’m in the process of making half a dozen similarly-sized ones to take to the Vintage Night tomorrow!

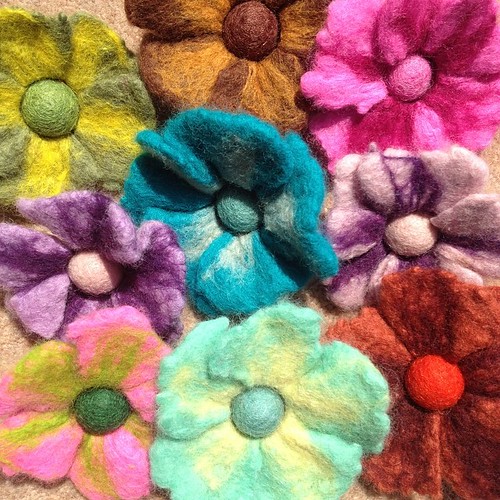
Yesterday's felt flowers, now dry and ready for brooch pins. More enormous flowers for hair combs on their way!

And this, again from Instagram, is a selection of the flowers I made yesterday. I’m hoping that there’s enough of a range of colours to appeal to lots of people, although from the response I’ve been getting to the photos, I’m hoping that their popularity isn’t going to be a problem!

Oh gosh, that sounds smug, and it really isn’t supposed to. In fact, I’m a little bit overwhelmed about how supportive and enthusiastic people are being. I’ve seen links to my Etsy store shared on forums, received offers of collaborations, and everyone’s just generally being lovely. I think I’m gradually starting to whittle down my making into things that I’m really happy with – so the fact that other people are happy with them too is the icing on the cake!

Felted Flower Experiments

Cut-and-sew felt flower

Whilst the feedback on all of my hats so far has been very positive (thank you!!), there’s one enquiry that’s come up several times now: “will we be able to buy the felt flowers without a hat?” The answer, of course, is yes! But I do need to work out the best way of doing that – both for me in terms of making the flowers, and for you in terms of offering lots of choice.

Cut-and-sew felt flower

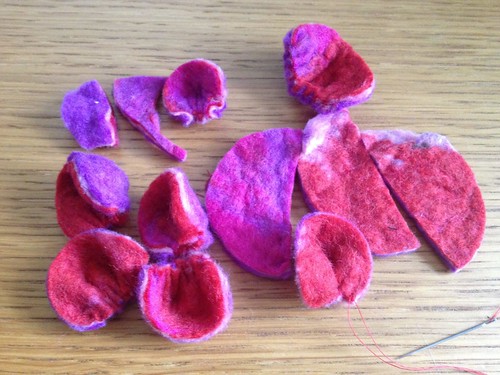
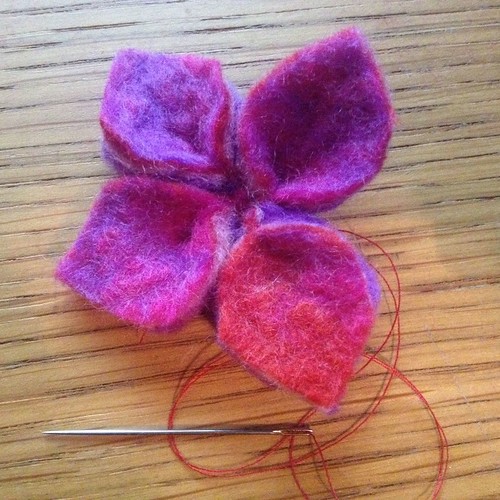
So, to that end, I’ve been doing lots of felt flower experiments. The two pictures above are of my attempts to cut out petals from a wet-felted sheet, and then sew them together again to make a flower. This did not go well. It turns out that if I’m making felt, I’d actually prefer to wet felt the flower itself, in one go.

Wet felted flowers

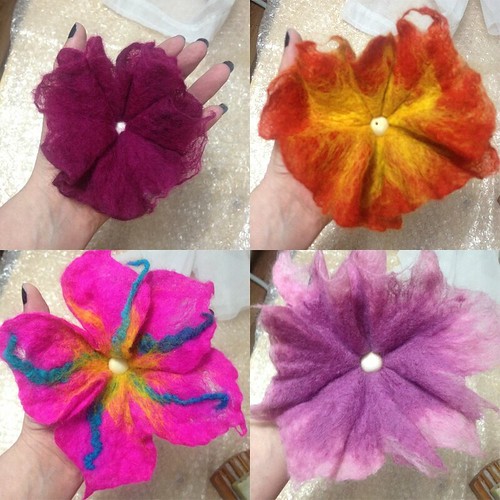
So that’s what I did next! It turns out I have a bit of a problem with size though… these are all smaller than the monster flower that I made for Nicola’s orange hat, but the smallest one is still almost the size of my hand. They just seem to naturally want to come out big!

This is fine by me, as I think a huge great flower on a brooch or a clip or a hair comb would make a fantastic statement! But of course not everybody wants to show off as much as I do, so I thought I’d better try and make some smaller ones as well.

Needle felted hair flower

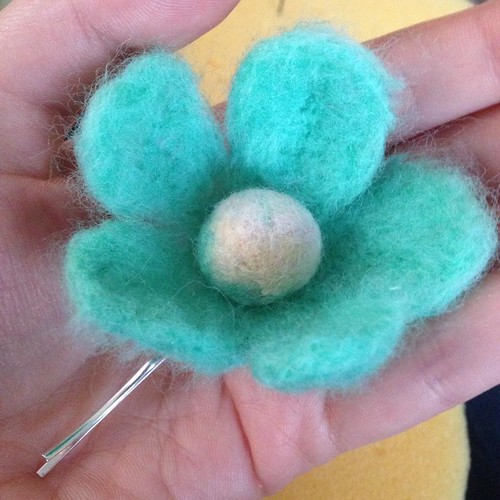
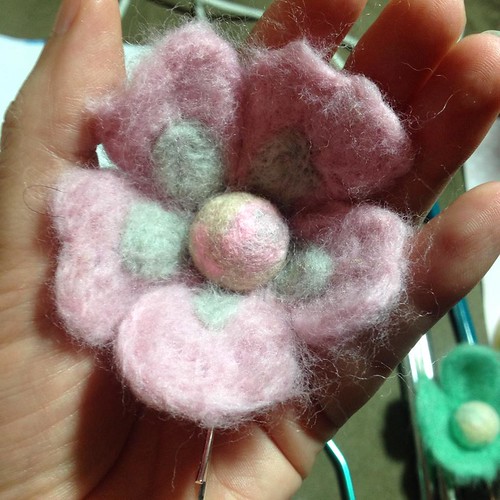
So, here’s a little needle-felted flower, attached to a large bobby pin. Much better! It fits in the palm of my hand, and the flower is light enough that it’s not going to pull the clip out of place.

Needle felted hair flower

This is the second one, playing with adding a bit more colour to go with the felted ball in the centre. I have a few of those that I made during a session with the children at work, so now I’m choosing colours and designing flowers to go around them. This one’s already sneaking up in size though, so I need to make sure that these stay dainty and don’t get too big! I also need to practice my needle felting technique, as I’m not quite convinced about the texture of this one. Maybe a finer needle would do the trick.

So, watch this space, as I suspect there will be lots more flowers to come!

At long last – another new hat!

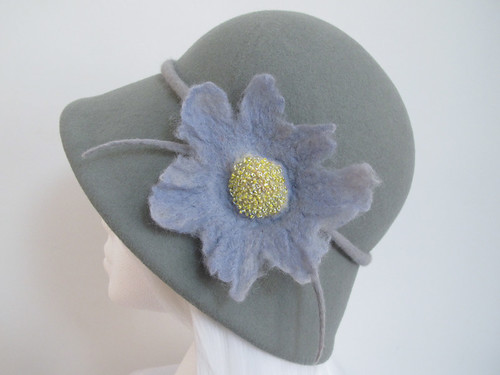
Pale grey cloche hat with blue beaded felt flower

It wasn’t until I came to upload this hat to the Etsy shop that I realised it’s a whole month since I added the previous one. How on earth did that happen?

I’ve been doing a lot of thinking about the hats (too much thinking and not enough doing, clearly!), and I think in April (when I formally register Eternal Magpie as a business again) I’m going to move these hats out of the Inexplicable Emporium and over to an Eternal Magpie branded Etsy store. I think that will allow me to have a bit more creativity without having to shoehorn them into the faux-Victorian theme… and if I make anything properly crazy or very obviously Steampunk-inspired, then it can go into the Emporium if that’s where it fits best.

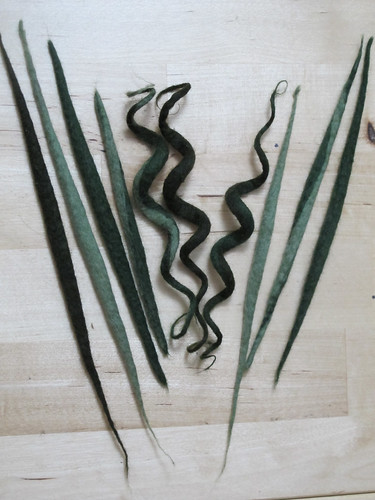
Felted leaves and tendrils

I’ve been having a bit of a play with felt again, with a view to the hats having a lot more handmade embellishments, rather than only ribbons and buttons. I think that lends them a certain uniqueness – anyone can go to a shop and choose a pretty ribbon and a striking button, but only I can make these exact flowers. Sure, there are a million and one felted flower tutorials out there, so I can’t claim any uniqueness in that. But these flowers will have come out of my hands and my imagination, and that will hopefully make these hats stand out a little from the many other cloches out there. Typing “felt cloche hat” into Etsy currently returns 1,869 results, so I need to make mind stand out somehow! They’re currently on pages 1, 2, 3, 5, 6 and 7 (out of 47) of that search, so not bad, but anything I can do to make them that little bit more interesting will definitely help.

I also want to make a few smaller things, such as hair clips, to offset the fact that yes, these hats are going to be expensive when the prices go up in April, and yes, they’re going to be outside of many people’s budgets. I’m hoping that people might start by buying a hair clip with some pretty felted flowers on it, and like it so much that they save up to buy a hat. Well, a woman can dream!


Jewellery Day

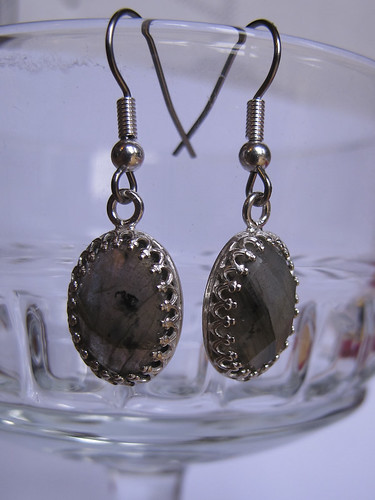
Labradorite earrings

Today was going to be Candle Day, but Paul’s at home with some horrible lurgy, so it seemed rude to make the house smell when he’s feeling poorly. They may be nice fragrances once they’re in a candle, but they’re very strong while you’re actually making them!

I’m not feeling too brilliant myself, so I thought I’d start the day gently by making a couple of pieces of jewellery. The earrings above are a little treat for me, and I bought all of the necessary bits from Kernowcraft. They took less than five minutes to put together, and I’m really pleased with them. Despite having three pairs of holes in my ears, I’m always bemoaning my lack of nice earrings – so now I have some lovely faceted labradorite cabochons. They were so easy to put together that I might just have to treat myself to a few more.

Helen's bracelet

This lovely bracelet belongs to my friend Helen, the Bright Lady. It just needed extending a little bit, so I added a couple of extra jump rings, and replaced the original fiddly little fastener with a better one. Again, a simple five-minute job, with all the necessary bits coming from Kernowcraft.

I feel a little bit like a walking advert for them sometimes, but I’ve been shopping from their catalogue since I was a teenager and my Mum had to write cheques for me to send off in the post! Yesterday they announced a job vacancy on their Facebook page, for somebody to design the catalogue and look after the website, and I must admit I spent a little while looking up the price of houses in Perranporth just in case.

Hapa-zome

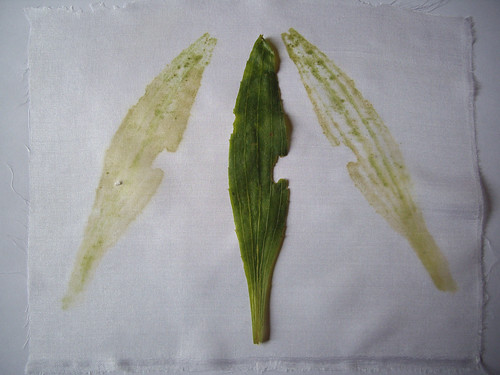
Plaintain leaf
Ribwort plaintain leaf

Today I have been mostly hitting plants with a hammer.

As you do.

It’s a technique called “hapa-zome”, coined by India Flint, that literally means “leaf dye” in Japanese.

Using a few sheets of thin cardboard to cushion my work table, I laid out a small piece of silk paj, and placed the plantain leaf on top. The silk was folded in half, leaving the leaf sandwiched in between. I popped a plain sheet of paper over the top… and hit it with a hammer.

A rubber hammer is advised, but I don’t have one of those, so I used my leather jeweller’s hammer instead. The trick is in hitting the leaf hard enough that the colour transfers onto the fabric, but not so hard that it turns into mush and gets stuck to the silk.

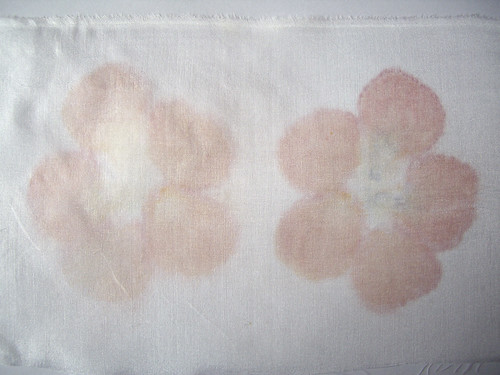
Nasturtium petals
nasturtium petals

The plantain leaf took a fair bit of hammering before I had a nice even print. These nasturtium petals, on the other hand, I barely had to touch. Interestingly, when I peeled them off the fabric they were almost transparent, having been bright orange beforehand. The print they’ve left behind is very soft and faint, almost ghostly.

These prints won’t be light fast, but apparently they should last a good couple of years if they’re not washed too often. I can’t decide whether or not I like them… but I’m keen to bring home some more leaves and have another go.

Summer Walk

Hydrangea

It finally felt a little bit like summer, for about an hour at lunchtime today. I’ve been ill for most of this week, and cooped up indoors, so I thought I’d brave a little walk.

Poppy

The hydrangea above, and these poppies, are in the garden of my local church. It’s a brand new building with a brand new garden, but a few small plants are finally starting to establish themselves.

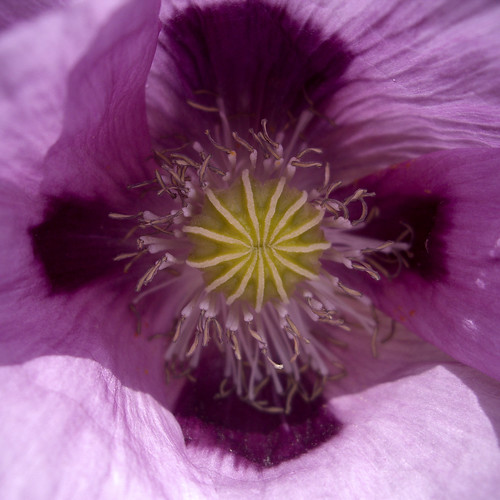
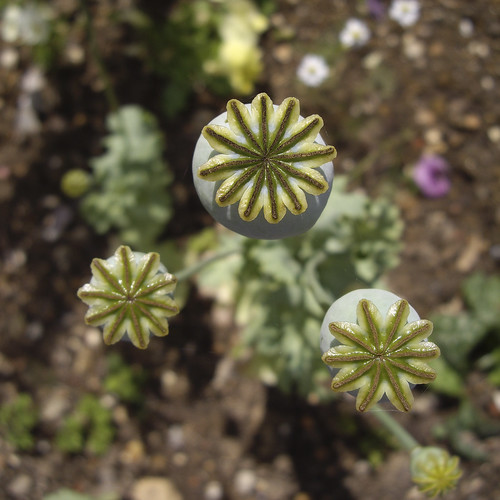
Poppy heads

I do love my little camera. It’s a Pentax Optio A30, about five years old, and it took this picture all by itself, on the super macro setting. The only post-processing I did was to crop the image into a square.

Sadly it’s just about on its last legs (it’s terrible in low light, and barely speaking to the batteries), which means I’m going to have to replace it. I’m not looking forward to that, partly because I can’t afford a new camera, and partly because this one’s been so lovely that I’m completely spoiled by it.

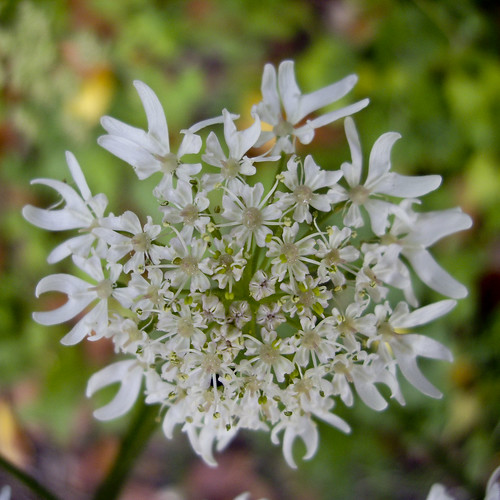
Hogweed

This hogweed (I think!) grows at the side of the path down to the underpass.

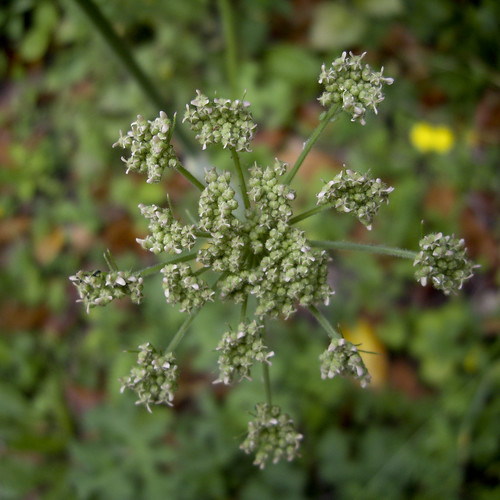
Hogweed

It gives me ideas for silver clay jewellery, with this lovely sculptural shape pressed into a pendant. Or perhaps a lovely embroidery, with the buds made up of french knots.

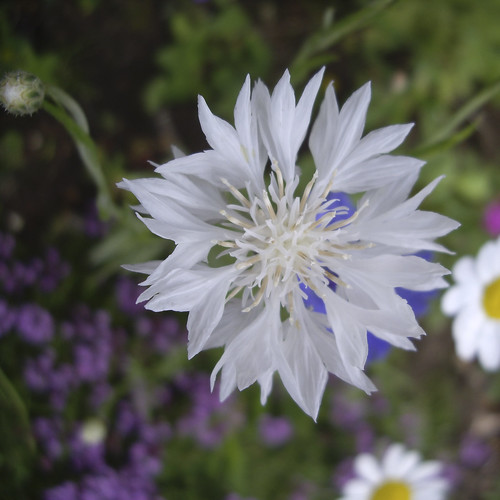
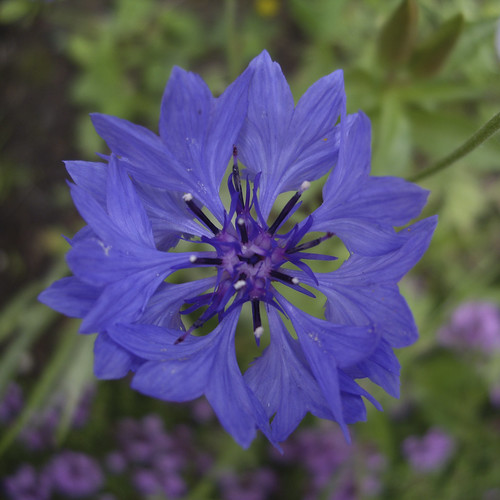
White cornflower

These cornflowers have both appeared in my front garden. Who knew you could have white cornflowers? The only ones I’ve ever known have been blue. I sowed three mixed packets of wildflower seeds, and this is the only little patch that’s come up. A square foot of daisies and cornflowers amongst the thyme.

Cornflower

Hopefully they’ll seed themselves, so that next year we have a front garden full of these little gems.

Colourful Flowery Shoes

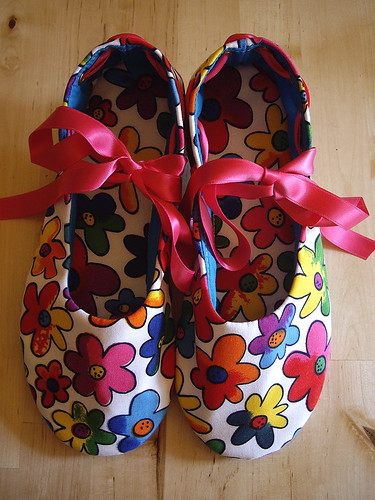
Serena's Flowery Shoes

Ooh, look, more shoes!

Serena sent me this fabric from her stash. Aren’t the bright colours fabulous?

This pair were slightly too small to fit onto my lasts, which means that you can see a bit more of the construction. All of the shoes so far have eight eyelets around the back of the heel. These have a ribbon threaded through, to fasten the shoes and adjust the fit.

The shoes do stay put without the ribbons, but I just prefer them this way.

Buttonholes

I haven’t been showing you very many of my wedding plans on here, but this is a little something I thought other people might be interested in. They’re not quite finished yet, but these are the basis of the buttonholes that our families and Best Man are going to wear on the day. The pink and purple ones are for the men, and the cream and peach are for the ladies.

All of the flowers came from Hobby Craft. The roses are paper, with wire stems. The fabric violets came as part of a big posy which I dismantled. I’ll be using the large leaves from the posy to go behind each of the buttonholes. The silver and gold holders are actually filigree aglets for corset laces, bought from Vena Cava.

The large leaves are currently being pressed underneath a pile of books, waiting for the glue to dry. I’ve attached a magnet to the back of each large leaf, and glued on a smaller leaf to cover it. That way there’s no need for pins – the back of the magnet simply goes underneath a lapel or inside a dress, and holds the buttonhole into place.

Once the glue is dry, the leaves will be held very simply by twisting around the wire stems from the flowers. Then I can trim the stems, crimp the top of the aglets, and they’re done!