It’s not all work, work, work…

bonnet

A question I’m asked fairly often is whether I plan to eventually give up my job and work full time for myself, making and selling things. If you’d asked me a few years ago, the answer would have been a resounding yes! I’ve had a couple of periods in between jobs where I was lucky enough to be able to work for myself full time, and whilst I did enjoy it, the pressure of needing to bring in a steady income coupled with the isolation of being alone at home all the time made me, quite frankly, go a bit bonkers.

For the past five years I’ve been volunteering and subsequently working at The Museum of English Rural Life, in a whole host of different capacities.

chicken

Chicken-wrangling, during a visit from a local farm…

victorian

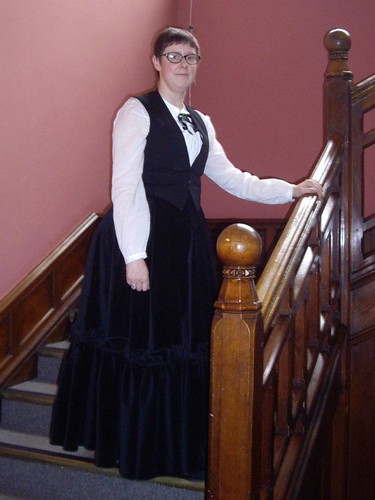
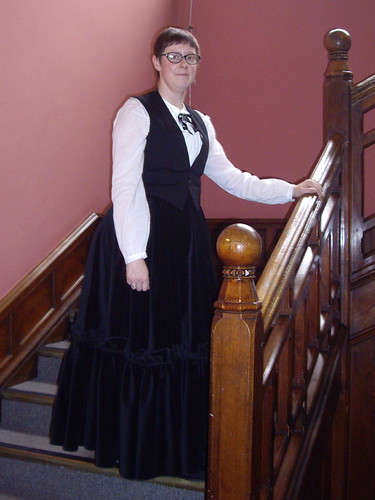
Dressing (approximately) as a Victorian, for a Dickens at Christmas event…

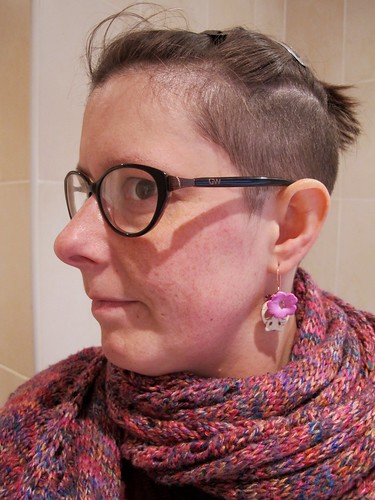
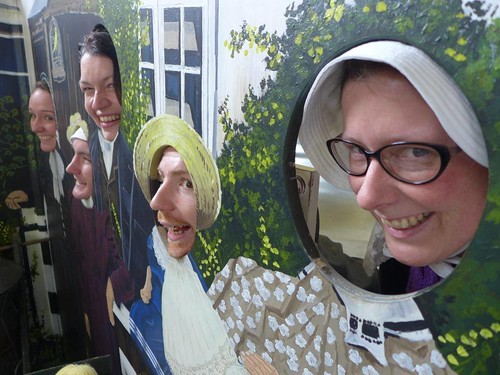
…and bonnet-wearing, with colleagues, for #museumselfie day on Twitter, in the photo at the top!

cupboard

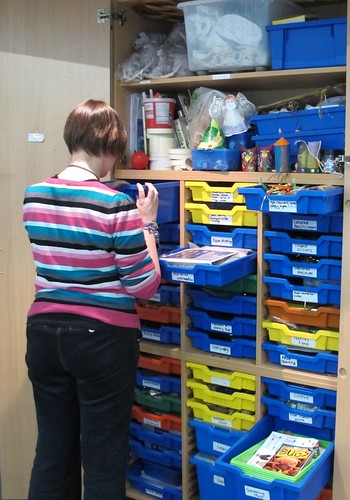
As Learning Assistant I had access to the most fantastic supply of materials, so I could work with the Toddler Time group, and with families to make all sorts of things…

apple_pompom

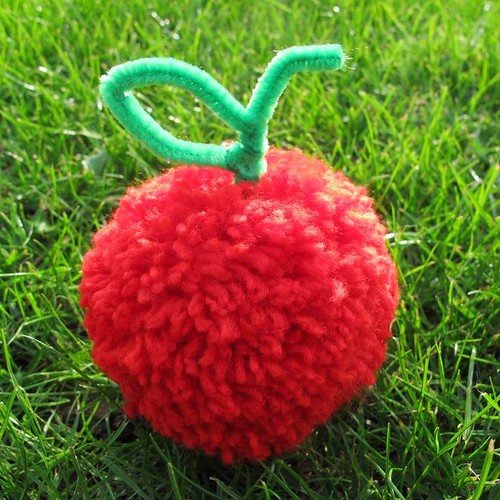
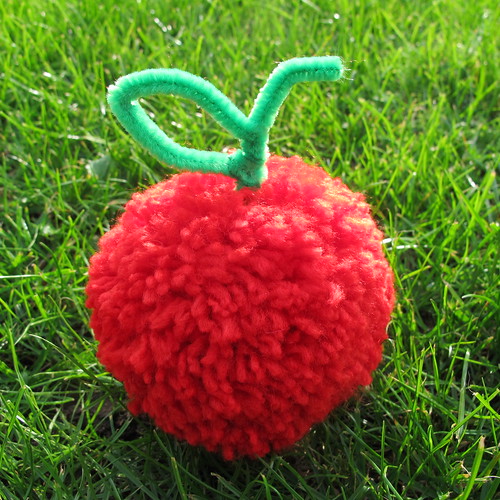
… like this “pomme pomme” for Apple Day!

king_alfred

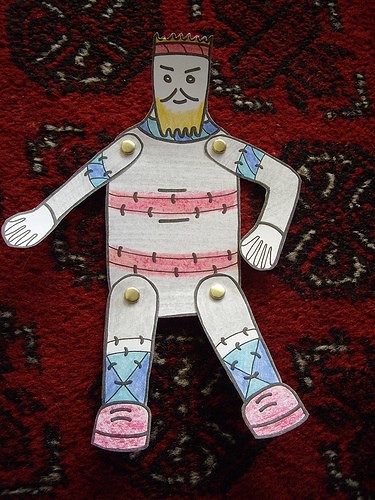
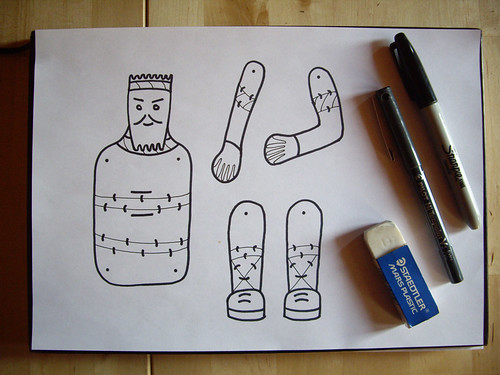
This paper puppet, inspired by our life-size straw effigy of King Alfred

xmas_trees

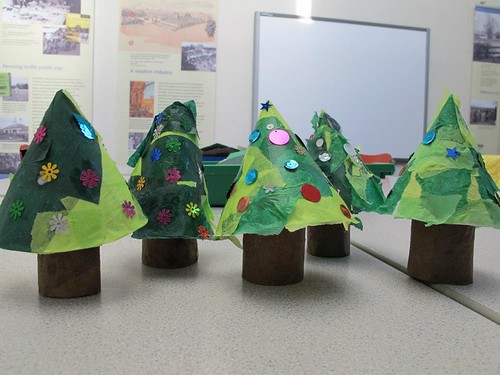
…and these adorable little Christmas trees. Recycled cardboard tubes and paper plates are an extremely versatile mainstay of toddler craft projects!

Admittedly I’m not working with the toddlers at the moment, having asked for a small cut in my hours to try and get my health back on track. But I am still working as part of the Visitor Services team, which means mostly half-days on the front desk meeting and greeting visitors to the museum, helping to look after the shop, and being on hand at lots of different types of events. I haven’t stopped working on the craft projects completely (I’m currently putting together a printing activity for our Village Fete), and I’m lucky enough to work with a great team of colleagues – many of whom I now count as friends.

Handspun and hand dyed yarn from The Outside, with hand carved drop spindle

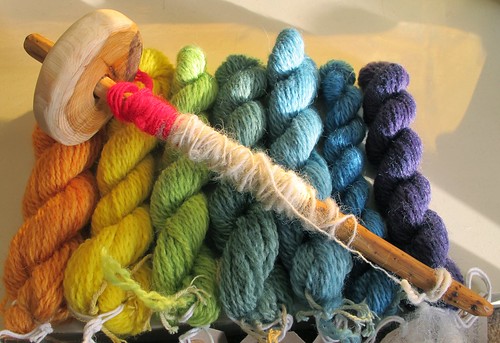
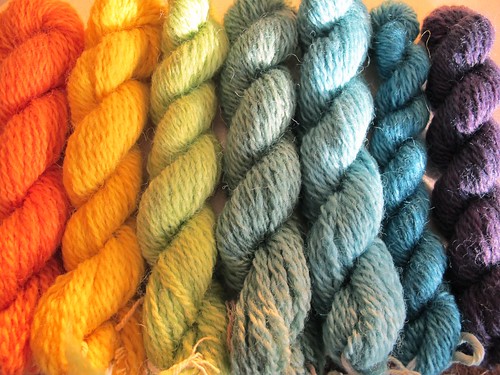
Of course, we all have days when we wake up in the morning and think, “I wish I didn’t have to go to work today”, especially when the making is going well, and I don’t want to have to take a break from a particular project. But having a steady part-time job gives me just enough income that I don’t have to rely on my artwork to pay the bills. This alone is incredibly liberating, as it gives me the freedom to experiment with different projects without having to worry about whether they’ll sell. It also gives me enough time to actually do the work, as well as being fantastically inspiring! Since being at the museum I’ve learned to make felt, to use a drop spindle and a spinning wheel, and been privileged to work with lots of other fantastic artists. There are tools and textiles in the collections which are endlessly fascinating, as well as tremendously knowledgeable colleagues to talk to. The garden is beautiful, and there’s always something different going on.

There’s a school of thought which suggests that the only ways for an artistic type to actually earn a living are either by teaching, or working part-time for somebody else. At the museum I get to do a bit of both, and a lot more besides. What more could I ask for? I used to think that my eventual goal should always be to end up working solely for myself, making a living from my artwork and sewing. It turns out that having this balance suits me much better, and I hope it can continue for many years to come.

(And thanks to the marvels of Modern Technology, this should magically update itself while I’m at work today!)


Shopping Spree: Skulls, Skeins and a Spindle

Handmade polymer & gemstone earrings from Honey & Ollie

Look what arrived today – my lovely new earrings from Honey and Ollie! They arrived super quick, all the way from California. So quick that I wasn’t expecting them for about another week! As a recovering goth, I’m still irresistibly drawn to Things With Skulls, and these were so pretty that I couldn’t resist.

Handmade polymer & gemstone earrings from Honey & Ollie

The skulls and flowers are made from polymer clay, with sparkly little gemstones dangling at the top. The findings (all hand made) are copper, which complements the stones beautifully. The hooks are a really lovely shape too, and they stay in place very securely. Despite being quite big, they’re really light to wear, and I’m definitely going to be adding more Honey and Ollie pieces to my wish list.

Handspun and hand dyed yarn from The Outside, with hand carved drop spindle

This is my little haul from the Museum of English Rural Life‘s Traditional Craft Fair.

All from The Outside, on top is a hand-carved drop spindle. It’s made from yew, and it’s a bottom-whorl style. Excuse the red acrylic leader, I was so keen to try it out that I grabbed the first thing I could find! Once I’d figured out how to do a half-hitch to hold the yarn in place, I grabbed some fluff and started to spin straight away. It’s a lovely spindle, and I’m really happy to have one of my own instead of having to borrow from work. Now I can practice at home, and make as much wobbly, lumpy yarn as I like!

Handspun and hand dyed yarn from The Outside

Speaking of yarn… this is neither wobbly, nor lumpy. It’s handspun from blue faced leicester wool, and it’s lovely and soft. The vibrant colours are all from natural dyes, and this should be just enough to make a pair of rainbow-striped mittens.

The colours, from left to right, are:
1) Weld & madder
2) Weld
3) Weld & woad
4) Weld & woad dipped in madder
5) Woad & weld
6) Woad
7) Cochineal (orange oxidised to blue)

I had a lovely chat with Romilly about dyeing, including planting up a dye garden and not being afraid of mordants. There is definitely going to be some experimentation with colour and fluff in my future! For now though, I need to practice my spinning, and think about the perfect pattern for my new rainbow-coloured mittens.

Fuzzy red apple

Pompom apple

It’s Apple Day at the Museum of English Rural Life next Saturday – October 19th. I needed to come up with an apple-related activity for families, but because my usual teaching space is being turned into a café for the day we’ll be doing the activity in the museum itself. Because a large number of our objects are on open display, this means the activity has to be very clean – no glue, no glitter, no paint.

Enter this ridiculously cute apple pompom! I used a mug as a template for the outer circle, and a bottle of tipp-ex for the centre. This results in a pompom about the size of a tennis ball, and uses about 20 metres of chunky wool. After you’ve tied off the centre of the pompom, you just wrap a pipe cleaner through before you remove the cardboard, and then twist the ends into a stalk and a leaf. Ta-da!

I know it’s just a simple little thing, but I’m disproportionately pleased with how this has come out. The yarn is so soft, and the pompom is a lovely size, and I might just have to rummage through my yarn stash and make some for myself! I’m usually opposed to the making of novelty yarn items that have no functional value, but I can feel myself being strongly swayed by this one.

If you want to make one for yourself, all you need to do is take yourself and 50p (plus the £1 entrance fee for adults) down to MERL next weekend!

Garden in the frost

MERL Garden

I seem to be going through a phase of taking only terrible photos of my sewing (possibly because it’s so damned dark out here in the Shed), so I braved the frost yesterday and took a few pictures in the garden at work.

Frosty flowerhead

I’m still using my camera completely on automatic, until I can afford an update to Lightroom. Then I’ll set it to manual, start shooting RAW files, and edit away to my little heart’s content!

MERL Garden

I’m really lucky in that the Museum of English Rural Life‘s garden is beautiful at any time of year. It’s open whenever the museum’s open, and it would be lovely if more people wanted to come and take pictures of it!

Frosty rosehips

These are the same rosehips I photographed back in October – see, I didn’t pick all of them for dyeing with! Which reminds me, the ones I did pick are still sitting in the freezer, waiting for me to find the time to do something with them.

Fennel

I think this is fennel, silhouetted dramatically against the sky. Well, that was the idea, anyway. I think Skycarrots’ silhouettes are much more dramatic than mine! Hers are hemlock, and they look very ethereal.

Frosty rosebud

Unbelievably, there are still lots of buds on some of the rose bushes. I love the delicate pink tips of this one, and its tiny string of frosted bunting.

Frosty spiderweb

And last but not least, that clichéd frosty morning photo of a spiderweb! Two days of heavy hoar frost has broken most of the webs into tatters, but this particular bush was absolutely covered in them.

One of my intentions for next year is to really try and make the most of this new camera, so hopefully there’ll be a lot more photo posts coming up in 2013!

Vaguely Victorian: Part Two

Victorian-ish outfit

Here you go – for those who were wondering, this is what the vaguely Victorian outfit looked like at the end of a long day, in a lovely Victorian staircase hall.

Contrary to a few people’s concerns, I did not boil to death with so many layers of clothes on. The skirt was quite heavy, but the bustle was so comfortable I kept forgetting I was wearing it and trying to squeeze through spaces that were impossible to negotiate with such an enormous bottom!

At the end of the day I also learned that it is possible to run for the bus in a corset and bustle – although I wouldn’t recommend it! In fact it’s not the ideal outfit for bus travel generally. You can’t get upstairs, for a start, and I was a bit worried that the driver would ask me to buy two tickets for taking up so much room!

I must admit that, without the complicated underpinnings, I’d actually quite happily wear this outfit (or something very similar) to work on any old not-particularly-Victorian day.

Crafty King Alfred

King Alfred Paper Puppet

Have I mentioned lately that I love my job? I run the Toddler Time sessions at the Museum of English Rural Life (every Friday during term time, 10-11 & 1-2), and part of that is to come up with an activity every week – preferably one that’s linked to the museum’s collections in some way.

This is a sneak preview of Friday’s activity – a paper puppet of King Alfred to colour in and cut out. You fasten all the pieces together with split pins, in case you were wondering. One of the highlights of the museum is a six foot straw sculpture of the king in question, so I thought it would be nice to make a little something in his honour.

I drew a quick pencil sketch, and had planned to recreate it in Illustrator. But the scanner won’t speak to my computer, I couldn’t get a photograph that was clear enough to be useful, and so I decided to go back and do things the old fashioned way. I traced my sketch onto a new piece of paper, drew over it with two different thicknesses of pen, and rubbed out the pencil lines. On Friday I’ll fit all the pieces onto A5 paper, then use the photocopier to enlarge it onto A4 card.

Sometimes it’s so much easier to do things the old fashioned way!

[edit] If you’d like to see some of the puppets that the toddlers made, I took some photos. Can you tell which is the one I made myself?

MERL: Farmyard Fun!

Meet Izzy and Fizzy – a Herdwick sheep and lamb from Miller’s Ark.

Over the summer, Miller’s Ark brought a garden full of animals to MERL, and I was lucky enough to be volunteering that day. The children were allowed inside the pen with the sheep and goats, so I spent most of the afternoon supervising them, and making sure that everybody had washed their hands.

There are loads of photos on MERL’s Facebook which show all the animals, and hundreds of visitors having a great time.

I also learned about The Herdy Company, who are committed to giving back a percentage of their profits to look after the Lakeland landscape. I think my favourite things are the stitch markers and the herdy banks. As they say, why should the pigs have all the money?

I had a fabulous day at the MERL farm – it was great to see some of the animals that would have played such an important part in everyday rural life, and to see the visitors enjoying them too.

MERL: Bread and Butter

Hand made bread

Look, I made bread! Normally I’d use the breadmaker. This time I was volunteering at the Museum of English Rural Life, where I was helping to teach small children (and their parents) how to make their own bread and butter.

We used the bread recipe from the flour packet, which you can find here. We weighed out all of the ingredients in advance, so all the kids had to do was mix the dough and then knead like mad!

There were some already-measured ingredients left over at the end of the day, so I had a go at making my own loaf. It didn’t go too well, which was a bit embarrassing when a room full of children had made it look quite simple! I didn’t use enough liquid in my dough, so it came out a bit on the heavy side. I also forgot to compensate for the speed of the fan oven when I baked it at home, but thankfully I managed to rescue it before it burned to a crisp! Despite being a bit dense, it tasted pretty good.

To make your own butter, you need the following:

  • A tub of cream, at room temperature. (Ours had been opened and left overnight.)
  • A clean glass jar. (Ours had been sterilised in the dishwasher.)
  • Two wooden spoons, or a piece of cheesecloth

That’s it!

Simply spoon in the cream until the jar’s about  one third full. Make sure the lid’s on very tight, and hold the jar with one hand on the top and one hand on the bottom. This makes sure that the lid doesn’t fly off, and also means that your warm hands aren’t all over the jar, heating up your butter. Now shake the jar.

As you keep shaking, you’ll see the cream start to go through some changes. At first it might be quite runny, but it will start to granulate and separate into yellow fat and white liquid. Eventually the buttermilk will separate out, and a large lump of very squashy butter will form.

Drain off the buttermilk – you can use it to bake scones or pancakes, or if you like the taste you can just drink it! You’ll need to pour some cold water into your jar to rinse off the rest. If you don’t get rid of the buttermilk, the butter can go rancid very quickly. Rinse until the water coming out of the jar is clear. The cold water will also help your butter to become more solid.

Once the rinsing’s done, you can pat your butter between two wooden spoons, or squeeze it through cheesecloth to get rid of the very last remains of the buttermilk. Pat it into shape and leave it in the fridge to harden, and it should be ready by the time your lovely loaf of bread comes out of the oven!

If shaking a glass jar seems like altogether too much hard work, you can also make butter in food processor. You have to pay attention though, and stop immediately the butter’s formed. If you keep going, you’ll get… well, I don’t know what it is, but it’s definitely not butter!

Falling in love with a concertina.

Wheatstone English Concertina

This is my lovely Wheatstone concertina. I bought it about a year ago, and have been playing it a little bit ever since. I don’t normally post about music very much, because this is supposed to be a sewing and knitting and generally crafty blog, but summer’s clog dancing season, so I might mention it from time to time.

Last week I went to a workshop at the Museum of English Rural Life, given by Karen Tweed, who’s an accordion player. I felt slightly awkward, being one of only three people to turn up with an instrument that wasn’t an accordion, but I had great fun. The workshop was slightly too difficult for my current level of skill but it pushed me to play more quickly than I’ve done before, and that’s definitely helped my practice since. After the workshop there was a concert by Hilary James and Simon Mayor, and then a wonderfully inspiring performance by Karen.

I came home absolutely smitten with the accordion, and the ability to carry practically an entire orchestra around with you in one handy box. I recently borrowed a tiny 12-bass accordion from a friend, although I haven’t yet managed to learn to play, well, anything. I can’t cope with trying to do so many things at the same time! Piano on one side, buttons on the other, notes and chords, bellows in the middle, plus reading the music… it all seems a bit much.

This weekend I went to Chippenham Folk Festival with Aldbrickham. I had a little look in the musical instrument tent, as you do, and accidentally fell in love with a new concertina, made by Marcus Music.

Marcus makes brand new hand crafted concertinas, and they’re absolutely beautiful. I’d previously been looking at antique ones because the general consensus seems to be that most modern concertinas are mass-produced and not very good, but these were hand-made and absolutely stunning. He makes a 37-button English concertina with wooden ends and seven-fold bellows. (Mine’s a four-fold.) I had a little play and it felt absolutely lovely. The buttons are slightly closer together than on my own instrument, which makes it a little bit easier on my small hands. The bellows are really smooth and free, and it makes a much louder sound than my Wheatstone without being at all honky or squeaky. My concertina’s a 48-key, so I’d have to be absolutely certain I wasn’t going to miss the extra notes, but I think if I’m still playing the concertina in a year’s time (which I plan to be!), I might have to invest in one of these.

This morning I did as much practice as my poor old thumbs could stand, and really enjoyed it. I’m still very much a beginner, so I’m at the stage where making any kind of progress at all is really satisfying. But even though I’m no virtuoso, there are some problems with my current concertina which are making a new one seem very tempting. It has a leak that needs repairing, and the bellows are very stiff, which is why it makes my thumbs hurt after a while.

I could send my current concertina off to Marcus and have the bellows repaired or replaced. He could proably also replace the missing leather from the finger plates. But with an antique instrument, I don’t know whether it’s a good idea to replace something as fundamental as the bellows. Does it become a different instrument then? Does it lose its value if the original bellows are missing? Or does that not matter, as long as it becomes playable again and I no longer need to sell it? I don’t know.

Either way, I can’t afford to buy a new concertina right now. So, I’ll keep learning to play the one I’ve got, and I’ll keep saving up for a better one, and I’ll see how things go.

Women’s Land Army boot

Women's Land Army boots, at MERL

The Museum of English Rural Life have an exhibition on at the moment called Land Ladies: women and farming in England, 1900-1954. It’s on until April 19th.

The boots above were issued by the Women’s Land Army, and they belonged to Doreen Thorpe who served in Hertfordshire, Middlesex, Derbyshire and Yorkshire.

I’m impressed that they’ve survived completely unworn, not least because it means that we can see all the details on the stitched and hobnailed soles. I particularly like the horseshoe heels which I hadn’t seen before.