Claire the Conservatrix

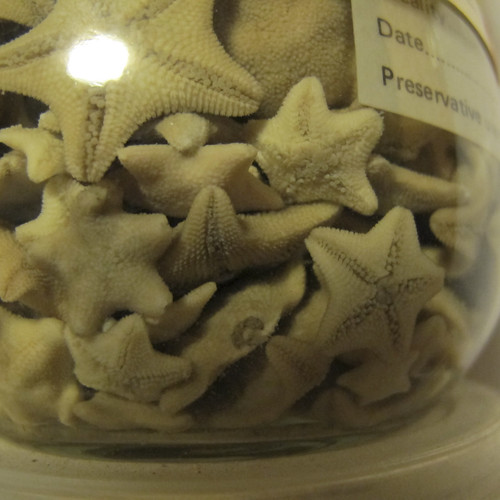
Little starfish

Aren’t these little starfish adorable? Pictured larger-than-life, they’re actually about the size of a 10p piece. So cute!

And in case you’re wondering what a jar full of preserved starfish are doing on a crafty blog… well, they won’t be here for much longer. You know I volunteer at the Cole Museum of Zoology? And I’m hoping to train in the conservation of natural history objects? Well, I thought it was about time that those subjects had a little blog of their own.

So, here it is:

claire the conservatrix
adventures in natural history conservation


I’m going on a course in London next week, learning more about the preservation of specimens in spirit, like these starfish. I’ve also applied for a voluntary position at another local museum, cataloguing beetles, so fingers crossed for that.

It would be lovely to get some discussion going on at the new blog, so please feel free to follow me. However, I’m aware that many people find pictures of wobbly things in jars a bit unpleasant, so there’ll be no hard feelings if you’d rather not look!


I will, of course, still be updating here with all of the things that I make. My extra hours at work finish at the end of this week, so once I’m back from the conservation course, I can get on with making a few things!

Working 9-5…

…what a way to make a living!

This photo crossed my path at work this week, which rather took me by surprise! It was taken earlier this year, when I was volunteering at the Cole Museum of Zoology. I’m very carefully cleaning one of the many bullfrog skeletons. I’m going back to the Cole Museum next week, to continue volunteering, and I’m really looking forward to it.

I’ve been volunteering and working in museums now since 2009, and my intention was to get involved in as many different areas as possible, to work out where I wanted to specialise. Most of my work has been in education, with a little foray into marketing, which I really enjoy.

In the long term though, I’m now hoping to train as a conservator, specialising in natural history objects. There’s no straighforward qualification route for this, so I’m trying to gain as much experience as I can by volunteering, and by taking short courses as they come up. In December I’ll be learning about the care of fluid-preserved collections, at the Horniman Museum. I’m also trying to raise the funds to study an MA in Preventive Conservation.

So, if you’ve been wondering why there haven’t been as many making things posts around here as usual, the answer is that I’ve been at work! I took on some extra hours during the summer, and those hours have now been extended for a while longer, so I’m saving all the extra pennies towards the fees for the MA.

I’m also trying to decide whether to blog about SCIENCE THINGS here, or whether to write about them somewhere different. I will be required to keep a blog as part of the MA, but I’m aware that some of you really don’t like to see wobbly things in jars (which is the area I’m hoping to specialise in), and I don’t want to frighten anybody away! Your feedback on this would be very welcome.

Grant Museum of Zoology

Grant Museum of Zoology, UCL

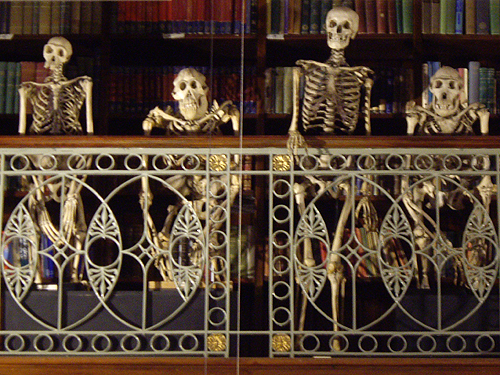
Somebody at the Grant Museum of Zoology definitely has a sense of humour. These four skeletons are perfectly placed to watch over the whole museum from their vantage point in the first floor gallery!

Those of a sensitive disposition should probably look away now, because the Grant Museum is filled with skeletons and things in jars. And when I say “filled”, I really mean it. I was reminded a little of the displays at Pitt Rivers, where the museum is as much about the origins of the collection itself as the individual objects in it.

Grant Museum of Zoology, UCL

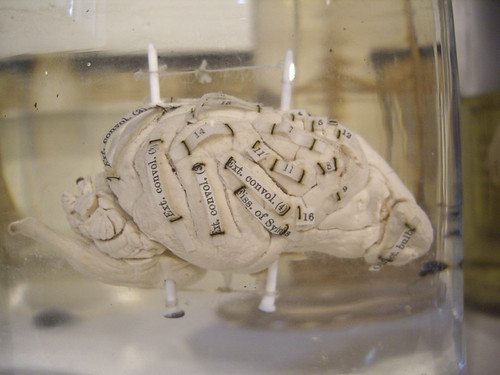
There’s a whole cabinet full of brains from different animals, so that you can compare and contrast them. I just love the way the parts have been labelled with little slips of paper stuck directly into the specimen. This one is

Brain of “Dog” in median section to show the main convolutions and sulci.

(Sulcipl. depression or fissure in the surface of the brain. The bumpy bits are gyri.)

Grant Museum of Zoology, UCL

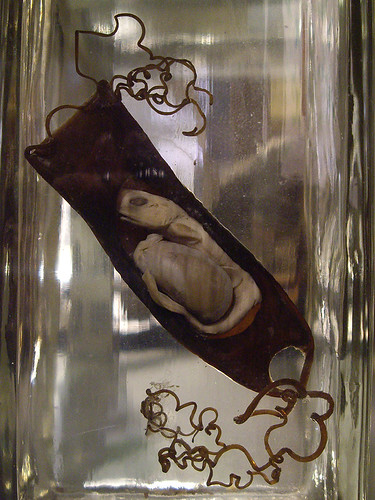
I didn’t make a note of exactly which species this is, but it reminded me of Skycarrots‘ beautifully delicate photograms of Mermaids’ Purses that she found on the beach. When you find these washed up they’ve usually already hatched, so I find it really exciting to be able to see one from the inside.

The museum’s currently open Monday-Friday, 1-5pm. I didn’t stay long because I was on a trip to UCL with work, so I’m going again on Monday. This time with a better camera, and a friend who wants to see the baby manatee!

(Yes, this does mean there’ll be more pictures. Sorry, Lettice!)

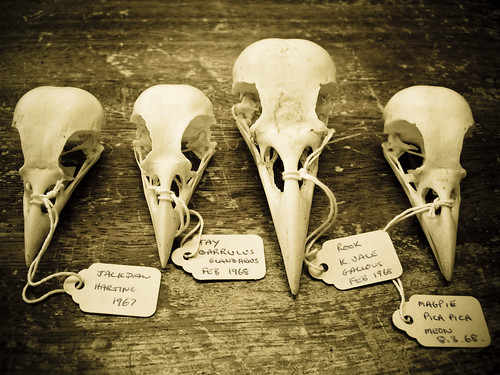
Cole Museum: Corvid Skulls

Cole Museum: Corvid Skulls

Four corvid skulls, waiting to be put away in a little box.

The skulls had been part of a temporary exhibition to illustrate the functionality of differing beak shapes in various species of bird.

It was an absolute joy to get out the boxes of bird skulls again, and to have another little look through them as I was putting away the exhibited pieces. Something as simple as seeing the skull of a heron next to the skull of a wren, so fragile that it’s kept in a sealed glass tube, was just magical.

Cole Museum: More Treasures

You might have noticed that there are a lot of photos from the Cole Museum turning up lately. I’m posting them now in a bunch because I wasn’t sure whether or not to talk about them on what was supposed to be a blog about sewing and other crafty pursuits.

But, I’m volunteering at the museum once a week, and each week I take my camera along and try to take a few snaps of whatever I’m working on. A couple of weeks ago we went into the store room of the larger specimens in the spirit collection, and here are a few of the highlights.

You can see all of my photos from the museum over on Flickr, if you’d like to. I’ve only posted small ones here in case people were squeamish. It turns out that skeletons seem to be mostly acceptable, but Things in Jars can make people feel a bit peculiar.

If you’d rather I didn’t post any pictures of Things In Jars at all, please let me know, and I can put them somewhere else – or at least make sure that the pictures are small, or behind a link so that you don’t have to look at them straight away.

I don’t want to put anybody off their dinner, but I’m finding looking at all these specimens absolutely fascinating, and I’d love to be able to share them.

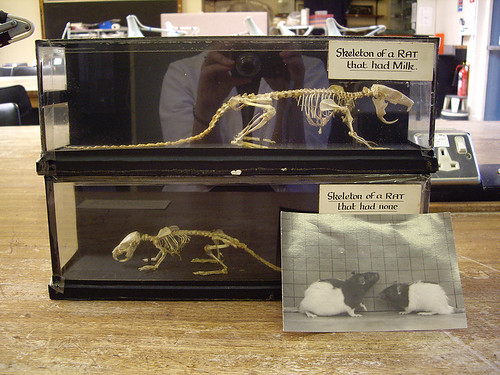
Cole Museum: Rat Skeletons

Rats: with and without milk

Another treasure from the cupboards of the Cole Museum – this time in the form of a pair of rat skeletons, and an accompanying photo of the rats themselves.

There was also a hand-painted sign:

These rats were brothers. This little rat [on top] had fresh milk. This little rat [below] had none. The only difference in their diet was that Specimen “A” received a supplement of milk. Note that milk produces stronger and better developed bones.

And for the unbelievers amongst you – yes, that is me you can see reflected in the glass of the display cases. And yes, I am wearing a lab coat. You may form an orderly queue from which to mock me – right behind my high school science teachers. If I’d realised when I was a kid that biology was interesting, I’d have started doing this kind of thing a long time ago!

Bitten by an Elephant.

Ouch.

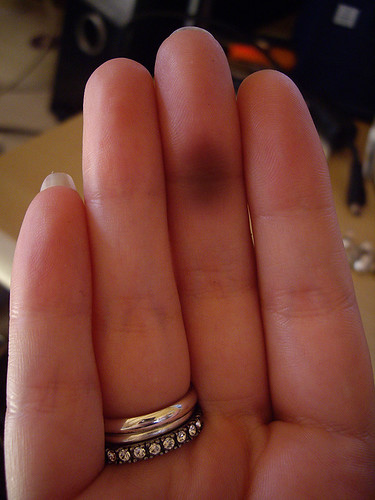
That mark on my middle finger? That’s a bruise.

A couple of weeks ago (yes, I am very behind with the blog!) I was helping out at the Cole Museum again. We’ve sorted out most of the smaller specimens, but a few of the larger ones needed moving, so we moved them. The last thing we had to do was move the jawbone of an elephant into the Bone Cupboard. After playing an extended game of Tetris with an assortment of large animal skulls (“if I move this antelope over here, we can probably squeeze that horse into this gap…”) we finally had a space large enough for the elephant.

We lifted the jawbone off the trolley, making sure to mind our backs. Elephant bones are heavy. We put it down carefully on the floor, making sure not to bash it into the wall, or into the shelf above. And when we came to let go, I realised that my finger was trapped.

My finger wasn’t broken – just a bit squished. The bruise came up extremely quickly and was gone again by the next day. Very strange indeed.

I suspect I failed my Large Object Handling Skills Mission right there. Not to mention health & safety.
But at least I didn’t damage the elephant bone…

Cole Museum: Conservation Cleaning

Damaged display

Over the summer I’ve been helping out behind the scenes at the Cole Museum. We’ve been taking an inventory of some of the storage cupboards, and doing a little bit of conservation and cleaning along the way.

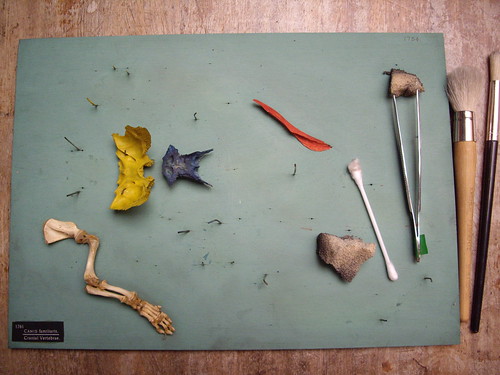
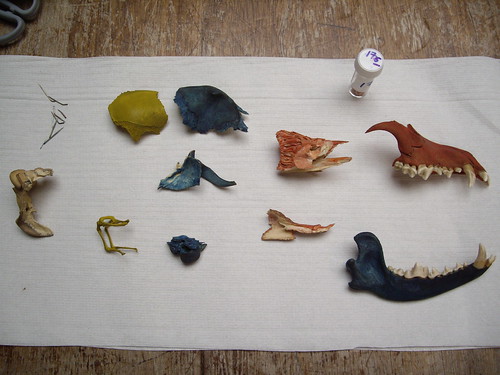
This display had been stored unwrapped, and had become rather damaged and dusty. The label says “Canis Familiaris – Cranial Vertebrae”, which is the bones of the head of a dog. There’s also, somewhat inexplicably, a little forelimb of a puppy attached too.

Parts removed for cleaning

First of all I removed all the parts that could be safely removed from the board without damage. The red part is glued on, and the other pieces are held securely into place with pins. I then used a combination of soft brushes, cotton buds, tweezers and smoke sponge to clean off the worst of the dirt. The loose dust on the backing board was brushed into a museum grade vacuum cleaner.

Complicated jigsaw...

These are the rest of the pieces, waiting to be cleaned. They’ve gone back into their cupboard again while I find out how to clean the dust off the bones without also removing the paint. The tube contains some tiny fragments that had broken off. This has been numbered, and will be kept with the rest of the display.

I’ve really enjoyed working on this little piece of conservation – although I have a sneaking suspicion that putting it back together again might be a little more difficult than taking it apart!

MERL: Bread and Butter

Hand made bread

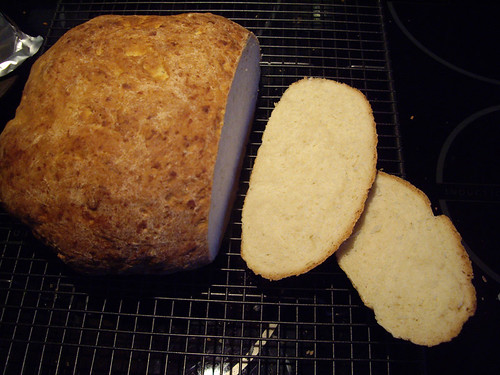
Look, I made bread! Normally I’d use the breadmaker. This time I was volunteering at the Museum of English Rural Life, where I was helping to teach small children (and their parents) how to make their own bread and butter.

We used the bread recipe from the flour packet, which you can find here. We weighed out all of the ingredients in advance, so all the kids had to do was mix the dough and then knead like mad!

There were some already-measured ingredients left over at the end of the day, so I had a go at making my own loaf. It didn’t go too well, which was a bit embarrassing when a room full of children had made it look quite simple! I didn’t use enough liquid in my dough, so it came out a bit on the heavy side. I also forgot to compensate for the speed of the fan oven when I baked it at home, but thankfully I managed to rescue it before it burned to a crisp! Despite being a bit dense, it tasted pretty good.

To make your own butter, you need the following:

  • A tub of cream, at room temperature. (Ours had been opened and left overnight.)
  • A clean glass jar. (Ours had been sterilised in the dishwasher.)
  • Two wooden spoons, or a piece of cheesecloth

That’s it!

Simply spoon in the cream until the jar’s about  one third full. Make sure the lid’s on very tight, and hold the jar with one hand on the top and one hand on the bottom. This makes sure that the lid doesn’t fly off, and also means that your warm hands aren’t all over the jar, heating up your butter. Now shake the jar.

As you keep shaking, you’ll see the cream start to go through some changes. At first it might be quite runny, but it will start to granulate and separate into yellow fat and white liquid. Eventually the buttermilk will separate out, and a large lump of very squashy butter will form.

Drain off the buttermilk – you can use it to bake scones or pancakes, or if you like the taste you can just drink it! You’ll need to pour some cold water into your jar to rinse off the rest. If you don’t get rid of the buttermilk, the butter can go rancid very quickly. Rinse until the water coming out of the jar is clear. The cold water will also help your butter to become more solid.

Once the rinsing’s done, you can pat your butter between two wooden spoons, or squeeze it through cheesecloth to get rid of the very last remains of the buttermilk. Pat it into shape and leave it in the fridge to harden, and it should be ready by the time your lovely loaf of bread comes out of the oven!

If shaking a glass jar seems like altogether too much hard work, you can also make butter in food processor. You have to pay attention though, and stop immediately the butter’s formed. If you keep going, you’ll get… well, I don’t know what it is, but it’s definitely not butter!

Cole Museum: Bat Conservation

Bat, being re-wrapped

Once a week I’ve been helping out at the Cole Museum of Zoology as a volunteer. A couple of us have been checking the inventory of some of the store cupboards, and we’ve started to do a bit of conservation work as we go along.

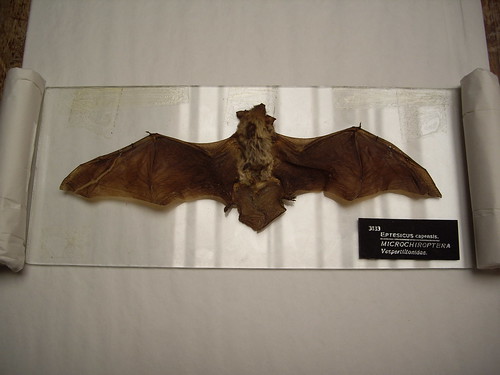
This little bat was wrapped up in a plastic bag, which is a bad idea as condensation can develop inside and damage the specimen. I carefully unwrapped it and prepared some little cushions of acid-free tissue paper so that it wouldn’t get squashed.

New boxes for the bats

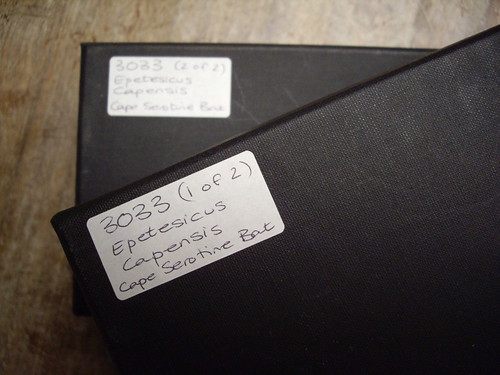
There were two bats which belonged together (mounted to show the front and the back), so I wrapped them up carefully and popped them each into a little box. This was then labelled with the specimen number and a brief description, so that the next person to come looking for these bats can find them nice and easily.

There are quite a number of bats in the Cole Museum’s cupboards, including a huge vampire bat that I pulled out on a day I didn’t have my camera with me. I think we’re going to need a lot more tissue paper and a bigger box to keep him safe!