Garden in the frost

MERL Garden

I seem to be going through a phase of taking only terrible photos of my sewing (possibly because it’s so damned dark out here in the Shed), so I braved the frost yesterday and took a few pictures in the garden at work.

Frosty flowerhead

I’m still using my camera completely on automatic, until I can afford an update to Lightroom. Then I’ll set it to manual, start shooting RAW files, and edit away to my little heart’s content!

MERL Garden

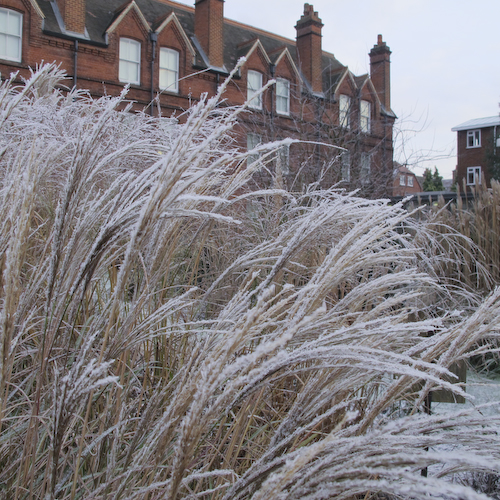
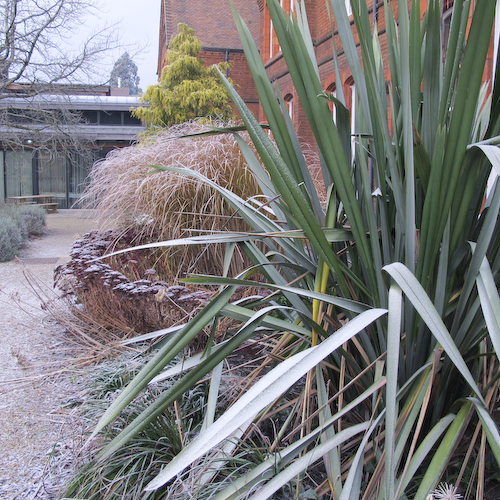
I’m really lucky in that the Museum of English Rural Life‘s garden is beautiful at any time of year. It’s open whenever the museum’s open, and it would be lovely if more people wanted to come and take pictures of it!

Frosty rosehips

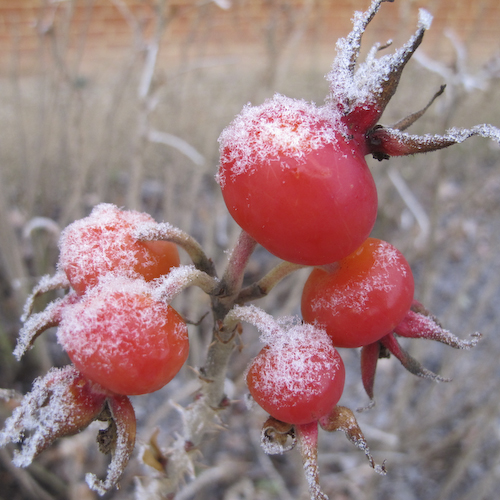
These are the same rosehips I photographed back in October – see, I didn’t pick all of them for dyeing with! Which reminds me, the ones I did pick are still sitting in the freezer, waiting for me to find the time to do something with them.

Fennel

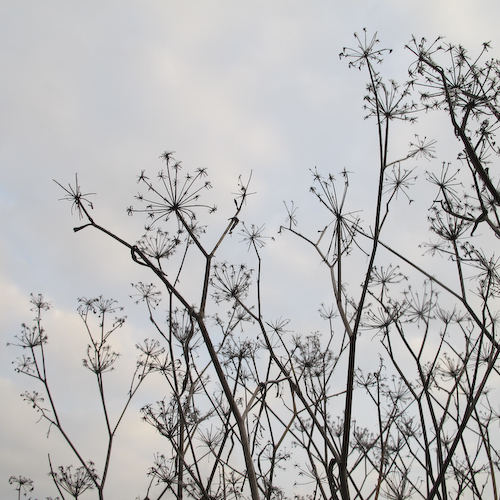
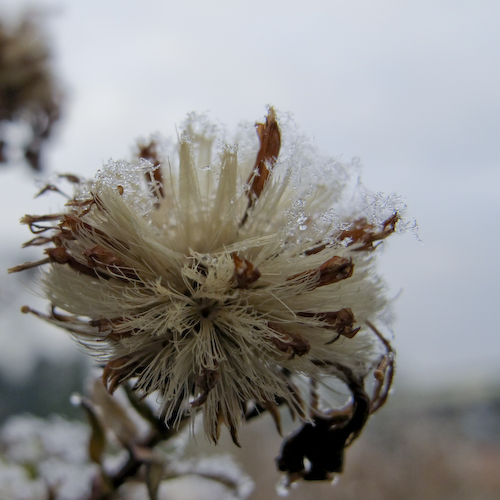
I think this is fennel, silhouetted dramatically against the sky. Well, that was the idea, anyway. I think Skycarrots’ silhouettes are much more dramatic than mine! Hers are hemlock, and they look very ethereal.

Frosty rosebud

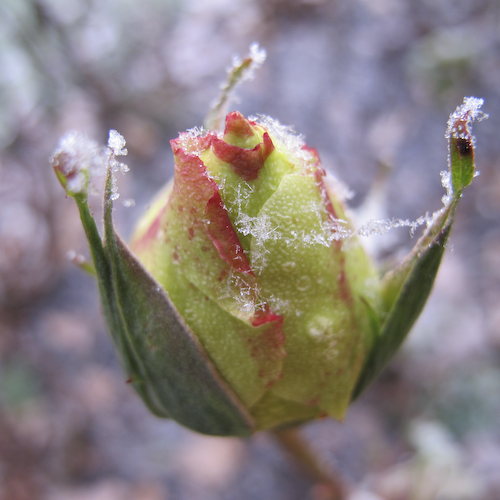
Unbelievably, there are still lots of buds on some of the rose bushes. I love the delicate pink tips of this one, and its tiny string of frosted bunting.

Frosty spiderweb

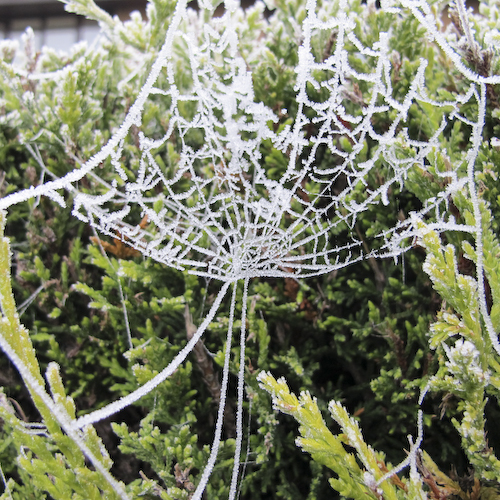
And last but not least, that clichéd frosty morning photo of a spiderweb! Two days of heavy hoar frost has broken most of the webs into tatters, but this particular bush was absolutely covered in them.

One of my intentions for next year is to really try and make the most of this new camera, so hopefully there’ll be a lot more photo posts coming up in 2013!

Rose Tattoo bow tie

Rose Tattoo bow tie

I spent yesterday drawing out a new bow tie pattern, and here’s the result! It’s made from quilting cotton, “Rose Tattoo” by Alexander Henry. Not that you’d know it, from the way this one’s folded, but I think it’s rather nice this way.

Rose Tattoo bow tie

As you can see, it’s both freestyle (self-tied) and adjustable. That means you get the classic self-tied look, but you don’t have to tie it yourself every time you put it on. The slider that you can see just below the collar is hidden once the tie’s fastened, and there’s a hook at the back.

This tie’s quite a long one, adjustable to fit 15″ to 21″ collars. (For reference: a ladies’ shirt in a size 12 has a collar around a 15″.) Next time I’ll amend the band a little bit, to make it a bit shorter and ever so slightly wider.

I’ve popped this one into my Etsy shop, and my plan for this afternoon is to start work on a few more to follow it!

More skull shoes…

Lisa's Skulls & Roses shoes

This is the second pair of skulls & roses shoes – this time with an organza ribbon for a little bit of variety.

Black Rose Shoes

Lucy's Floral Shoes

Lucy requested a pair of shoes in the same black rose fabric as my original test pair. I was happy to oblige!

Skulls & Roses Shoes

Madeleine's Skull Shoes

This is the next pair of shoes – a pretty gothy pair with skulls and roses. I’ve actually made two pairs of these, and I’m extraordinarily tempted to make a third pair for myself

I don’t want to make eleven identical posts about the prototype shoes, so I’m hoping that the fabulous variety of fabrics will speak for themselves.

(Unless I keep making them in the same fabrics, of course…)

Butterick 4731

Butterick 4731, View A

I know I’ve already made one little jacket in this fabric, but when I looked at the whole outfit together on the dressform I wasn’t sure. S, I had a little browse on the internet, dashed down to the fabric shop, bought another pattern and made another jacket. As you do.

This one’s Butterick 4731. It goes with a very smart evening dress, and there’s also a pattern for another little bolero. The body of the jacket’s lined, but I didn’t line the sleeves as I wanted it to be very light. It was really simple to make, just five pieces, and no darts or anything. If I make this again I might actually add a couple of darts into the lower back to make it a little more fitted, but I want to wear this one first and see how easy it is to move in. It only uses just over a metre of fabric, so I think it would be fun to make lots of these in different colours of silk, and use them to liven up a plain outfit.

The unusual shape of the front of this jacket is really flattering, and I think it will show off the shape of the corset much better than the other one. It was a very quick and easy thing to make, and I’m really pleased with it!

Skulls & Roses Corset

Skulls & Roses Corset

Here’s what I’ve been working on this weekend – a matching corset for the skulls & roses outfit. The intention is that the skirt, bra and corset together should give the overall impression of a dress.

I drafted the corset myself – I needed to update my pattern because all the corsets I made for myself two years ago are now just a little bit too big. The irony is, of course, that I must have made a mistake somewhere in the maths for this one because it’s rather a lot too small!

Still, it looks lovely from the front, which is a good start. I designed the shape to fit the bones that I had already, so it comes up a bit at the centre front and back, and fits perfectly below the underwires of the bra. I only had a short busk, so I placed a full length bone next to it and used another pretty red frog fastener at the top.

A friend who’s also an experienced corset maker suggested adding an extra panel into the gap at the back, and having the corset fasten with two sets of laces instead of one. As luck would have it I do have another corset lace and plenty of eyelets, so I think I might just take up that suggestion. I’ll let you know how it works out!

Skull & Rose Print Knickers

Red and black skull print knickers

This is pair of knickers number five. This time I started with Kwik Sew 2100, the most striking aspect of which was the ridiculous width of the gusset, especially as the sizes increase. I modified that part of the pattern to make more anatomical sense, and I was impressed by the instructions for putting together the lined gusset. It’s a bit fiddly but you end up with no raw edges on the inside, which makes these knickers very comfortable to wear.

I didn’t like the way that the original knickers were so puffy, so I decided to combine a stretch and a woven fabric to try and make them a bit flatter. They are more streamlined than they look in the picture (the mannequin’s so small I can’t stretch them right out), but they’re still not how I want them. I really need to buy a lingerie-drafting book, so I can work out how to do this properly.

I’m trying really hard to avoid using entirely stretch fabrics because there’s so much more interesting variety in wovens, but I’ll have to get the pattern absolutely right if this is going to work. These need the print panels to be smaller and the jersey panels to be bigger, to allow more stretch around the legs.

I also tried two different ways of applying the elastic – the waist has the elastic turned to the inside, and around the legs it’s on the outside. Each method is a two-step process, so there’s no time-saving in doing it one way over the other, but I think aesthetically I prefer the elastic on the outside, which I didn’t expect. Maybe because it looks more like something you’d buy from a shop, which is what I usually try to avoid.

[Later…]
In fact, I liked the elastic on the outside so much that I trimmed off the waist elastic and sewed it again to match the legs. Much better.

Matching Jacket

Skull print bolero jacket

This is Simplicity 2478, view C. I made it exactly as per the pattern (for once!) and then embellished it with the very last tiny pieces of my broderie anglais trim and a pretty red frog fastener.

What can I say? It went together really easily! It helps if you have prior experience of sewing together convex and concave curves, otherwise attaching the band can be a little tricky, but there are no separate sleeves to set in, and it was a very fast piece to sew.

Obviously it’s intended to go with the little skirt I made the other day, but I think it would also smarten up plain black jeans and a t-shirt very nicely indeed.

Skull Print Skirt

Mini skull skirt

So, this is a bit of a departure from the type of thing I’ve been sewing lately – in fact it’s a skirt pattern that came from my first business, about eight or nine years ago.

There are four layers of skirt altogether, each with four panels for fullness. The inside three layers are black net, trimmed with red gathered lace. The top layer is skulls-and-roses print cotton, trimmed with the very last piece of black gathered broderie anglais in my stash. Fabric Land haven’t had any of this in stock for a long time, and I don’t quite know what I’m going to do without it. It really is absolutely my favourite kind of trim.

(Is it silly to have a favourite kind of trim? I do, anyway.)

The waistband is another favourite – red bomber-jacker elastic, also from Fabric Land. it’s made in the same way as all of my elasticated skirts – simply divided into quarters and zig-zagged into place.

I haven’t worn a skirt this short for years – in fact I’m not at all convinced that it’s actually long enough to cover my bottom, or that a person of my advancing years should be seen in it at all. I suspect I will be very grateful indeed for a pair of black leggings to wear underneath!