Pink Felted Slippers

Felted Slipper Tutorial

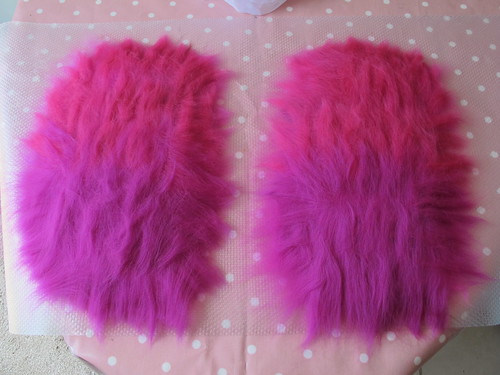
Today I spent about three and a half hours transforming this…

Felted Slipper Tutorial

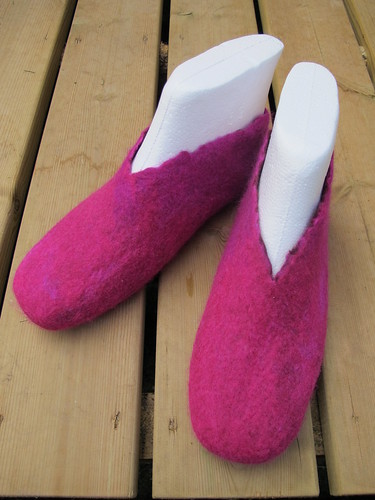
…into these!

I have to say that, although they’re not quite finished yet, and there are definitely things I’d do differently next time, I’m really pleased with my first attempt at resist felting!

I’m currently impatiently waiting for them to dry. I was hoping it would take less than 24 hours in this heat, but the humidity’s so high at the moment I think they might actually be getting wetter the longer I leave them out in the garden.

Whilst they look toasty warm, I think these will turn out to be summer slippers. I only used four layers of merino to make the felt, and really they need to be a lot more sturdy than this if they’re going to last any length of time. I’d also like to be able to glue a rubber sole onto future slippers, and this pair are much too thin for that. Perhaps I’ve really made myself some nice warm socks? (In the middle of a heatwave! Brilliant!)

I spent about an hour this morning searching for a good tutorial, with lots of pictures, explaining how to use the polystyrene lasts without taking the (altogether too risky for me) option of just chucking them in the washing machine. I couldn’t find one, so I’ve written my own. Because this was my first attempt, it will no doubt be edited as I go along and find ways to improve things. In the meantime, you can read it here!

Louisa Harding Ginerva

Louisa Harding Ginerva

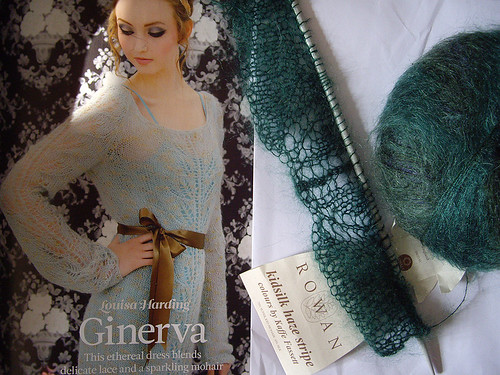
Issue 34 of The Knitter dropped though my letterbox a couple of days ago, and I was immediately smitten by this lacy dress pattern. It’s Ginerva by Louise Harding, and it’s so new that there are currently only 2 projects for it on Ravelry. (One of them’s mine!)

I decided straight away that I didn’t want to make a dress version, but a shorter jumper would be perfect. A few sums and a day later, I found myself in John Lewis buying two balls of Kidsilk Haze Stripe. This is the Forest colourway.

I’ve started with the sleeves. That way I can see how much yarn they take up, and then hopefully figure out how long I can make the body afterwards. I tried to pick two balls of yarn that looked as though they’d been wound the same way, in the hope that the stripes won’t be too all over the place on the finished jumper.

So far I’ve managed the set-up rows and one repeat of the edging. The pattern says to repeat the twelve row lace pattern until the work measures a certain length (depending on your size), and then you get into the tricky business of trying to work shaping at the same time as keeping track of which pattern row you’re on. I know from experience that I’m very bad at following more than one set of instructions at once, so it seemed like a good idea to make myself a chart. That way I can simply tick off each row as I work it, without having to scribble incomprehensibly all over the magazine.

I thought it would be nice to share it, so you can have it as an Excel file, or a PDF.

Please note that this is NOT THE ENTIRE PATTERN. That’s obviously copyrighted to Louisa Harding and The Knitter. This is just a way of keeping track of the lace motif and the shaping, for both the body and the sleeves. You’ll need a proper copy of the pattern for the rest.

Also, these are only the instructions for a size 14. If you need a different size, I recommend downloading the Excel file and using the original pattern to update the stitch counts for each row. (The central lace motif stays the same for each size.) If you’re already making a size 14, you can just download the PDF.

I’m rapidly discovering that this is the most complicated thing I’ve ever knitted, mostly because the lace motif is worked from both sides. This is definitely going to be slow going because of all the counting and tracking required. Not one to sit and knit in front of the telly, or to take out and about with me. Thankfully I’ve cast on another sock for that!

New Old Cardigan

New Old Cardigan

This morning I rediscovered the gathering foot for my sewing machine, and combined it with Pretty Jane’s continuous bias tape tutorial.

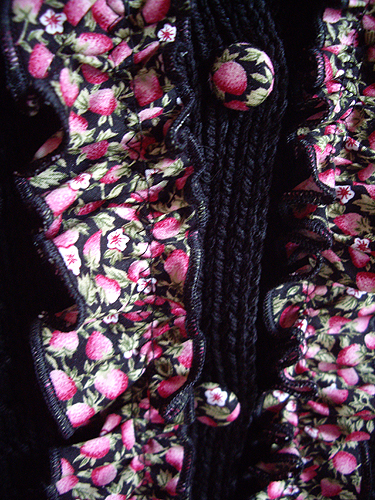
Half a metre of fabric turned into around twelve metres of tape, which I then ran through the gathering foot. This resulted in about four and a half metres of pretty ruffled trim! It’s about 4cm wide, and I ran both long edges through the overlocker. This gives it a nice finish, and also a little extra wiggle as the bias edges stretch a bit.

New Old Cardigan

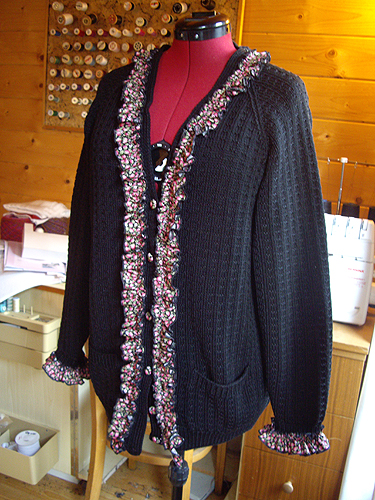
I wanted to use my lovely new ruffle straight away, so I decided to re-vamp a very old cardigan. My Mum knitted this for me many years ago (I might even have worn it to school!), and the cuffs had become very threadbare.

Once I’d chopped off the worst of the unravelling cuffs and run them through the overlocker, I simply zig-zagged a length of ruffle into place. That looked a bit silly on its own, so I added some matching buttons. Good, but still nowhere near ruffly enough, so I decided to go a bit mad and stitch the ruffled trim all the way around the neck. Much better!

I was looking at the bias tape tutorial because I have quite a lot of small pieces of fabric lying around in the Shed, and I wanted to find a use for them. Now I’ve got the hang of it I’m planning to make some lengths of bias tape in different prints and patterns, and see about resurrecting my old Etsy shop. I have lots of vintage buttons that I’m never going to use, so I was thinking about listing them, along with some covered buttons and bias tape, and having a little haberdashery clear-out. Chances of this happening soon are minimal, but I’m thinking about it, and that’s a start!

A couple of scarves

Loopy Cowl

I think this is the last project I finished in 2011. I started knitting it on Christmas Day, having been asked by my mother-in-law to bring a pair of 5mm needles to dinner with me. Somewhat confused, all became clear when I opened my gifts to find two balls of Rowan Felted Tweed and two books of knitting patterns!

This is Loopy Cowl by Rachel Proudman. It’s made up of eight strands which aren’t i-cord, they’re simply knit flat and allowed to curl up on themselves. All the strands are seamed together, then the seams are covered by another strand. I think you’re supposed to wear it with the seams at the back, but I quite like it at the side like this. Even better with a blingy brooch pinned to it, I think.

You need two balls of Felted Tweed because you’re knitting with two strands held together, although you only use around 70g of yarn. Not quite enough to risk buying only one ball, but enough left over (hopefully) to make a pair of matching gloves, or perhaps a little hat.

Moss Stitch Scarf

This enormous beast is the biggest scarf I’ve ever made, and also one of the quickest. Knitted in Rowan Big Wool and Noro Blossom on 15mm needles, I finished it in two evenings and it’s more than two and a half metres long!

Should you happen to need a pattern for a giant moss stitch scarf, I’ve added it to the tutorials section. Perfect for the silly snowy weather we’ve got going on at the moment.

MERL: Bread and Butter

Hand made bread

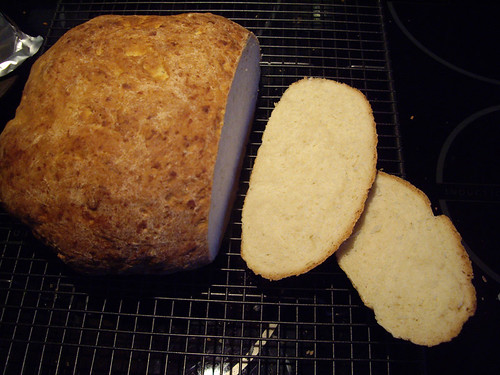
Look, I made bread! Normally I’d use the breadmaker. This time I was volunteering at the Museum of English Rural Life, where I was helping to teach small children (and their parents) how to make their own bread and butter.

We used the bread recipe from the flour packet, which you can find here. We weighed out all of the ingredients in advance, so all the kids had to do was mix the dough and then knead like mad!

There were some already-measured ingredients left over at the end of the day, so I had a go at making my own loaf. It didn’t go too well, which was a bit embarrassing when a room full of children had made it look quite simple! I didn’t use enough liquid in my dough, so it came out a bit on the heavy side. I also forgot to compensate for the speed of the fan oven when I baked it at home, but thankfully I managed to rescue it before it burned to a crisp! Despite being a bit dense, it tasted pretty good.

To make your own butter, you need the following:

  • A tub of cream, at room temperature. (Ours had been opened and left overnight.)
  • A clean glass jar. (Ours had been sterilised in the dishwasher.)
  • Two wooden spoons, or a piece of cheesecloth

That’s it!

Simply spoon in the cream until the jar’s about  one third full. Make sure the lid’s on very tight, and hold the jar with one hand on the top and one hand on the bottom. This makes sure that the lid doesn’t fly off, and also means that your warm hands aren’t all over the jar, heating up your butter. Now shake the jar.

As you keep shaking, you’ll see the cream start to go through some changes. At first it might be quite runny, but it will start to granulate and separate into yellow fat and white liquid. Eventually the buttermilk will separate out, and a large lump of very squashy butter will form.

Drain off the buttermilk – you can use it to bake scones or pancakes, or if you like the taste you can just drink it! You’ll need to pour some cold water into your jar to rinse off the rest. If you don’t get rid of the buttermilk, the butter can go rancid very quickly. Rinse until the water coming out of the jar is clear. The cold water will also help your butter to become more solid.

Once the rinsing’s done, you can pat your butter between two wooden spoons, or squeeze it through cheesecloth to get rid of the very last remains of the buttermilk. Pat it into shape and leave it in the fridge to harden, and it should be ready by the time your lovely loaf of bread comes out of the oven!

If shaking a glass jar seems like altogether too much hard work, you can also make butter in food processor. You have to pay attention though, and stop immediately the butter’s formed. If you keep going, you’ll get… well, I don’t know what it is, but it’s definitely not butter!

T-shirt shrug

T-shirt shrug

I was supposed to be at a barbeque on this gloriously sunny Sunday afternoon, celebrating the success of the Witt Studio Chorus Summer Showcase. Unfortunately my kind husband decided to share his filthy germs with me, and now we’re both too ill to go. Bah.

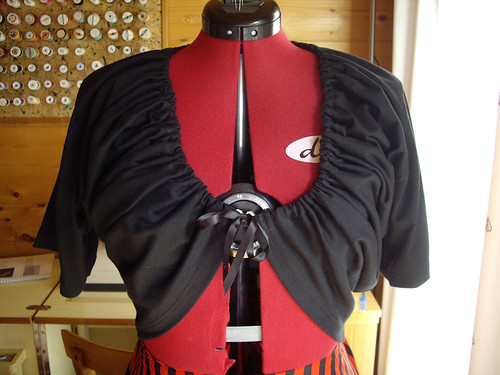
I’ve spent most of the day sitting on the sofa feeling sorry for myself, watching Torchwood and Doctor Who, and looking at the internet in the name of research for a new range of clothing that I have in mind. While I was wandering about on Pinterest, I stumbled across this tutorial for turning a t-shirt into a shrug.

Deciding that I couldn’t go a whole day without making something (not even a poorly Sunday), I dragged an old organic t-shirt out of the languishing stash, set about it with scissors, the sewing machine and a bit of ribbon. The whole thing took less than an hour – including taking photos and writing this.

The only thing I did that wasn’t specified in the pattern was to stitch the ribbons into position at the end of the casing. This means that the gathering is no longer adjustable, but it stops the ribbons from disappearing inside the t-shirt.

I have a giant pile of old t-shirts in the Shed, just waiting to transformed into something new. I can feel a few more of these little shrugs coming on, I think.

Cufflinks

Cufflinks

The main reason I bought that TM Lewin shirt was because it fastened with cufflinks. It’s quite rare to find women’s shirts with double cuffs (unless you want to splash out more than I can currently afford), so I was really pleased to have spotted it.

In the shop the cuffs are fastened with little plastic studs, so of course I then needed to make myself a pair of cufflinks. I was going to follow the Martha Stewart tutorial, but a quick rummage around in the Shed turned up some slightly more sturdy components.

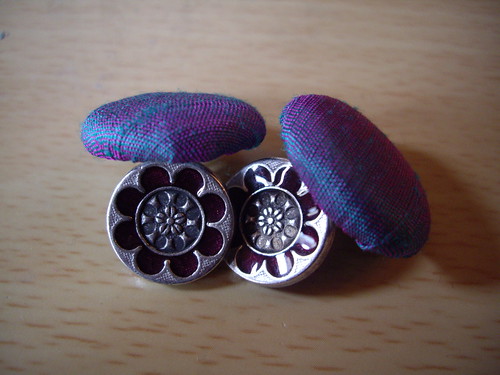
These are two pairs of buttons, as per Martha Stewart’s directions, but instead of being joined with thread loops I used metal jump rings from my jewellery-making supplies. All four buttons have shanks rather than holes, so this seemed like a more appropriate solution than joining them with thread.

The top buttons are about an inch across, and covered in offcuts of silk from the waistcoat and bow tie. The bottom buttons are about a centimetre across, and are the same as the buttons on the waistcoat. I also managed to find larger versions of the same buttons for the trousers and the jacket. So there you go – custom cufflinks to match your outfit for the price of four buttons and a couple of little metal rings!

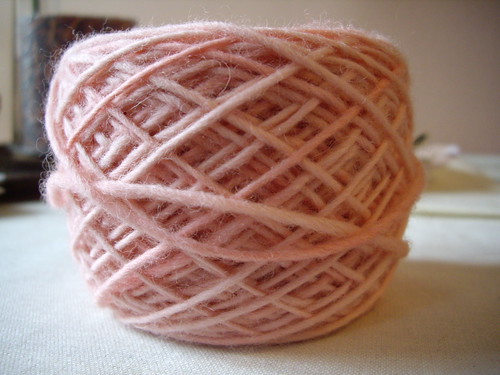
Dyeing wool with Kool Aid

Ta-Daa!

I was looking through some of my photos on Flickr, and realised that I’d never posted my tutorial for dyeing wool using Kool Aid

It’s now in the FAQ section, with my other tutorials.

I dyed this one lonely ball of wool more than a year ago, and I still haven’t thought of anything in particular to knit with it. What do you do with just one ball of double knitting? Time to head over to Ravelry and look for some ideas, I think!