This morning I spent a good hour searching online for a comprehensive felted slipper tutorial, with lots of pictures, using polystyrene lasts to finish the slippers. I couldn’t find one I liked, so I thought I’d do my own as I was going along.
This documents my first attempt at making felted slippers, so it will probably be updated in future as I find better ways to do things!
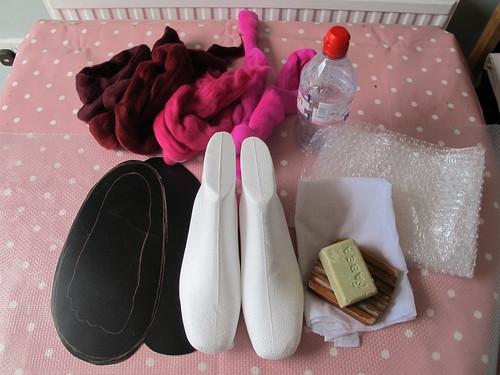
This is everything I used:
- a waterproof tablecloth
- a roll of IKEA drawer liner to stop everything from slipping about (helpful, but not essential)
- around 200g of merino tops (I bought mine from Wingham Wool Work, in a random bag of mixed pinks and reds)
- water bottle – this particular brand has holes in the sports cap that allow the water to sprinkle rather than pour
- a big piece of bubble wrap
- a big piece of net curtain or similar synthetic mesh fabric
- soap (mine is olive soap, you can just as easily use washing up liquid or any old cheap soap)
- polystyrene shoe lasts
- templates of your feet made in lightweight plastic (I used a folder cover)
- scissors and a glue stick
- ridged wooden soap dish or palm washboard (not essential, but makes the work much quicker!)
- …and a towel (not pictured), to mop up the inevitable splashes!
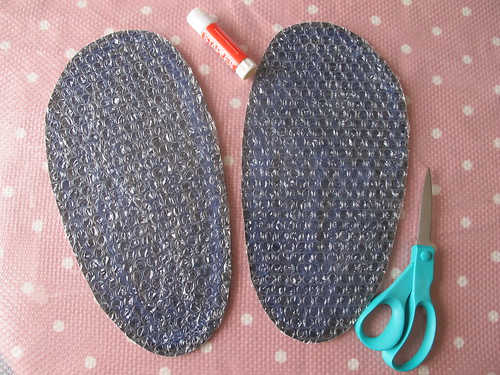
To make the resist templates for the inside of your slippers, draw around one of your feet on a piece of plastic. Then draw a sort of a foot-shaped oval, a bit bigger than your feet, to allow for the shrinkage of the wool. (Not very scientific I’m afraid, I just added an inch or so all around.) Cut one out, then use it as a template to cut out the other.
Now glue bubble wrap to both sides of each template, and cut away the excess. This gives the felt something to rub against on the inside of the slippers, so you can concentrate on the outside.
Now to make the fuzzy monster feet!
I divided my fibre into four piles, so I knew I’d be using the same amount for each side of the template, and for each slipper. It’s hard to tell how much fibre you’ve used when it’s all dry and fluffy, so it’s easier to divide it up beforehand. You only need to measure it roughly by eye – you don’t have to measure it down to the nearest gram or anything! (Although you can, of course, if you like to be more precise than me.)
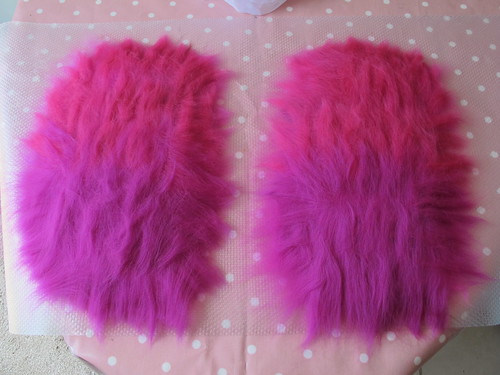
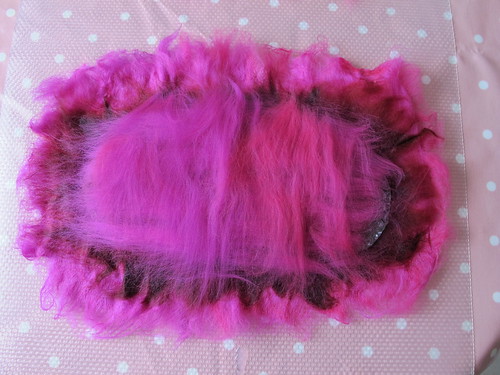
I used four layers of merino, starting with a layer going all the way up to and beyond the edge of each resist, with the fibres radiating outwards. I then laid three more layers, alternating the fibres on each layer between horizontal and vertical. I finished off with a few more fibres radiating out over the edges, as I wanted to make sure that the join between the two sides would be well sealed.
I put one piece to the side, very carefully, and worked on one slipper at a time. As it turned out, I could have been much less generous with the fibres going over the edges of the resists. This turned out to be far more than enough, and was a bit of a pain to felt out later!
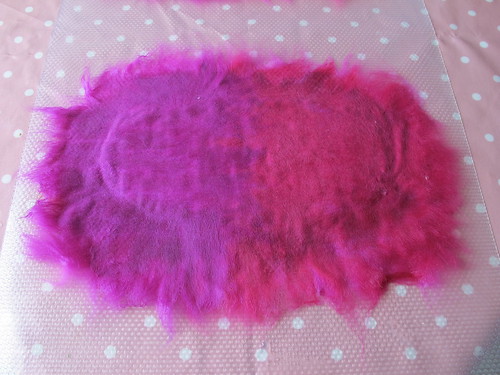
I placed my piece of net curtain over the top of the template, and dribbled some hand-hot water over it. I then pushed down gently all over the piece with my palms and fingertips, gently easing the water through all the layers, adding more water into any dry spots. Once it was wet all over, I rubbed the bar of soap over the netting just enough to make it slippery. I then began to rub, very gently, starting in the middle, pressing out the air, and making sure the water was still soaking through. I left the edges a bit dry, and carried on gently felting until the centre of the piece was sturdy enough to lift up and flip over.
With the resist flipped over, I laid out my fibre on the other side. I was originally going to use the same amount of wool as I’d used for the first side, but I had so much extra around the edges that I simply filled in the middle. Four layers again, alternating between laying the fibres horizontally and vertically.
With the second side of fibres laid down, I carefully folded the edges over towards the middle. Really, this is way too much fibre around the edges! Next time I’d use less, but overlap the edges on both sides of the resist. (Does that make sense?)
Then I laid the net down on the top, wetted the piece, and felted it the same as for the first side – until it was sturdy enough to pick up.
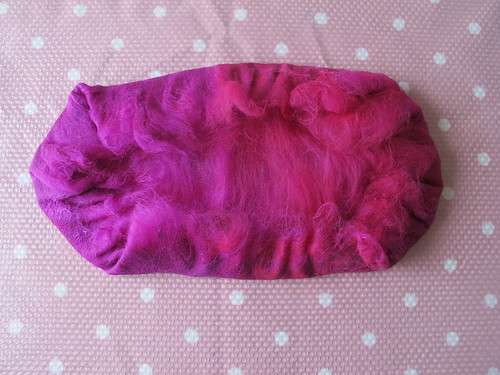
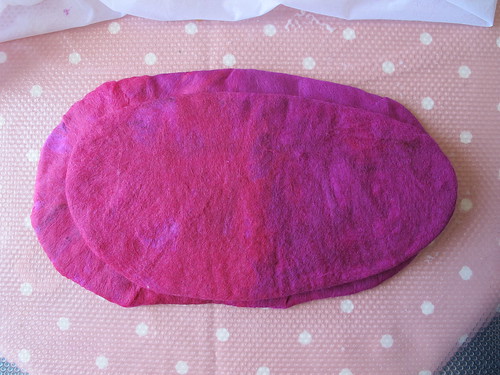
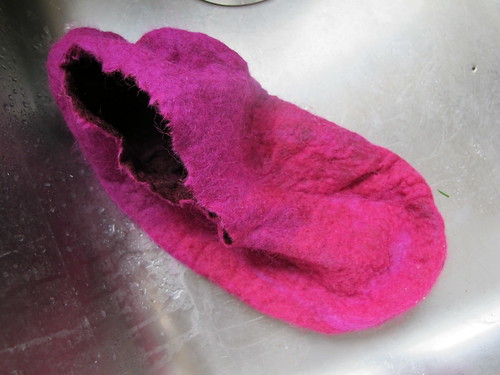
At this point the felt was still quite baggy around the resist, so I pulled it around until the fabric from the edges was now in the middle. This created some huge great wrinkles, which meant I had to go very gently in order not to felt lots of creases into the slipper. I put the net over the top again, added more soap, and kept on felting, very gently, checking for creases all the time. At this point I was beginning to wonder whether the dratted thing would ever shrink down and tighten up, but after about half an hour it looked like this…
Ta-daa! One nice smooth slipper that closely resembles a bright pink pitta bread. It’s shrunk very tightly around the resist, which is just beginning to buckle inside it.
When you get to this stage, you can pop your slipper/pitta to one side, and repeat for the second one!
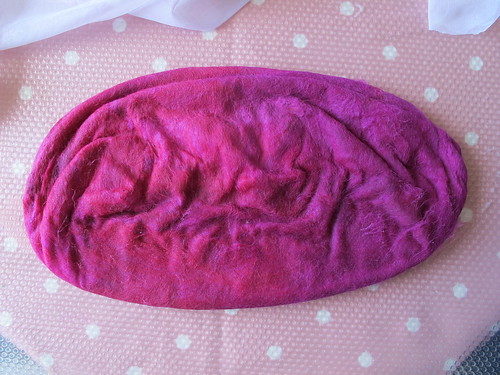
That’s the first slipper, on top. The one underneath is just about holding together, and you can see how much it needs to shrink down to match the first one!
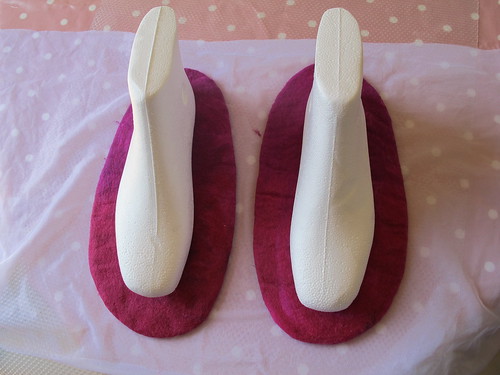
If you were demoralised by that, then don’t look at how much more they still need to shrink to fit the lasts!
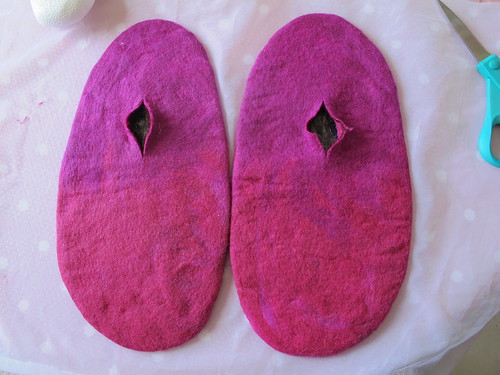
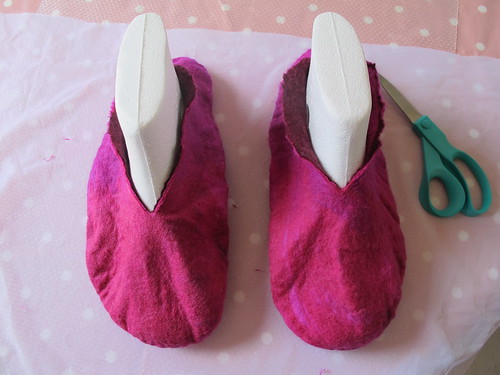
To get the resists out, snip a hole in each slipper, towards the heel end. Don’t forget to allow enough fabric at the back to come up and over the heels of the lasts – in other words, don’t make your cuts too far back! (Although it’s not a disaster – you’re just making slip-ons instead.)
You don’t need to make the holes too big – they will stretch as you pull the resists out, and as you continue to work on the slippers.
(I had a break for lunch at this point. Getting to this stage took about two and a half hours – including faffing about taking photos of every step.)
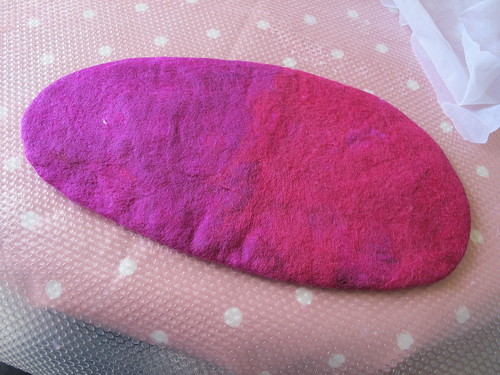
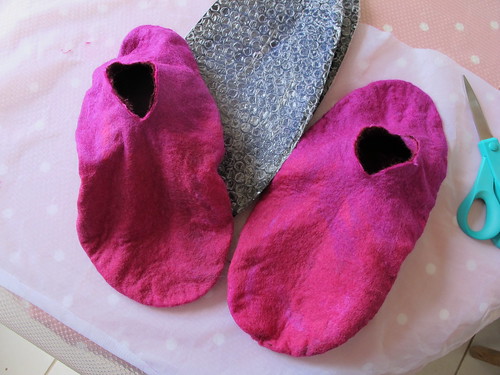
After lunch, I chucked the slippers in the sink, and subjected them to some shock treatment underneath hot and cold running water. This begins the fulling process, and starts to shock the fibres into really shrinking and grabbing together. Chucking the slippers into the bottom of the sink as hard as you can, a good few times, doesn’t hurt either.
At this point they were still pretty enormous on the lasts, but it only took about half an hour per slipper until they’d shrunk down beautifully! I kept the slippers damp, but not soaking wet, and applied plenty of soap. This allowed my hands to rub over the surface more firmly this time, without making little bobbles on the surface of the felt. I also used my wooden soap dish as a mini washboard, and that helped to speed things up a lot. At this stage, it’s all about being careful but firm. You don’t want creases to form in the excess fabric, but you need to be quite rough with it to encourage it to shrink and full properly.
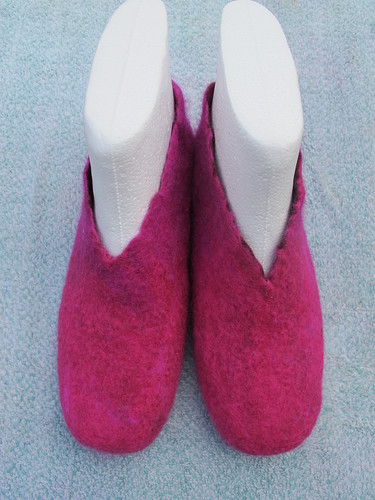
So, about an hour of rubbing and scrubbing later, here they are! A pair of pink slippers, sitting neatly on the lasts.
A note of warning – DO NOT take the slippers off the lasts yet! While they’re still wet, you might stretch them out of shape. They will also look floppy and disappointing, so don’t be tempted!
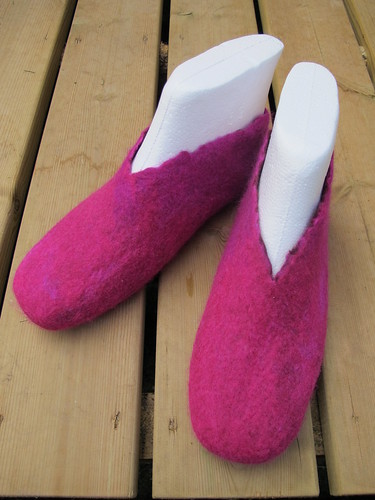
Mine are actually still out in the garden drying. I gather that this could taker up to 24 hours, but I’m hoping it’ll be much quicker in this heat!
Once they’re dry I’ll decide whether I want to change the shape of the opening, or add any needle-felted embellishments.
Now I just have to keep my fingers crossed and hope they fit!
All of these tutorials and downloads are completely free for you to use and print! They do take time and resources to put together though, so if you wanted to pop a few pennies in my PayPal tip jar or buy Miss Mouse a coffee by way of a thank you, I’d be very grateful.
What a great tutorial – and what great slippers! Thank you very much for doing this. I’ve been searching for well-illustrated method for ages and yours is wonderful. I can’t wait to get started…
thanks for your tutorial just purchased my lasts .Got the felt slipper bug over xmas using my feet was ok but hoping for a better finish on the lasts. I use a firm plastic for the resist which i find easier to keep a good shape.
I keep seeing varied info about the type of wool to use for slippers.
-merino being too soft, and was told it “won’t hold up” & and “it will pill”
I really love your slippers, and have plenty of merino roving which I planned on using. Can you please share how your slipper held up using only merino? And are they stiff I am looking to make a slip – on, clog type slipper, not the bootie like you made so I’m guessing I need either more layers or a coarser tpe of wool to blend we the merino so the opening remains as such.
I’m open to any suggestions!
Hi Lori, my merino slippers are very soft, you would definitely need more layers or a more coarse type of wool to make them more hard wearing. I hope yours turn out well, and have fun making them! 🙂
Hello! I’ve made 8 pairs of wet felted slippers in the past 2 years and used lambswool. Since I don’t have access to wool roving (I live in Mexico), I unspun lambswool yarn and used 8 layers on each side. On the first pair I made I only used 4 layers but the slipper tured out very flimsy, so I never wear them. The other 7 pairs are being worn by myself, my husband and kids every day and they’re holding up well. I used lambswool because I had already read about merino not lasting. And yes, the first pair gave me a huge headache because of the ridge that forms at the sides from the overlapping wool layers, so I really watched how much wool overlapped and during the fulling process, I turned the slippers inside out, placed them on the lasts and fulled them some more, placing special interest on the sides of the slippers, then removed them, turned them right side out and put them back on the lasts for another good rub. To finish, I rinsed them in cold water and soaked them in cold water and a little white vinegar for a short while and put them back on the lasts to dry into shape. I hope this is helpful
Thank you Katia, that’s really helpful! 🙂
Wonderful tutorial. I can’t wait to get started on my felted slippers project and lucky me, just in time for Christmas!
I started learning how to felt a few months ago, I made a cat bed but used cardboard fro the resist, I tried heavy plastic and my project, another cat bed was a disaster. I am going to try slippers next and your instructions are very helpful. Thank you for the trouble you went to, helping others, myself
Thanks again, janice