Making Do and Mending

IMG_3999

Well, isn’t this irritating? One freshly-dyed white t-shirt (Dylon Rosewood Red, not as lurid as it appears in these photos!) complete with stain that, annoyingly, wasn’t visible when the t-shirt was white. Now that the t-shirt’s dyed I can’t use a stain-removal product or scrub at the fabric, as that will most likely take off the dye as well as the stain. My only option now is to cover it up with something.

IMG_4002

That’s better! A bit out of focus, but these are floral motifs carefully snipped from a small piece of Lancaster & Cornish organic cotton lace. I’m hoping there might be just enough loose dye still in the fabric that a little bit of it leaches out into the lace the next time it’s washed, just to soften the cream colour a little bit. But if that doesn’t happen, no worries, because the cream lace makes the white stitching on the t-shirt look as bit more as though it’s supposed to be white on purpose.

Knowing that the stitching wouldn’t take the dye was the main reason I chose the colours I did for dyeing my trousers – beige to dark brown, and pale blue to dark grey. With the contrast stitching they just look like smart, lightweight jeans. I also have plans for mending all of my funny-coloured trousers in the future. I’m on the look-out for small pieces of Liberty print fabrics that I can use for patching, and maybe for adding a hint-of-a-print on the turn-ups. Hopefully that will be a long way off yet though!

IMG_4004-1

While I was mending things, I made the decision to take two of my most beloved t-shirts out of my wardrobe. This Suzanne Vega t-shirt is from the very first gig I ever went to – at the Wulfrun Civic Hall in Wolverhampton, on April 8th 1993. (We were sitting three rows from the back, and Suzanne Vega had a cough.) Having been worn pretty often over the past 22 years, although recently relegated to hospital wear or pyjamas only, it’s safe to say that this t-shirt is very much past its best! But there was no way on earth I was going to throw it out, and it’s really not fit to give to a charity shop, so it was the work of about five minutes to turn it into a cushion. The tour dates are on the back.

IMG_4005-1

The same fate befell my other favourite t-shirt, also purchased in 1993, this time from Forbidden Plant in Hanley. I didn’t own any other green clothes, and it was far too big for me (being a men’s size XL), but I just had to have it. It saw me through art college and University, but again, it’s not even really fit to wear as pyjamas any more. But, because it was still in my wardrobe, it kept mysteriously finding its way out and onto my body. Drastic measures clearly had to be taken. So, cushion it is.

(No, I don’t iron my bedding. Sorry, Mum!)

Making these two cushions from my favourite t-shirts has made me wonder though – are there any items in my current wardrobe that I can imagine myself still wanting to keep in 22 years’ time?!

New Old Cardigan

New Old Cardigan

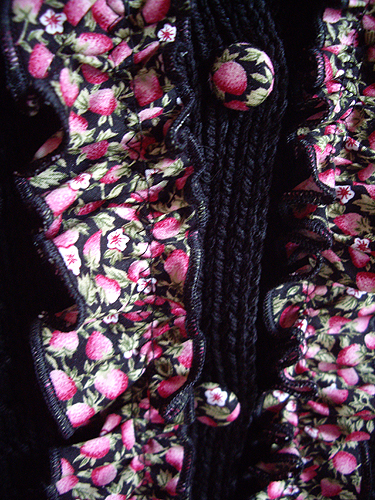
This morning I rediscovered the gathering foot for my sewing machine, and combined it with Pretty Jane’s continuous bias tape tutorial.

Half a metre of fabric turned into around twelve metres of tape, which I then ran through the gathering foot. This resulted in about four and a half metres of pretty ruffled trim! It’s about 4cm wide, and I ran both long edges through the overlocker. This gives it a nice finish, and also a little extra wiggle as the bias edges stretch a bit.

New Old Cardigan

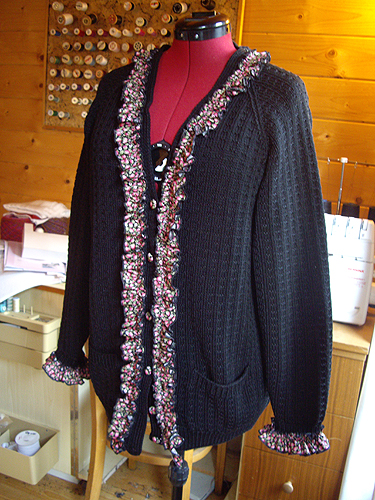
I wanted to use my lovely new ruffle straight away, so I decided to re-vamp a very old cardigan. My Mum knitted this for me many years ago (I might even have worn it to school!), and the cuffs had become very threadbare.

Once I’d chopped off the worst of the unravelling cuffs and run them through the overlocker, I simply zig-zagged a length of ruffle into place. That looked a bit silly on its own, so I added some matching buttons. Good, but still nowhere near ruffly enough, so I decided to go a bit mad and stitch the ruffled trim all the way around the neck. Much better!

I was looking at the bias tape tutorial because I have quite a lot of small pieces of fabric lying around in the Shed, and I wanted to find a use for them. Now I’ve got the hang of it I’m planning to make some lengths of bias tape in different prints and patterns, and see about resurrecting my old Etsy shop. I have lots of vintage buttons that I’m never going to use, so I was thinking about listing them, along with some covered buttons and bias tape, and having a little haberdashery clear-out. Chances of this happening soon are minimal, but I’m thinking about it, and that’s a start!

Twenty-eight buttons

Military jacket

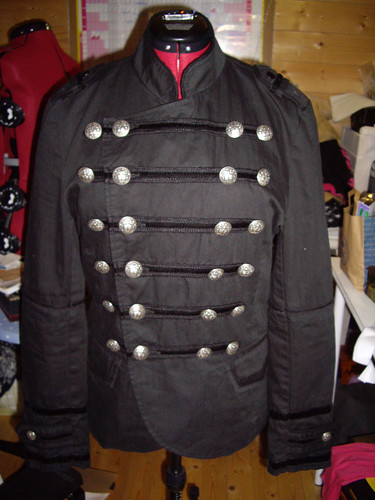
This is a lovely jacket that belongs to a friend of mine. It came with black buttons, and we’d been chatting about how nice they were, and how difficult it would be to find a replacement if one was lost. A couple of hours later… you’ve guessed it! One missing button.

There were no spare buttons with the jacket, so the only option was to replace the whole lot. All twenty-eight of them. (There are two more on the sleeves that you can’t see in the picture.)  They’re ever so slightly larger than the original buttons, but thankfully they still fit through the buttonholes.

I bought practically every button in this style, and I’ve tucked a couple of spares into one of the pockets. That way, if another button goes missing, I don’t have to replace them all again. My fingers are really sore, from sewing them all on in one evening!

Action Man

Action Man Jacket

One of the joys of Facebook is that occasionally you receive a message from an old friend. In this case it was a plea from someone I went to school with – could I help him with his vintage Action Man collection? Of course!

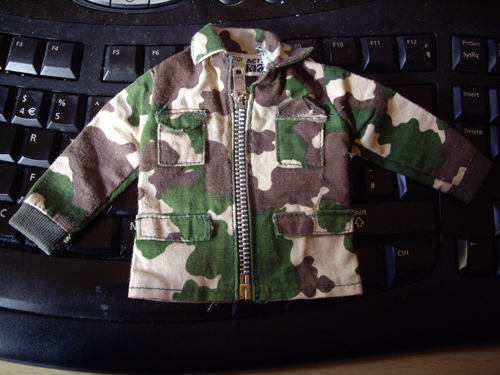
Shortly afterwards I received two tiny little jackets in the post.

My mission was to remove the broken zip from the older jacket, and replace it with the functional zip from a newer one. No problem! I even used vintage cotton thread, for authenticity.

I hung on to the two little jackets for a while, in case I could turn up a second tiny little zip and repair them both. Unfortunately 3½” long zips with green tape and metal teeth are quite difficult to come by, as it turns out. Possibly their only use is in mending broken Action Man jackets.

Summer brights

Karen's orange dress

A seam ripper is one of the most useful tools you can have as a dressmaker. Not just for those inevitable wobbles and wonky bits, but for tasks like this one.

My very petite friend had bought a dress that was too long for her, and she asked whether I could remove the ruffle from the hem. I don’t usually do alterations, but this was a nice simple one, so I brought my seam ripper to the rescue.

Rather than attack the dress with scissors, I used the seam ripper to nip out the stitching that was holding the ruffle in place. This allowed me to get a lovely neat edge, and expose the lace trim that was holding the two sections together.

It’s so tidy that I don’t even need to hem the new bottom of the dress. Marvellous!