What a Difference an Iron Makes…

Blue organic cotton dress - before

Without wishing to put anyone off the idea of buying my organic cotton fabric, this is what it looks like when it comes out of the washing machine. In these days of synthetic fibres and “easy-iron” fabrics, this might come as a bit of a shock.

Blue organic cotton dress - after

Thankfully, a few minutes with a nice hot iron can work wonders!

I know that plenty of people will be looking at this and thinking “why bother?”, especially when synthetic blends and surface coatings can reduce or even eliminate the need for ironing altogether. From a personal point of view, I’d much rather wear a natural fibre such as cotton than a synthetic one, even if it does require a little more effort on my part. Let’s just not talk about the little mountain of crumpled shirts sitting in the bottom of my wardrobe, waiting for me to get around to doing the ironing…

Black Fleece Hoody

Black fleece hoody

I’ve been saving my pennies for ages, and last week my copy of the Cochenille Garment Designer software arrived. I haven’t said too much about it yet because I’m still on the steep part of the learning curve. This means that anything I might have wanted to say was probably unprintable anyway.

The first pattern I drafted and printed out was a simple dress… which would have been lovely if it hadn’t turned out to be at least six inches too big! I hadn’t checked the design ease in the pattern, and it was rather more generous than I’d expected. Oops.

Black fleece hoody

This little fleece hoody is my second attempt, and I’m really pleased with it! Isn’t it adorable? I particularly like the slim bell sleeves and the edge-to-edge fastening at the front. It’s trimmed with bias binding because they’s my current obsession. I think it makes for a lovely neat edge, and it would be great in a contrasting colour too.

Unfortunately I went a little bit too far the other way with the design ease on this one, and it’s come out a little bit too small for me. I’ve popped it into my Big Cartel store, alongside the organic fabrics, so if you’re a size 34-36″ chest it might be just right for you.

This pattern’s definitely a keeper though, unlike my first attempt. And now I’ve made one pattern that’s much too big, and a second one that’s much too small… it stands to reason that the third pattern I make should be just right!

Vogue 1202

Vogue 1202

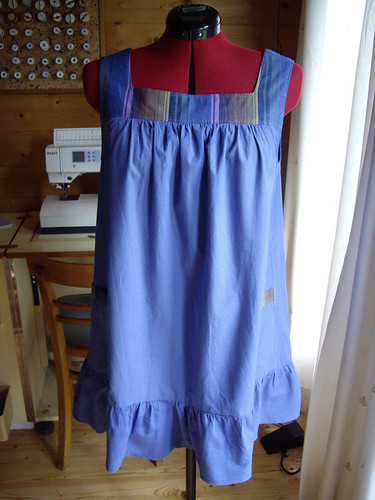
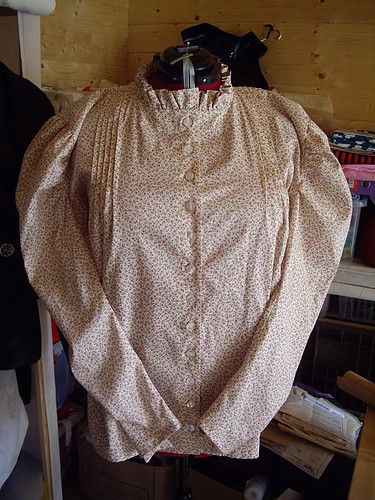
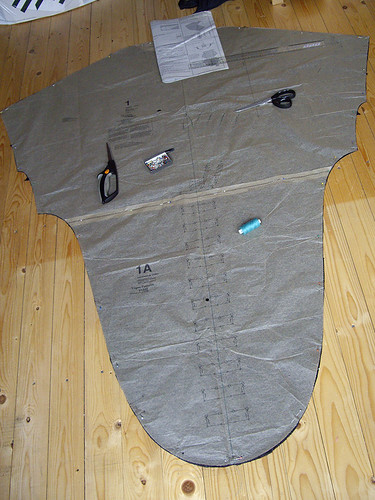
This is Vogue 1202, a designer Donna Karan pattern. I’ve had it in my stash for about a year. I kept unfolding it, looking at the size of the pattern pieces, folding it up and putting it away again. The piece above is the front, and it measures 140cm wide by 160cm long. Which is much larger than my cutting table.

I folded away my cutting table and made enough space on the floor to cut out the pattern. But before I did that I had to use my psychic powers to figure out which size to cut out. Obviously the size of the bust doesn’t matter at all in a draped pattern like this one. But the waist does matter, and the finished waist measurement isn’t given anywhere. Yes, there are measurements on the pattern envelope. But anyone who’s been sewing for more than five minutes understands that those are nothing more than a guideline at best.

Vogue 1202

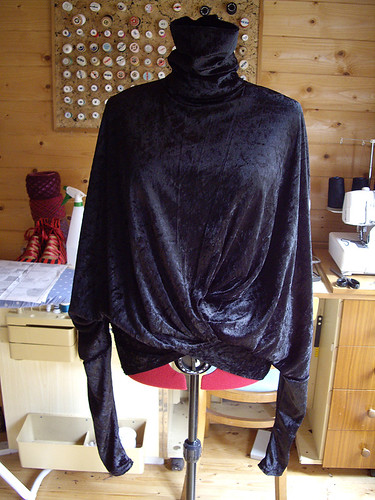
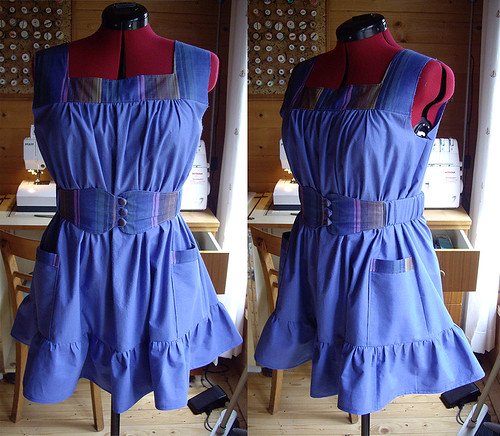
I plucked a number out of thin air and made a size 12, which turned out to be at least two sizes too small. Unfortunately it wasn’t possible to find this out until the top was finished and I could try it on. Thankfully the fabric is stretchy, and once I’ve managed to wriggle the stupid thing over my shoulders it does (just about) fit around my waist.

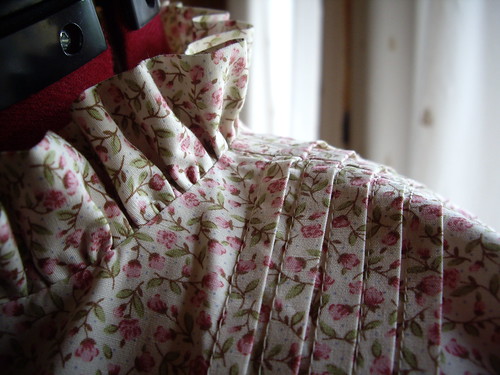
You can see the lovely draped effect around the waist, which is sadly lost on me. I’m so short-waisted that the main body of the top simply folds right over it and covers it up. The sleeves aren’t as long as they look, by the way. They’re very narrow, so they fit very close to your lower arm and then the upper sleeve billows over them. This works something like a straitjacket, ensuring that you can’t move your arms despite the voluminous nature of the top.

Vogue 1202

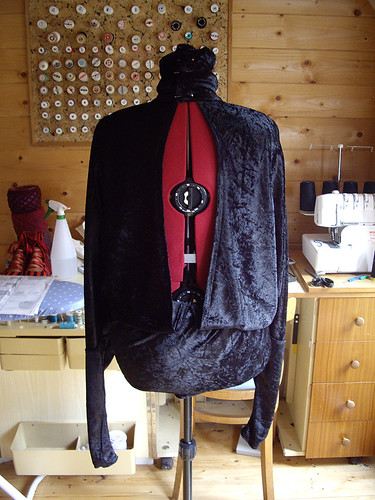
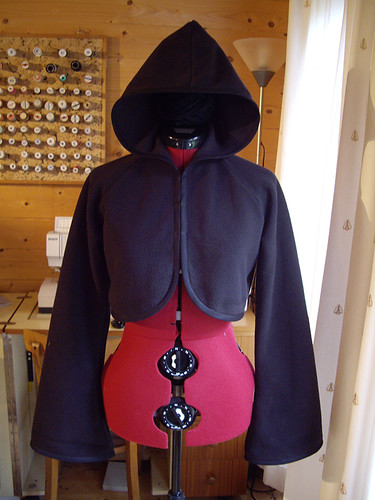
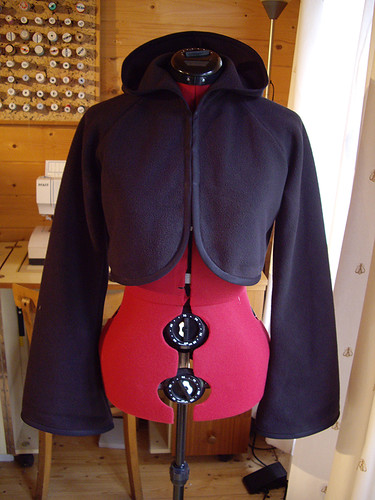
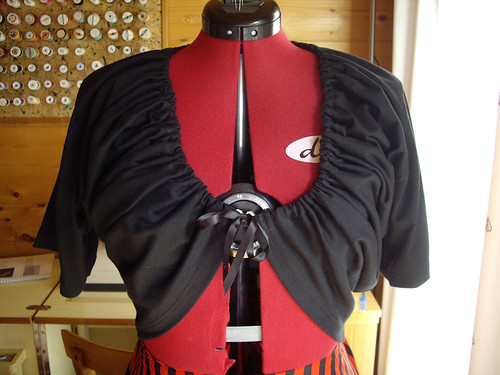
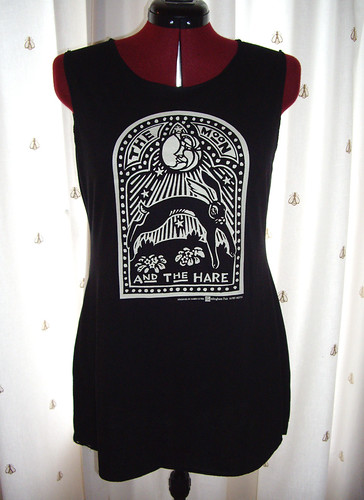
Here’s the back, which is the main reason I wanted to make this top in the first place. I have a selection of brightly-coloured vests and t-shirts that I think would look great underneath. (I also have a sparkly-backed bra, if I’m feeling particularly adventurous.) You’re supposed to sew nine tiny snap fasteners to the back of the very high neck, but I think I’m going to go with four big ones.

I was hoping to feel very glamorous and sexy in my new designer Donna Karan top. Then I tried it on, and realised that it looks as though I’ve been to the hairdresser’s and forgotten to take the cape off. Oh dear.

I wouldn’t recommend this pattern for anybody who wasn’t very long-waisted, or willing to take a gamble on what size they needed to cut out. I’m sure Donna Karan’s very clever, and I’m sure this top would look great on the right person… unfortunately that person isn’t me. In fact, I’ve already scrunched up the pattern pieces and thrown them away so that I don’t try and make it again in a different fabric, in the hope that it might somehow magically fit differently a second time.

Somewhere in the stash I have some fabric that I’d earmarked to make the matching skirt. Given that the skirt pattern doesn’t come with any finished measurements either, and has a very similar construction, I’m not entirely certain that’s going to be a good idea.

Blue Organic Cotton Dress

Blue organic cotton dress

This is a little tunic dress, from one of my own patterns. The main body of the dress is blue organic cotton from Bishopston Trading. The yoke and assorted other parts are also organic cotton, from Kaffe Fassett’s collection for Rowan a few years ago.

The pockets are set into the side seams, because it seemed like a good way of creating a nice sturdy finish. As the tunic is so full, next time I think I’ll make patch pockets and place them a little further towards the centre.

I’ve worn this with and without the belt, and I think it looks great either way. The belt is made from 5cm elastic, simply covered with matching fabric which gathers as the elastic contracts. The ends are fastened with loops and matching fabric-covered buttons. Next time I’ll add a slightly thicker interfacing, or perhaps a scrap of corset coutil, to make the front panels a little less likely to fold over on themselves. I also need to make another one about two inches longer, as this one’s a bit too tight for my liking!

I’ve been thinking for a long time about what to make with my organic cottons, and I’m really pleased with this tunic and belt. This is going to be the start of some thinking out loud in fabric, as I try to work out which styles might be available for sale.

Edwardian-ish Blouse

Edwardian-ish Blouse

I don’t think I showed you the finished blouse that I was making for Aldbrickham Clog & Step Dancers. It took much longer than I was expecting, because I ended up having to make all of the buttonholes by hand.

The body and collar of the blouse are from Simplicity 3623, with pintucks instead of gathering at the shoulders. The sleeves are from Simplicity 2207, and the buttons down the front were added by request.

I’m just waiting to find out whether the blouse is going to be okay for dancing – because of the shape of the sleeve heads, I might need to add a little gusset at the underarm to allow a better range of movement. Otherwise, I’m really pleased with how it’s turned out.

T-shirt shrug

T-shirt shrug

I was supposed to be at a barbeque on this gloriously sunny Sunday afternoon, celebrating the success of the Witt Studio Chorus Summer Showcase. Unfortunately my kind husband decided to share his filthy germs with me, and now we’re both too ill to go. Bah.

I’ve spent most of the day sitting on the sofa feeling sorry for myself, watching Torchwood and Doctor Who, and looking at the internet in the name of research for a new range of clothing that I have in mind. While I was wandering about on Pinterest, I stumbled across this tutorial for turning a t-shirt into a shrug.

Deciding that I couldn’t go a whole day without making something (not even a poorly Sunday), I dragged an old organic t-shirt out of the languishing stash, set about it with scissors, the sewing machine and a bit of ribbon. The whole thing took less than an hour – including taking photos and writing this.

The only thing I did that wasn’t specified in the pattern was to stitch the ribbons into position at the end of the casing. This means that the gathering is no longer adjustable, but it stops the ribbons from disappearing inside the t-shirt.

I have a giant pile of old t-shirts in the Shed, just waiting to transformed into something new. I can feel a few more of these little shrugs coming on, I think.

Regency dresses or summer tunics?

This is Vogue 8434, a pattern I added to my stash recently – partly because I was thinking about shirts for the summer, and partly because Vogue were having a sale.

In my giant fabric mountain I have nine metres of linen – three metres each of black, white and purple. I also have three metres each of matching cotton lawn. This was originally earmarked for making three lined Regency-ish dresses to wear on a three-day trip to London next month.

I’d been wondering what to wear underneath the Regency dresses (more bloomers? Long, loose trousers?) and then I remembered that I have these Gossypium yoga trousers in black, white and purple. The purple ones used to be pale pink, but I dyed them in the same wash as the purple cotton lawn, so now they’re a perfect match! I could make three of these tunics in linen… or in lawn… or in linen with floaty lawn sleeves…

Question is, which am I going to get more wear out of – three Regency-ish dresses, or three long linen tunics…?

(And more to the point, what shoes am I going to wear?!)

Regency-ish Dress and Bloomers

Regency-ish dress & bloomers

(Sorry about the terrible picture, trying to take photos of black lace is a nightmare.)

Today I have finally finished all the hand-sewing on this Regency-ish dress based on Simplicity 4055. Some of it was of my own making – I had to bind the edges of the armholes to stop the seams of the net sleeves from being scratchy. Originally I’d put poppers at the back, but it turned out to be a bit tight and every time I moved they’d pop open. Not good for dancing. So I unpicked the poppers, put in eyelets, and now it laces up. Not very Regency. Ah well. The length’s hardly period – and it’s even shorter than I’d intended, hence the definitely not-Regency bloomers to go underneath.

The bloomers started life as Simplicity 2777, view E. I left off the waist casing, and finished the top edge with picot edged lingerie elastic. I also left off the leg bands and ruffles, because I found a piece of very extravagant garter elastic in my stash. It was much too stretchy to use as an actual garter, but absolutely perfect for trimming these little shorts.

I’m still trying to get used to the shape of the dress. It’s pretty and I know it’s basically the same shape as me, but I’m so conditioned to believe that every woman should have a neat little waist that I feel as though it looks a bit frumpy. Hopefully that’ll wear off when I put it on and discover that it’s actually comfortable rather than digging into the waist that I haven’t got, which is what happens with most of my other dresses. Which is why I never wear them.

I’m wearing the outfit on Friday evening, so hopefully I’ll be able to ask someone to take a better photo for me!

The Moon and the Hare

The Moon and the Hare

If you’ve been reading this blog for a very long time, you might recognise The Moon and the Hare. One of the first posts I wrote was about a t-shirt alteration featuring this print. I actually bought the t-shirt back in 2000 or 2001, the first time my paths crossed with the clog dancers. They were having an all-day event, and I had a stall selling velvet waistcoats and silver jewellery. I think I bought more than I sold that day, including this t-shirt.

I bought it from Hedingham Fair, rather optimistically in a children’s size, and when I eventually outgrew it I was rather upset. So I was really pleased to run across their stall at Chippenham, and find a t-shirt with the same print! This time I bought it in a men’s XXL, and spent a rainy Bank Holiday transforming it into a little tunic dress.

I started by removing the neckband and sleeves, and separating the shoulder seams. I then used an existing t-shirt to trace a new shape for the shoulders, armholes and neck. I used the old baggy sleeves to make new fitted ones, but thanks to a slight lapse in concentration I managed to sew the first one into place inside out. Using the overlocker. Oops. If I’d unpicked it the edges would have been a mess, and if I’d cut it out the sleeve would have been too small to go back in again… so I made an executive decision to go without sleeves. I copied another t-shirt and finished off the armhole and neck edges by simply turning the edges to the outside, stitching them in place, and letting them curl. I liked this effect, so I chopped off the original hem of the t-shirt and stretched it out until that curled too.

So there you have it – a new t-shirt becomes a new dress. Simple!

Pintucks and ruffles

Pinktucks and ruffles

This is just a little sneaky peek at something I’m working on at the moment. It’s a costume for Aldbrickham Clog & Step Dancers. I play recorder and concertina for them, and I’m helping out a friend who needs a new blouse.

We wear roughly Edwardian costumes, based on the working clothes worn in the countryside until about 1914. I’m putting this one together based on a Renaissance pattern, a steampunk-Victorian pattern, measurements taken from two existing blouses, and a bit of imagination!