Vandemar’s Raven Skull Rings

Vandemar's Raven Skull RIngs

Oh dear, I’m doing it again. Blogging all enthusiastically, then disappearing for a week. In my defence I’m still working on the costumes for Neverwhere which, as well as doing the odd day or two of overtime at work, is taking up every spare minute of my time and then some.

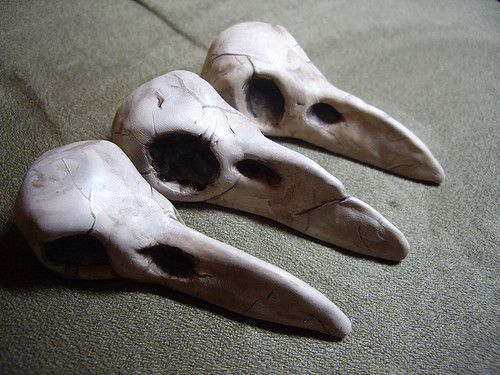
These are three raven skulls that I made the other day – and in the process of doing so I managed to pull a muscle in my shoulder that trapped a nerve, leaving me wearing my arm in a sling because everything hurt and I couldn’t feel my fingers. Oops. That’s what happens when you spend upwards of seven hours pinching a layer of Fimo into place over an armature of masking tape and paper clip wire, apparently. I won’t be doing that again in a hurry!

You can see the development of the skulls over on Flickr. I did the sculpting and, once the shapes were baked and hardened, I passed them on to Paul who painted them for me. We wanted them to look as though Vandemar had been wearing the rings for years, so Paul’s painted them to look somewhat aged and cracked.

In an ideal world I would have smoothed and sanded out all of those fingerprints, but time was of the essence! If anyone can see the fingerprints from the stage, I’ll be very surprised. Although Louise did spend part of last night’s rehearsal shortening Vandemar’s coat sleeves, otherwise nobody would have been able to see the skulls at all!

They’ve now been mounted onto rings, with glue that I can only hope will be strong enough to last through the entire run. Performances start next week, and I keep thinking that we must be into the final straight with the costumes by now. But Louise and I spent yesterday evening at the theatre and each came back with a to-do list longer than the one we’d started with, despite having sewed our way through the entire rehearsal.

We must be nearly there though, surely?

Reticulated Silver Earrings

Reticulated earrings

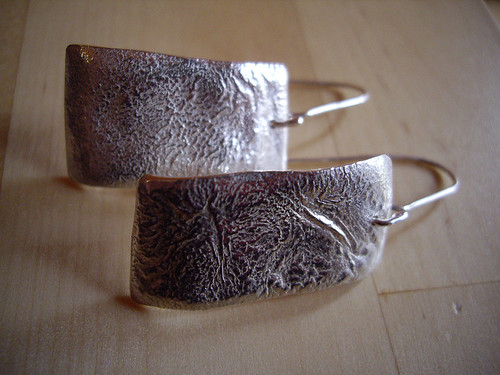
Still busy… and getting busier, as I’ve been offered the opportunity to attend an unexpected training session on Thursday. So this is just a quick little picture to show you what I made in last night’s silver jewellery class. It’s a pair of earrings made from reticulated sterling silver. You can’t really see the scale from this picture, but they’re about an inch long.

I did finish two pairs, but when I went to try on the second pair, I managed to snap off one of the wires. Hopefully my tutor will be able to show me how to repair this next week, as I think it must have been a soldering error on my part. Oops!

The surface texture is made by heating the metal several times. Sterling silver is actually an alloy, containing around 7.5% copper for strength. Repeated heating brings the fine silver particles to the surface, and with a bit of careful work from the blowtorch, they’ll transform into this delicate texture. The trick is in knowing when to take the blowtorch away, so that the entire piece doesn’t melt.

Originally they were going to be the front pieces for a pair of cufflinks, but I accidentally melted the back pieces, and then lost patience with the chain I was trying to make. After a bit of a struggle with lots of little links, I made an executive decision that earrings were the way forward. Much nicer!

Silver and Labradorite Ring

Silver and Labradorite ring

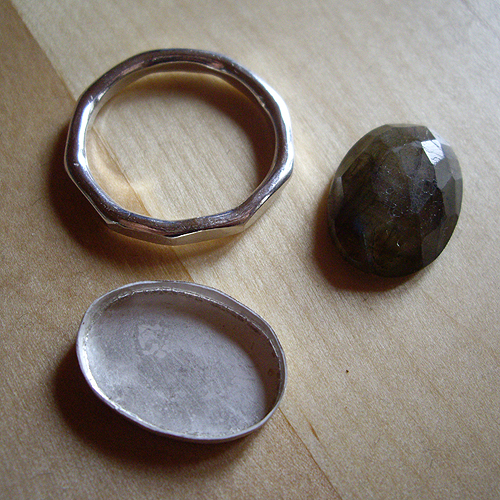
Well, it will be once I’ve soldered the bezel to the ring and set the stone!

Last August I did a short silver jewellery course as part of a week of courses at my local high school. They also run silver jewellery classes during term-time, but they’re so popular that they’re always over-subscribed. I asked to be kept on the waiting list, but I was rather taken by surprise when an email arrived letting me know that a place was available!

These are the results of two evenings’ work. In the first session I made the ring, which I’m really pleased with. Much better than my first two, although I can see from this larger-than-life photo that it’s not quite flat. In the second session I made the bezel for the stone, which still needs a little filing and polishing before it’s finished. Once that’s done I can solder it to the ring, and set the stone into place.

We were advised to go for a larger stone rather than a smaller one, so I went for a lovely 18x13mm labradorite cabochon from Kernowcraft. I thought the rose cut matched nicely with the hammered ring. Everything needs a thorough clean and polish, but I hope it’ll be lovely when it’s finished.

I’ve also bought a little pile of rose quartz cabochons in different sizes (hoorah for gift vouchers!), thinking that I’d like to use the classes to practice making different types of settings for the stones. But I bought a couple of smart shirts recently, and now I’m thinking that I might like to make some cufflinks. I can feel some experiments with textures coming on, I think.

Cufflinks

Cufflinks

The main reason I bought that TM Lewin shirt was because it fastened with cufflinks. It’s quite rare to find women’s shirts with double cuffs (unless you want to splash out more than I can currently afford), so I was really pleased to have spotted it.

In the shop the cuffs are fastened with little plastic studs, so of course I then needed to make myself a pair of cufflinks. I was going to follow the Martha Stewart tutorial, but a quick rummage around in the Shed turned up some slightly more sturdy components.

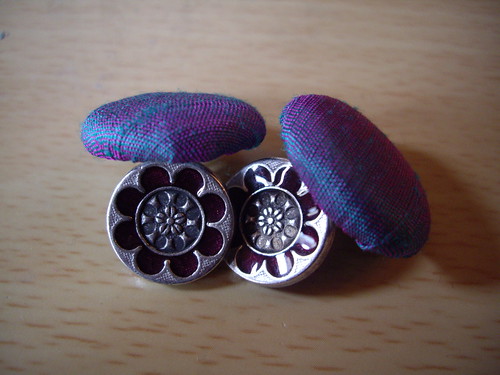
These are two pairs of buttons, as per Martha Stewart’s directions, but instead of being joined with thread loops I used metal jump rings from my jewellery-making supplies. All four buttons have shanks rather than holes, so this seemed like a more appropriate solution than joining them with thread.

The top buttons are about an inch across, and covered in offcuts of silk from the waistcoat and bow tie. The bottom buttons are about a centimetre across, and are the same as the buttons on the waistcoat. I also managed to find larger versions of the same buttons for the trousers and the jacket. So there you go – custom cufflinks to match your outfit for the price of four buttons and a couple of little metal rings!

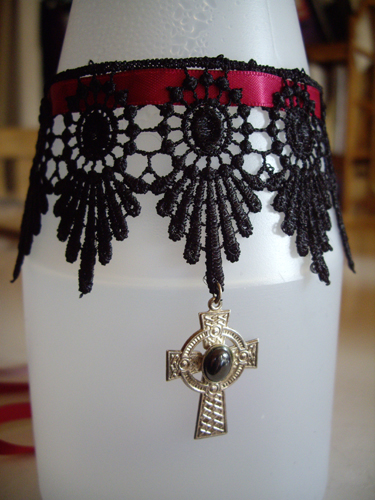
Lace & Ribbon Choker

Lace & ribbon choker

I was going to write a tutorial for this, but I honestly can’t imagine how anybody could need one.

  1. Take a piece of lace that fits around your neck.
  2. Take a piece of ribbon three times as long as the lace, and narrow enough to fit through the holes.
  3. Thread ribbon through holes in lace.
  4. Add a pendant if you happen to have one lying around.
  5. Tie it around your neck.

Ta-daa!

Precious Metal Clay

Silver jewellery

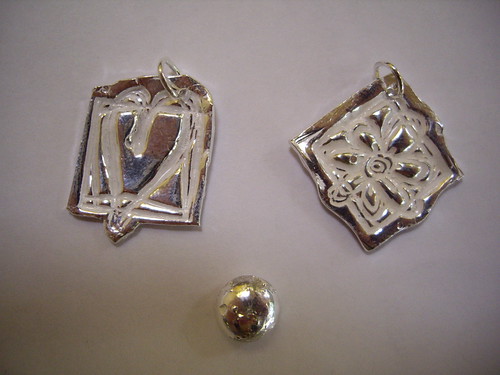
These two little pendants are made from Precious Metal Clay. I’ve had the clay for almost a year, but was a bit afraid to make anything with it in case I ruined it. Janet (the silversmithing tutor) said that if I wanted to make something at home and bring it in, she’d show me how to fire it. I very gratefully took her up on the offer, and here are the results.

The pendants were made very simply by pushing a rubber stamp into the rolled-out clay. They’ve been through the barrel polisher, but I need to get into the indentations with a brash brush to bring up the shine. Another technique I’ve read about is to push polymer clay into the pendant, to add a bit of colour.

The silver blob is what happens when you melt silver clay completely to a liquid. I wanted to do that with the leftovers, so that I could see what the various stages of melting look like. Theoretically this should help me to avoid disaster in the future.

Silver jewellery

Sadly it didn’t help me to avoid this little disaster!

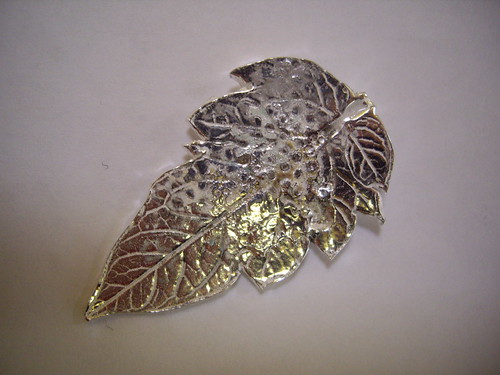
This is what happens when you’re firing your metal clay piece from the back (so you don’t squash the bail), but you let it get a little bit too hot. The honeycomb texture on this leaf is because I accidentally melted it ever so slightly into the firing block. Oops.

Unfortunately there’s not a great deal I can do about that, but I can at least clean it up with the brass brush and see how noticeable it is when the whole thing’s nice and shiny. Such a shame, because the delicate texture of the leaf was beautiful!

My next step is to book myself onto one of Janet’s Precious Metal Clay courses. I think I need a little bit more help…

Silver Jewellery

Silver jewellery

The final two days of my Art Week were spent at a silversmithing course. I’ve been meaning to get around to going on a silversmithing course for more than ten years, and now I’m really cross with myself that I didn’t do it sooner. Silversmithing is brilliant!

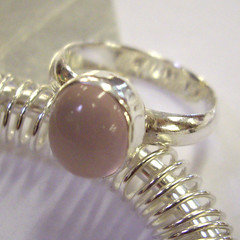
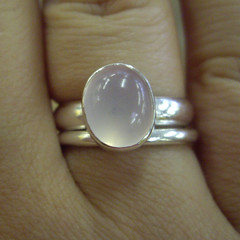
On the first day we made silver rings using different profiles of wire. On the second day we were given a quick demonstration of stone setting, so I set one of my rings with this lovely rose quartz. I’m absolutely thrilled to bits with this, and you can expect to see me wearing it pretty much all the time from now on.

Silver jewellery

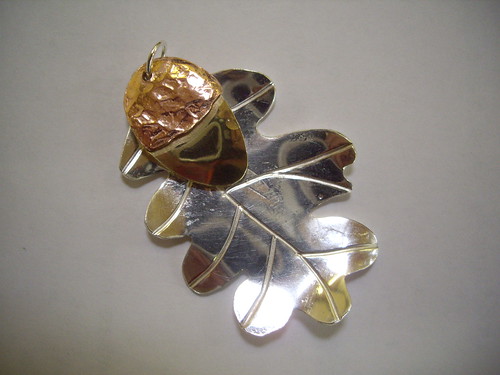
My main project was this pendant. The leaf is silver sheet, textured with wire to make the veins, and then hammered gently over dome punches to give it a bit of shape. The acorn is made from copper and brass, and also gently domed. I’ve since brushed the brass part of the acorn, to give it a satin texture. I’m now pretty handy with a piercing saw and a needle file, although my hammering skills definitely have room for improvement!

Silver jewellery

I already have quite a few of the necessary tools for making jewellery, so I’m currently contemplating buying a few more. A bench clamp, a ring mandrel, a piercing saw and a few bits and pieces to allow me to do soldering… I can feel a few more pretty rings coming on!

There are quite a few silversmithing evening classes local to me, although apparently it’s quite a challenge to find one that actually has any available places. I’ll definitely be looking around to see whether I can squeeze myself onto a course. There’s so much to learn, and I can’t wait!

Always Make A Toile.

Work Outft?

Yesterday’s lesson turned out to be “Always Make A Toile”. The waistcoat didn’t fit. Not even slightly.

So, this morning I went on a mammoth wardrobe clear-out, and took out everything that doesn’t fit me any more. I then sorted the remaining clothes into “suitable for work” and “not suitable for work”. This led to the discovery that I own approximately one million really nice tops, but nothing to wear with them apart from jeans. And one ankle length black skirt. And my grey suit trousers.

So, this week, I will be wearing my grey suit trousers and my ankle length black skirt, with an assortment of tops.

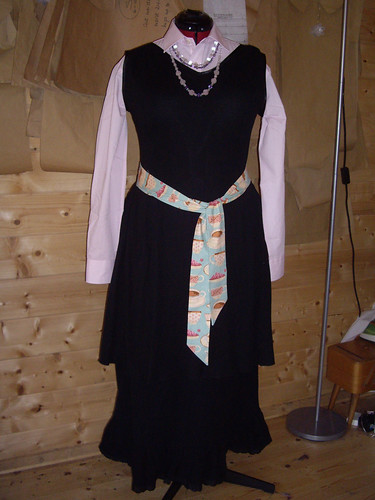
However, I can’t alternate between one skirt and one pair of trousers indefinitely, so my next mission was to go through my wardrobe again, and try on combinations of clothes that I hadn’t thought of before. That led to the outfit above, which I really like!

  • The pale pink shirt is a men’s one from Marks & Spencer.
  • The dress over the top is this black jersey one.
  • The long skirt is this seersucker one, that I made last year and have almost worn out already. The dress is long enough that the outfit would be fine without the extra skirt underneath, but I do prefer to go for ankle length these days. It looks much better with my new shoes.
  • The belt is one with a teacup print, but I don’t think it’s quite the right colour. It does work to break up the black though, which I like.
  • The necklace is this rose quartz and amethyst one, that I made at the beginning of the year. I like the way that the three strands work with the neckline of the dress.

I think for my first day I’m going to play it safe and wear my grey Marks & Spencer suit with a plain black top. Once I’ve seen what everyone else is wearing, and established whether there’s an official dress code, I can work out what I need to sew next.

Hematite and polymer clay

Hematite & polymer clay necklace

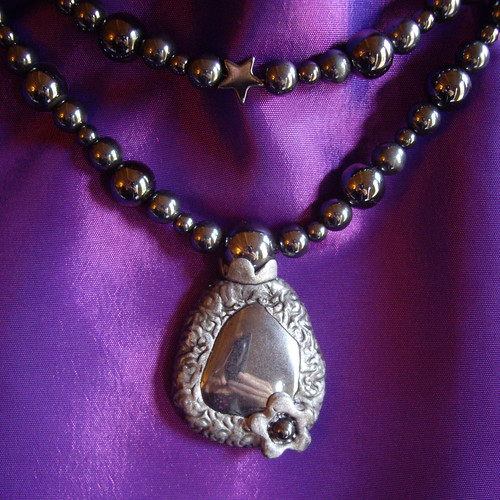
This is another of my experiments with polymer clay and tumbled stones. The pendant is made by simply wrapping the edges of a tumbled stone with polymer clay. The large bead at the top of the pendant has a third hole in the bottom, and this was pushed right into the polymer clay before it’s baked. The flower embellishment has a bead in the centre which was also added before the pendant was baked. No glue was used in the pendant. The texture was created by rolling a decorative button over the surface.

After baking, the textured pendant was painted to tone down the colour of the clay and to bring out the texture in contrast to the smooth stone. Once that was done, it was simply a case of looking through all of my hematite beads, and deciding what the necklace was going to be like. The longer strand measures 21″, with the pendant adding an extra inch and a half. The inner strand measures 19″.

I don’t think the photo accurately conveys how glittering and shiny this necklace is. I also couldn’t figure out how to take a picture of such a reflective surface without having my hands and the camera appear in every bead!

I have plenty more tumbled stones, so I think a few more of these pendants are going to be forthcoming in the near future.

Sarah’s Angel

Sarah's angel

My friend Sarah saw the stamped Fimo pendants I made a few weeks ago, and asked whether I could make one for her Mum.

The brief was simply “pale yellow, with an angel”, and this is what I made.

The pendant is just less than two inches long, and made from pale yellow Fimo. The angel isn’t stamped, but rather drawn into the clay with a sharpened pencil. The whole pendant was then washed with a coat of metallic gold acrylic paint, to give it a slightly “aged” look, and the angel impression was also painted with gold. I hung the pendant on gold organza ribbon, and finished it with a gold bolt ring and matching loop.

Thankfully it turned out to be exactly what Sarah wanted – and I hope her Mum likes it too.