Felted gemstone pendant

Felted pendant

A little experiment for a Tuesday afternoon – a felted pendant.

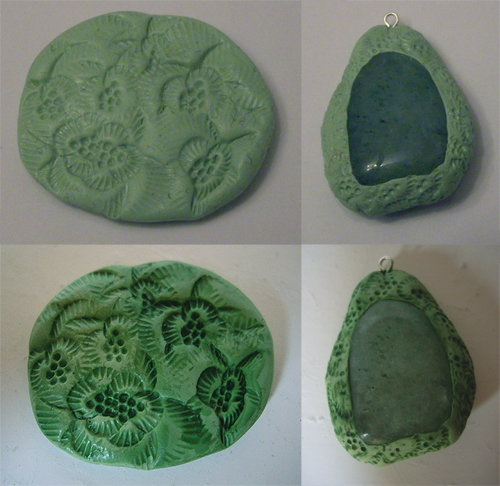
This nugget of purest green has been hanging around on my desk since January 2010. It sort of did what I wanted it to (the polymer clay encased the stone, took texture and paint well, and provided an anchor for a bail), but I was never quite happy with the finish of it.

Interestingly though, I’ve just found the piece of fimo that I added fragrance to at the same time, and it just about still smells. So now I know that the fragrance lasts roughly three years before it wears off. Not bad!

Given that this pendant had effectively become a waste product, in that I didn’t like it enough to either wear or sell, I decided that I had nothing to lose by seeing what would happen if I took my little rotary drill to it. The stone (aventurine) engraves quite nicely, though it’ll take a little more practice and experimentation with different shapes of diamond point to discover what works best.

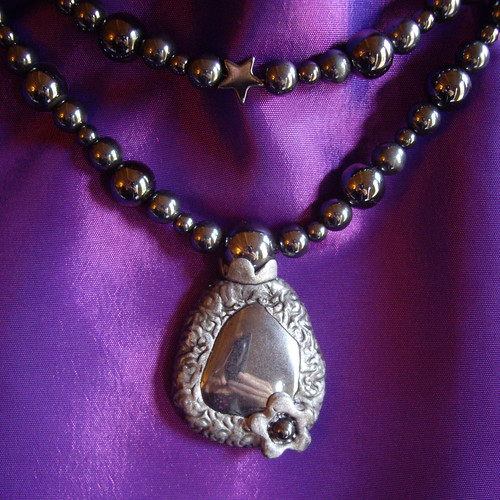
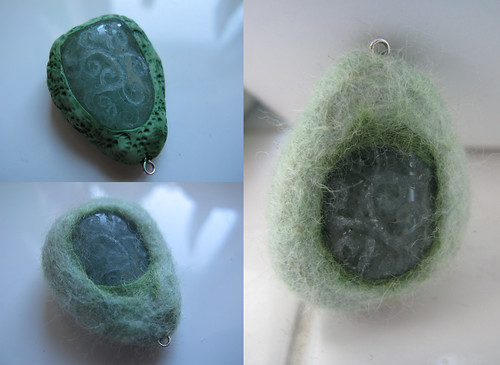
Once that was done I thought I might as well carry on experimenting, so I rummaged about in my little bag of coloured wool. Less than an hour later I had this – an engraved gemstone encased in felt.

Now this I do like, very much.

The wool has shrunk nice and tightly around the stone so that it can’t fall out, and you can see the inner layer of dark green felt just poking out around the edges of the opening. The polymer clay that I didn’t like has been hidden away completely, and I love the soft edges of the new shape. I might do a little experiment with fragrance on this one as well, by adding a couple of drops of essential oil to the back of the pendant. I doubt that will last for three years, but I’ll let you know!

Hematite and polymer clay

Hematite & polymer clay necklace

This is another of my experiments with polymer clay and tumbled stones. The pendant is made by simply wrapping the edges of a tumbled stone with polymer clay. The large bead at the top of the pendant has a third hole in the bottom, and this was pushed right into the polymer clay before it’s baked. The flower embellishment has a bead in the centre which was also added before the pendant was baked. No glue was used in the pendant. The texture was created by rolling a decorative button over the surface.

After baking, the textured pendant was painted to tone down the colour of the clay and to bring out the texture in contrast to the smooth stone. Once that was done, it was simply a case of looking through all of my hematite beads, and deciding what the necklace was going to be like. The longer strand measures 21″, with the pendant adding an extra inch and a half. The inner strand measures 19″.

I don’t think the photo accurately conveys how glittering and shiny this necklace is. I also couldn’t figure out how to take a picture of such a reflective surface without having my hands and the camera appear in every bead!

I have plenty more tumbled stones, so I think a few more of these pendants are going to be forthcoming in the near future.

Sarah’s Angel

Sarah's angel

My friend Sarah saw the stamped Fimo pendants I made a few weeks ago, and asked whether I could make one for her Mum.

The brief was simply “pale yellow, with an angel”, and this is what I made.

The pendant is just less than two inches long, and made from pale yellow Fimo. The angel isn’t stamped, but rather drawn into the clay with a sharpened pencil. The whole pendant was then washed with a coat of metallic gold acrylic paint, to give it a slightly “aged” look, and the angel impression was also painted with gold. I hung the pendant on gold organza ribbon, and finished it with a gold bolt ring and matching loop.

Thankfully it turned out to be exactly what Sarah wanted – and I hope her Mum likes it too.

Stamped Fimo pendants

Fimo pendants

Just a couple of tiny little pictures to show you what I’ve been up to today.

I’m still playing about with Fimo, trying out some techniques that may or may not work when I move on to using the silver clay.

Both pendants are imprinted with a rubber stamp. The Piglet has been painted with acrylics, and both pendants have been washed.

The spider pendant would be an ideal candidate for enamelling, if it was made in silver clay. The imprint of the rubber stamp makes a perfect reservoir for liquid enamel colours. The Piglet is too detailed for enamels, but the details could definitely be picked out with liver of sulphur, which creates an “antiqued” effect. I think it would look very smart if the pendant itself had a brushed finish, but the heart was burnished to make it shiny.

I have so many ideas for Fimo and silver clay pieces that I want to make, and techniques that I want to try. I think I need to get out my pencils and start a little sketch book, so I don’t forget anything.

A nugget of purest green!

A nugget of purest green!

I was given a starter kit of PMC (silver clay) for my birthday, but decided that I’d rather try out a few techniques with polymer clay before I dive up to my elbows into the silver. I had a few blocks of Fimo in the house, so I’ve finally found some time to have a bit of a play with it, and this is the result.

The piece on the right is a pendant made from a tumbled green aventurine stone, with the polymer clay wrapped around the edges and then textured. The texture isn’t exactly what I was hoping for, but I have plans for future improvements. The baked clay was then washed with acrylic paints, sanded and washed again.

Once I’ve taken some better photos, I’ll probably pop this one up for sale on Etsy, while I think about the next incarnation of this technique.

My original idea was to test the process a few times, and then replicate it with the silver clay. Unfortunately my jewellery magazines tell me that’s not possible, because the gemstones won’t withstand the temperatures needed to fire the silver, whereas they’re quite happy in the oven at the low temperature required for Fimo.

While I was reading up about polymer clay techniques online (shockingly, I own no books on the subject!) I came across a very interesting tutorial by Monster Kookies, about using fragrance oils to add scent.

You can’t use essential oils because the smell won’t survive the baking process, but you can use soap and candle fragrance oils, because they’re designed to be used at higher temperatures. The structure of the fragrance oils also blends well with the polymer clay, (hopefully) without compromising its structure.

The piece on the left I’ve scented using a fragrance oil from Gracefruit‘s extremely comprehensive selection, left over from my cosmetics-making days. I used the stopper from the top of the bottle to rub a very thin layer of oil across the piece of flattened clay, and then rolled it and flattened it and rolled it again until all the oil had been absorbed.

After baking it still smells, which is a very good start! I’ve written the date on the back, so I can find out how long it takes for the fragrance to fade.

I then used the baked piece to experiment with different methods of adding paint washes to the textured clay, and had a little practice with my new rotary tool’s polishing heads. I borrowed my husband’s Games Workshop Citadel Washes, as these paints are specifically designed to be used on plastics. I’m pleased with the results, and the painting tutorial was useful too.

Now I’m quite keen to try out some of Paul’s other modelling supplies! I know he has mould-making and resin casting supplies around here somewhere… I wonder what I could make with those?

(By the way – the title of the post is from Blackadder, when Percy tries his hand at Alchemy, and accidentally invents “green” instead of gold.)