Socks and salt dough

Untitled

I’m so bored of saying this, but I’m ill, AGAIN! Just a cough and a cold, no doubt brought home from one of the hundreds of children who came to take part in activities at the museum over half term. But as a result, there has been a great deal of languishing on the sofa, and a need for some extremely simple knitting. So, I used up some leftovers of sock yarn and made these teen-tiny newborn sized baby socks!

Untitled

When they were done I still had a little bit of yarn left over, so I improvised a pattern for some matching mittens. They’re so cute, I might have to start knitting baby socks with all of my leftover sock yarn! And even though I was looking for easy knitting, I still managed to learn something – these little socks have my first ever short-row heels. I don’t think I managed to close up all the holes very neatly, and I didn’t wrap the stitches, but I know that once these socks have been through the wash a few times, any little irregularities will disappear.

Salt dough experiments

This afternoon I had a little bit of a play with some salt dough, which is currently waiting to go in the oven. I tried two recipes, both of which I’d found on Pinterest, but one was significantly better than the other. These are made from my usual combination of 2 parts flour to one part salt, but with the addition of a small amount of cornflour. This made the dough feel extremely smooth, and it certainly picked up the detail from the leaf cutters (designed for fondant icing) very well.

Salt dough experiments

The second recipe… well, that just made a great big mess. It called for cornflour and bicarbonate of soda, but while the proportions of the recipe were provided, there were no instructions. I knew the split second I’d added too much water because I didn’t have dough so much as this…

I’ve made cornflour gloop with the toddlers enough times to know that I was never going to make anything useful out of it, and I don’t know why I didn’t realise sooner that this is what would happen! Perhaps the state to be aiming for with this recipe is something more like damp sand rather than actual dough. Although I don’t know whether that would hold together enough to cut shapes out of it. (It does work for bath bombs though, so perhaps it would be okay.)

The reason I’m mucking about with salt dough is that I’m looking for an alternative to polymer clay. I did an experiment several years ago using essential oils to scent Fimo, but now I think I want to use something a bit more natural as my base material. I’ve had limited success with papier mache, so I’m thinking that air drying clay might be my next best option. We’ll see. If these little leaves and flowers survive their baking and a little bit of paint, perhaps salt dough will be fine!

Learning Curve

Spinning wheel

These past couple of weeks I seem to have been on a learning curve for all sorts of things. I’ve been trying to sort out the spinning wheel at work, which seemed to be going really well! I’d identified it as being a 1960s/70s Ashford Traditional, found a diagram to help me set up the brake band for the bobbin, and oiled it to within an inch of its life. It now treadles beautifully, and the flyer is very smooth… until I start trying to spin. Whether I’m trying to spin my own yarn or just wind readymade yarn onto the bobbin, as soon as I put the slightest tension on the yarn, the flyer stops turning. I know it’s a question of getting the tension for both the drive band and the brake band in balance with one another, but I just can’t seem to get it right! Very frustrating.

Bootlaces

Last weekend (the weekend before? I forget), I made some bootlaces. This involved a great deal of swearing at offcuts of bias tape and various feet on my sewing machine. I finally managed to get the stitching even and without danger of slipping off the edge of the laces (the blind hemming foot turned out to be the thing I needed!), but then I mucked up the aglets.

Bootlaces

I bought the lace tipper originally to put the metal ends onto corset laces. Then I stopped making corsets, so it’s been in a drawer for the longest time. I made some hand-folded bias binding for the Etsy store, and when it didn’t sell (despite a lot of people having favourited it – I think they all went away and made their own!) I thought I’d repurpose it to make pretty bootlaces. I’ve made laces with sewn ends before, but metal aglets are obviously much more durable.

Can I get the dratted tool to work right? No, I can’t. These laces were just too thick, so I trimmed them down… and didn’t manage to catch the trimmed part inside the metal. The instructions say that one side of the tool is bigger than the other, but it’s not marked in any way, and I genuinely can’t see so much as a millimetre of difference between the two. The laces are getting shorter and shorter as I cut the tips off and try again, and I’m not sure now many more little pieces of metal I can afford to waste!

So, the bias binding’s back in the Etsy store, along with the first batch of vintage buttons. Now I’m off for a quiet little lie down as, on top of everything else, I’ve somehow managed to put my back out again!

On the plus side though, I’m very excited to report that my hat blocks from Guy Morse Brown have been made, and will be arriving this week! I expect another learning curve to follow shortly…

2013 round-up

I am 40!

Well, 2013 has certainly been a very interesting year!

My formal diagnosis with fibromyalgia came right at the tail end of 2012, but it’s coloured the whole of 2013. My health this year has been dreadful – not being able to sleep, not being able to walk, not being able to manage the pain – but I’ve just had to keep going regardless. What else is there to do? Of course I’ve done my fair share of complaining about it, but at the end of the day all I can do is carry on and do my best.

Farming cycle

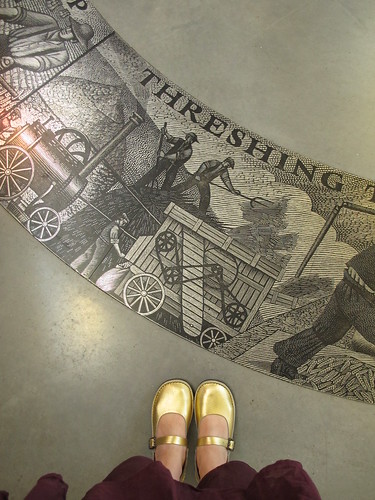
Things at work have also been interesting… my role changed quite dramatically in March, when I stopped working every weekend and increased my hours to work a job-share rota as Visitor Services Assistant. This year will be even more interesting, as a lot of physical changes are happening to the museum itself (thanks to Heritage Lottery funding), but I have no idea yet how this will impact my role.

First Frost

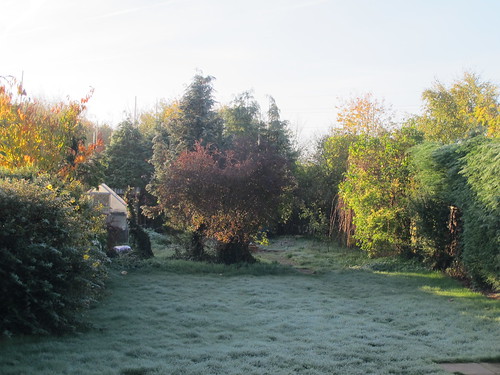
Our home life has seen perhaps the most interesting change of all, in that we now live in a new house! This was not something that we had been planning, but once the decision was made to look for somewhere new, we’d put in an offer on a bungalow in a matter of days! We then had to wait several months for the sale to go through, and getting to know the new place has not been without its trials (nicotine stains, dog hair, malfunctioning drains, a door that keeps falling off its hinges…), but we’re gradually making it into our own place.

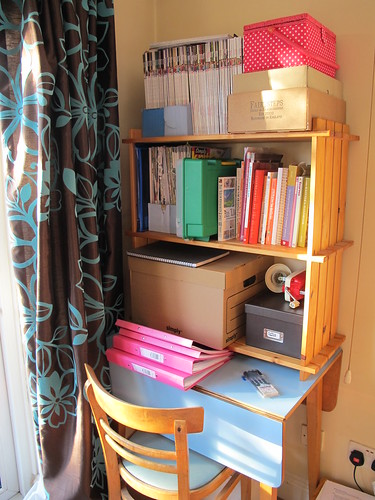
The overall feeling of 2013 has been one of resting, nesting and hibernation. So much of the year was spent waiting for the house move to happen that I feel as though I’ve done hardly anything creative with my time. Looking through my photos reveals that’s not actually true, so here are a few highlights of what I’ve been up to.

Mrs Magpie

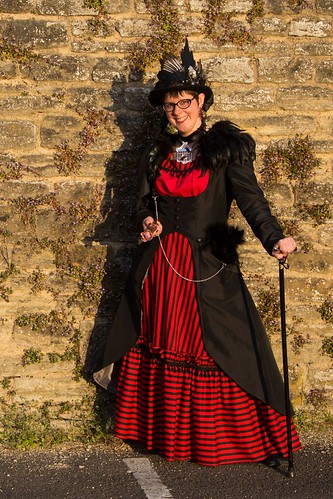
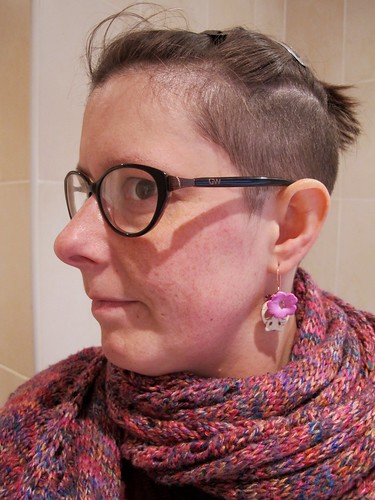
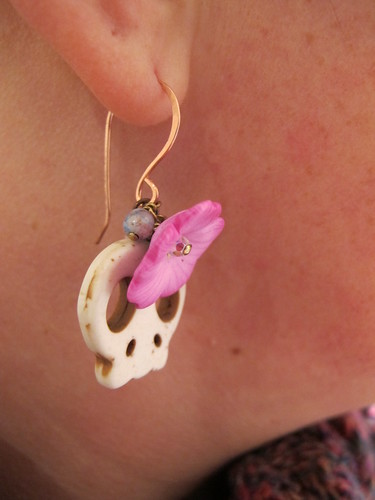
The beginning of the year was mostly taken up with building Mr & Mrs Magpie’s Inexplicable Emporium! Our first event in May was at a Steampunk festival in Frome, which was really a test to see how our offerings would be received. We learned a lot from watching people’s reactions to the stall, and it was successful enough that I decided to carry it on as an Etsy store when we came home. This year has been all about the market research, and I’ve learned a lot about how I both do and don’t want to run a business in future!

Airship Fresheners - tealight sample pack

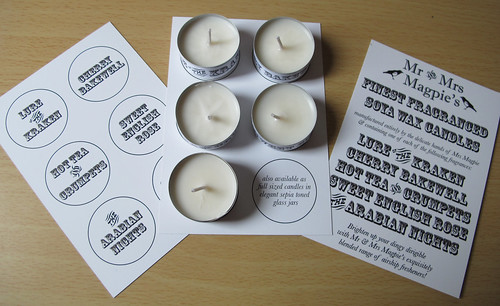
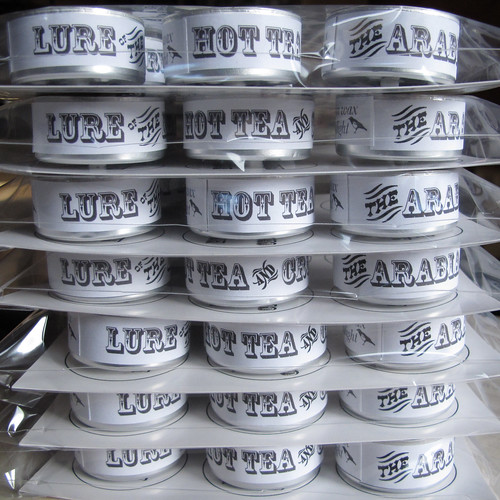
The key to the Emporium has been two things: Diversity and Branding. They might seem mutually exclusive, but (finally) putting my typography degree to good use to create a coherent brand has meant that we can include all sorts of seemingly unrelated things into the Emporium, and they all look as though they belong together. We also discovered that the faux-Victorian theme can work outside the Steampunk community, being well-received at a local charity stall just before Christmas.

Some individual products have worked better than others in terms of popularity and sales, and some have worked better than others for me in terms of what’s required to make them. I’ve learned that I enjoy working in small batches, but don’t like making custom orders. I’ve really enjoyed writing the little blurbs to go on the labels for each piece, but really hated making the Harris Tweed Cufflinks. (They’re beautiful, but I cut my fingers to ribbons as I made them!)

Having taken the time to do this preparation and research, I’m pleased to say that I’ll be formally setting up as a Sole Trader again in April, and running the Emporium as a proper business from then on!

Felted Hat

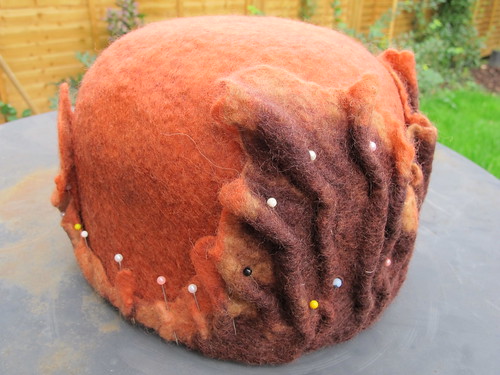
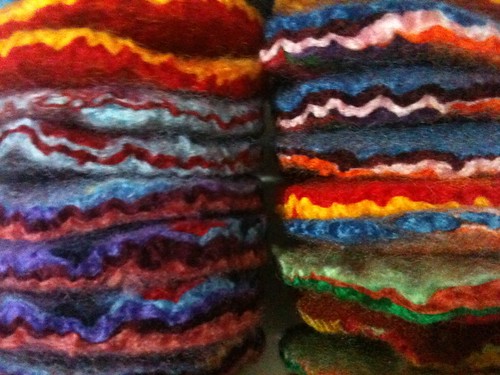
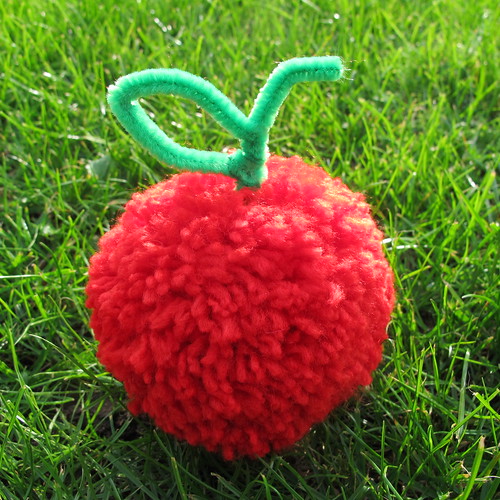
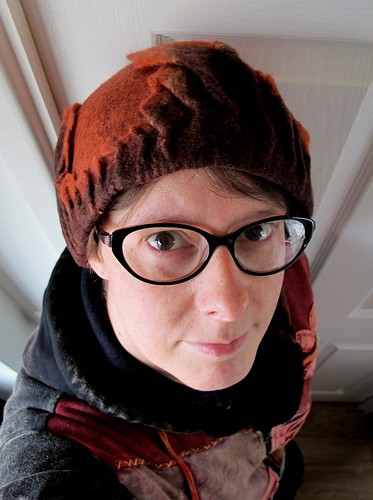
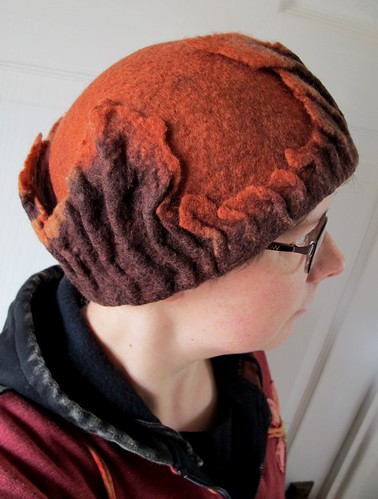
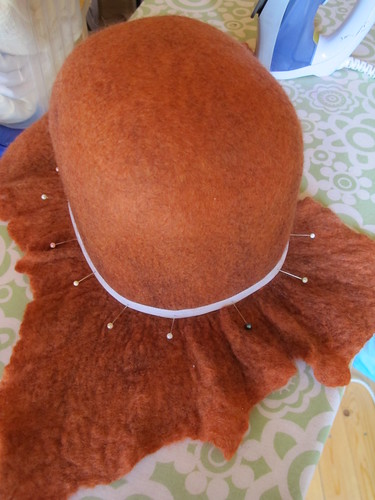
I’ve done a little bit of more ambitious felting this year, making a hat, a pair of slippers, and a number of small experimental pieces to try and get the hang of felting in three dimensions. There’s something really satisfying about the nothing-into-something aspect of felt making, even more so than with sewing. You’re starting a process completely from scratch, with nothing but a bit of fluff from a sheep’s back, and ending up with a (hopefully) beautiful piece of fabric or a three-dimensional object. I have a huge bag of wool sitting in a cupboard, waiting for me to find a good space in the new house for making a mess with fluff and water and soap. I’ve also ordered a set of hat blocks from Guy Morse-Brown, so watch out for hand-felted cloche hats coming this way!

Tea dyeing

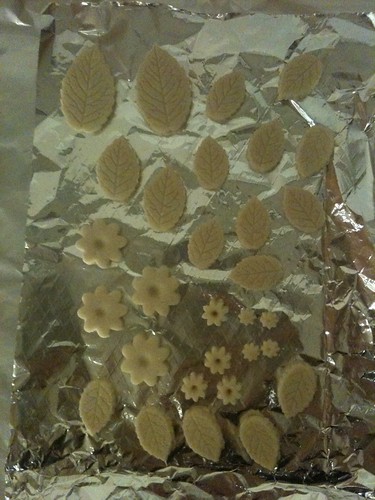
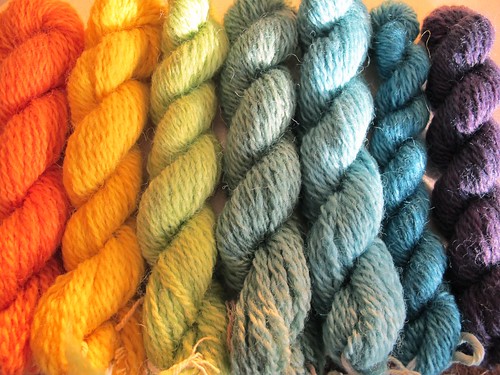
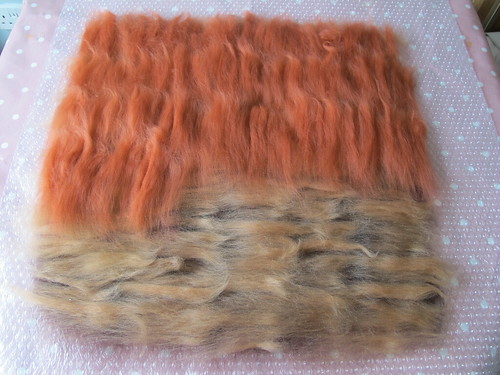
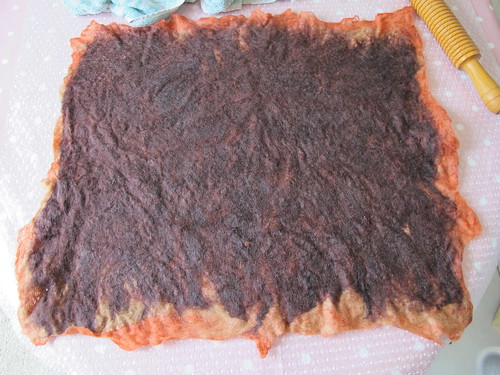
My natural dyeing experiments have been a bit hit and miss, to be honest. Reluctant to experiment with chemical mordants, I restricted myself to working only with substantive dyes to begin with… which basically means tea!  Not having a great deal of use for miles of beige fabric (although I am currently making a smocked dress from the silk shown above), my future dyeing plans are now more long-term. I want to do lots of research into dye plants that will grow in my new garden, and then begin the process of planting and harvesting and dyeing. Realistically it could be two years before I have my first crop of dye plants ready to use, so this will be a continual background project for a while.

My first handspun!

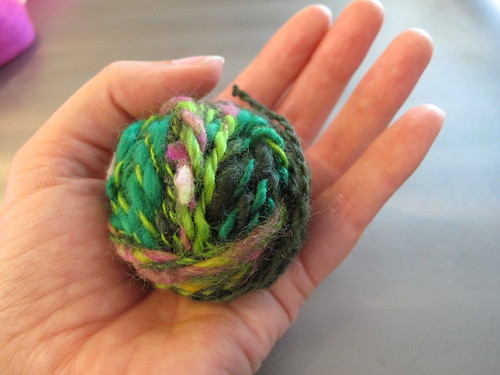
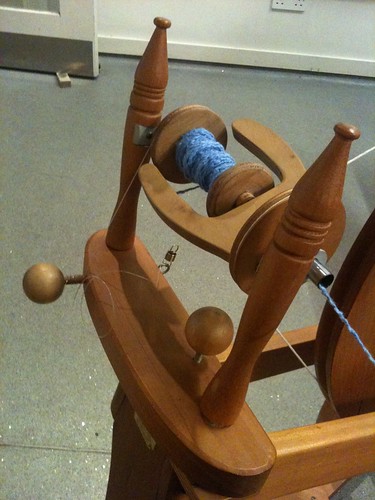
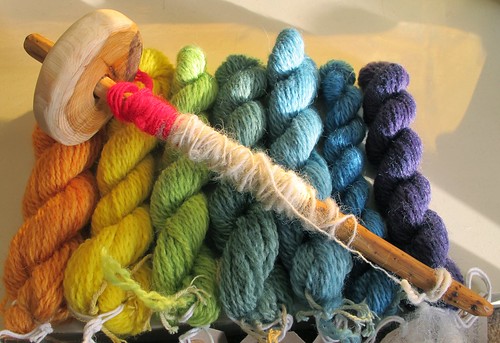
This little ball of goodness is my very first handspun yarn, made on a borrowed drop spindle. I’ve since bought my own spindle, and borrowed the spinning wheel from work, although I haven’t made a great deal of progress with either yet. Spinning brings with it the same sense of satisfaction that I get from felting – of being involved with every step of the process. I had fluff, now I have yarn, soon I can weave or knit or braid and make a whole new thing!

Going back to basics, unburdened by the demands of making things for other people, or without even considering the finished product at all, has been really important for me this year. Being able to immerse myself in a process, learn different techniques, and see where they take me, has been really liberating.

Mostly, I seem to have started a lot of things that I want to carry on with and learn to a much deeper level over the coming months. I’m planning to divide my time away from work between developing the Emporium to keep the sales coming in, and carrying on learning and testing and making things with wool and felt and fabric. I hate to use the word “whimsical”, it having been mocked so soundly by Regretsy, but that’s the direction I want to follow. Felting, spinning, dyeing, embroidery, beading, knitting, sewing… the theme for this year is to take my crafty skills, and turn myself into a Textile Artist.

Quite how this is going to happen I have absolutely no idea at the moment, but I’m guessing that sitting on the sofa, wrapped in a fluffy blanket and scoffing the last of the Christmas chocolates as I poke the computer isn’t going to make me a great deal of Art. Time to get up, and get on with it!

Insomnia and Inspiration

Robin

It’s that time of year again. Too much food, not enough exercise, late nights, late mornings, never shifting from the sofa. I’ve officially done too much relaxing now, eaten too much chocolate, and I need to get moving again. Yesterday I started sewing, and now that the Christmas knitting is finished I’ve picked up a couple of long-abandoned projects that I’m enjoying working on again.

Last night I couldn’t sleep, and was nestled into the sofa again at half past three in the morning. I managed to find a spot of David Attenborough on the telly, and when he’d finished I found a programme with Maya Angelou. I also watched a five minute preview of “Here Comes Honey Boo Boo”, and that’s five minutes of my life I’m never getting back. Sometimes I despair of humanity, I really do, and I don’t know what kind of mess we’ll be in when people like David Attenborough and Maya Angelou are gone.  I was very glad to have the opportunity to watch them, and even though I’m very tired, I’m also inspired by their excellence and experience.

Frosty Garden

When the sun came up, I opened the blinds and curtains and was met with this. I’m sure I’ll show you many pictures of this view, and this picture doesn’t do any kind of justice to the beautiful light that fills this space. Now the ice is melting as the sun comes up, and every leaf in the garden is twinkling as the heavy frost melts and falls. The houses at the back are nearing completion, and I’m thinking about what kinds of trees we can plant to disguise the vast expanse of that big brown roof. We were lucky enough to suffer very little damage in the storms, just the loosening of a few already-wobbly fence panels, but we know we have a lot of work do do out there.

Crafty Corner

Inside the house, I had a little flash of inspiration right when I should have been going to bed. This led to the late night shifting of furniture, and the creation of a little crafty corner. It’s not the most elegant arrangement, but it fits in the space and fulfils its function, which makes it ideal! The table and chair are from the 1950s, and used to belong to my Great Uncle Frank. They’re the closest thing I have to a family heirloom in furniture terms, and I’m really happy that they’ve found a little space in the new house. (Plus they match the curtains, which is a bonus!) The bookshelf on top used to belong in Paul’s teenage bedroom, and we have several of them scattered around the house. I might paint it, if Paul doesn’t mind. It’s the perfect size to hold my knitting books and magazines, and the big box at the bottom is my “emergency craft box” that I have to confess I haven’t touched since the move.

As always, when the New Year approaches, I’m full of good intentions and thoughts of diaries and journals and plans. Every year I buy a new planner or start a creative project that always falls flat after a few weeks. This year I’ve downloaded Susannah Conway’s Unravelling 2014 workbook (free) and Leonie Dawson’s Life and Business Workbooks (not free). I’ve also joined a Facebook Group called The Documented Life Project, which is about keeping a planner and art journal combined – something I’ve tried before, but never quite succeeded at. I’m hoping that now I have a little place where I can sit down, with arty and crafty materials at hand, I’ll have no excuse not to follow the weekly prompts and see what happens. We’ll see…

Christmas Fair & New Year Plans

Christmas Fair

This is Paul making himself comfortable behind the Eternal Magpie stall at the Berkshire Autistic Society Christmas Fair last Saturday. We were in a brand new school designed especially for kids of all ages who are on the autistic spectrum, which was a really lovely space. The floor was both squashy and heated, so he was actually much more comfortable than you might expect!

From a stall point of view the day was fairly quiet, but it was the first event of its kind in this venue, so I expect next year’s will be a lot busier. We were lucky enough to have some local friends pop in and do some Christmas shopping with us, and we chatted to some other lovely stallholders. We also met lots of families, some of whom I knew from working at the Museum, and some from my previous job with the Family Resource Centre. Two little boys had a great time sorting through all my button badges (they loved the maps), and another was extremely honest with us about the scented candles. Thankfully he was complimentary, his Mum was a bit worried he was going to say something rude! Everyone at BAS had clearly put a lot of effort into the event, and it definitely deserves to be a lot better attended in future.

However, as it turned out, we came home with just the right amount of money to tip my savings over into being enough to buy the set of hat blocks I’ve been coveting all year! So, an email has been sent to Guy Morse-Brown about a set of interchangeable crown and brim blocks for making felt cloche hats. There’s going to be a steep learning curve involved, but there will be (hopefully lovely) hats coming this way in the New Year!

tealight stack

There will be a number of other changes too. I’ve just discovered that four out of five of the Airship Fresheners fragrances have been discontinued, so I’ll be choosing some new candle oils in the New Year. Lure of the Kraken will continue to be available, and Hot Tea & Crumpets (currently sold out) I can hopefully buy another batch of before it disappears – but Sweet English Rose, The Arabian Nights and Cherry Bakewell will be gone completely once these last few candles have been snapped up. Still, it’s a good excuse to look for some interesting new fragrances, and there are a few I have my eye on already. Sloe Gin, anyone?

I’ve also decided to discontinue the large candles in the glass jars, and only make tea light candles in the future. The jars make the candles heavy and fragile, which makes them difficult to ship. I think sticking to tea lights and offering some kind of “pick-and-mix” option with the different fragrances is going to be a better way forward. I’ve also had requests for wax tarts rather than candles, so I’m going to be investigating the possibilities for those too.

I have kept back one large candle in each fragrance though, so that the winner of the Facebook Giveaway (almost there!) can have their pick.

Anyway, the next couple of weeks will be free from Emporium work as I take a break to spend time with Paul and our families, and also to do a little bit of sewing for myself and my niece. It’s Christmas Dress time again, and I’ve got some really sweet fabric waiting for me. I hope she likes it!

Felted layers

Felted brooch bases

Progress on the fleecy hats is slow. Hand-sewing the bands and brims is taking about half an hour per hat, and there’s a limit to how much I can do in one go before my hands start to complain.

I’d been thinking about making some felt brooches, so not being one to do things by halves, here are twenty-two little circles. I had planned to work blanket stitch around the cut edges, but I actually really like the way you can see all the layers of colour showing through.

They’re made from half a dozen rectangles of wonky, uneven felt that I made as practice pieces. They’d been sitting in a cupboard for about a year, gathering dust and moths, so I decided to chuck them in the washing machine and see what happened. After a quick whiz through a hot wash and a tumble dryer, they’d shrunk down from about A4 size to about A5, become nice and thick, and developed a lovely crinkly texture.

I have some little pieces of Harris Tweed that I’m hoping will needle felt nicely onto the top of the circles, perhaps with a little button each to finish them off. (And a pin on the back, of course.)

Much as I love the bright colours in these, I can also imagine them in nice muted, natural, sheepy shades. Maybe with some Wensleydale curls and semi-precious stones stitched on top. Something to think about after Christmas, definitely.

Shopping Spree: Skulls, Skeins and a Spindle

Handmade polymer & gemstone earrings from Honey & Ollie

Look what arrived today – my lovely new earrings from Honey and Ollie! They arrived super quick, all the way from California. So quick that I wasn’t expecting them for about another week! As a recovering goth, I’m still irresistibly drawn to Things With Skulls, and these were so pretty that I couldn’t resist.

Handmade polymer & gemstone earrings from Honey & Ollie

The skulls and flowers are made from polymer clay, with sparkly little gemstones dangling at the top. The findings (all hand made) are copper, which complements the stones beautifully. The hooks are a really lovely shape too, and they stay in place very securely. Despite being quite big, they’re really light to wear, and I’m definitely going to be adding more Honey and Ollie pieces to my wish list.

Handspun and hand dyed yarn from The Outside, with hand carved drop spindle

This is my little haul from the Museum of English Rural Life‘s Traditional Craft Fair.

All from The Outside, on top is a hand-carved drop spindle. It’s made from yew, and it’s a bottom-whorl style. Excuse the red acrylic leader, I was so keen to try it out that I grabbed the first thing I could find! Once I’d figured out how to do a half-hitch to hold the yarn in place, I grabbed some fluff and started to spin straight away. It’s a lovely spindle, and I’m really happy to have one of my own instead of having to borrow from work. Now I can practice at home, and make as much wobbly, lumpy yarn as I like!

Handspun and hand dyed yarn from The Outside

Speaking of yarn… this is neither wobbly, nor lumpy. It’s handspun from blue faced leicester wool, and it’s lovely and soft. The vibrant colours are all from natural dyes, and this should be just enough to make a pair of rainbow-striped mittens.

The colours, from left to right, are:
1) Weld & madder
2) Weld
3) Weld & woad
4) Weld & woad dipped in madder
5) Woad & weld
6) Woad
7) Cochineal (orange oxidised to blue)

I had a lovely chat with Romilly about dyeing, including planting up a dye garden and not being afraid of mordants. There is definitely going to be some experimentation with colour and fluff in my future! For now though, I need to practice my spinning, and think about the perfect pattern for my new rainbow-coloured mittens.

Fuzzy red apple

Pompom apple

It’s Apple Day at the Museum of English Rural Life next Saturday – October 19th. I needed to come up with an apple-related activity for families, but because my usual teaching space is being turned into a café for the day we’ll be doing the activity in the museum itself. Because a large number of our objects are on open display, this means the activity has to be very clean – no glue, no glitter, no paint.

Enter this ridiculously cute apple pompom! I used a mug as a template for the outer circle, and a bottle of tipp-ex for the centre. This results in a pompom about the size of a tennis ball, and uses about 20 metres of chunky wool. After you’ve tied off the centre of the pompom, you just wrap a pipe cleaner through before you remove the cardboard, and then twist the ends into a stalk and a leaf. Ta-da!

I know it’s just a simple little thing, but I’m disproportionately pleased with how this has come out. The yarn is so soft, and the pompom is a lovely size, and I might just have to rummage through my yarn stash and make some for myself! I’m usually opposed to the making of novelty yarn items that have no functional value, but I can feel myself being strongly swayed by this one.

If you want to make one for yourself, all you need to do is take yourself and 50p (plus the £1 entrance fee for adults) down to MERL next weekend!

Experimental Hat’s first outing

Felted hat

Turns out it’s quite difficult to take a photo of yourself in a hat – my arms aren’t long enough!

I took the hat for a test-drive this morning, after I’d spent a while blasting the brim with a hairdryer to make sure it was properly dry. It took ages to get all the pins out, and it was half way through the day, when I was showing the hat to a friend, that I inevitably found the one that I’d left in. Thankfully I discovered it before I stabbed myself in the head!

Felted hat

I do need to stab the hat slightly though. Now that I’ve worn it a bit, the brim has succumbed to gravity and the corners have started to stick out in a way that reminds me of the leaves of a cabbage! It’s also got a slightly thin patch on the top, which is covered by one of the long parts of the brim, so I think a bit of needle felting will help to overcome both of those issues.

So far I have been described as looking like a flower fairy and a “woodland creature” in the hat, so as far as I’m concerned, that makes it a complete success!

Experimental hat

Felted Hat

I’ve spent all week thinking “I must get around to doing a bit of felting”, so today I got out some fluff and some soap, and got on with it. This is three layers of merino tops – dark brown on the bottom, a light tan in the middle, and a sort of a foxy-coloured orangey layer on the top.

Felted Hat

I’m always surprised by how quickly the felt actually comes together when you make the layers nice and thin. Perhaps because my initial experience with felt was making it with kids, who tend to whack a ton of fluff down any old way, no matter how carefully you explain “thin layers” to them! There again, I’m always surprised at how long the fulling part takes. As soon as my felt’s holding together I want to call it finished, and I’m always a bit disgruntled when it isn’t.

Felted Hat

Once the felt was made, and fulled a bit, I decided to get out my hat block from Wingham Wool Work, and try to make a hat. If I’d known at the beginning that I was going to make a hat, I’d have made the piece of felt round instead of square! I did a lot of the stretching and shrinking by hand and with my trusty wooden soap dish, all the while thinking “I wish I had a palm washboard” alternated with “I wish I’d just bought a felt hood“. Eventually I resorted to the ironing board, and discovered that steaming the living daylights out of the felt with the iron worked really well!

(Although I also discovered that I hadn’t actually washed all the soap out of the felt, so my Shed now smells of hot, soapy sheep. Could be worse, I suppose.)

Felted Hat

And here’s what I’ve got to show for an afternoon’s work – a funny, felty, foxy sort of a hat.

I thought about cutting away the excess, or trying to neaten it up into some kind of tidy brim, but I really like the raw “unfinished” edges of the felt, and the way you can see all three layers of colour this way. I’m hoping that once the hat is dry, the pleats and folds will stay in place, but I suspect that I’ll actually have to stitch them. Which is fine, because I can take the opportunity to embellish the hat a little bit more as I’m working on it.

The last thing I’ll need to do is add an elasticated band inside the hat. That way it should mould to my head nicely (the polystyrene form’s a little bit too big for me), and it should be less likely to pull out of shape as I wear it.

Now I just need to convince myself that I don’t need a lovely wooden cloche block. The polystyrene one’s fine. Really.