Surprisingly popular!

A little bouquet of felted flowers. Wet felt for the petals, needle felted in the centre to hold them onto the bobby pins at the back.

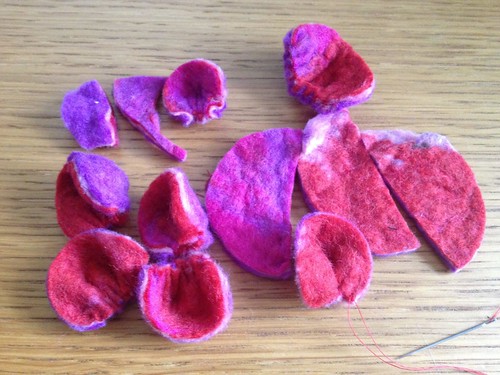
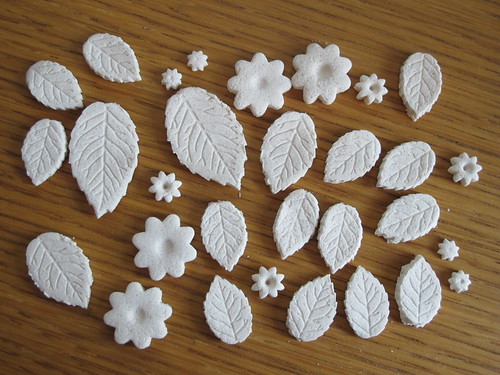
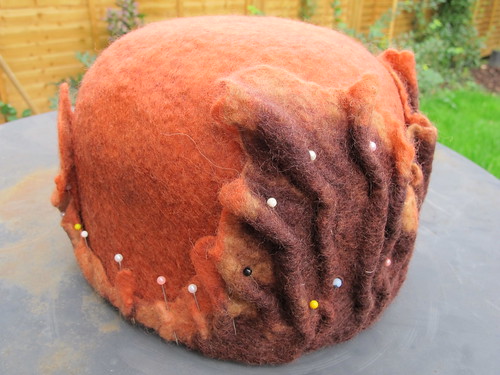
This little pile of felted flowers (complete with grainy Instagram filter – I’m “inexplicableemporium”) is waiting to go to work with me on Saturday evening, where I’ll be having a stall at our Museums At Night event. Well, that was the plan, anyway! The two green were ones were made by request for a friend, and the blue one sold on Facebook this afternoon, to another friend who’s also ordered a waterfall jacket that I’m really looking forward to making. Thankfully I still have seven hair flowers to take with me, plus another nine brooches the same size that are just waiting for the pins to be sewn on.

Small felt hair flower on a bobby pin

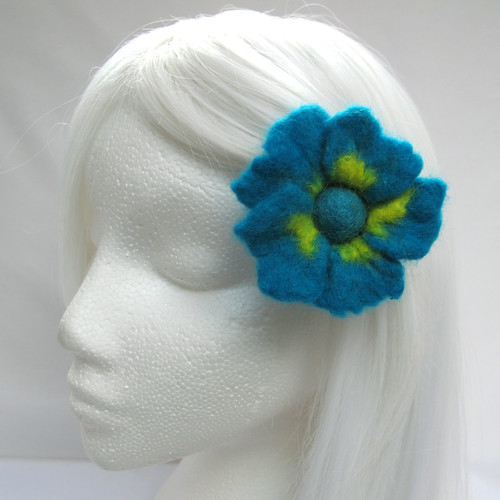
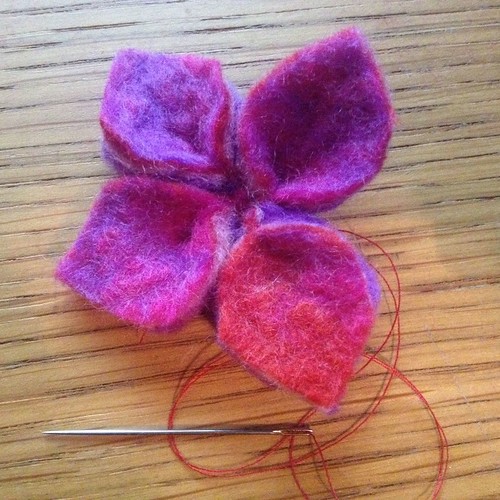
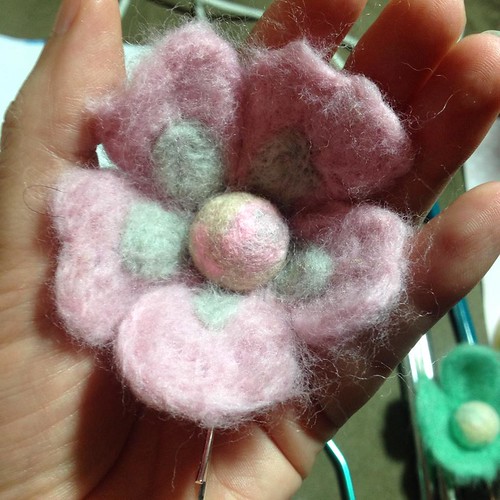
This is the size of the smaller flowers – about 7-10cm (3-4″) across, and quite deep. It’s attached to a bobby pin that has a little round pad at the top, which holds it firmly in place. The pad sits in between the flower petals and the centre ball, so it’s completely hidden and very secure.

Large felt hair flower on a ribbon-covered comb

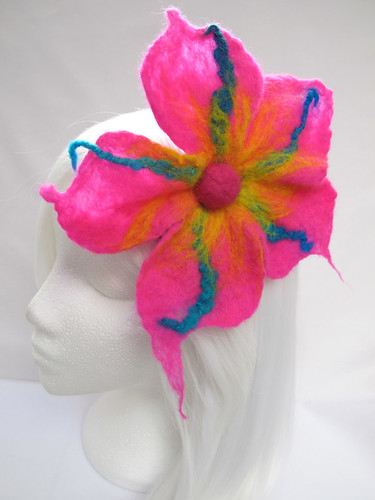
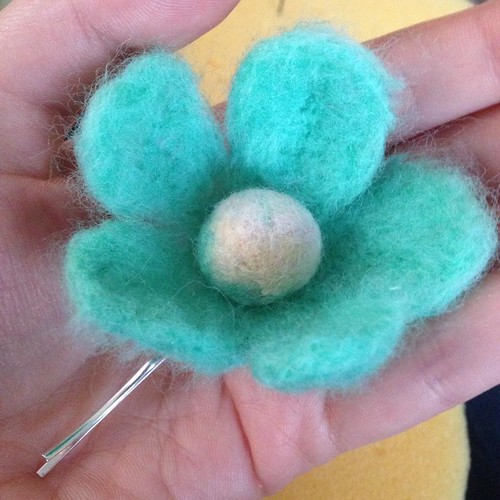
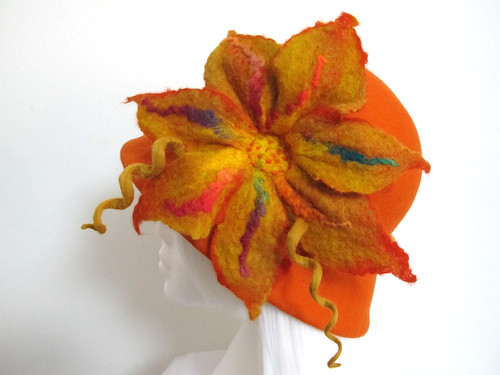
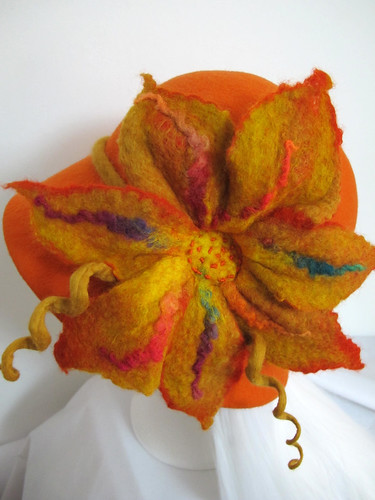
This one… well, first I was going to keep it. Then I sewed it onto a comb, and remembered that combs really don’t stay put in my hair. But I was worried that it would be too big, so I popped this photo onto Facebook to ask for some feedback. Apparently it’s not too big at all, a friend has claimed it for her own, and I’m in the process of making half a dozen similarly-sized ones to take to the Vintage Night tomorrow!

Yesterday's felt flowers, now dry and ready for brooch pins. More enormous flowers for hair combs on their way!

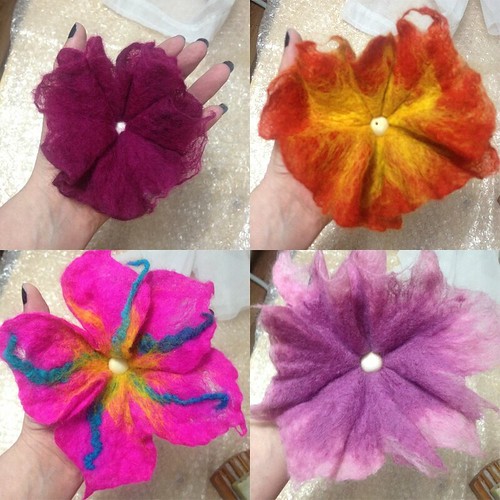
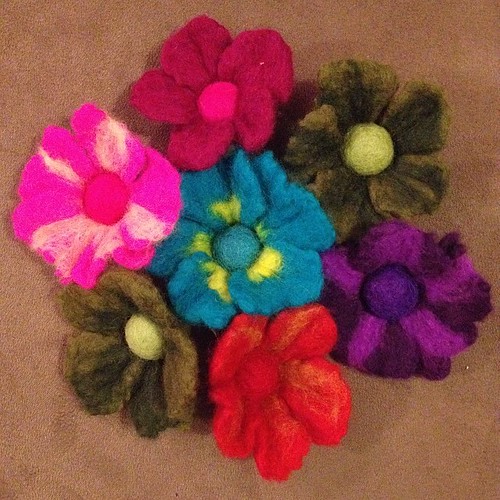
And this, again from Instagram, is a selection of the flowers I made yesterday. I’m hoping that there’s enough of a range of colours to appeal to lots of people, although from the response I’ve been getting to the photos, I’m hoping that their popularity isn’t going to be a problem!

Oh gosh, that sounds smug, and it really isn’t supposed to. In fact, I’m a little bit overwhelmed about how supportive and enthusiastic people are being. I’ve seen links to my Etsy store shared on forums, received offers of collaborations, and everyone’s just generally being lovely. I think I’m gradually starting to whittle down my making into things that I’m really happy with – so the fact that other people are happy with them too is the icing on the cake!

Felted Flower Experiments

Cut-and-sew felt flower

Whilst the feedback on all of my hats so far has been very positive (thank you!!), there’s one enquiry that’s come up several times now: “will we be able to buy the felt flowers without a hat?” The answer, of course, is yes! But I do need to work out the best way of doing that – both for me in terms of making the flowers, and for you in terms of offering lots of choice.

Cut-and-sew felt flower

So, to that end, I’ve been doing lots of felt flower experiments. The two pictures above are of my attempts to cut out petals from a wet-felted sheet, and then sew them together again to make a flower. This did not go well. It turns out that if I’m making felt, I’d actually prefer to wet felt the flower itself, in one go.

Wet felted flowers

So that’s what I did next! It turns out I have a bit of a problem with size though… these are all smaller than the monster flower that I made for Nicola’s orange hat, but the smallest one is still almost the size of my hand. They just seem to naturally want to come out big!

This is fine by me, as I think a huge great flower on a brooch or a clip or a hair comb would make a fantastic statement! But of course not everybody wants to show off as much as I do, so I thought I’d better try and make some smaller ones as well.

Needle felted hair flower

So, here’s a little needle-felted flower, attached to a large bobby pin. Much better! It fits in the palm of my hand, and the flower is light enough that it’s not going to pull the clip out of place.

Needle felted hair flower

This is the second one, playing with adding a bit more colour to go with the felted ball in the centre. I have a few of those that I made during a session with the children at work, so now I’m choosing colours and designing flowers to go around them. This one’s already sneaking up in size though, so I need to make sure that these stay dainty and don’t get too big! I also need to practice my needle felting technique, as I’m not quite convinced about the texture of this one. Maybe a finer needle would do the trick.

So, watch this space, as I suspect there will be lots more flowers to come!

More flower than hat…

Nicola's ORANGE hat!

So, this is what happens when you order a hat in BRIGHT ORANGE, and then give me free reign to decorate it however I like. I blame Nicola, for agreeing that a massive “alien flower” would be a good thing to wander around wearing on her head.

Nicola's ORANGE hat!

I have to say that I have absolutely LOVED making this. The opportunity to use a nice bright base colour, and the freedom to make something that I thought Nicola would like, has been really enjoyable. As has the process of making the felt itself. I’m learning something new every time I work with wool in this way, and I’m so excited about the possibilities. It’s good for me too – it keeps away my perfectionist streak, as there’s no such thing as “perfect felt”, and it changes all the time as you’re working with it.

Nicola's ORANGE hat!

The centre of the flower is circled with bright orange bullion knots, to draw the colour back into the hat. The process of stitching through handmade felt is incredibly satisfying – almost therapeutic, somehow.

I had to take a bit of a break from felting today, as my shoulders and neck were complaining about all the rubbing and rolling, but I can’t wait to get back to it. My next day not-at-work is Tuesday, and that’s most definitely going to be another felting day!

At long last – another new hat!

Pale grey cloche hat with blue beaded felt flower

It wasn’t until I came to upload this hat to the Etsy shop that I realised it’s a whole month since I added the previous one. How on earth did that happen?

I’ve been doing a lot of thinking about the hats (too much thinking and not enough doing, clearly!), and I think in April (when I formally register Eternal Magpie as a business again) I’m going to move these hats out of the Inexplicable Emporium and over to an Eternal Magpie branded Etsy store. I think that will allow me to have a bit more creativity without having to shoehorn them into the faux-Victorian theme… and if I make anything properly crazy or very obviously Steampunk-inspired, then it can go into the Emporium if that’s where it fits best.

Felted leaves and tendrils

I’ve been having a bit of a play with felt again, with a view to the hats having a lot more handmade embellishments, rather than only ribbons and buttons. I think that lends them a certain uniqueness – anyone can go to a shop and choose a pretty ribbon and a striking button, but only I can make these exact flowers. Sure, there are a million and one felted flower tutorials out there, so I can’t claim any uniqueness in that. But these flowers will have come out of my hands and my imagination, and that will hopefully make these hats stand out a little from the many other cloches out there. Typing “felt cloche hat” into Etsy currently returns 1,869 results, so I need to make mind stand out somehow! They’re currently on pages 1, 2, 3, 5, 6 and 7 (out of 47) of that search, so not bad, but anything I can do to make them that little bit more interesting will definitely help.

I also want to make a few smaller things, such as hair clips, to offset the fact that yes, these hats are going to be expensive when the prices go up in April, and yes, they’re going to be outside of many people’s budgets. I’m hoping that people might start by buying a hair clip with some pretty felted flowers on it, and like it so much that they save up to buy a hat. Well, a woman can dream!


Experimental Afternoon

Failed felting experiment

I had one of those “brilliant ideas” just as I was falling asleep last night, so I rushed home after work this afternoon to try it out. It turned out not to be as brilliant as I’d thought, which is often the case! I’d been contemplating the possibility of felting loose wool fibres onto the pre-made felt hoods that I’ve been using to make the hats. I hadn’t seen that method of working in books or online anywhere, so I thought I’d give it a go.

I tried needle felting first, with a piece of leftover wool yarn. Coarse needles worked, with a little effort, but left unsightly holes in the front of the work. Fine needles resulted almost immediately in a break – the needle just wasn’t strong enough for the dense machine-made felt.

Failed felting experiment

Next I gave wet felting a go. Admittedly I’ve used a very small amount of wool here, but again it just didn’t really work. The fibres are starting to felt to themselves, but they’re not even thinking about meshing in with the darker felt underneath. I guess it’s finished too smoothly for the top layer to grab on to.

Failed felting experiment

The yarn and the merino fibres also started to hold on to one another very nicely, but you can see that they’re just not even slightly attached to the bottom layer.

It’s possible that with a lot more fibre and a lot more effort, this technique might work. But to be honest, if I’m going to have to go to a lot of effort, I’d much rather be making my own felt completely from scratch. That was always the plan anyway, I just wanted to see whether there was an interim method between machine-made hood and handmade felt. Apparently not!

Salt dough experiment

This is how the experimental salt dough looks now that it’s dry. I haven’t baked it – I left it at work while I was off sick for three days, and it’s dried itself out nicely in the meantime! It’s lovely and white, but the salt does make it look a little grainy. The backs of the pieces are rather rough, and I’m not completely convinced it will survive being sanded. I also want to test a few pieces to see how brittle they are. There’s no point making a pendant or a pair of earrings that are going to snap the first time you bump them – or that might dissolve the minute they get damp! So I need to experiment with painting and sealing them too. Oh, and drilling holes in them. I should really have poked holes with a cocktail stick while the dough was still wet, but I’m hoping they won’t snap under the pressure of a hand drill. Another fun experiment to try!

Experimental Hat’s first outing

Felted hat

Turns out it’s quite difficult to take a photo of yourself in a hat – my arms aren’t long enough!

I took the hat for a test-drive this morning, after I’d spent a while blasting the brim with a hairdryer to make sure it was properly dry. It took ages to get all the pins out, and it was half way through the day, when I was showing the hat to a friend, that I inevitably found the one that I’d left in. Thankfully I discovered it before I stabbed myself in the head!

Felted hat

I do need to stab the hat slightly though. Now that I’ve worn it a bit, the brim has succumbed to gravity and the corners have started to stick out in a way that reminds me of the leaves of a cabbage! It’s also got a slightly thin patch on the top, which is covered by one of the long parts of the brim, so I think a bit of needle felting will help to overcome both of those issues.

So far I have been described as looking like a flower fairy and a “woodland creature” in the hat, so as far as I’m concerned, that makes it a complete success!

Experimental hat

Felted Hat

I’ve spent all week thinking “I must get around to doing a bit of felting”, so today I got out some fluff and some soap, and got on with it. This is three layers of merino tops – dark brown on the bottom, a light tan in the middle, and a sort of a foxy-coloured orangey layer on the top.

Felted Hat

I’m always surprised by how quickly the felt actually comes together when you make the layers nice and thin. Perhaps because my initial experience with felt was making it with kids, who tend to whack a ton of fluff down any old way, no matter how carefully you explain “thin layers” to them! There again, I’m always surprised at how long the fulling part takes. As soon as my felt’s holding together I want to call it finished, and I’m always a bit disgruntled when it isn’t.

Felted Hat

Once the felt was made, and fulled a bit, I decided to get out my hat block from Wingham Wool Work, and try to make a hat. If I’d known at the beginning that I was going to make a hat, I’d have made the piece of felt round instead of square! I did a lot of the stretching and shrinking by hand and with my trusty wooden soap dish, all the while thinking “I wish I had a palm washboard” alternated with “I wish I’d just bought a felt hood“. Eventually I resorted to the ironing board, and discovered that steaming the living daylights out of the felt with the iron worked really well!

(Although I also discovered that I hadn’t actually washed all the soap out of the felt, so my Shed now smells of hot, soapy sheep. Could be worse, I suppose.)

Felted Hat

And here’s what I’ve got to show for an afternoon’s work – a funny, felty, foxy sort of a hat.

I thought about cutting away the excess, or trying to neaten it up into some kind of tidy brim, but I really like the raw “unfinished” edges of the felt, and the way you can see all three layers of colour this way. I’m hoping that once the hat is dry, the pleats and folds will stay in place, but I suspect that I’ll actually have to stitch them. Which is fine, because I can take the opportunity to embellish the hat a little bit more as I’m working on it.

The last thing I’ll need to do is add an elasticated band inside the hat. That way it should mould to my head nicely (the polystyrene form’s a little bit too big for me), and it should be less likely to pull out of shape as I wear it.

Now I just need to convince myself that I don’t need a lovely wooden cloche block. The polystyrene one’s fine. Really.