Continental Clothing

Please forgive me while I get a little bit over-excited for a minute.

Way back in the mists of time, I ran a t-shirt printing company. We used the best quality t-shirts we could afford to buy at the time, but I wanted more. I wanted organic cotton. Sustainable production. Ethical business practices. And all of these things were sadly rather hard to find. I did buy some organic cotton t-shirts, and some Fair Trade ones, but most of the inventory I bought all those years ago is still sitting in my Shed. The fit wasn’t right, the colours weren’t right, and they were so much more expensive than ordinary t-shirts that nobody was willing to pay for them.

Fast forward to yesterday, when I was looking again for wholesale suppliers of organic t-shirts that I could use in my dyeing experiments. Imagine my excitement when I stumbled upon Continental Clothing. All of their garments are either organic, fairly traded, sustainably produced or a combination of all three. They have exemplary business practices, and even more exciting, the clothes they produce are so much more than just plain t-shirts!

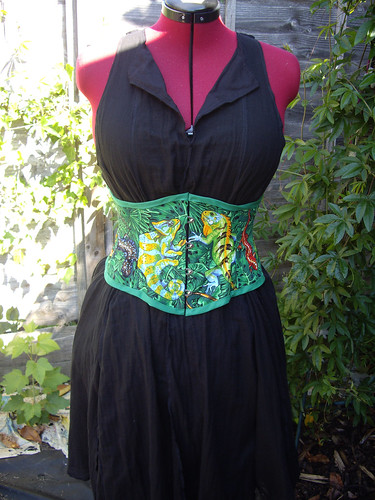
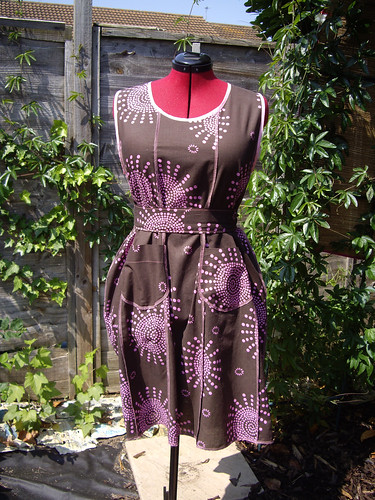
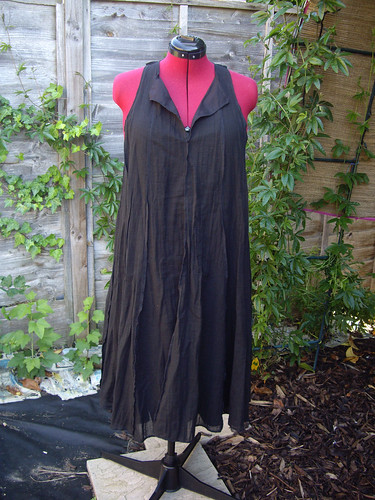
I have grand plans for the racerback tunic shown above, for example, worn with a contrasting vest or t-shirt underneath. Think how pretty it would look in a patchy natural dye, with hand embroidery all around the neck and armholes…

Even better, and the thing that I’m extremely over-excited about, is the fact that they offer bespoke manufacturing! Okay, so a minimum order of 150 garments per size is out of my reach at the moment, but think of the possibilities! The tunic above would be fantastic as a dress, for example. Continental could make it for me, and I’d add the embellishments myself. It would work out significantly cheaper in the long run than me buying organic jersey at retail prices, making the clothing myself, and then embellishing it.

I’ve applied for an account with them, so I can start by buying a few sample garments for myself. I can then do lots of dye tests, and see how the different styles and fabrics fit, wash and wear. I can already imagine how several of the tops would go with many of the skirts I’ve made.

So, watch this space for hand-dyed t-shirts with added embroidery, lots of pockets and other pretty things!

Onion skin dye

Onion skin dye

This post is for Sarah, who’s very kindly been saving her leftovers! Paul and I don’t eat onions (weirdly, they burn Paul’s mouth – does anyone else have this?), so Sarah’s been hanging on to her onion skins for me. This looked like a lot, but only weighed about 6g, so I only added small pieces of fabric that added up to about 8g. Judging by the colour of the dye bath, I could have added a lot more!

Onion skin dye

As with my previous experiments, I simmered the onion skins in almost-boiling water for about an hour, before removing them and adding the wet fabric. I left the fabric simmering for another hour, then switched off the heat and left the saucepan to cool.

Once again, I didn’t use any kind of mordant for this experiment. The colour of the water led me to hope for some really bright fabrics, but the actual results are a lot more muted. I’m definitely going to need to add mordants to my experiments if I want to explore the full potential of the colours available from plants.

Onion skin dye
Silk dupion, silk paj, silk noil, bamboo, cotton muslin

This time the dye came out rather patchy, and with very marked differences between the fabrics. The silks have once again taken up the colour much better than the vegetable fibres. The bamboo in particular is very pale, especially in contrast to the silk paj!

The next part of this experiment is to keep some of the fabric pieces I’ve dyed so far closed away in a book, and leave others to hang in a window. That will help me to find out how fade-resistant they are. (I suspect not at all.)

Sarah also gave me a big pot full of previously-cooked blackcurrant pulp, which is very exciting! I had intended to try solar dyeing with it, but I don’t think the sun’s come out once today. Maybe at the weekend, when it’s forecast to perk up a little! Failing that it’s back to the big cooking pot, in the hope of coming out with a lovely shade of blue.

Spotty cotton & bamboo

Organic cotton & bamboo

Here’s my latest order from my lovely organic cotton people. Three metres each of spotty and plain organic cotton and bamboo blend. Isn’t it lovely? It’s in the washing machine at the moment, and I’m expecting it to be super soft when it comes out. The almost-matching thread’s organic too, and I’m planning to buy a lot more of this in future.

When the pattern eventually turns up in the UK, I’m going to turn it into Simplicity 1755. I might have let out a little squeal when I saw this dress. It’s everything I usually look for in a vintage pattern – cute collar, raglan sleeves, full skirt, pockets… but in a modern size, which means I don’t have to wear terrifying underwear or spend days re-drafting the pattern only to discover that it still doesn’t fit. Marvellous!

The sample swatches are Texweave, which is a lovely heavyweight woven fabric, perfect for coats or upholstery, and Super Jersey, which is another cotton/bamboo blend. It really does feel super too, so soft, and with just enough elastane to make sure it doesn’t go baggy. I can feel some lovely soft pyjamas coming on, or perhaps a vest or two.

I have a lovely big tin full of their fabric samples now – every time they bring out something new I send off for the samples straight away. This means that any time I want to go fabric shopping, I can simply pull down the tin and look at all the little squares. Much easier than just picking something at random from the website and hoping for the best!

Reptile corset – for sale SOLD!

Lizard underbust corset

I made this little corset a couple of weeks ago, but sadly it doesn’t fit me properly, so it’s in need of a new home.

Lizard underbust corset

The front and back have the same print – a chameleon on the left and what may or may not be an iguana on the right. The centre front measures 22cm from top to bottom, the centre back is 19cm, and the sides are 17cm. It’s boned with flat steel throughout, so it’ll take a couple of wearings for these to mould to the shape of your body.

Lizard underbust corset

The fabric is a cotton print, the lining’s plain black cotton, and the strength layer’s beige coutil. The binding is plain green cotton bias. The back lacing is also bias cut green cotton. There are nine silver eyelets on each side at the back. They’re one-part split eyelets, which can be a bit scratchy, so I’d recommend wearing this corset over other clothes rather than next to your skin.

Lizard underbust corset

And now for the all-important measurements… fully closed, this corset measures 25½” at the waist, 28″ around the top, and 36″ at the bottom. It’ll easily accommodate measurements up to 4″ larger. (29½”/32″/40″) This style will work best on someone with a well-defined waist-to-hip ratio – so you can be up to 4″ larger than the measurements, but you need to be roughly in proportion with them.

£45, including UK postage. Leave a comment if you’d like to take it off my hands, or if you have any questions!


(I don’t have enough fabric left to make another one, sorry! And I’m not doing custom corset commissions at the moment.)

Turmeric dyeing experiment

Turmeric dyeing

It seems as though I’ve been bitten by the dyeing bug rather badly. I can’t stop thinking about plants I could grow in my garden (coreopsis, safflower, weld, marigolds), or plants I could forage (walnuts, elderberries, sumac), or plants I could ask friends-and-relations to save for me (onion skins, rhubarb leaves).

I’m still working in the kitchen without mordants, so the next obvious step was turmeric. A quick trip to the corner shop procured a nice big bag of spice, and I found these instructions online. I used them as more of a guideline than a rule, as I don’t have a thermometer, and I don’t have any coffee filters to strain out the turmeric powder.

Turmeric dyeing

I cut slightly larger pieces of fabric this time, with a total dry weight of 30g. I used 25g of turmeric powder, and the water looked extremely yellow! As before, all the fabric’s been pre-treated by a quick trip through a hot wash, and it was all dampened under the hot tap before putting it in with the turmeric.

Turmeric dyeing
Left to right: silk paj, silk dupion, bamboo, cotton muslin

The fabrics started to take up the colour immediately, a beautiful rich yellow. Apparently you can modify this to red with the addition of baking soda, but I wanted to see what colour the pure turmeric would result in first.

As before, I simmered the turmeric for an hour, then added the fabric and simmered for another hour. Finally the heat was turned off and the water left to cool before rinsing the turmeric out of the fabric. I could probably have kept the dye and used it again to create a paler colour – or perhaps tried to modify it the second time around.

Turmeric dyeing

An awful lot of colour leached out of the fabrics as I was rinsing them, particularly the cotton and bamboo, but I was still left with nice bright colours.

Turmeric dyeing
Cotton muslin, silk paj, bamboo, silk dupion

I hung them out on the washing line to dry, loving the fantastically bright yellows, but bearing in mind the warning that turmeric isn’t terribly light fast as a dye. How bad could it be though, really?

Turmeric dyeing

An hour and a half later, I had my answer! You can see the colour change most clearly in the silk dupion (on the right), which has a stripe down it where it was covered by the bamboo as it dried. As a friend pointed out, when you want to shift a turmeric stain it seems to stay for ever, so perhaps the answer is to leave the stained garment out in the sun for a bit…

The colours are still lovely, if nowhere near as bright as they were to begin with. This photosensitivity does limit what I can do with the finished fabric though. I don’t want to go out  on a summer day wearing a bright yellow scarf, and come home wearing a white one!

Summer dress three…

Panelled dress - front

Inspired by the dress I made last week, Vogue 1301, I made another one today. I drafted the pattern myself, using the Cochenille Garment Designer software, and made alterations as I went along. I forgot to lessen the amount of ease included, so the armholes are still a bit big, but overall I’m really pleased with this one.

As you can see, the seams are overlocked on the outside, making it super quick and easy to put together. The pockets look a bit high on the mannequin, but my waist sits higher than hers, so they’re actually in the perfect place for my hands.

Panelled dress - back

The belt is my usual 2″ sash, nice and long to make a bigger bow. The neck and arms are bound with vintage cotton bias binding. The fabric’s a cotton lawn from Fabric Land, and I think I have enough left over to make another dress!

The first priority is to make some kind of petticoat to go underneath. I’ve just ordered a 1970s lingerie book, having seen the gorgeous pictures on Miss Peelpants’ blog. I can’t wait to make some pretty things when that arrives. In the meantime I can wear the purple petticoat that goes with my my Phase Eight dress, which should make this one safe to wear for work.

Vogue 1301

Vogue 1301

This is Vogue 1301, a Koos van den Akker design. I’ve been stalking this pattern online for ages, so as soon as it appeared in the UK I snapped it up. The recommended fabrics are chiffon, georgette and gauze, all of which I hate sewing with a fiery passion, so I decided to go for a fine cotton voile instead. I also decided to go for plain black, figuring that would have an easier place in my wardrobe than the four contrasting prints pictured on the envelope! It also meant that I needed much less fabric – only three metres in total.

Despite being marked as “advanced”, the pattern came together really easily. All the seams are sewn on the outside, and then finished with the overlocker. The dress has a simple three-piece lining, so you don’t have to make the entire thing twice. I used cotton lawn for the lining, which was probably a mistake as the two layers tend to stick together. (And it shrank A LOT when I pre-washed it.) Next time I’ll use bamboo, which is much more slippery.

Vogue 1301

The finished dress is actually extremely full, although it doesn’t look it because the fabric’s so thin. It’s pretty shapeless, so I added a large belt. I think the only thing I’d change about this pattern is the shape of the armholes. They’re enormous! It does say “cut away” on the envelope, but they come down almost to my waist! So this dress can really only be worn with a vest or a t-shirt underneath, unless you don’t mind showing your bra to all and sundry.

The belt I made up as I was going along. The wide part is from Butterick 5371, and the ties are my usual 2″ fabric sash belt. The ties are offset (at the top on one side and the bottom on the other) so that they don’t get all tangled up as they cross over in the middle of the belt. They simply tie in a bow at the back. I lined the belt with velvet, the idea being to stop it from sliding around over the top of the dress.

I think I need a plainer belt for every day wear, but I’m really pleased with this dress. Although I made it for the summer, with a contrasting t-shirt and socks underneath, I think it’ll actually get a lot of wear all year round.

Tea dyeing experiment

Out of date decaf

I’ve been reading a lot of books and blogs about dyeing fabric with plants lately, and I wanted to do a little experiment. But chemical mordants seemed a bit complicated and scary, and I don’t yet have a dedicated saucepan just for dyeing, and I wanted to get started straight away. So, inspired by Tiina Teaspoon, I decided to start with tea!

Tiina recommends freezing your used teabags until you’ve got enough to dye with, which I’m going to start doing from now on, but tucked away in the back of the cupboard I knew I already had a box of decaffeinated tea bags that had gone out of date. I started with 16g of dry fabric (silk paj, cotton muslin, bamboo and silk dupion) and 17g of tea, or five tea bags.

Fabric swimming in the tea

I filled a saucepan with hot water, and simmered the tea bags for an hour. Our water here is very hard and full of lime, and there was a lot of scum on the top of the tea. I did wonder whether I should have used distilled water, but not having any to hand, tap it had to be. I took out the tea bags before adding the fabric. All of the fabrics had previously been through the washing machine to remove any starches or other treatments left over from the manufacturing process (including the silk), and I soaked them in warm water before putting them into the tea.

Taking up the colour

The resulting brew was very dark, and the fabric began to take up the colour immediately. If I just wanted to dull down a piece of cotton, or create an “antique” look, I wouldn’t have needed to do much more than just dip the fabrics into the tea.

Almost finished

In the end I let the pot simmer for another hour, by which time almost all of the water had evaporated. Possibly I should have left the lid on the pot, and turned the temperature down even lower. The water really only needs to be kept hot for this, not actually boiling. After the hour I turned off the heat and left the fabrics in the tea dye to cool down. I kept stirring the fabrics around throughout the entire process, maybe every fifteen to twenty minutes or so. (Every time I walked through the kitchen. I wasn’t very precise about it!)

Tea dyed fabrics
From left to right: bamboo, silk paj, cotton muslin, silk dupion

I rinsed the fabrics under the shower until the water ran clear, which was actually very quickly. I didn’t use any detergents, just warm water. I knew the cellulose fibres (bamboo & cotton) would take the colour differently from the protein (silk) ones, but I’m suprised at the depth of colour and the variations between them all. The fabrics are still a little bit damp in this photo, so the dupion has dried a little bit paler, but the two silks have kept their shine, and the colours are just lovely.

I’m now on the lookout for more plant dyes that can be used without any additional chemicals to fix the colour or release the dye. In the meantime I have plenty of tea in the house, so I can feel an experiment coming on!

Organic cotton/bamboo skirt

Cotton/Bamboo Skirt

After years of buying only sample pieces from organiccotton.biz, I finally got around to ordering some yardage. The skirt above is a blend of organic cotton and bamboo, and it’s beautifully soft and drapey.

I don’t believe most of the claims about bamboo fabric having practically magical anti-fungal and anti-bacterial properties. The plant material (which does have those qualities) needs to go through so many processes before it can be spun, it’s doubtful whether any of its beneficial aspects would survive. However, it’s a very good fibre to use for fabric. It needs no pesticides to grow, uses far less water than cotton, and it grows so rapidly that it’s quick to replenish, which means you don’t need acres of space to plant it. Even better, the fabric it produces is unbelievably soft.

This is my usual ruffled skirt – take one calf length a-line skirt pattern, and stick a ten-inch ruffle on the bottom. Simple! It has pockets in the side seams, and the edges of the ruffle are overlocked with a satin stitch.

Waistband

The waistband I pretty much made up as I went along. It’s based on an old favourite skirt that wore out long ago. The centre channel has a bias tape drawstring threaded through two eyelets. The channels above and below have narrow elastic threaded through.

Things I learnt as I was making it?

  1. Thread the drawstring through before the elastic.
  2. Make absolutely certain that the elastic isn’t twisted.
  3. Whilst the bias tape foot for my sewing machine is a marvellous invention, I need to learn how to make the joins in the bias strip go through it more smoothly.

Leaf detail

The finishing detail is this pair of little leaves on the ends of the drawstring. They each have an offcut of batting inside, making them a little bit textured and squishy. I was torn between overlocking the edges or leaving them raw so that they’d fray a little in the wash. I do like the satin stitch edge, not least because they make the leaves stand out against the skirt, but it isn’t as tidy as I’d have liked. A little more practice needed, perhaps.

I keep going on about the softness of the fabric, but that really is its stand-out quality for me. It’s like the softest sheets you’ve ever slept on, or that favourite shirt you’ve been wearing for years.

I’m working on a set of costumes at the moment, all of which seem to be made with synthetic fabrics and have lots of fiddly little details. It’s been really nice to take a break and sew something simple, that feels like a little bit of luxury.

Handkerchief Hem Skirt

Handkerchief hem skirt

I’d been thinking about making myself a floaty black skirt for a while. My seersucker skirt‘s been worn almost to death, so I thought I ought to have a backup plan for the day it comes out of the washing machine in pieces. I’ve been waiting for this to happen for months, thankfully the fabric’s more resilient than I’d thought!

This time I wanted a more floppy skirt, full and drapey, with an asymmetric hem. I looked at patterns, browsed through fashion magazines, and eventually had a brainwave in the middle of the night. This is made from my simple circle skirt pattern… only instead of rounding off the hem of each quarter piece, you just leave it as a square! So it’s effectively four squares sewn together, with a little shaping at the top for the waist.

As usual it has pockets in the side seams, and my trusty elastic waistband. The edges were done very simply on the overlocker, because I didn’t want to make hems that might spoil the soft draping of the very thin cotton lawn. I’m not sure this would work as well in a heavier fabric (even a shirt-weight cotton might be too much), so next time I’d like to make one with two layers. If I offset the points at the hem I think it could look really pretty, especially if I went for contrasting colours.

The only problem with using a fabric as lightweight as lawn for a skirt (aside from it being a bit chilly if you happen to live in a country that’s apparently not having a summer this year) is that it creases like crazy! This skirt was beautiful when I took it off the ironing board (yes, believe it or not I did iron it!), but within seconds of putting it on it was all wrinkly again. I think I’m going to have to adopt the same approach as I have to linen, and simply not mind looking a bit crinkly around the edges.