Sunset

Sunset

I don’t think I’ve even attempted to take any photographs in low light since Paul and I went on the Twilight Photography course at South Hill Park last year. Last week I decided to take a walk down to the lake one evening, and see whether I could capture the sunset.

As it turned out I didn’t pick a very good day for it, as the sunset itself wasn’t terribly dramatic. But I do like the very clear sky, and the contrast with the silhouetted trees.

I also learned that I really don’t like Paul’s tripod, which I borrowed because mine’s a cheapy little one that won’t hold the weight of an SLR camera. Paul’s is certainly much more sturdy, but it has screws rather than tabs to release the legs, and it takes so long to set the thing up that I thought I was going to miss the sunset altogether! I would have grabbed the monopod, but I didn’t think I could hold it steady for long enough to get clear pictures in the dark.

Perhaps I’ll try again another day.

Structured Lingerie (Part Four)

Structured Lingerie

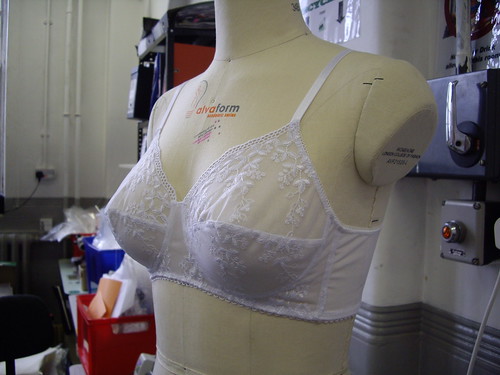
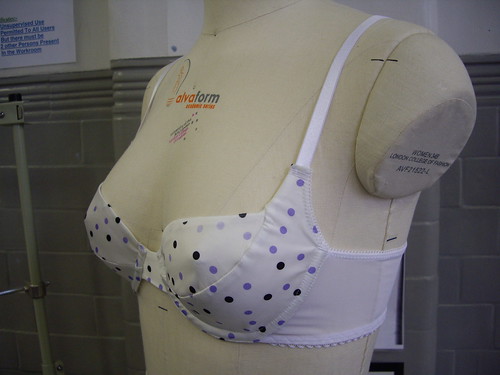
This is the fourth and final bra from the Structured Lingerie short course at the London College of Fashion.

It’s made from a pattern that I drafted from one of my own bras, which sadly had to be sacrificed for the occasion. Each of us had to unpick a bra in our own size, writing down the order that we’d taken it apart so that we’d know how to assemble the new one.

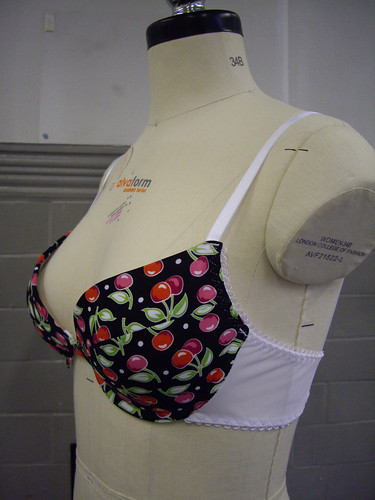
I got a little bit too ambitious with mine, making a few alterations to the style of the original bra. This turned out to mean that some mistakes crept in along the way, so this bra doesn’t actually fit as well as the other three.

My main mistake was to take my pattern from the foam cup rather than the fabric that had been covering it. This seemed like a good idea at the time, as I could make a more accurate pattern from the stable foam than from the stretchy fabric. Unfortunately I forgot to add the seam allowance to the bottom of the lower cup, which makes the bra smaller than it ought to be. This was compounded by an error in the boning – I hadn’t realised that the boning channels we were using at the College were quite a bit wider than the ones on the original bra. This took an extra few millimetres out of the bottom cup, making it even smaller!

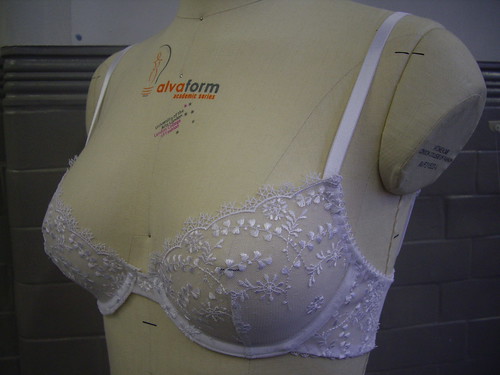
Still, I have my pattern, I know what changes I need to make, and I think I have just enough fabric left over from the course to have another try.

All in all, I had an absolutely brilliant week!
The facilities at the college were absolutely excellent (I’m coveting an industrial bar-tacking machine), the tutor was very experienced and helpful, and I learned a lot of things that I can now put into practice as I continue in my mission to make fiddly things from awkward fabrics.

You can actually do an entire degree in underwear if you want to, but I’m currently extremely tempted by another of their short courses. The Lingerie Workshop is another full week, but this time concentrating on “the skills of traditional couture lingerie, especially the feminine 1930s bias-cut styles and other similar themes and updating these into 21st-century lingerie.”

Doesn’t that sound absolutely perfect?

Structured Lingerie (Part Three)

Structured Lingerie

This is the third bra from the Structured Lingerie short course at the London College of Fashion.

As you can see, this one is a much fuller style than the previous two. Despite also being an “industry standard” 34B, the cups were slightly roomier than the other styles.
This bra isn’t underwired – instead it has a “cradle” for support, which goes underneath and in between the cups. (The underwired styles have a little “bridge” piece that sits in between the cups.) The cups are made in two pieces which, like the first bra, allows for a scalloped or lacy edge at the top. The cradle and the the lower part of the cups are lined with stabilised nylon for reinforcement.
The wings are much deeper on this bra than the others, and this actually makes it really comfortable to wear. Despite its somewhat old-fashioned styling, having tried them all on, this is actually my favourite of all the bras I made on the course.

Structured Lingerie (Part Two)

Structured Lingerie

This is bra number two from the Structured Lingerie short course at the London College of Fashion.

The cups on this one are made from foam, a couple of millimetres thick, to make something resembling a t-shirt bra. You can’t easily buy the foam moulded cups that these are made from (unless you’re Marks & Spencer and want to order thousands at a time), so we learned how to join the foam pieces together without creating bulky seams, and then we covered them with a stretch fabric.

(This photo makes it look as though I’ve sewn the cherry fabric upside down, but I haven’t, honest!)

The wings on all the bras (that’s the bit that comes out from the sides and turns into the strap at the back) are made from plain white powernet. The elastic’s attached with a three-step zig-zag which I conveniently happen to have on my own sewing machine, which is nice, as that’s one of the things that makes a bra look more professionally made. This one just needs a little bow where the straps join to the cups, and it almost looks like the real thing!

Structured Lingerie (Part One)

Structured Lingerie

At the beginning of April I went to London for a week, to do the Structured Lingerie short course at the London College of Fashion. The aim of the week was to make three bras of differing styles, to an industry-standard size (34B). After that there would be the opportunity to take apart a bra of your own size, draft a pattern from it, and make a new one!

This is the first bra of the week – a lace underwired bra. Each cup is made from a single piece of lace, and darted to create shape. This means you can use fabrics with a scalloped edge, as you’re cutting a straight piece at the top of the cup. Pretty, isn’t it?

Cufflinks

Cufflinks

The main reason I bought that TM Lewin shirt was because it fastened with cufflinks. It’s quite rare to find women’s shirts with double cuffs (unless you want to splash out more than I can currently afford), so I was really pleased to have spotted it.

In the shop the cuffs are fastened with little plastic studs, so of course I then needed to make myself a pair of cufflinks. I was going to follow the Martha Stewart tutorial, but a quick rummage around in the Shed turned up some slightly more sturdy components.

These are two pairs of buttons, as per Martha Stewart’s directions, but instead of being joined with thread loops I used metal jump rings from my jewellery-making supplies. All four buttons have shanks rather than holes, so this seemed like a more appropriate solution than joining them with thread.

The top buttons are about an inch across, and covered in offcuts of silk from the waistcoat and bow tie. The bottom buttons are about a centimetre across, and are the same as the buttons on the waistcoat. I also managed to find larger versions of the same buttons for the trousers and the jacket. So there you go – custom cufflinks to match your outfit for the price of four buttons and a couple of little metal rings!

Bow Ties are (still) Cool.

Waistcoat & bow tie

Back in March I managed to find a lovely TM Lewin women’s shirt for a bargain price in TK Maxx. We were going to see Mr B the Gentleman Rhymer, so I thought it would be a good idea to make a gentlemanly sort of an outfit for the occasion.

The bow tie is Kwik Sew 3183, as usual, and the waistcoat is Butterick 4815, view C. They’re both made from a lovely silk dupion which is turquoise shot with purple. The buttons on the waistcoat have a little flower embossed into them, which is filled with purple enamel.

I also made a pair of trousers (Vogue 1034, view A) and a jacket (Vogue 1132, view B), but I don’t seem to have taken any photos of those. I must grab them out of my wardrobe and pop them onto the dress form for you!

Summer Skirt

Mum's Skirt

Right back at the end of last year, my Mum gave me a length of fabric for a new summer skirt. It’s made using my basic gathered skirt instructions, with modifications to the waistband. Instead of being elasticated all the way round, the waistband is flat at the front with the skirt gathered into it. The back of the waistband has elastic running through it as normal.

I also made two round tablecloths, which I simply hemmed using the overlocker. They were cut from a single size bedsheet, simply because it was the only fabric we could find in the right colour.

(You can also see that I made this before I had my great big clear-out in the Shed. Excuse the mess!)

Fanciest Pigeon

Pigeon

This glamorous fellow is a Nicobar Pigeon. We met him at Bristol Zoo, in the Bird Forest. It’s a little section that you can walk through with lots of birds flying (or in fact mostly walking) around freely.

We also met a Roul Roul Partridge, who has an excellent punk hairdo and does a funny little dance when he digs in the leaves on the ground. He was the perfect size to pop in my pocket and smuggle out of the zoo, but I think they might have noticed. Shame.

I tried really hard to take a photo of the Nicobar Pigeons bathing in a little waterfall, but sadly it was just too dark in that section of the forest. You’ll just have to imagine how pretty they looked with the light and water bouncing off their feathers.

Tuppence a Bag

Feeding the Lorikeets

Way back in February, on our way home from Devon, we stopped off at Bristol Zoo.

I took a few photos, as usual, but I wasn’t feeling very well that day so I wanted to try and concentrate on seeing as much as possible and having a good time. I love anywhere that you can actually walk in amongst the animals, so getting to feed the lorikeets was the highlight of my day. You pay £1 for a little cup of nectar, stand in the designated feeding area, and noisy little parrots come and land all over you. Brilliant!

There was also a lemur enclosure that you could walk through, where we met ringtailed and mongoose lemurs and a bird forest. (More about that later.) There were also the most adorable fruitbats, but being February they’d wisely decided to stay indoors!

I loved the Twighlight area, which featured several aye-ayes, a not-very-slow loris, and the tiniest deer I’d ever seen. So cute! I also spent a long time failing to get a decent photo of a hilariously grumpy-looking chameleon, and laughing at a tern with a very dignified moustache.

I wouldn’t normally recommend going to the zoo on a freezing cold day in February, much less the first weekend of half term, but we really enjoyed ourselves.