Milly’s 2013 Christmas Dresses

Milly's Christmas Dresses 2013

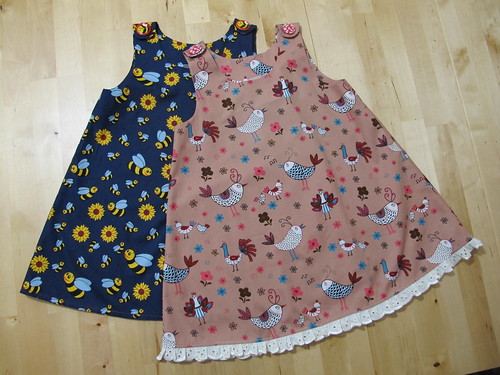
Today I have been mostly making Christmas dresses. Yes, I only have the one niece… but I got a bit carried away in the fabric shop! The pattern is Butterick 3772, again. This time it’s in the largest size I have, so I want to get a few more made before they’re outgrown.

Milly's Christmas Dresses 2013

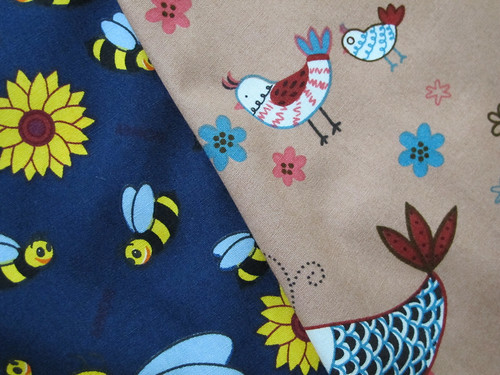
I didn’t deliberately buy birds and bees… in fact I didn’t even notice the combination until Paul pointed it out to me! But given that birds and bees are two of my favourite things, it’s probably no surprise that I was smitten with these fabrics.

Milly's Christmas Dresses 2013

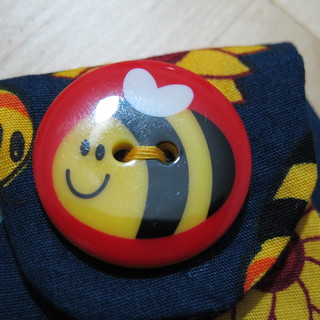
I was waiting in line to pay for the fabric when I spotted this button across the store. How perfect is that? I kind of want to knit myself a cardigan now, and put great big BEE BUTTONS all down the front.

Milly's Christmas Dresses 2013

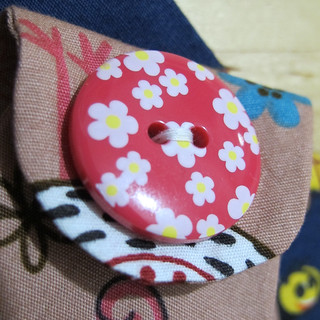
Not wanting the birdy dress to feel left out, and in the absence of a matching bird button, I thought these little pink flowers would do very nicely. In case the super-observant amongst you are wondering why you can’t see any buttonholes, it’s because the buttons have great big snap fasteners sewn underneath.

I haven’t added any pockets to these dresses, as I want to use the leftovers to do the same thing as last year and make a couple of matching outfits for her rag doll. I’ll make a start on those tomorrow, and if there are still any scraps big enough then these two dresses might end up with pockets after all.

(Note to self: Don’t wrap them up just yet!)

Lots more hats

Lots of hats

Today I took a day’s holiday from work, to go to a symposium in Oxford about the care and maintenance of natural history collections in museums.

Unfortunately, when I got up this morning, it became apparent that the central heating had stopped working, so I had to stay at home and wait for someone to come and fix it. Thank goodness for the British Gas home care insurance – we’ve only lived here for a month, and it’s the third time we’ve called them already!

While I was waiting, I popped the fan heater on in my sewing room, and wrapped myself up with a scarf and fingerless gloves. The end result of a day’s work has turned out to be the little mountain of polar fleece you can see above. Eight more hats waiting for the brims and the bands to be sewn by hand, and another twelve hats cut out and ready for the machine.

Now I just need a bit of inspiration for embellishing them, as they’re rather plain at the moment. I read over on Betz White’s blog that you can use paper cutting tools on felt, so I thought I might give the paddle punches (assuming I can find them!) a try with fleece and see what happens.

Four Fleece Hats

Fleecy hat

This is one of four fleecy hats that I managed to make today. I decided that I’d start my first round of sewing in the new house by using up the fabric that’s currently taking up the most room, which is a veritable mountain of polar fleece. I bought it to make hats to take to Frome in May, but ran out of time to actually make them.

Sadly, today’s four hats have not made any sort of dent in the pile of fleece, but I’ve been invited to take the Emporium to the Berkshire Autistic Society‘s Christmas Fair on December 14th, so hopefully I’ll have time to make a few more hats between now and then!

Hopefully I’ll also have time to get some better lighting sorted out in my sewing room. Its only window is six feet away from next door’s two-storey house, so it gets very little light at the best of times. In electric light it’s just awful – the hat above is actually a lovely light purple, not dark grey!

Fleecy hats

The hats are quite plain, with an oval crown and a turned back brim. Suitable for men and women, I’ll be making more of these in two sizes. I have two black and two purple so far, both 22″ which is the smaller size. I also have more colours – two greens, some burgundy, and a sandy colour, as well as black with white skulls, and pink with black skulls. Enough for about twenty-four more hats, I think! That should keep me busy for a bit.

While I’m making the hats, I’m also thinking about what kind of embellishment might suit them. I’m contemplating a brooch of some kind, perhaps something needle felted onto a matching (or contrasting) fleece background. I’m also contemplating how best to make the polystyrene heads look a little bit smarter before the fair. A coat of paint, maybe, or some sewing pattern paper. I have plans for more hats in the future, not just a mountain of fleece ones, so I want the head forms to look their best!

Scary Little Pumpkin

Scary Pumpkin!

I was going to whinge on about how poorly I’m feeling (working day seven of nine today, half term holidays, should have taken the opportunity not to work the weekend when my boss offered it to me but I’m a sucker for agreeing to stuff), how frustrating the house move continues to be (blocked drains, compost heap full of dog waste, where have the removal men hidden my laundry?!), or how I haven’t knitted anything or checked my email for nearly two weeks (argh!!), but instead I thought I’d show you this lovely picture of my little niece being a scary pumpkin.

As mentioned when I made it, this is Butterick 3772, and I have to say it’s been a brilliantly versatile little pattern!

Milly's First Birthday Party

I made one for her first birthday, which she wore as a dress, and then as a top, until the armholes got too tight.

Milly & Me

I made another one for her second birthday, this time with an enormous pocket on the front.

The pattern has loads of cute variations, although I’ve only ever made the simplest version, with a bit of lace or an improvised pocket. (Or a puffball hem and a pumpkin face. As you do.) Up to age 3 you only need a metre of 44″ wide fabric which, given the size of my stash, is pretty easy to come by. You can squeeze the smallest size out of half a metre, if you use a different fabric for the facings. In fact, I only used a metre for the pumpkin version, which is fully lined.

To be honest, it’s such an easy dress to make that I feel like a very bad aunty for not making more! Maybe once I’ve unearthed my sewing machine, I can have a rummage through the fabric mountain and make a few more.

2012 round-up

I’ve been thinking about this post for a week, and I kept putting it off because I felt as though it wasn’t really worth making. Each year I like to look back at everything that I’ve made, but this last year I don’t seem to have made anything very much!

Of course there were the theatre costumes for Neverwhere, which I still haven’t shown in their entirety. They took up most of January. May was dominated by several Steampunk outfits, including a ball gown. From August to December I was working five days a week instead of three, and from October onwards I was also volunteering, so I suppose I didn’t really have as much time as usual to make things. I also haven’t been trying to run a business this year, so I’ve been doing more things just for the sake of trying them out, which means I’ve got a lot of unfinished bits and pieces lying around that didn’t really fit into this collage.

I just can’t help looking at this picture and feeling a bit miserable, as though I’ve done nothing with the past twelve months. I love to make things, and it does make me sad when I don’t have time to do it. I think this year, I need to find a better balance.

Paul Smith – Kraken Hunter

Paul Smith - Kraken Hunter

This is Paul at Chepstow Castle, part of Waltz on the Wye 2012. Despite being May, the weather was absolutely freezing, so he hijacked my new Clapotis for most of the weekend.

Paul Smith - Kraken Hunter

But what was he hunting with his camera, high up in the remains of the castle?

Kraken at the Castle

Why, the Kraken, of course!

Paul Smith - Kraken Hunter

When he wasn’t off adventuring, he dressed smartly for an evening’s entertainment at the Drill Hall.

Paul Smith - Kraken Hunter

Both waistcoats are from the Harlots and Angels Sweeney Todd pattern. The brown one is moleskin, the grey is pinstriped denim. They’re a little bit big, but they pull in nicely with a little corset-style lace-up belt at the back.

I had a bit of trouble with the pattern (the amount of interfacing needed wasn’t clear, and the construction method seemed unnecessarily complicated), but once I’d decided to ignore the instructions and just sew, they were easy enough to put together. Because my sewing machine refuses to make buttonholes and I didn’t have time to do them by hand, each waistcoat is fastened with poppers and the buttons are sewn on top.

Thankfully I took a sewing kit with me, because I made the grey waistcoat in such a hurry that I’d sewn half the poppers in the wrong place! That was easily fixed, and the sewing kit came in handy a few times over the course of the weekend.

Paul’s usually extremely averse to dressing up, but he was so comfortable in these waistcoats that he’s thinking of wearing the grey one to business meetings instead of a suit jacket. I call that a sewing success!

Organic cotton/bamboo skirt

Cotton/Bamboo Skirt

After years of buying only sample pieces from organiccotton.biz, I finally got around to ordering some yardage. The skirt above is a blend of organic cotton and bamboo, and it’s beautifully soft and drapey.

I don’t believe most of the claims about bamboo fabric having practically magical anti-fungal and anti-bacterial properties. The plant material (which does have those qualities) needs to go through so many processes before it can be spun, it’s doubtful whether any of its beneficial aspects would survive. However, it’s a very good fibre to use for fabric. It needs no pesticides to grow, uses far less water than cotton, and it grows so rapidly that it’s quick to replenish, which means you don’t need acres of space to plant it. Even better, the fabric it produces is unbelievably soft.

This is my usual ruffled skirt – take one calf length a-line skirt pattern, and stick a ten-inch ruffle on the bottom. Simple! It has pockets in the side seams, and the edges of the ruffle are overlocked with a satin stitch.

Waistband

The waistband I pretty much made up as I went along. It’s based on an old favourite skirt that wore out long ago. The centre channel has a bias tape drawstring threaded through two eyelets. The channels above and below have narrow elastic threaded through.

Things I learnt as I was making it?

  1. Thread the drawstring through before the elastic.
  2. Make absolutely certain that the elastic isn’t twisted.
  3. Whilst the bias tape foot for my sewing machine is a marvellous invention, I need to learn how to make the joins in the bias strip go through it more smoothly.

Leaf detail

The finishing detail is this pair of little leaves on the ends of the drawstring. They each have an offcut of batting inside, making them a little bit textured and squishy. I was torn between overlocking the edges or leaving them raw so that they’d fray a little in the wash. I do like the satin stitch edge, not least because they make the leaves stand out against the skirt, but it isn’t as tidy as I’d have liked. A little more practice needed, perhaps.

I keep going on about the softness of the fabric, but that really is its stand-out quality for me. It’s like the softest sheets you’ve ever slept on, or that favourite shirt you’ve been wearing for years.

I’m working on a set of costumes at the moment, all of which seem to be made with synthetic fabrics and have lots of fiddly little details. It’s been really nice to take a break and sew something simple, that feels like a little bit of luxury.

Dashing away with the smoothing iron…

Yuk.

Yuk.

I think it might be time to clean the iron, and fit the new ironing board cover.

This is what happens when you use a lot of synthetic fabrics and iron-on interfacing. Things melt and stick, and you’re left with a mess.

That’s why I usually buy the cheapest iron I can possibly find, and then use it until it’s either beyond cleaning, or the heating element burns out. Domestic irons aren’t designed to be used for hours and days at a time, so this tends to work out to a buying a new one every eighteen months or so.

I know that a lot of dressmakers swear by heavy-duty steam-generating irons. I’ve used them before, but find them too heavy for my bad wrist. I also find that the water tanks get full of limescale and the steam eventually leaves dirty marks on your fabric. I use a simple plant sprayer, using it to dampen either the fabric, the ironing board cover, or a separate pressing cloth. A nice hot iron on top creates plenty of steam.

When I (eventually) finish work on my current costume project and switch to my lovely organic cottons, I’d like to give up using iron-on interfacing altogether. Hopefully that should help my irons to last a bit longer – and make a lot less mess!

The right tools for the job.

Upholstery & Lampshade Needles

No, I haven’t been sewing upholstery or lampshades. But I did find myself in need of a curved sewing needle today, and I knew I had a packet somewhere. I hadn’t realised that they’d be older than I am! They’re in perfect condition, and they were just what I needed to sew through multiple layers of fabric that couldn’t be done by machine.

Pleats & Pins

I’m in the process of making a costume, which is going to be an extremely sumptuous ball gown. The starting point was my (first) wedding dress, which has been sitting in my loft for almost fifteen years. Thanks to an extremely generous seam allowance, I was able to let it out enough to make it fit again! I’m replacing the ivory skirt with a matching burgundy one, but  rather than dismantling the original dress I’m simply adding an extra layer of fabric. So this is five metres of satin, draped and pleated into place.

Clearly there was no way I could have even considered doing this kind of alteration using the sewing machine, but working by hand directly on the dressform (to maintain the shape of the draping as I worked) was rather awkward. Thankfully the curved needles were strong enough to push through all those layers as I sewed down the pleats, and the perfect tool for this kind of fiddly work.

Time permitting, I’m intending to make a matching hat. I have a feeling that these curved needles are going to come in handy again!

Organic Cotton Thread

Organic Cotton Thread

This, in the centre, is that holiest of grails: organic cotton sewing thread. Not only that, but it’s available to purchase in the UK!

This is something that I’ve been trying to track down for a long time. It seemed ridiculous to be sewing organic cotton fabric with polyester thread (right), and in fact I do use cotton threads (left) now when I’m sewing natural fibres like cotton or linen. But surely if I’m making organic cotton clothing, I should be able to sew it with organic cotton thread? Sadly, it simply wasn’t available.

A couple of years ago I bought some organic cotton thread from Near Sea Naturals in America. Unfortunately my sewing machine didn’t like it (it won’t tolerate thread that’s the slightest bit fluffy), and it did seem a bit silly to add so many airmiles to my sewing thread in the first place.

Coats EcoVerde is a range of recycled polyester and organic cotton threads, but they’re available to industry only, so that’s no help.

And then, when I went to place my most recent order with organiccotton.biz… there it was! Organic cotton thread! It’s available in 11 colours, but I went with cream to begin with so that I can do some dye tests on it. It comes on nice big 275m spools for £2.99, and the spools themselves are wooden which makes them ideal for keeping and recycling afterwards.

I’d just assumed that organic cotton thread would be a lot more expensive than polyester or even ordinary cotton, but for the natural colour it actually works out ever so slightly cheaper! Other colours are £3.99 a spool, but even that doesn’t compare too badly.

As you can see from the picture above, I haven’t actually tested it out yet, so I do need to keep my fingers crossed that my machine doesn’t chew it up and spit it out. But it looks nice and fine and smooth, finer than the Coats cotton, even, so I live in hope that it’ll be good.

All I need then is to be able to buy it in overlocker-sized cones. I’m going to get through an awful lot of 275m spools otherwise!