Silver Jewellery

Silver jewellery

The final two days of my Art Week were spent at a silversmithing course. I’ve been meaning to get around to going on a silversmithing course for more than ten years, and now I’m really cross with myself that I didn’t do it sooner. Silversmithing is brilliant!

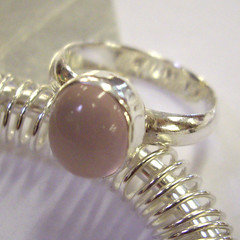
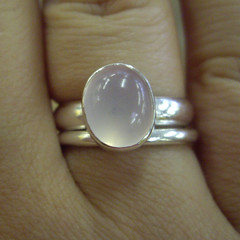
On the first day we made silver rings using different profiles of wire. On the second day we were given a quick demonstration of stone setting, so I set one of my rings with this lovely rose quartz. I’m absolutely thrilled to bits with this, and you can expect to see me wearing it pretty much all the time from now on.

Silver jewellery

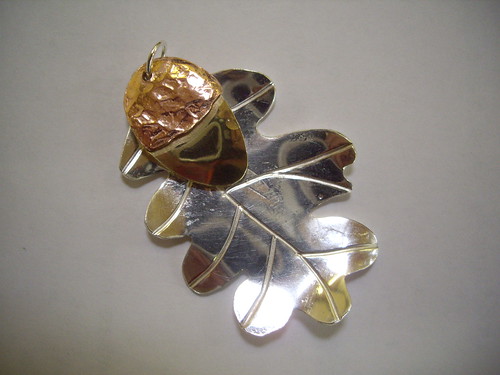
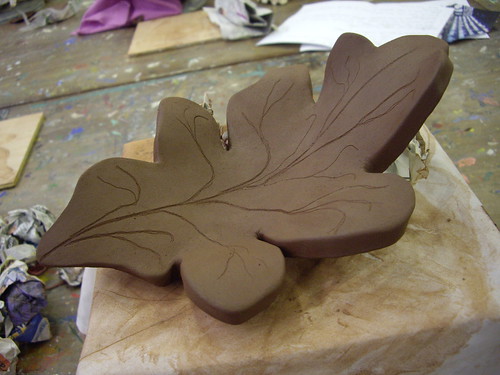
My main project was this pendant. The leaf is silver sheet, textured with wire to make the veins, and then hammered gently over dome punches to give it a bit of shape. The acorn is made from copper and brass, and also gently domed. I’ve since brushed the brass part of the acorn, to give it a satin texture. I’m now pretty handy with a piercing saw and a needle file, although my hammering skills definitely have room for improvement!

Silver jewellery

I already have quite a few of the necessary tools for making jewellery, so I’m currently contemplating buying a few more. A bench clamp, a ring mandrel, a piercing saw and a few bits and pieces to allow me to do soldering… I can feel a few more pretty rings coming on!

There are quite a few silversmithing evening classes local to me, although apparently it’s quite a challenge to find one that actually has any available places. I’ll definitely be looking around to see whether I can squeeze myself onto a course. There’s so much to learn, and I can’t wait!

Create With Clay

Create With Clay

This week I’ve been at my local school, taking part in various art courses. The first one was “Create With Clay”, and above you can see the first thing that I’ve created in clay for approximately seventeen years. It’s a slightly wonky thumb or pinch pot, with coils added to the top.

Create With Clay

This is a slab of unfired terracotta, rolled out to a uniform thickness, and then curled into a pleasing shape.

I didn’t really enjoy the time I spent working with ceramics on my Art Foundation course. I hated getting my hands dirty, I didn’t like working in three dimensions, and I wasn’t really interested in waiting for weeks on end for the finished piece to come out of the kiln. Especially as it was quite likely that something in there would have exploded and ruined everybody else’s work. As a result I didn’t really pay much attention in ceramics classes, and so I made rubbish pieces which only confirmed that I didn’t like it.

Create With Clay

This one’s a “pod”. I made two pinch pots, stuck them together, and then made a hole – as per Kay’s instructions. The texture on the outside is done with the end of a pen and a dried up old paintbrush. The texture on the inside? That’s just my fingerprints.

I tried really hard not to mind about having dirty hands, although it turns out that I’m still pretty squeamish about the way that the clay draws all the moisture out of your skin. I also tried not to have a pre-conceived idea about what I wanted to achieve, and simply followed the instructions and enjoyed the process.

As it turned out, I actually did enjoy the process!

Create With Clay

On the second day we made a piece of our own devising. I enjoyed the simplicity of working with a slab of clay (particularly the fact that I didn’t have to stick my thumbs into it!), so I decided that an oak leaf would be my “inspiration from nature”.

I drew out the shape onto a pice of A4 paper, and used that as my template for the size of the terracotta slab. After some experimentation with mark-making (something else that I loathed in college) I decided to use embroidery thread to mark out the veins. The underside of the leaf was textured by rolling it out onto a sheet of newspaper that I’d scrumpled up and then flattened out again.

Create With Clay

Once that was all done I spent a long time smoothing down the edges of the piece, and coaxing it gently into a more interesting shape. After I’d carefully pulled out the embroidery thread, the top surface was very gently textured with a damp sponge.

All of the pieces will be fired during the summer holidays, so we have to wait until the end of September to get them back. I’m really excited to see how the leaf looks once it’s been fired and finished with a clear glaze.

I’m not entirely certain what I’m going to do with a 12″ long terracotta leaf once I get it back… but this course definitely helped me to get over my fear and loathing of working with ceramics. In fact, I wouldn’t mind signing up for a longer course so that I could play with colours and glazes. That seems like fun!