Strawberry Shorts

Strawberry knickers

I’m afraid it’s all underwear around here at the moment! I’m in the middle of working on a couple of larger projects (an Edwardian-ish blouse and the prototype shoes), so these are little things than I can make when I don’t have time to get stuck in to something else.

These are made from the same block as the last pair, with a few alterations to the pattern. I slashed the front and back pieces from waist to hem, and spread the sections apart by an inch at each slash. This gave them a lot more volume at the leg, for a more skirt-like feel.

Once again the fabric’s a bit stiff, especially with the bound edges, and the waist is a little bit low, especially at the back. But they’re very comfortable under jeans, despite the width in the leg, so I want to use this pattern to make a silky pair and see how they come out.

New Knickers

Silk knickers

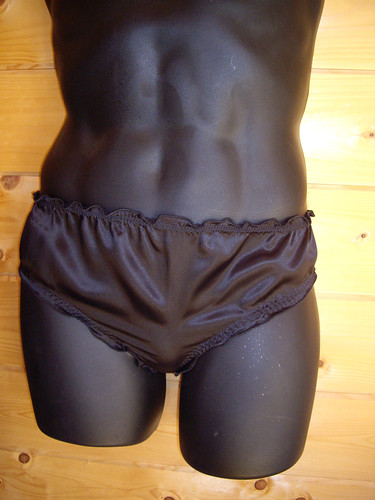
Remember the black silk knickers I made back in January? Well, they were gratefully received, but unfortunately they turned out not to fit terribly well. So, despite the best efforts of both my sewing machine and my overlocker (which I think are both overdue for a service), I made another pair.

I made some changes to the pattern to make them slightly deeper at the sides, and also to allow more room at the front. As you can probably tell from the mannequin, yes, they’re for a man. Hopefully this pair will actually fit!

Prototype Pants

Prototype Pants

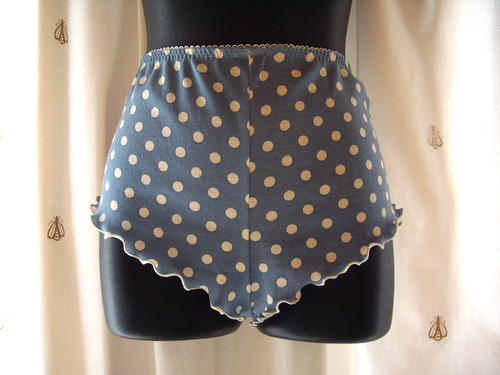
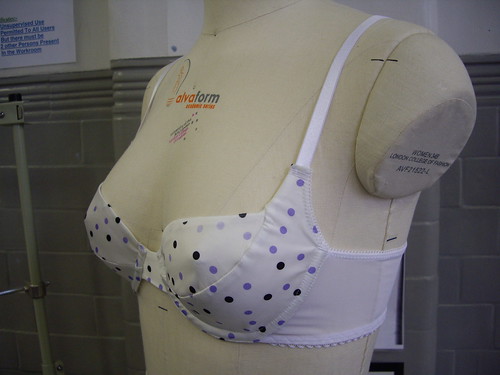
Today I have been mostly trying to remember my technical drawing lessons, and drafting a pattern for french knickers. This pair are made from spotty jersey (t-shirt weight), with frilly legs and an elasticated waist.

They’re quite high-waisted, they should come up to your bellybutton, pretty much. They’re designed to be a close fit to the body, as they’re in a stretchy fabric. They have a small lined gusset, so you don’t get lots of seams bunching up underneath.

Because of Complicated Technical Reasons (also known as I Can’t Do Maths) they’ve come out a bit big for me, so I need to re-draft the pattern and try again.

In the meantime this pair have been relocated to a good home, where they have been described as “a perfect fit and AWESOME!!!”, which is always good to hear!

Structured Lingerie (Part Four)

Structured Lingerie

This is the fourth and final bra from the Structured Lingerie short course at the London College of Fashion.

It’s made from a pattern that I drafted from one of my own bras, which sadly had to be sacrificed for the occasion. Each of us had to unpick a bra in our own size, writing down the order that we’d taken it apart so that we’d know how to assemble the new one.

I got a little bit too ambitious with mine, making a few alterations to the style of the original bra. This turned out to mean that some mistakes crept in along the way, so this bra doesn’t actually fit as well as the other three.

My main mistake was to take my pattern from the foam cup rather than the fabric that had been covering it. This seemed like a good idea at the time, as I could make a more accurate pattern from the stable foam than from the stretchy fabric. Unfortunately I forgot to add the seam allowance to the bottom of the lower cup, which makes the bra smaller than it ought to be. This was compounded by an error in the boning – I hadn’t realised that the boning channels we were using at the College were quite a bit wider than the ones on the original bra. This took an extra few millimetres out of the bottom cup, making it even smaller!

Still, I have my pattern, I know what changes I need to make, and I think I have just enough fabric left over from the course to have another try.

All in all, I had an absolutely brilliant week!
The facilities at the college were absolutely excellent (I’m coveting an industrial bar-tacking machine), the tutor was very experienced and helpful, and I learned a lot of things that I can now put into practice as I continue in my mission to make fiddly things from awkward fabrics.

You can actually do an entire degree in underwear if you want to, but I’m currently extremely tempted by another of their short courses. The Lingerie Workshop is another full week, but this time concentrating on “the skills of traditional couture lingerie, especially the feminine 1930s bias-cut styles and other similar themes and updating these into 21st-century lingerie.”

Doesn’t that sound absolutely perfect?

Structured Lingerie (Part Three)

Structured Lingerie

This is the third bra from the Structured Lingerie short course at the London College of Fashion.

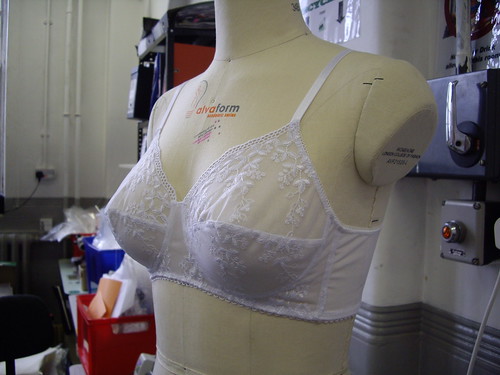
As you can see, this one is a much fuller style than the previous two. Despite also being an “industry standard” 34B, the cups were slightly roomier than the other styles.
This bra isn’t underwired – instead it has a “cradle” for support, which goes underneath and in between the cups. (The underwired styles have a little “bridge” piece that sits in between the cups.) The cups are made in two pieces which, like the first bra, allows for a scalloped or lacy edge at the top. The cradle and the the lower part of the cups are lined with stabilised nylon for reinforcement.
The wings are much deeper on this bra than the others, and this actually makes it really comfortable to wear. Despite its somewhat old-fashioned styling, having tried them all on, this is actually my favourite of all the bras I made on the course.

Structured Lingerie (Part Two)

Structured Lingerie

This is bra number two from the Structured Lingerie short course at the London College of Fashion.

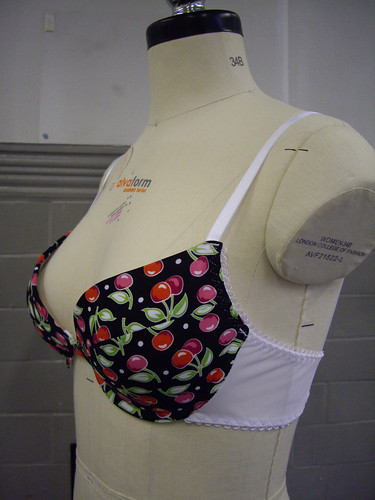
The cups on this one are made from foam, a couple of millimetres thick, to make something resembling a t-shirt bra. You can’t easily buy the foam moulded cups that these are made from (unless you’re Marks & Spencer and want to order thousands at a time), so we learned how to join the foam pieces together without creating bulky seams, and then we covered them with a stretch fabric.

(This photo makes it look as though I’ve sewn the cherry fabric upside down, but I haven’t, honest!)

The wings on all the bras (that’s the bit that comes out from the sides and turns into the strap at the back) are made from plain white powernet. The elastic’s attached with a three-step zig-zag which I conveniently happen to have on my own sewing machine, which is nice, as that’s one of the things that makes a bra look more professionally made. This one just needs a little bow where the straps join to the cups, and it almost looks like the real thing!

Structured Lingerie (Part One)

Structured Lingerie

At the beginning of April I went to London for a week, to do the Structured Lingerie short course at the London College of Fashion. The aim of the week was to make three bras of differing styles, to an industry-standard size (34B). After that there would be the opportunity to take apart a bra of your own size, draft a pattern from it, and make a new one!

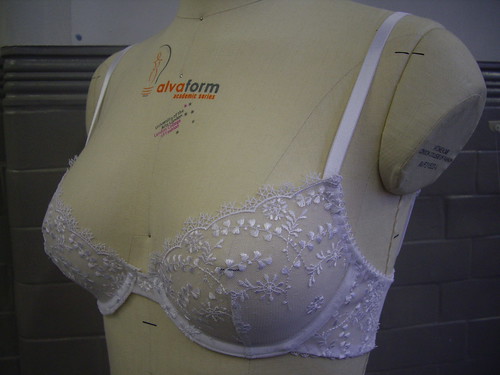
This is the first bra of the week – a lace underwired bra. Each cup is made from a single piece of lace, and darted to create shape. This means you can use fabrics with a scalloped edge, as you’re cutting a straight piece at the top of the cup. Pretty, isn’t it?

Ayten Gasson & Kiss Me Deadly


Picture © Ayten Gasson

Remember the skull & rose print bra that I made last month? Well, I wore it last week. It was certainly a better fit than the first bra I made, but it still wasn’t all that comfortable.

I have a few ideas regarding underwires, and I thought it might fit better if I gave the bra a much wider band. So I did a search for “longline bra” thinking that even if all the results were frumpy and horrible, I might get some construction ideas that I could translate into pretty fabrics.

You can imagine my surprise then, when one of the first pictures that came up was the one above! Isn’t it lovely? It’s part of the Lady M range by Ayten Gasson. Ayten specialises in vintage-inspired lingerie, all of which is hand made in the UK from silk and Nottingham lace.


Image © Kiss Me Deadly

Another designer that features all manner of pretty things is Kiss Me Deadly. Vintage-inspired again, and with a gorgeous range of shapewear. Most of their items are limited edition, so if you see something you like you need to snap it up quickly!

Sadly for me the longline bra that matches this gorgeous girdle is sold out already, otherwise I’d have gone for the whole set!

Never mind making my own bras, I think I might need to go shopping…

Skull & Rose Print Bra

Bra & Pants

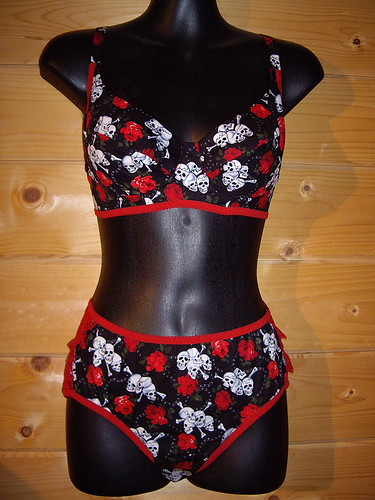
While I was on a roll with this matching-everything outfit, I wanted to have another go at making a bra. This is Kwik Sew 2489 again, with a couple of modifications based on the fit of my first attempt.

I widened the centre front panel slightly at the top, and adjusted the shape of the cups to fit. I’ve also added underwires to this one, so I’ll see what difference that makes. (I haven’t tried it on since I added the wires.)

As you can see, I added the elastic on the outside, to match the pants. The front part of the straps is made from matching fabric, while the back part is made from ready-made bra straps. I bought those, and the red bra fastener, from Sewing Chest, along with the red elastic and a few other bits and pieces. I feel as though it was somehow cheating slightly to buy the bra straps ready-made, but I couldn’t find all the individual components in red. I could have bought black ones and made the straps myself, but I’d already bought red stretch fabric for the back strap panels and I wanted the findings to match.

I rather like the slightly long-line effect of this bra, caused by sewing the elastic onto the outside without trimming off the seam allowances first. (The pattern instructs you to turn the elastic to the inside.) I think I might make the next one even longer, and see how comfortable (or not) it is to wear.

Black silk knickers

Black silk knickers

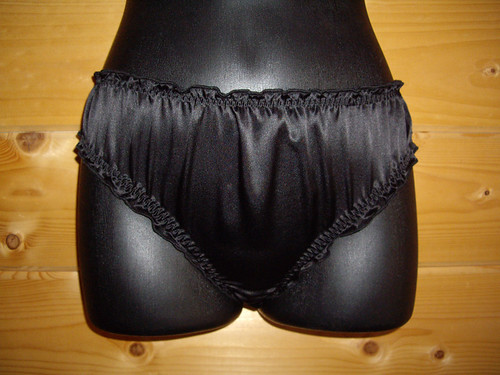
This is pair of knickers number two – in plain black silk.

The silk satin’s very fine, and I’d been worried that the fabric might slip or fray. As it turned out, they were much easier to sew than I’d expected. I really like the lettuce edges, done on the overlocker, and the three-step zig-zag stitch looks nicely professional.

I still need to make some modifications for the pattern. It needs re-working slightly to work with a directional print, although that’s obviously not an issue with this pair! Starting to stitch down the ends of the elastic is a bit fiddly – the machine has a tendency to suck the fabric down into the feed dogs.

Once I’ve got these little bits and pieces sorted out, you can look forward to seeing a lot more of these!