A stash-busting exercise gone awry

Zipped pouches - in progress

It started off as an exercise in using up my stash of 7″ skirt zips. These are the ingredients for 20 lined pouches, cut from remnants left from clothes I’ve made over the years.

While I was cutting up my pile of larger scraps, I thought I might as well carry on. So I kept on snipping until I’d been though every piece of quilting cotton I could find.

Zipped pouches - in progress

This then, is another forty-four sets of fabric and lining. Which means that whilst I have indeed used up my entire stash of 7″ skirt zips… I now need to go and buy quite a lot more. Oops…

I don’t know how many of these I’ll manage to complete in time for the Berkshire Autistic Society Christmas Fair next Saturday, as my only day off work next week is earmarked for Christmas shopping. But I’ve got a couple of afternoons and a week’s worth of evenings, so hopefully there should be quite a few for sale!

Flamingo Weekend Bag

Flamingo Weekend Bag

This is what I looked like when I arrived home from a long weekend with two of my oldest friends. We had a fabulous time, but I had to leave early because I was completely and utterly exhausted. And then I had to wrestle this bag across London on a bus and a train, which just about finished me off.

I started to pack my little wheeled suitcase. Then I decided that was overkill for a long weekend, and took everything out. I tried to re-pack everything into my Baba Studio Alice in Wonderland bag, but that was too small. So I decided to make a new weekend bag. Three hours before I was due to leave. As you do.

I knew I’d have to leave my bag in the cloakroom at the V&A, so I went to their website to see what size of bag they’d accept. I took those measurements, subtracted an inch all round to be on the safe side, pulled out the heaviest fabric in my stash, and set to work. It’s an extremely basic rectangular box bag, with a zip set into the top. It has two long handles, so it can be carried on the shoulder. It took hardly any time to make, and I was really pleased with it.

Until I took it upstairs and realised that it was actually larger than my little suitcase. And less convenient because it didn’t have wheels. Oops.

I dragged the damn thing into London anyway, but unfortunately it met with a slight disaster on the way home. Heading upstairs on the bus, I caught one of the handles on the end of the hand rail. The stitching turned out to be stronger than the fabric, and now there’s a hole. Oops.

Obviously I could fix the hole, and I should have reinforced the area behind the handles in the first place… but the bag was so big and so heavy that I can’t bear to think about using it again for a while! Maybe when I do mend it, I’ll make it a little bit smaller at the same time.

Library Book Bag

Library Book Bag

I’ve been making this book bag for several months now, on and off. It was a request from my parents, to make them a nice sturdy bag that they could use to carry a little pile of hardbacks home from the library.

This is actually bag number two, as I somehow managed to get myself a bit confused with the measurements of the first one. For reasons I’m not quite clear on, it came out wide instead of tall. (No, I didn’t sew the pieces together the wrong way round. Honest.)

Thankfully I had enough fabric left over to make this second bag… and there’s still a piece big enough to make bag number three, just in case I’ve accidentally done something daft with this one as well!

Looking for the perfect bag.

Now that the honeymoon’s booked (hooray!), I’ve started to think about what I’ll need to take with me on our trip. We’ll be walking around the city all day, and we’ll be carrying heavy cameras, so I need a comfortable bag to fit everything into.

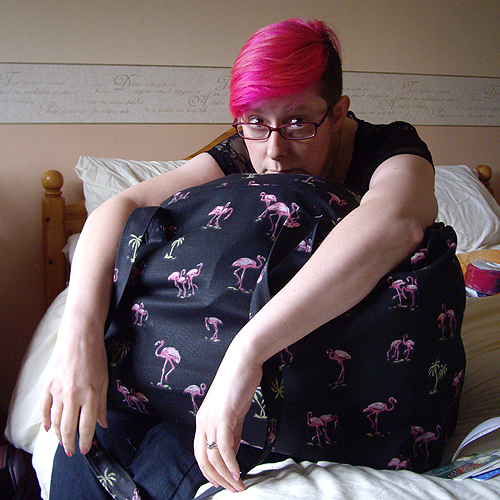
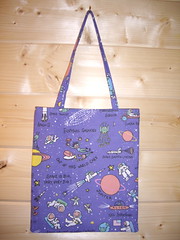
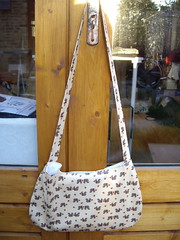
This is a bag that I have already – a Crumpler Sheep Scarer.
It was perfect for college, and for lugging my old laptop about. It’s also perfect for days out when I’m close to home and only packing the camera and not much else. Because of the triangular shape of the bag, once you’ve got the camera and a lens or two stashed in the bottom, you can’t fit anything else in the top without having to unpack it all to get the camera in and out. Not ideal.

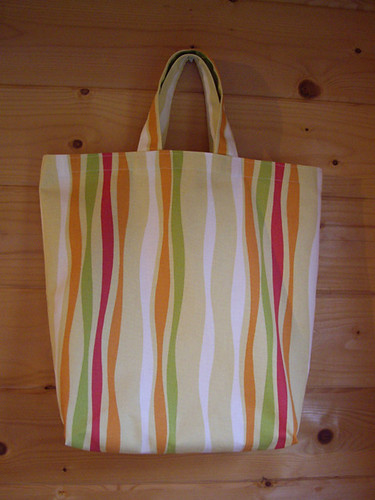
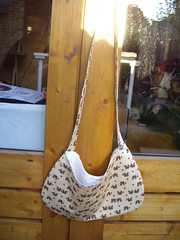
This is my proper grown-up handbag – a Mulberry Bayswater.
I love it to bits, but it has two problems. One, if I’m wearing a jumper or a big winter coat, the straps are about an inch too short to fit over my shoulder, which means I have to carry it in my hand. If I’m using the camera a lot, I really need a bag that’s hands-free. Two, inside it’s just one great big enormous space, which makes it very easy to fill with heavy things, and I can never manage to find the thing I want because it’s always right down in one of the corners.

So, after a fruitless trip to the local shops, I did what any sensible person would do and had a look on Etsy for a new bag.

Browing the “backpacks” category was a bit daunting – it brought up 117 pages of bags that mostly weren’t backpacks at all. (I do hate it when people deliberately tag things incorrectly to get more views.) Thankfully, on just the third page, I spotted a familiar image and went to the Bohemian Cats store to have a look.

I’ve bought bags from Baba Studio before, for Christmas gifts, and I was delighted with the quality as well as the beautiful imagery.

This is one of their three-way messenger bags. They come in black or taupe as a base colour, and you can choose from a stunning array of images for the front flap. I particularly like the way you can convert this style from shoulder bag to messenger bag to rucksack with just the one strap. So clever!

But, at only a couple of inches wide this is quite a slim bag, and I wasn’t absolutely convinced that my camera would fit inside. I contacted Karen at Baba Studio on Facebook, and she suggested that the laptop bag might be a better choice.

And wow, I think she’s right.

There’s an Etsy store specifically for the laptop bags, which are kept in stock, or you can place an order for the design of your choice from the Baba Store. Again you can decide between black or taupe as a base colour, and there are more than twenty gorgeous images to choose from. The inside of the bag has been made with brilliant attention to detail. There’s a padded section for your laptop, of course, but there’s also a drawstring waterproof cover over the main body of the bag. There are two zipped pockets, one of which has sections for pens. This is very important, as I can almost never find a pen when I need one! All of the pockets are completely covered by the flap, which I think is held in place by magnets, making it all extra secure.

But it’s not a rucksack, which is what I thought I was looking for.

Now I just need to decide whether that matters… and which design to choose!

Smocking, Traditional and Modern.

Smocking, traditional and modern

This is a sneaky peek at what you’ll be making if you come along to my Smocking Workshop at the Museum of English Rural Life. (It’s on September 19 & 20, and there are still places left! Book here…)

As you can see, we’ll be working the smocking stitches on gingham. For beginners it’s the easiest way to keep everything neat and lined up.

The top panel shows a variety of traditional smocking stitches – like the ones found on the smocks in the Museum’s collection.

The lower panel is made up of more modern smocking stitches that you tend to find on clothing from the 1930s onwards.

I find it interesting that the traditional stitches keep the gathering in very neat little columns all the way down, whereas the modern stitches are almost all designed to form a diamond pattern. The modern stitches are much more stretchy, but they take quite a bit longer to work.

In reality, although smocking looks very elaborate, you only need to know how to do one embroidery stitch, and you can turn it into all of these. If you can get the hang of back stitch, you can be smocking away in no time!

Spectacular spats!

When I wrote about those gorgeous ruffly boots, Cathryn pointed out that I could achieve the same effect on any pair of boots by making myself a pair of spats. Brilliant!

I went straight to the internet for inspiration, and came across this amazing pair from Maide. Her motto is “good mood fashion”, and I’m definitely in a good mood now that I’ve seen these. Maide has a gorgeous Dawanda store which is filled with amazing creations.

I liked this pair particularly because they reminded me of this beautiful Mucha print bag, which I bought from Baba Studio last Christmas. If you become a fan of Baba Studio on Facebook, you can see sneak previews of Karen’s latest designs. The new printed chiffon wraps are especially lovely!

Paddington shopping bag…

This is what I’ve been up to today – as well as finishing ‘s dress, I’ve made a Paddington shopping bag at the request of .

Paddington shopping bag

It’s a big bag, quite a lot bigger than the totes that I’ve made previously. It’s roughly A3 in size, and the handles are short ones. They won’t go over your shoulder, but you can carry the bag in your hand without it dragging on the floor.

I’ve got quite a lot of pillowcases in the Shed – most of them came with the duvet covers I’ve been buying to make skirts from. I can get two of these bags out of one pillowcase, so I’ll be running up a lot more in the not-too-distant future. I particularly like the fact that there won’t be any leftover fabric at all, by the time I’ve finished.

I’ve signed up for the Rising Sun Art Market in September and November, and I’m on the reserve list for July. I’ll be taking these new bags along with me, as well as lots of badges, and anything else I happen to make in the meantime!

Jeans and T-shirt tote bag

This tote bag is a one-off design that I made for my sister.

She originally presented me with a pair of her husband’s old jeans and asked me to make them into a skirt. Unfortunately the reason that her husband was throwing out these jeans was a huge rip across the behind, and it was strategically placed so that I didn’t have quite enough fabric for a skirt.

So, instead, I made a tote bag, for carrying around all of life’s essentials on a casual weekend.

Jeans & t-shirt tote

The bag is my standard tote size, 10 x 12 inches. It will comfortably hold A4 paper, or your favourite magazine. The handles are 25″ long, and fit nicely over the shoulder. You can also carry the bag in your hand without it dragging on the floor.

There is a pocket on each side of the bag – the one on the front still has the original “Levi’s” tag!

The bag is lined with a pretty blue t-shirt from my mountainous collection of “things to cut up”.

Now to parcel it up and send it off in the post – along with my Dad’s second Christmas glove. They took slightly longer to knit than I’d expected… sorry Dad!

Bags of space…

…pun intended.

Today I have been mostly making cushion covers and Christmas presents. This means that I can’t show you most of what I’ve been making, but I’m fairly certain that the recipient of this little bag won’t be reading my blog and spoiling her surprise – she’s only five!

Holly's Bag Holly's Bag

This is a regular magazine-sized tote bag, made from a recycled duvet cover.

The handles are a bit narrower than usual, to accommodate little hands.

Don’t forget that you can order tote bags in the shop, in any of the fabrics shown here.

A scarf and a squirrel handbag.

Remember that frighteningly tangled skein of silk?

This is what became of it:

Silk & Mohair Scarf Silk & Mohair Scarf

It’s a narrow scarf, which is long enough to reach below the waist on both sides. It’s knitted with one strand of Debbie Bliss Pure Silk and two strands of Colinette Parisienne held together. I cast on 13 stitches, on 5mm needles. Every fourth row, I changed to a 10mm needle. Otherwise it’s just plain garter stitch – keep knitting until the yarn runs out!

Here’s the last of the pre-ordered tote bags, which I finished today.

Squirrel handbag Squirrel handbag

You may have noticed that it’s a different shape from the others!

The photographs don’t show the shape particularly well – it’s more curvy than it looks. It’s big, too – in the second picture the bag has an A4 pad inside it, to keep it nice and flat. It has one long handle, and you can just see a tiny sneaky peek of the Design By Claire label in there too.

Tomorrow night is Hallowe’en and I’ve just rustled up a very quick costume thanks to Martha Stewart. I’ll tell you all about it as soon as I have some photos. Happy Hallowe’en!