Yesterday evening I did some smocking.
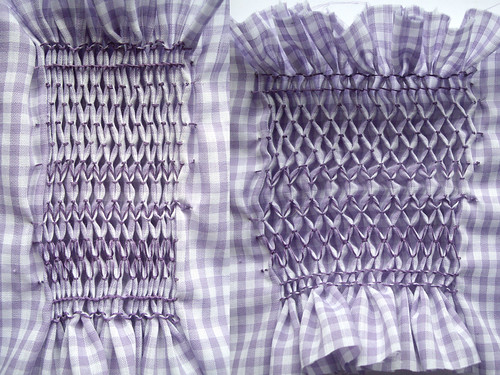
From top to bottom:
Cable, Stem, Honeycomb, Surface Honeycomb and Van Dyke stitches.
Ta-daaa!
Tonight’s endeavour is going to be trying out some fancier stitches – Wave and Trellis. Then I should be able to pretty much replicate this panel, from one of the reproduction smocks at the Museum.
I notice that the pleats I’ve made are much deeper than those on the reproduction smock. It seems as though the more stretch you want, the deeper the pleats should be. If the work is primarily decorative, the pleats can be much more shallow.
The stitches themselves control the amount of stretch. Cable and Stem stitches hold the fabric pretty firmly in place, although they do allow a little bit of give. Honeycomb is the most stretchy of the stitches on this sampler – I suspect that the travelling stitches like Wave and Trellis will also stretch quite a lot.
The size of the stitch in relation to the depth of the pleat also makes quite a big impact on the work. I’ve made quite small stitches on deep pleats, which allows for a lot of stretch. If my stitches had been larger or the pleats less deep, the whole piece would have come out completely different.
Smocking actually has some things in common with knitting – it matters which direction you’re working in, it matters which direction you put the needle into the stitch, and if you get all twisted up it just won’t work out right.
Working on gingham is pretty easy, because you’ve got ready made guidelines to follow. The real test will be making something neat on a plain fabric. There’ll be a few more samplers to make before I’m ready for that!
You might find these examples of Japanese Smocking on gingham helpful or interesting:
http://rosylittlethings.typepad.com/posie_gets_cozy/2008/02/where-i-smock-i.html
http://rosylittlethings.typepad.com/posie_gets_cozy/2008/02/picnic-skirt.html
Thank you!
I love Alicia Paulson’s stuff, it’s all so pretty. 🙂
The last time I was on http://www.abakhan.co.uk/
they had 1/8th inch gingham too. I am thinking of maybe doing a gingham valence for the kitchen just for fun and maybe smocking the top. Alicia did a cute chicken scratch one a while back for her living room or something.