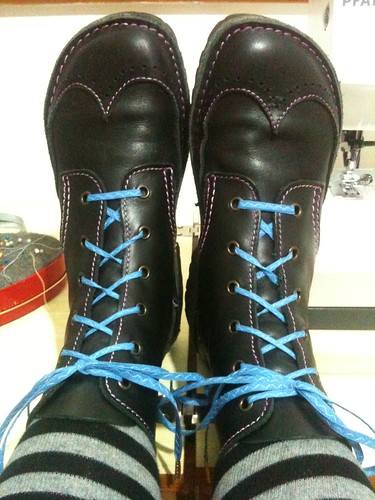
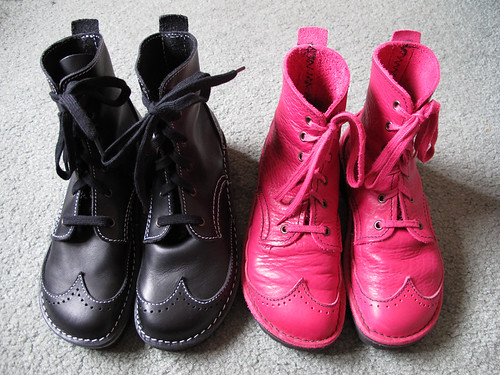
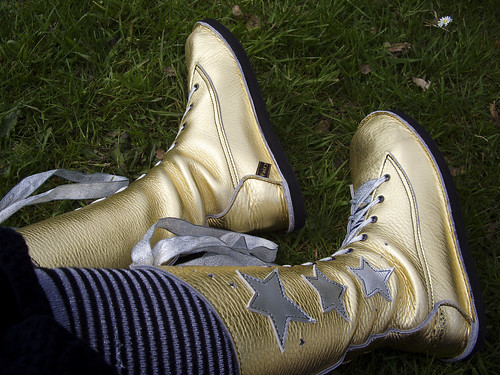
Prototype Shoes: Making Progress!

Felt shoes: First Prototype

Well, it feels as though it’s taken absolutely FOREVER, but I have just completed my first pair of prototype shoes made on my new lasts! After much waiting and worrying and more waiting, the lasts finally arrived at the beginning of August, and it’s taken me about three weeks to get the first pair made. Now that I know what I’m doing (and what changes I need to make), the next nine pairs should come about a lot more quickly!

The lasts have arrived!

I have twelve pairs of lasts in total, in European sizes from 34 to 45. They’re solid plastic (with a hinge for getting the lasts out of the shoes without stretching the uppers), and they’re really, really heavy! Thank goodness I didn’t choose the option with the metal sole plates!

Felt shoes: First Prototype

Most of the work I’ve been doing so far has been distinctly un-photogenic. It starts with mummifying the lasts in two layers of masking tape.

Felt shoes: First Prototype

Then comes the design, which you can now draw directly onto the last.

Felt shoes: First Prototype

Repeat for every size you want to make…

Felt shoes: First Prototype

And then you can peel off the tape and create the actual patterns.

Felt shoes: First Prototype

This takes a bit of technical wizardry (okay, it’s just technical drawing), so I turned to some shoemaking videos produced by Cordwainers at the London College of Fashion. (They helped a bit, but I think my shoemaking books and years of research were of more use at this point.)

Felt shoes: First Prototype

As uninviting as it looks, this photo represents my favourite part of the new shoes. I was able to find a good strong water-based glue, which means no more solvents and no more breathing equipment! No more shoemaking migraines! Hooray! I do still need to make sure I’ve got good ventilation, and I’ll probably wear a face mask anyway, but this stuff is so much nicer than the rubber cement I was using before. Here you can see the little wedge pieces (just 5mm deep) waiting to be glued to the cork midsoles.

Felt shoes: First Prototype

While I was waiting for the glue to dry, I cut and stitched the first pair of uppers from the new patterns. I can see some pretty bridal versions in the future, although most of my prototype pairs are going to be made in fantastically bright colours!

Felt shoes: First Prototype

This first pair is for me to test, and I decided to re-use the little felt oak leaves from the pair of green felt shoes that didn’t fit. (I managed to re-use the midsoles from those too, so I’m glad they weren’t too much of a waste.)

Felt shoes: First Prototype

They’re stitched into place by hand, and embellished with Swarovski crystals. It’s impossible to photograph how sparkly they are, but they glitter like little raindrops on the leaves. So pretty! Felt shoes: First Prototype

More waiting for glue… this time to attach the uppers to the midsoles. The only down side of this glue is that it takes thirty minutes to be ready to stick, as opposed to the ten minutes required by the horrible old stinky stuff. This is a very small price to pay, but it’s a bit of a trial for a very impatient person. (Who, me?)

Felt shoes: First Prototype

Once the glue had dried, I took them for their first walk! I definitely need to swap the ribbons for wider ones, as these have a tendency to slip around my ankles, but otherwise they seem great so far. I’ll wear them as much as possible over the next few weeks while I continue to make the rest of the prototypes. I should end up with ten pairs to show you altogether, and then I can pop them into the Etsy shop for you!

New shoes in progress…

Felt shoes

Did I mention that I was making some new shoes? I suspect that might be one of those things that I only mentioned on Facebook and Instagram, while I was having a bit of a break from the blog. I started working on them back in April, with some lovely wool felt from Cloud Craft.

Embroidered felt leaves

I’d originally wanted to make my own felt, but my hands and shoulders haven’t been well enough to allow that, so I decided to bite the bullet and buy some. I love the combination of felt and embroidery (I seem to be doing that a lot these days!), and I figured that I could use the techniques from my original fabric shoes to make something a bit more robust.

Felt shoes

This turned out to be very nearly the case. These are just lacking their rubber outdoor soles, and they look really good on the lasts – if I do say so myself!

Felt shoes

Unfortunately something went a bit peculiar in the sizing department. When I took them off the lasts and put them on my feet, they were enormous! By this time I’d already taken orders for ten prototype pairs, so I could thoroughly test the techniques before letting them loose in my Etsy shop. Obviously I couldn’t make ten pairs of shoes that didn’t fit their recipients, so I decided to bite the bullet and borrow enough money to allow me to order some lasts.

Ballet Flats lasts from shoe-last-shop.com, ordered in sized 32-45!

I found the perfect style at Shoe Last Shop, a company which specialises in selling small quantities of lasts to shoemakers without factories, who aren’t mass-producing thousands of pairs. I’ve ordered a full set of these, in European sizes 32 to 45. I suspect that the smallest and largest sizes will get a lot of use (which is why I wanted them), as most commercial shoe ranges only include sizes 36 to 41, sometimes up to a 43 if you’re lucky.

I was expecting to have ten finished pairs of shoes to show you by now, as the lasts were scheduled to arrive just over a month ago! Sadly there have been some production delays at the factory, and I’m going to have to keep people waiting a while longer, which I really don’t like. It’s bad customer service on my part, even though there’s nothing I could have done to fix it. (Well, except for not having taken the shoe orders, even for prototypes, until I had the lasts in my hands.)

Thankfully, I received an email yesterday to say that the production backlog had been caught up, and my lasts should be shipping in the next couple of days. I have a huge pile of felt read and waiting, so as soon as they turn up I can make new upper patterns to fit them, and get a move on with the shoes!

The Captain Samuel Vimes ‘Boots’ theory of socioeconomic unfairness

10734051_10152331012281574_2380779816979614773_n
Image © Fairysteps

“The reason that the rich were so rich, Vimes reasoned, was because they managed to spend less money.

Take boots, for example. He earned thirty-eight dollars a month plus allowances. A really good pair of leather boots cost fifty dollars. But an affordable pair of boots, which were sort of OK for a season or two and then leaked like hell when the cardboard gave out, cost about ten dollars. Those were the kind of boots Vimes always bought, and wore until the soles were so thin that he could tell where he was in Ankh-Morpork on a foggy night by the feel of the cobbles.

But the thing was that good boots lasted for years and years. A man who could afford fifty dollars had a pair of boots that’d still be keeping his feet dry in ten years’ time, while the poor man who could only afford cheap boots would have spent a hundred dollars on boots in the same time and would still have wet feet.

This was the Captain Samuel Vimes ‘Boots’ theory of socioeconomic unfairness.”

Terry Pratchett, Men At Arms

478831_379250662117541_1312318083_o
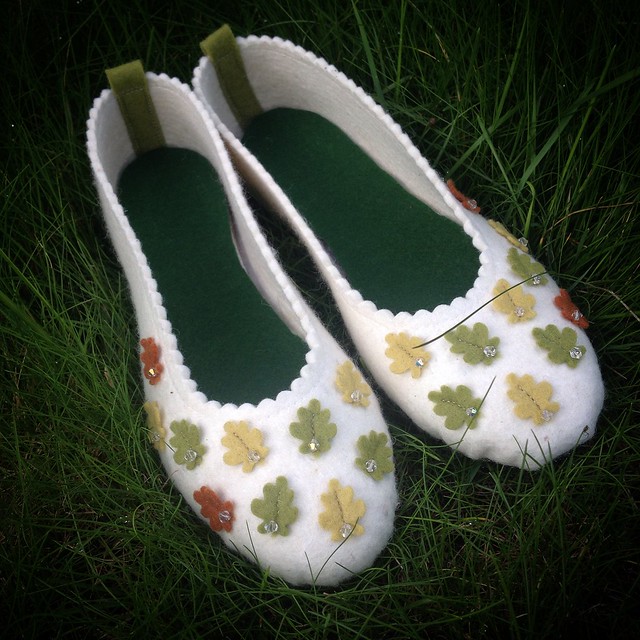
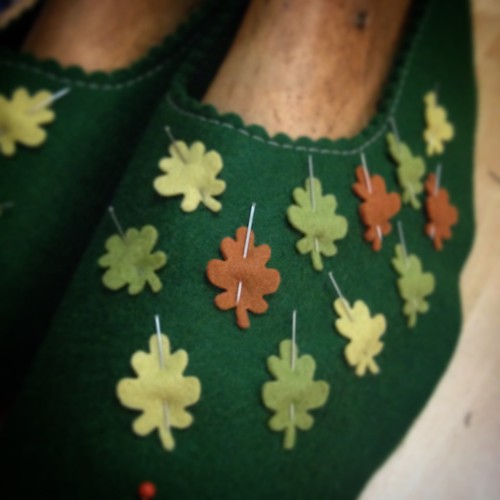
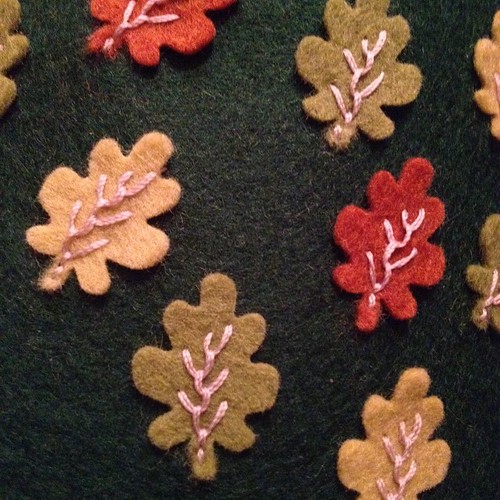
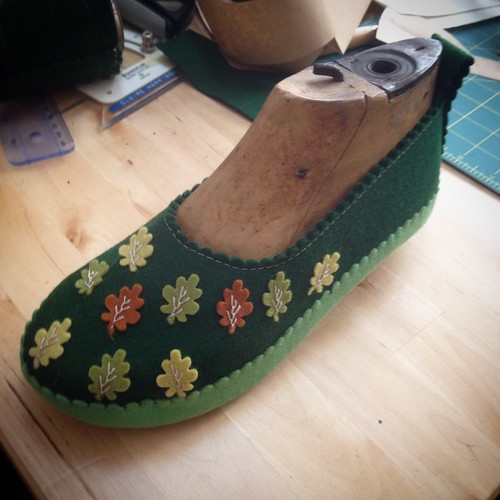
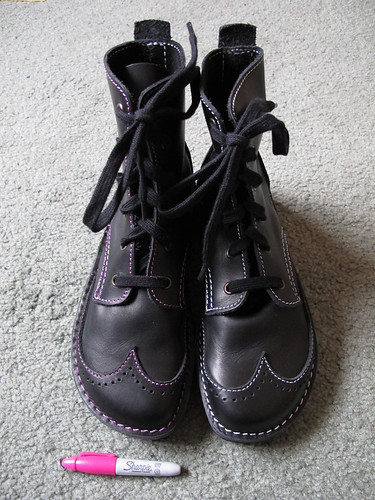
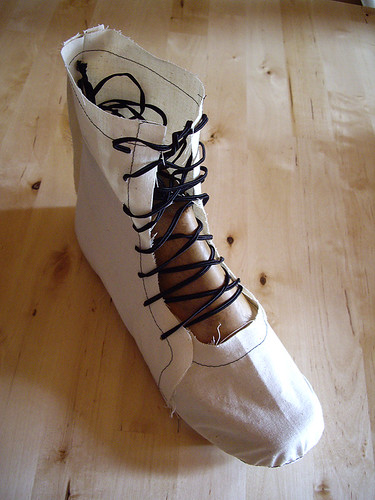
Image © Conker Shoes

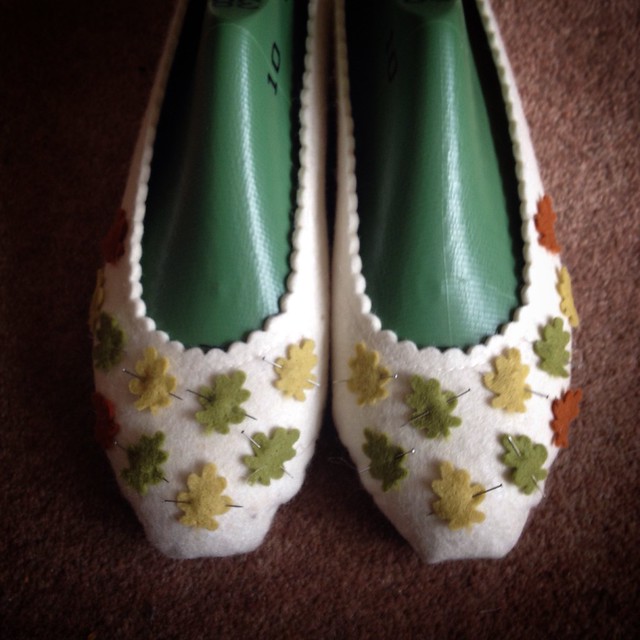
I used to be something of a shoe addict. As a child I had to wear Very Sensible shoes, but the moment I was freed from this tyranny I got myself a job in a shoe shop, and spent all my hard-earned cash (did I tell you about the time a toddler kicked me in the eye?) on buying ALL THE SHOES. This continued into my twenties, when I eventually stopped working in a shoe shop (and being kicked by toddlers, mostly), but carried on buying ALL THE SHOES. By the time I was in my thirties, I lived in a house with a dedicated Shoe Cupboard. I don’t think I ever counted them, but at the height of my shoe obsession I probably had something in the region of fifty pairs. A couple of them were very expensive. Most of them were very cheap, badly made, bought in sales, didn’t really fit properly, and certainly weren’t comfortable. Comfortable shoes were for losers! It was all about having the perfect pair to go with the perfect outfit.

After my first hip operation, I bought a pair of hiking trainers, and a pair of orthotics to go inside them. They were a revelation. I could walk! My back didn’t hurt! But wow, they were ugly. I did get rid of the majority of my ridiculously high-heeled shoes, but all I did was replace one addiction with another. I took to buying second-hand Dr Martens on Ebay, thinking that at least they were flat, and (mostly) comfortable. Soon I had a pair to match every outfit! And then the hip surgery came around again, on the other leg. My physiotherapist told me that Dr Martens, even with orthotics inside them, were the worst possible shoes I could wear. (But surely they were originally designed to be orthopaedic? What the heck?!) They were too stiff, offered insufficient support, and he convinced me to sell the lot. Heartbreaking.

Fairysteps Queenie

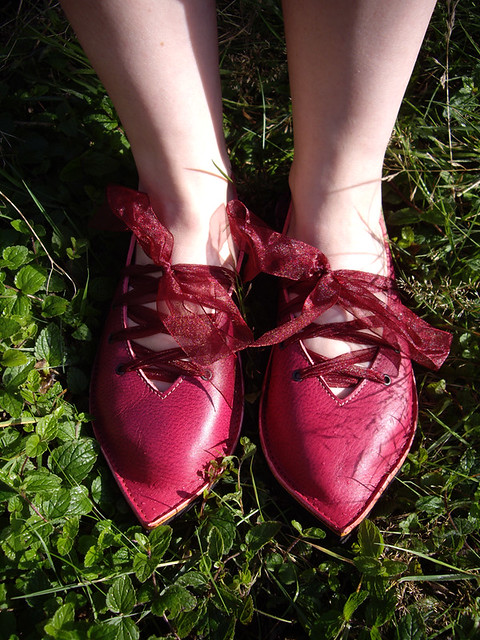
Since then, having reached the conclusions that 1) I really like being able to walk, and 2) I don’t really fancy having any more hip surgery until they eventually have to be replaced, I made the decision to buy Only Sensible Shoes. An initial online search turned up mostly horrible ugly orthopaedic-looking things, which was a bit depressing. Thankfully I eventually stumbled upon the wonders that are Fairysteps and Conker Shoes!

Conker Boots

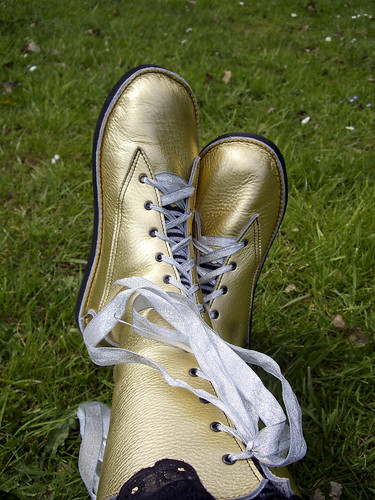
I now have a grand total of fifteen pairs of shoes. A small collection for me, but by my husband’s standards, this is triple the number of shoes a person needs. (He has two pairs of army boots, two pairs of Converse, and a pair of casual Merrells that he never wears.) I’ve been gradually building up my collection until I have enough shoes and boots that will work with with most of my clothes, and the only gap remaining is a pair of summer sandals. I’m saving up, and I’m going to buy a gold and silver pair from Conker, if the weather’s ever warm again.

Once my collection’s complete, I effectively won’t need to buy shoes! Ever again!

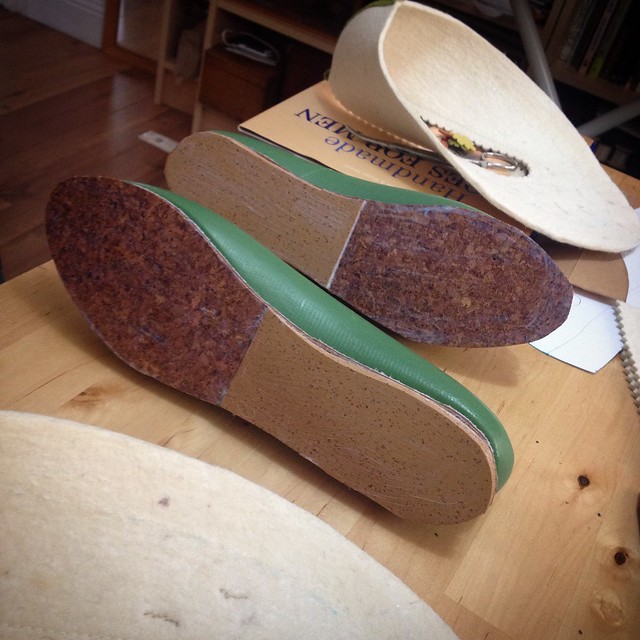
Actually, I try not to think about that too much, because it makes me shiver a little bit. But the whole point of Conkers is that they can be completely re-soled once they wear out, and then they’ll be lovely and fresh and new again. They can also fix mistakes! My black and silver brogues were my first pair, and I ordered them one width fitting too tight, and with soles that I don’t find especially comfortable. But, when the time comes to have them repaired, I can have the uppers stretched, and the soles replaced with ones I like – without having to buy a whole new pair of shoes!

Fairysteps Moonshine
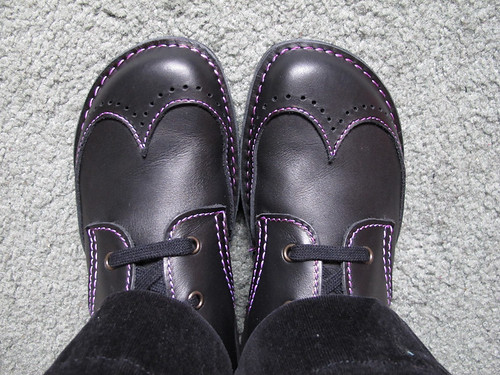
(Yes, I wear these to work. People take the mickey every damn time, but I wear them anyway.)

I’m not sure what to do about re-soling the Fairysteps collection – I don’t have a Proper Cobbler in my town any more, and I’m not completely convinced I can trust them to any old glue-a-rubber-heel-on shoe repairer on the high street. That’s a bridge I’m going to need to cross fairly soon, as the ones I wear most often are starting to get a little bit slippery as the treads wear away.

Anyway. What was I waffling on about?

Oh yes, I know.

At the end of the day, all of these shoes are really rather expensive.

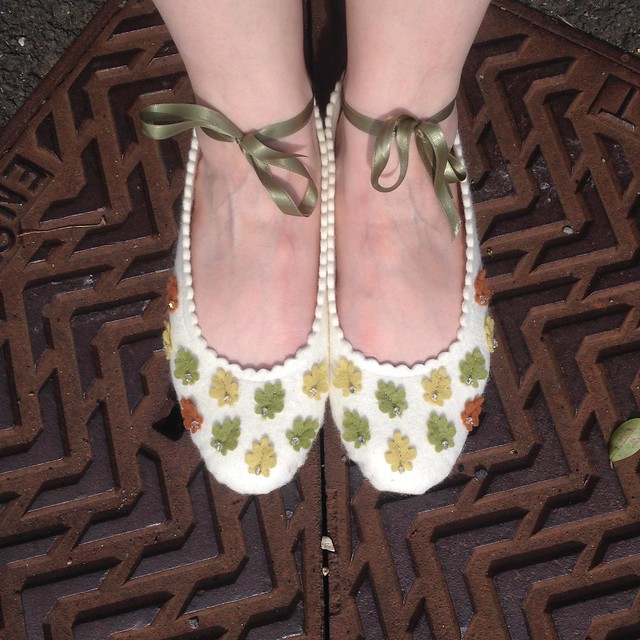
Like Captain Vimes, I can’t afford them. The boots at the top were bought for me as a joint Christmas gift by my husband, parents and sister, and I chipped in a bit towards them too. But, I think they’re worth the money.

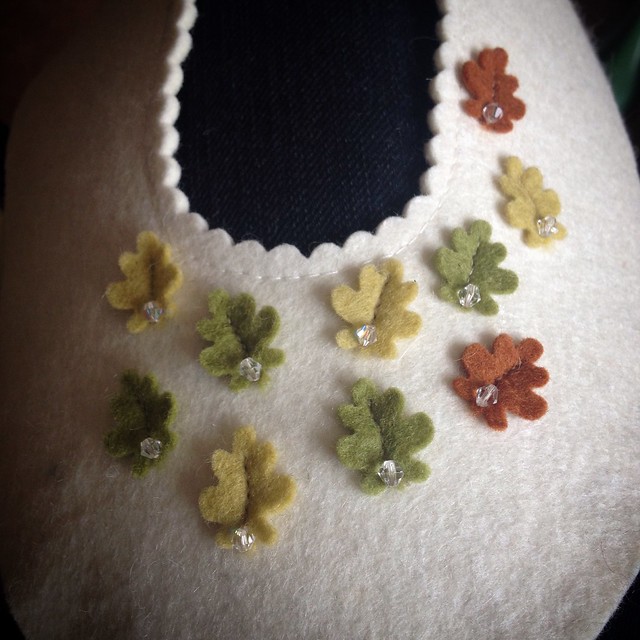
Each pair of these shoes and boots was made individually, by hand, by a single person. (Or a small team, in Conker’s case.) No factory, no thousands of identical pairs being pumped out only to end up in landfill when fashions change, so the impact on the planet in terms of both production and waste is much, much lower. And because they can be repaired, only the worn-out sole needs to be disposed of rather than the entire shoe, meaning less waste again.

The black & silver brogues were a colour combination that I chose, and Conker put together for me. I have a pair of Fairysteps boots that are turquoise with little brown birds on them, which are absolutely unique. Conker don’t make their derby boots with a brogue toecap – but when I emailed to ask them whether it was possible, they said yes. They also read my blog, spotted that my black & silver shoes were too tight, and recommended a wider fit when I bought the boots – a year later. How’s that for customer service?!

So yes, it can be very hard to reconcile spending a lot of money on a pair of shoes. Especially when you don’t have a great deal of money to spend in the first place. (Which, as someone who works part time, I definitely don’t!) But when you look at how long these boots are going to last, the kind of customer service that comes with them, and the greatly reduced impact on the planet thanks to opting out of mass production, the decision (to me, at least) seems a great deal easier.

Learning Curve

Spinning wheel

These past couple of weeks I seem to have been on a learning curve for all sorts of things. I’ve been trying to sort out the spinning wheel at work, which seemed to be going really well! I’d identified it as being a 1960s/70s Ashford Traditional, found a diagram to help me set up the brake band for the bobbin, and oiled it to within an inch of its life. It now treadles beautifully, and the flyer is very smooth… until I start trying to spin. Whether I’m trying to spin my own yarn or just wind readymade yarn onto the bobbin, as soon as I put the slightest tension on the yarn, the flyer stops turning. I know it’s a question of getting the tension for both the drive band and the brake band in balance with one another, but I just can’t seem to get it right! Very frustrating.

Bootlaces

Last weekend (the weekend before? I forget), I made some bootlaces. This involved a great deal of swearing at offcuts of bias tape and various feet on my sewing machine. I finally managed to get the stitching even and without danger of slipping off the edge of the laces (the blind hemming foot turned out to be the thing I needed!), but then I mucked up the aglets.

Bootlaces

I bought the lace tipper originally to put the metal ends onto corset laces. Then I stopped making corsets, so it’s been in a drawer for the longest time. I made some hand-folded bias binding for the Etsy store, and when it didn’t sell (despite a lot of people having favourited it – I think they all went away and made their own!) I thought I’d repurpose it to make pretty bootlaces. I’ve made laces with sewn ends before, but metal aglets are obviously much more durable.

Can I get the dratted tool to work right? No, I can’t. These laces were just too thick, so I trimmed them down… and didn’t manage to catch the trimmed part inside the metal. The instructions say that one side of the tool is bigger than the other, but it’s not marked in any way, and I genuinely can’t see so much as a millimetre of difference between the two. The laces are getting shorter and shorter as I cut the tips off and try again, and I’m not sure now many more little pieces of metal I can afford to waste!

So, the bias binding’s back in the Etsy store, along with the first batch of vintage buttons. Now I’m off for a quiet little lie down as, on top of everything else, I’ve somehow managed to put my back out again!

On the plus side though, I’m very excited to report that my hat blocks from Guy Morse Brown have been made, and will be arriving this week! I expect another learning curve to follow shortly…

Silk bloomers & Fairysteps…

Silk bloomers & Fairysteps

You remember the silk bloomers I made yesterday?

Silk bloomers & Fairysteps

This is what happened when we went outside to take some photos of them.

Silk bloomers & Fairysteps

I’m sure the local dog-walkers thought we were bonkers!

Thanks to Fairysteps for the gold boots and leather top, and of course to Paul for patiently taking dozens of photos, most of which I pulled a face at. (Or in.) I am not confident having my photo taken, or trying to climb a tree!

Shiny New Conkers!

Conker Boots

I don’t think I told you, back in January, about my glorious pink Conker boots? Here they are, having been worn for the past six months, and they really are the most comfortable pair of boots I’ve ever owned!

I ordered them in November, having seen a photo of a pair of magenta ripley (a very soft leather) boots on Conker’s Facebook page. Being in love with my Conker brogue shoes, I asked whether I could have brogue toecaps added to a pair of boots. The answer turned out to be yes… but not in the ripley leather, as it’s too thick. So the lovely team at Conker sent me three little circles of pink leather in the post, so I could choose which one I wanted for the toe cap. I went for a slightly waxy leather, but one that I’d be able to polish when they inevitably got a bit scuffed. Although I have to say that, six months in, they’re looking pretty good!

I knew I wanted a plain black pair pretty much the same as the pink ones, it was just a question of saving up enough pennies to pay for them. Just as I was beginning to wonder about the wisdom of spending such a lot of money on a pair of plain black boots, and half contemplating a return to Doc Martens, I spotted a gorgeous pair of black shoes with white stitching (again on Conker’s Facebook page) which gave me an idea.

Conker Boots

Dear lovely people at Conker, please don’t cry when you see this picture!

You see, I didn’t really want white stitching at all. I wanted pink. So the moment my boots arrived, even before I’d tried them on, I set about colouring in the white stitching with a pink Sharpie. As you do.

Conker Boots

I know that the stitching will eventually get dirty, and as I polish the boots it will eventually turn black. But for now, while they’re new, I have the simple pleasure of knowing that nobody else has a pair of boots exactly like these.

Perfect!

I’m also really pleased that all of my shoes (with the exception of trainers and waterproofs) are now made by hand, in the UK. So much better than all those mass-produced uncomfortable shoes I used to collect!

Fuzzy Feet

Dilemma of the day:

My feet have pins and needles and a burning sensation, which makes it quite difficult to walk without a walking stick.

My hands also have pins and needles and a burning sensation, which makes it quite difficult to hold a walking stick.

Tricky business.

My list of ridiculous and frustrating symptoms is getting longer and more annoying as the months go on. I do have an appointment with my doctor next week, but I don’t honestly expect anything to come of it. (Although I’m hoping for a referral to a rheumatologist, who can at least arrange for some tests I haven’t had already.)

Hey ho.

At least it’s a bit easier to put up with having very uncomfortable feet when you get to put them inside some lovely comfortable shoes. Fairysteps Holly, in case you were wondering. I wear mine with the ribbons around the ankle rather than across the instep.

Just as well I sold my entire shoe collection in order to buy these, really. I can’t imagine I’d have been able to wear a single pair of my old shoes right now!

Gold Rush

Darwin Barberry

It was a beautiful sunny morning, so I thought I’d go for a little walk and see what I could find. Flashes of gold were everywhere! This Darwin Barberry was covered with the most amazing flowers…

Kerria Japonica

…as was this Kerria Japonica.

Primroses

The primroses outside the church were beautiful…

Peacock butterfly on dandelion

…and I found a peacock butterfly having a spot of lunch on these glowing dandelions.

Gorse

The gorse was lovely in all its fluffy spikiness…

Lesser Celandine

…while the Lesser Celandines shone out from under the trees.

Cowslips

Cowslips were nodding their heavy heads as I walked…

Fairysteps Moonshine

…but the most lovely golden things on my walk were the ones I took with me.

Fairysteps Moonshine

These are my Moonshine boots from Fairysteps. Hand made in the depths of Dartmoor by the lovely Ren, these are the only pair of their kind in existence, and she made them just for me! How lovely!

I can’t tell you how soft they are, and how comfortable. The only trouble is, they’re so amazing that I’m going to have to sew myself a whole new wardrobe full of clothes in order to do them justice! Still, I can’t see that being too much of a difficulty, can you?

Stripy Boots

Stripy Boots

Ta-daa!

This pair isn’t wearable outside, mostly because I made an error in the construction (I am clumsy, and accidentally snipped a little hole in the outer fabric), so I sewed felt slipper-soles onto the bottom. Annoyingly, this took longer than it would have done to glue the rubber soles on, but it meant that I could try them on and walk about in them for a bit, at least inside the house.

There are some little adjustments I want to make to the pattern, but this is fundamentally it.

I’m waiting for drawings-of-feet from a couple of willing prototype testers, so I’ll be able to show you some different versions of these as I make them. I’m looking forward to the peacock-coloured silk pair that have been requested!

Prototype Boots: Take Two

Muslin Boots 2

I made another little boot prototype, sort of idly based on the construction of Converse, but developed from my existing shoe pattern. The black stitching lines are the seam allowances, so they’ll be a little more cut-away than they appear.

I need to make the curves more shallow, as they’ve come out a bit right-angled on this little boot, but I think the style might just work.