Goodbye, Bishopston Trading.

The parcel!

Bishopston Trading closes tomorrow, after 28 years in business. This is the statement, in full, from their website:

“It is with great regret and sadness that we have to announce that, after 28 years in business, the Bishopston Trading Company will close at the end of July 2013.
The village of K.V.Kuppam, where our clothes have always been made, has seen huge changes. An entire generation has grown up since we started. All our workers’ children have been educated and very few are now seeking jobs as tailors, embroiderers or appliqué workers. The problem is even more acute with our weavers. In 1985 we formed a partnership with a community of handloom weavers in the village. Weaving is a traditional craft skill, passed down within families. We helped pay for a scheme to enable weavers’ children to stay in school until they were 17 years old. Many have been able to go on to higher education. There are now not enough weavers in the area to keep up with the supplies we need.

While India has developed financially, Britain’s economy has been slow for five years, and this has changed the buying habits of our customers. Our customers tend to be thoughtful, concerned, cautious people (a bit like us). They worry about the environment and over consumption and debt. They have not deserted us but are buying less – this is particularly evident with our online customers.

We can now no longer continue and wish to close down our business voluntarily and ethically and in an honourable way.
We would like to thank our loyal customers, in Britain and around the world, who have supported us for many years.”

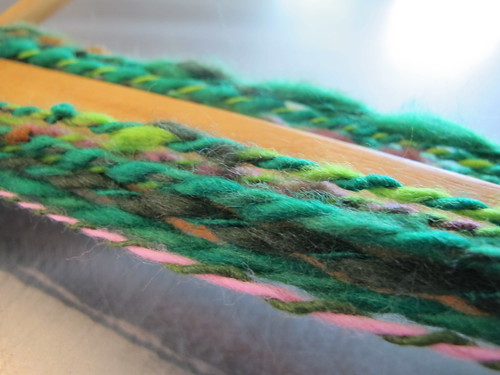
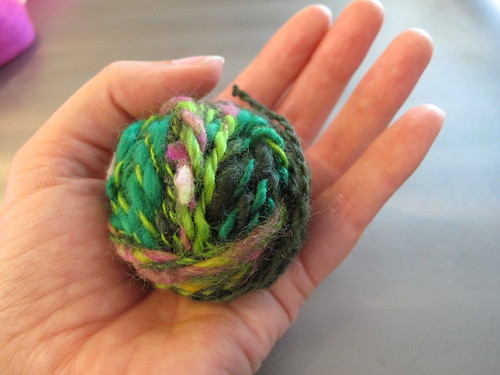
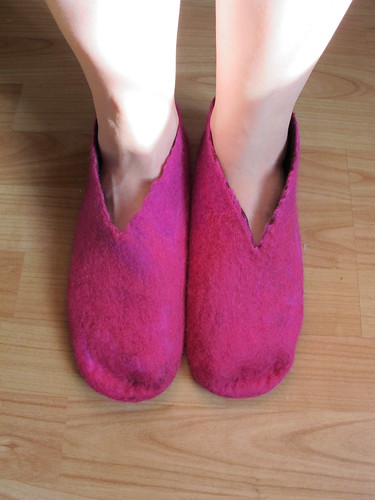
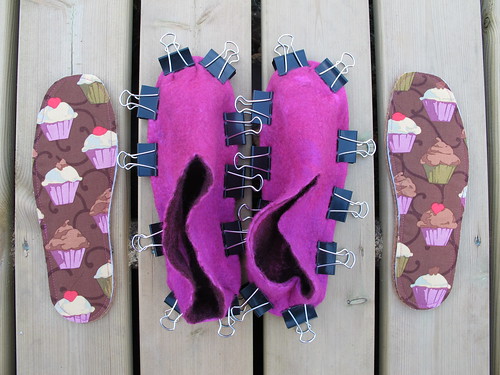
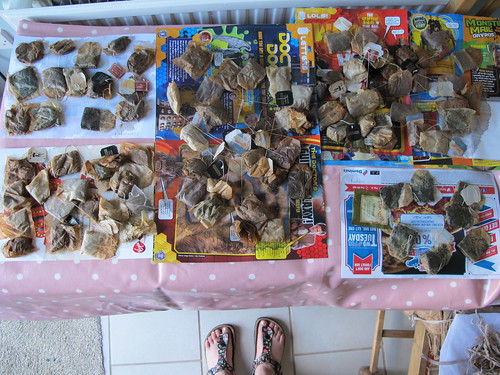
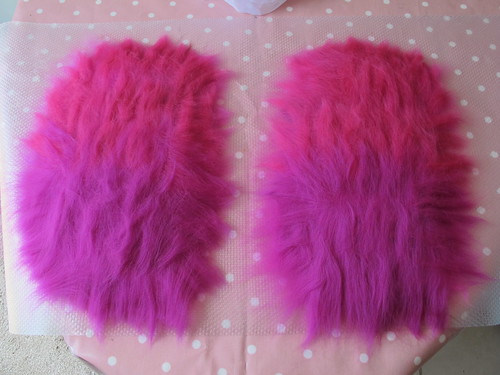
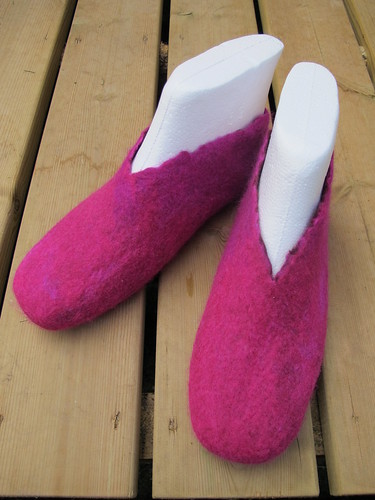
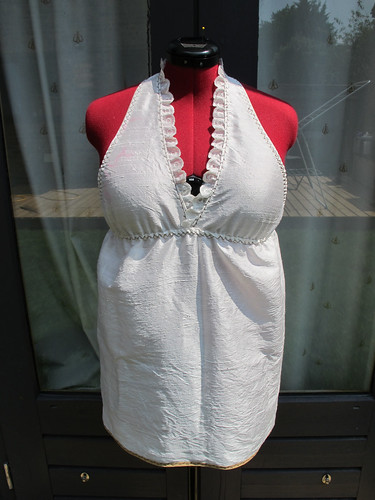
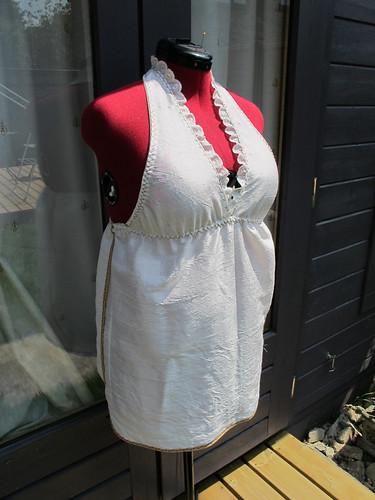
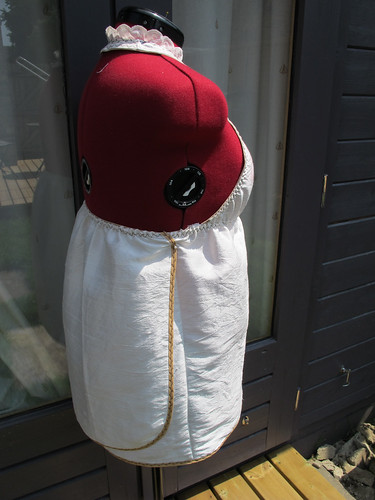
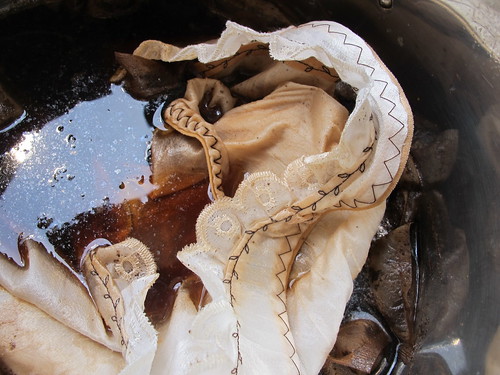
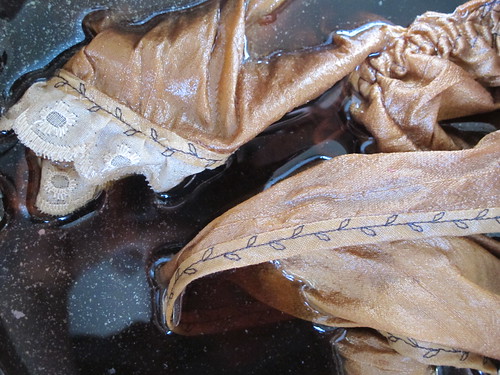
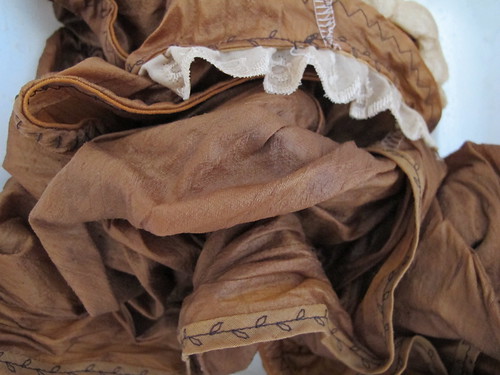
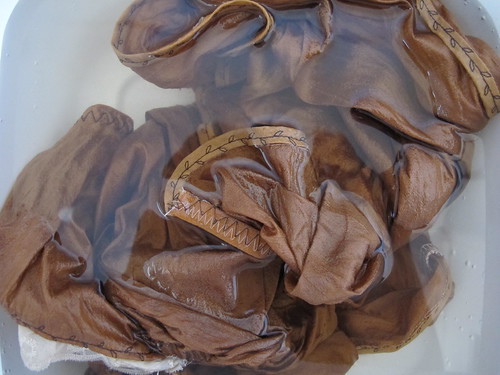
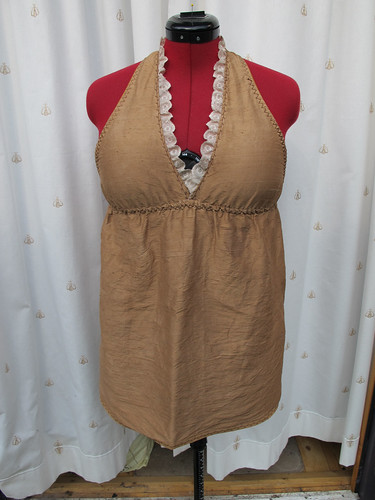
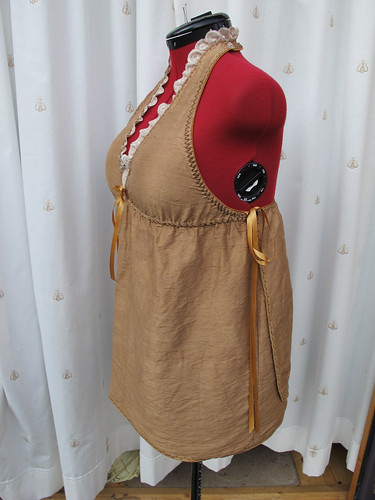
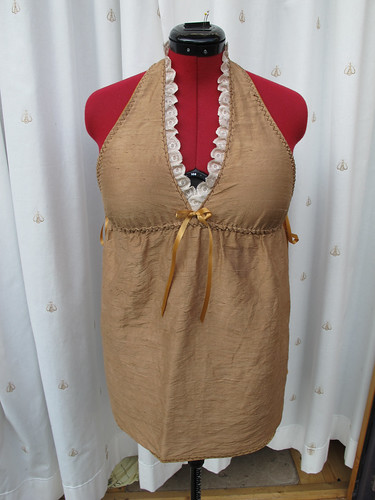
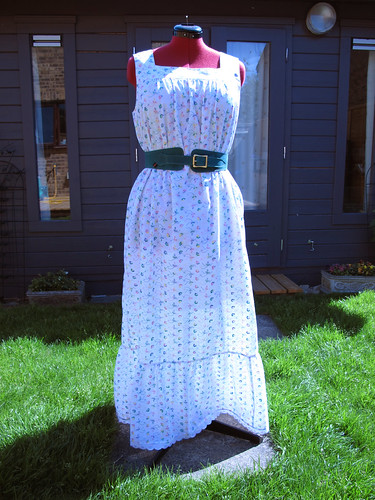
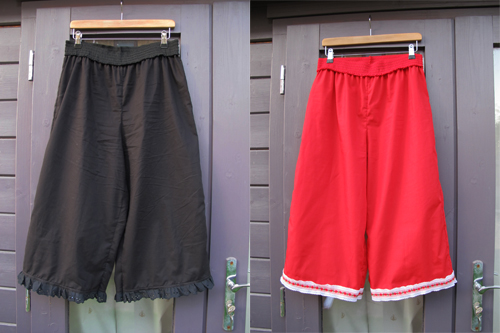
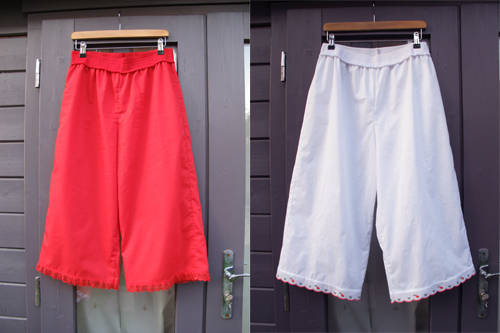
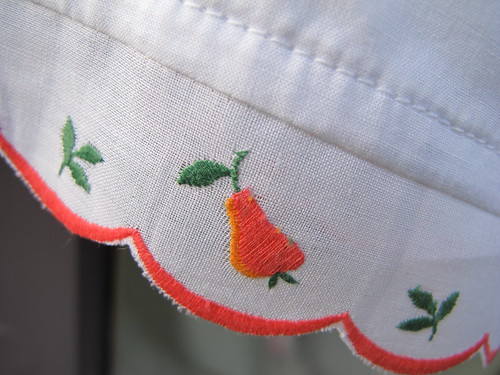
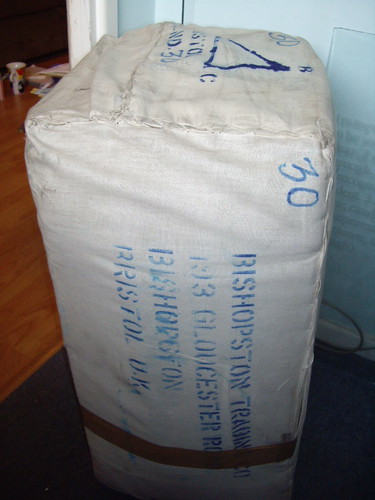
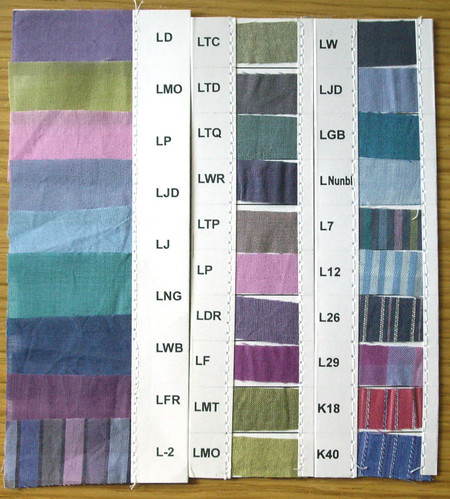
The photos, above and below, are from the one and only wholesale order that I placed with them in 2008. To be perfectly honest, I ordered far too much, and five years later I’m still using it. I may have been a small and infrequent customer of Bishopston’s, but I’ll still miss them.

Bishopston fabrics - straight out of the box

There’s something that intrigues me about their statement though, and it’s this:

All our workers’ children have been educated and very few are now seeking jobs as tailors, embroiderers or appliqué workers. The problem is even more acute with our weavers.

So we’ve set up these co-operatives, and we’ve paid fair wages, and we’ve educated all the children… but there’s nobody left to do the weaving. Because traditional skills, passed down from person-to-person, generation-to-generation, simply aren’t valued any more.

Now I’m certainly not saying that any child, anywhere in the world, should have to forego a formal education in favour of sitting at home with multiple generations of their extended family and learning to weave. But if nobody learns how to weave, or sew, or lay bricks, or install plumbing… because those kinds of practical skills simply aren’t valued in an “educated” society… then how long will it be before we’re all naked and homeless? How bad do things have to be before actual practical skills are seen as anything other than menial?

New Bishopston swatches

I’ve learnt a lot of practical skills over the years. I very much doubt I could remember my Girl Guide training in how to make a shelter and find clean water, but I can still make a damn good stand for a plastic washing up bowl, given enough pea sticks and a handy ball of string! I’m hopeless at cooking, but I know how to make bread, how to make butter, and how to forage for some edible plants. (And how to burn baked beans inside the can into an inedible mush over a campfire. Thanks again, Baden-Powell!) I may not be retting a pile of stinging nettles to weave my own cloth, but I’m learning to spin wool, and I can knit, and I can sew and mend my own clothes. I realise that “naked and homeless” is a shameless piece of hyperbole. And I’m all too aware of the hypocrisy of decrying any skills other than the strictly practical whilst sitting at my computer shouting pointlessly at the internet.

What I’m searching for is balance. Something that seems to be lacking almost everywhere I look right now.

Coddlers!

In an unexpected departure from showing you Stuff I’ve Made, this time I’m showing you A Thing I’ve Bought. These things, in fact – a pair of Royal Worcester Egg Coddlers. They cost me a grand total of £6 on Ebay, and £5 of that was for shipping! There are loads more out there at a similar sort of price, if you fancy coddling an egg for yourself. I bet they often turn up in charity shops too.

I’d assumed that these were a mis-matched pair (which, considering they don’t match anything else in my kitchen, wasn’t really a problem), but the internet informs me that the “Evesham” designs often came in sets featuring different fruits. The plum and blackberry combination (as above) seems to be the most common.


Image © www.egg-coddlers.com

The size wasn’t given on the Ebay listing, but I think these are “standard” one-egg coddlers. (On the left of the image above.) Royal Worcester used to make four different sizes – Standard for one egg, King Size for two, and then Jumbo or Maxime which is apparently big enough to prepare a small stew! I think I might need to go hunting on Ebay again for one of those! They’d be fantastic for camping (not that I do that), assuming you could rustle up a pan of boiling water. Apparently they’re also brilliant for warming baby food, should you need to.

So, for those of you wondering what you do with an egg coddler… well, apart from the obvious answer of make coddled eggs… you break your egg into the coddler, pop the lid on, and stand the coddler in a pan of boiling water until your egg is cooked. (You can lift it out to check, using a spoon handle through the ring on the lid, if you’re not sure how long it’ll take.)

In case you’re wondering why egg coddlers, I’ve been advised by my doctor to eat (amongst other things) more eggs. Which shouldn’t be too difficult, considering that the current number of eggs I currently eat is none, if I can help it. I just don’t like them very much. They wobble, and I don’t eat wobbly food. (Except jelly. Obviously.) I don’t like fried eggs, because the whites have a funny texture. I don’t like boiled eggs because I can’t get the hang of cooking them properly. They’re always either too wobbly, or boiled until the yolks have gone a bit grey. Scrambled eggs are only any good if my Mum makes them (full of milk and cheese, which I’m supposed to be avoiding), and I can’t eat poached eggs because the texture makes me cringe. I do realise that coddled eggs are basically just poached eggs in a fancy pot that you then have to wash up. But frankly, if I can use a fancy pot from Ebay to trick myself into being excited about eating a food that I don’t much like, I’ll go for that.

(Although I rather wish I hadn’t looked too closely at the Royal Worcester website. I’ve just discovered that “Evesham” is still a current design, which means I now have to convince myself that I don’t need a set of porcelain-handled spoons to match my egg coddlers, or a matching plate to put them on, or a set of matching cups and saucers…)

Now I just need to wait for them to arrive, and I can get coddling!

My first handspun yarn!

Plied handspun yarn

Well, it took me long enough, but today I took my singles off the drop spindle, and turned it into yarn! I wound it off onto a plastic bottle which took the place of a nostepinne. I was then able to use both ends of the same yarn, and ply them together with the spindle.

My first handspun!

And here it is – my very first ball of handspun yarn. A whole ten grams of thick-and-thin, funny-coloured, badly spun, badly plied hand made yarn!

Little Mikey's Monstrous Scarf

I wasn’t sure what I’d be able to knit with such a little amount of yarn. (I wasn’t able to spin any more because the spindle needed to be emptied before the spinning workshop that’s running next week.) It turned out that Little Mikey was in need of a scarf, so I thought my monstrous handspun would be the perfect yarn! I used my Simplest Scarf in the World tutorial, with two 5mm needles and one 12mm. It came out just long enough, and I’ve saved the last couple of inches of yarn as a memento.

I have to say that ticking the “my handspun” box on Ravelry was very satisfying. I hope I’m able to make a lot more!

Felted slippers – part two

Too big!

Awww. They’re too big! I knew the lasts would be quite roomy around the top, and I do plan to cut these away to more of a ballet pump shape. But still. Too big.

Too big!

Look how much room there is in front of my toes! The lasts were a size 38/39, but I’d say these have come out around a 40/41. I did toy with the idea of chucking them in the washing machine, to take the hard work out of shrinking them a little bit more, but was so worried about them coming out the right size to fit my two year old niece that I decided against. (Not that I begrudge her a pair of pink felted slippers, but I want these to be mine!)

Soles and insoles

So, I went back to my long-neglected shoemaking supplies, and have given them rubber soles along with cork-and-fleece insoles. These are now sitting on the deck waiting to dry, while I’m recovering from the fumes from the glue. Wow, that stuff is disgusting. Even wearing a respirator and eye protection, you can still smell it a bit, and it still makes my eyes water. That, along with the terrifying health and safety warnings, makes me think that there must be a better solution than glue. I mean, what’s the point of painstakingly hand crafting a pair of slippers from natural materials… and then whacking four layers of highly toxic rubber cement all over them?

They do need some kind of sole though. On laminate flooring and tiles they’re slippery enough to be absolutely lethal, and of course without soles they can’t be worn outside. Time to go back to my shoemaking books (and maybe a few museums with non-leather shoes?) to come up with some more ideas.

Lots and lots of tea bags...

Meanwhile… this is the scene in my kitchen at the moment. Remember I said I was going to take all my frozen tea bags out of the freezer, to make room for ice cubes? Well, I did that, and I left them all out on a table in the garden to dry overnight. Except that, for the first time in weeks and weeks, it rained. It rained A LOT. So now they’re on the kitchen table, drying off again.

I have no idea whether they’ll have any dyeing properties left whatsoever, after the amount of water that landed on them last night! Hopefully they’ll still leave at least a little trace. I’m still not entirely sure what I’m going to dye with them yet, but after a few experiments with the leftovers in the tea urn filled with assam, I’m thinking it needs to be silk for the best results. Which is the one thing, of course, that I don’t have a great deal of in my fabric stash! I might need to make a bit of extra room by sewing up some of the cottons first…

Pink Felted Slippers

Felted Slipper Tutorial

Today I spent about three and a half hours transforming this…

Felted Slipper Tutorial

…into these!

I have to say that, although they’re not quite finished yet, and there are definitely things I’d do differently next time, I’m really pleased with my first attempt at resist felting!

I’m currently impatiently waiting for them to dry. I was hoping it would take less than 24 hours in this heat, but the humidity’s so high at the moment I think they might actually be getting wetter the longer I leave them out in the garden.

Whilst they look toasty warm, I think these will turn out to be summer slippers. I only used four layers of merino to make the felt, and really they need to be a lot more sturdy than this if they’re going to last any length of time. I’d also like to be able to glue a rubber sole onto future slippers, and this pair are much too thin for that. Perhaps I’ve really made myself some nice warm socks? (In the middle of a heatwave! Brilliant!)

I spent about an hour this morning searching for a good tutorial, with lots of pictures, explaining how to use the polystyrene lasts without taking the (altogether too risky for me) option of just chucking them in the washing machine. I couldn’t find one, so I’ve written my own. Because this was my first attempt, it will no doubt be edited as I go along and find ways to improve things. In the meantime, you can read it here!

Tumblr: June archive

Here’s my Tumblr archive for June – better late than never!

You can see the archive in more detail, here.

I haven’t been using tumblr as much lately. I got bored of seeing the same images flash past over and over again, so I decided to see who was following me, and clock back to follow everybody. This turned out to be a HUGE mistake, as the signal-to-noise ratio is now so bad that I can barely find anything I like at all!

I still haven’t really got back into Pinterest either, and I feel as though my own tumblr’s getting very samey, somehow. Perhaps I need to get away from the computer a bit more, and look for inspiration in the real world.

Assam Tunic

Assam Tunic

Today I decided to take a day off from doing anything I “ought” to be doing (like packing the house ready for the move), or any kind of “useful” sewing (like more bloomers and summer tunics to wear in this ridiculous heat), and make something that had been nagging at the back of my brain for a few weeks.

This is a silk dupion tunic, with broderie anglais trim and bias tape edging, waiting to be dyed in the tea urn. The stitching is brown because it’s polyester and therefore won’t dye, so I wanted to use a colour that would tone in afterwards. (In future I’ll use cotton thread, but right now I’m using up the stash.)

Assam Tunic

The tunic is elasticated all the way around the waist, under the bust, and around the edges of the top. It wraps over at the back. The broderie anglais trim might be polyester, polycotton at best, so it’ll probably stay cream.

Assam Tunic

It has a fixed, ruffled halter neck, and wrapover back detail. The bias trim is polycotton, and won’t take the dye as well as the silk, so I chose a colour that would still look good with whatever dye it did take up.

Assam Tunic

First dip into the tea urn…

Assam Tunic

The tea itself had been brewing for about two hours. This photo was taken after about another two hours in the tea, and the fabric was already much darker than it looks in the photo! You can see that the trim is still very pale, but the bias binding tones in nicely. The machine embroidery on the trim represents the tea leaves in the dye. (Although I used bags in the urn, as they were left over and out of date.)

Assam tunic

Squeezed out of the tea, the bias trim has taken up the dye nicely, but the broderie anglais is still very pale. The white overlocking on the shoulders is unfortunately on the outside. I had a bit of a moment when applying the broderie anglais, so I made the executive decision that two little white seams on the back of the neck wouldn’t matter too much on an experimental piece.

Assam tunic

Rinsed until the water ran clear…

Assam tunic

Here it is dry, and just waiting for finishing touches. I hung it outside, in the shade so it wouldn’t get bleached by the sun, and it dried at record speed. (I suppose the heatwave has its uses.)

Assam tunic

I added gold ribbons at each side to fasten, and another one in the front for decoration.

Assam tunic

Ta-daa!

There is a little bit of a story behind this piece. The assam tea bags were bought specifically for a reunion with a long-lost friend, about three years ago. Said friend then always seemed to be too busy to come and visit me enough times to actually drink the tea, and we’ve since all but lost touch again. It wasn’t until I came to tidy the kitchen cupboards to sell the house, that I realised the teabags have actually been out of date for eighteen months. Rather than waste them, I thought I’d turn them into something pretty for myself.

Going to work in my nightie

Broderie anglais dress

Anybodywho follows me on Facebook will be aware that a) we’re having a heatwave in the UK, and b) I’m not enjoying it. (Please note: this may be an understatement.)

I’m really not cut out for existing in hot weather, never mind still having to go to work and actually Do Things on a daily basis. My current medication makes me light sensitive, which means I burn even more easily than usual, and my eyes hurt. I also overheat easily, which means I sweat a lot (lovely!), which means I’m now on my summer diet supplement of disgusting electrolyte drink sachets, as it’s physically impossible to drink enough fluids to replace what I’m losing in the heat. Not Fun.

So, in order to alleviate the horror of the summer just a little bit, I decided to make myself a couple of Emergency Dresses. They’re both from the same pattern, one I drafted a couple of years ago. I wear the black linen version all the time, so a white one seemed like a good idea.

White linen dress

The one at the top is white cotton broderie anglais, with multi-coloured embroidery. It’s lined down to the knees with plain white polycotton, and I’ll probably wear a pair of bloomers underneath too, to combat horrible sweaty legs. (Classy!) I am slightly concerned that it looks rather like a nightie, especially since I added some matching rainbow coloured broderie anglais trim to the bottom. (It has the cutest little stars on it! Not as awesome as the pears, but still pretty.) I might add some big patch pockets onto the front, to make it look more like a dress than a nightgown. But I think with a nice belt, it doesn’t look too much as though I’ve accidentally gone sleepwalking.

The plain white one is linen. You can’t really tell from this picture, but I definitely should have lined it. And I didn’t. The black one isn’t lined, and the linen is a thicker fabric than the broderie anglais, and of course doesn’t have holes all over it. However it is a looser weave, and the light does pass through it rather well. I think this one might end up as a layering dress rather than being worn on its own. Sadly that means it probably won’t come out of my wardrobe until the weather starts getting a bit colder again. (Can’t wait!) Unless of course, I decide to just wear it as a nightie, on the days when I’m too ill to do anything other than pootle gently around the house. A pretty lounging dress might be quite a nice thing to have, come to think of it.

Blooming Lovely

black & red bloomers

Today I have been mostly making bloomers. I made a pair on Tuesday afternoon, from some deep purple cotton lawn, which I wore to work on Wednesday. They were so comfortable in this heatwave we’re having, that I got up today (my day off) and made four more pairs!

Please excuse the creases on the black ones – I tried them on when they were finished, and they were so comfy I wore them for most of the day! They’re cotton lawn, trimmed with broderie anglais trim that I salvaged from a skirt that wore out years ago. The red ones… I’m not quite sure about. I love the trim – it’s vintage white nylon lace, with a little row of red machine-embroidered roses running through the middle. Worn with the right dress over the top they might look great, but at the moment all I can think of is Christmas!

Red & white bloomers

This pair’s better – a slightly different shade of red, trimmed with inch-wide nylon lace. I want to stand on an embankment and wave these at a train, though I suspect I might get into trouble! And yes, I know that Jenny Agutter waved a red flannel petticoat, not a pair of bloomers, but wouldn’t it be a fantastic image to recreate? Both red pairs are polycotton, left over from my Steampunk costumes. I’m not sure why I had so much left, or why I decided to make two pairs of bloomers given that I have no other red clothes to wear them with, but I like them anyway.

pretty pear trim

The white ones though, they’re my absolute favourites.

I pulled the fabric out of a box thinking it was going to be the slightly stiffer polycotton, and was thrilled to discover that it was actually a piece of cotton lawn, just big enough for a pair of bloomers! But look at this trim, isn’t it absolutely adorable? Little pears, for goodness’ sake! I have no recollection of where I found it. It could have been a random Fabric Land bargain, it could have turned up in one of my vintage haberdashery boxes. I only had a small piece, so I’ve been waiting for the perfect project to use it on – and here it is!

Unravelling

27/05/2012

Starting today, and for the next eight weeks, I’ll be taking part in Susannah Conway’s “Unravelling” e-course. A bunch of women from all over the world will be getting together online, to share photos and respond to writing prompts, with the aim of getting in touch with our “real selves”.

See, I’m already so nervous about what anybody who might be reading this will think about it, that I’ve put “real selves” in inverted commas as an act of self defence. To show I’m not taking it too seriously. Except I am. I’m taking it very seriously indeed.

There are a lot of things going on in my life at the moment. You’re aware of the surface details – my job has changed, I’m struggling with my health, we’re moving house. I’m also going to be 40 this year, and phrases such as “mid life crisis” are being thrown around. After we’ve moved, Paul and I want to change some of our routines, improve the way we live. I certainly want to improve and change the work I do outside of my “proper job”, and to think more deeply about why I’m doing it, and what it means to me.

I won’t be sharing everything I do for the course here, although I will certainly share some of the thoughts that come out of it. The first assignment will be posted later today, and I’m both nervous about it and looking forward to it at the same time. Let the unravelling begin… I can only hope that I don’t fall apart in the process.