Inexplicable Emporium

Remember the picture that was propped up against the wall in my Shed? Here it is outside, in the last of the snow, looking rather smart on its nice new easel.

We’re getting ready for a stall at an event in May, which I’ll tell you a bit more about once we’ve received confirmation that we can go ahead! Hopefully we’ll be launching the INEXPLICABLE EMPORIUM there, and this is the sign that we’ll be taking with us!

I’ve been ordering lots of materials and packaging, and doing a bit of product design while I wait for them to arrive.

Hopefully some of the things that I’ve been showing you recently are starting to make a bit more sense now!

I also have all of the ingredients necessary to make some scented candles, to which we’ll be giving thoroughly silly names and descriptions.

The idea is to give the impression of a Victorian-style shop, with a wide range of different products. Obviously the things I’m making are thoroughly anachronistic, but that’s all part of the fun! I’ve been really enjoying writing the copy and designing the labels. I knew my degree in Typography & Graphic Communication would come in useful one day…

Ghostly pants…

Ghostly pants...

Here I am, showing my underwear to the internet again. Please excuse the glimpse of my horrid garden beyond, I’m far more embarrassed about you seeing that than I am about showing you my knickers!

These started off life as a teddy, but I made a mistake while I was applying the elastic to the top. It didn’t fit right, and the straps kept falling off my shoulders, so I decided to take the scissors to it and try again. This is the result – a pair of french knickers in lovely soft bamboo fabric.

The centre front and back are finished with french seams, but I got a bit lazy at the side seams and just overlocked them. The legs are lazier still – just a lettuce hem run straight through the overlocker.

I wanted to use a soft, wide elastic as I thought that would be more comfortable than a narrow lingerie elastic that might dig in. I deliberately didn’t cut them on the bias, mainly because I didn’t have enough fabric to do that when I was cutting an entire teddy, and also because the fabric has such good drape that I didn’t think it was necessary. I may change my mind as I wear these, but they’re so soft that I think they’ll be fine.

Now all that remains is to wear and wash them a few times, and see how they cope with actually being worn. If they’re as comfortable as they look, I can foresee plenty more pairs of little bamboo shorts in my future wardrobe!

Steel Wool Pincushions

Steel Wool Pincushion

I should probably state first of all that I copied this idea shamelessly from Mister Finch, who shared his gorgeous pincushions (in vintage silver trays) on Facebook. I was so smitten that I made my own.

It was incredibly easy to do, and there’s a tutorial for you here.

I bought the steel wool in Wilkinson‘s, and I was very tempted to buy a cheap heart-shaped dish that I’d spotted just down the aisle. Then I remembered that I already had these two heart shaped tins sitting empty at home. They’re a souvenir from the days when Paul worked for a company that had an office very close to a chocolate factory in Belgium. The bigger tin contained praline hearts, and the little one had dark chocolate with marzipan. My favourite!

The lovely flower-head pins in the little heart were a Christmas gift from my friend Chris, who makes amazing quilts. I might have to invest in some more of these – they’re much longer than ordinary dressmaking pins, and so pretty!

At the moment I’m finding that my work time is eating increasingly into my non-work time, with lots of meetings and planning and stress. I find that quick and easy projects like this will cheer me up immediately when I can at least end the day having made something both beautiful and useful.

(Also, I very much enjoyed the part where I got to stab all of those pins into the steel wool. Extremely therapeutic!)

Spoke too soon…

Harris Tweed cufflinks - heather pink & orange

Well, the purple cufflinks were going to be mine, all mine… and then I posted a picture of them to Facebook, where my friend Patrick made the persuasive argument that they’d go perfectly with his purple Blaqua shirt.

So now the purple ones will belong to Patrick, and these lovely orange and lilac heathered ones can go into the cuffs of my shirt with the pink, purple and orange flowers. Perfect!

If anybody’s looking covetously at this pair, I do have another piece of identical Harris Tweed, so I will be making some more! I’m going to try not to make too many duplicate sets, as I want these to be as individual as possible.

Harris Tweed cufflinks

Harris Tweed cufflinks - purple

I recently bought a packet of teeny-tiny offcuts of Harris Tweed, from a seller on Ebay.

Today I was feeling thoroughly overwhelmed by the amount of things I need to do and the amount of time I’m spending doing admin-type tasks instead of being creative, and I simply had to MAKE SOMETHING.

So, here’s a pair of Harris Tweed cufflinks in an absolutely glorious shade of purple.

There will be future Harris Tweed cufflinks available for sale, but this is the only pair in this colour, and they’re mine, all mine!

Pads, pouches, pillows and pockets

zipped pouch for Sarah

This is a zipped pouch that I made for Sarah’s birthday. It’s about 12″ long, but sadly not quite big enough to fit a 12″ ruler inside, otherwise it would have made a lovely pencil case! Although it is long enough for pencils…

I wanted to pop something inside the pouch, and it was just the right size for a wheat pad, a hop pocket and a little clove and lavender pillow. The hops came from the skycarrots allotment, but I didn’t think Sarah would mind getting a few back again!

Wheat, hops, lavender & cloves

Sarah and I are doing a fun art project together, where we take it in turns to create an image which we then share on a tumblr called scribblescribes. Each of our entries is “inspired by the day” and contains lettering. So far I think Sarah’s “scribbles” are much more imaginative than mine, so I want to try and think about my days a bit more creatively!

Today I am mostly staring at a blank Risk Assessment form that I need to fill in to apply for a market stall at an event in May. These things just feel so terribly soul-sucking. What risk can there possibly be from a stall full of haberdashery that can’t be avoided by the application of simple common sense? Okay, so we are hoping to take candles, but there’s a strong possibility that we won’t be allowed to light them anyway, so hopefully our chances of setting fire to all our customers and burning down the venue will be minimal!

(Note to self: must buy small fire blanket.)

Floral fabric and vintage knickers

1980s underwear

I had intended to spend this morning sewing, but the temperature in the Shed soon put paid to that. It took an hour and a half for the little heater to force its way into double figures. Brrr! I think this is perhaps the only disadvantage of working in a Shed in the garden – it’s blooming cold when it snows!

By the time I’d spent half the morning sending work-related emails (on a day when I’m not at work, more fool me), it seemed pointless to start something when I have to go out this afternoon to catalogue some more beetles.

So, here are my latest bargains from the weekend!

The fabric is a £3.49/m cotton from Fabric Land, and it’s creased because it’s been through a 60° wash and the tumble dryer. This is a much harsher treatment than it’s ever going to receive once it’s a dress, so I can be confident that it won’t shrink or otherwise misbehave in the wash once I’ve spent ages making it. Paul mumbled something about cushions when I showed it to him. Rude.

The pattern was a bargain from my local Sue Ryder shop, in the centre of Reading, which has a large Retro and Vintage section that I love to bits. I’m not sure whether 1988 (the date of this pattern) counts as either Retro or Vintage, but it was 25 years ago… which certainly makes me feel old!

Anyway, the pattern only cost £2, and although some of it’s been cut up and sellotaped back together (argh!), the part that I really wanted is still intact. That’s the two different styles of french knickers, which I plan to make both in printed cotton and in bamboo. The pattern’s a size too small for me, but I plan to cheat it by sewing with smaller seam allowances.

I wonder whether I actually do have time to run up a quick pair now, before I go off to my beetles…?

Simplicity 2184 – it’s here!

Patterns from HoneymoonBus

Wow, that was quick. It took less than ten days for my PERFECT PATTERN to reach me, all the way from Canada! Bless her, Zoe from HoneymoonBus had already sent me a lovely convo via Etsy, to say thank you for mentioning her on my blog, and to let me know that she’d included a little gift. I didn’t know it was going to be a second pattern! That one’s Simplicity 3224, a sundress from 1950 with the options of fantastically enormous pockets and a matching bolero jacket. Fantastic! That one doesn’t have its original envelope, but thanks to The Magic of the Internet I’ve been able to track one down, so I can see how much fabric I’ll need to make it.

And just look at this simply gorgeous promotional needle case from Sunbeam Bread:

Vintage needle case

Isn’t it a beauty? Almost completely intact, you can just see where a couple of needles are missing from the right-hand green panel. On the back is a little paragraph explaining that adding vitamins to bread doesn’t affect its taste or texture, and reassuring us that it’s the best way of staying healthy.

The Pattern!

And here’s the pattern itself! I’m really pleased that Simplicity patterns were printed ones by the 1950s, as unprinted dress patterns tend to confuse me a bit. This one seems to have been made up as a short-sleeved blouse – the long sleeve and skirt pieces remain uncut. The previous owner had also done exactly what I was going to do, which is to take about an inch out of the bodice length to make it smaller – her original folds are still in place!

Once I’ve given all the pieces a gentle smoothing with the iron, I’ll trace them to keep the original safe for future use. I also need to make a few alterations, and it’ll be much better for me to scribble all over a new brown paper pattern than on this original one.

I popped into town yesterday to buy some frog fastenings and sequin trim to finish off my velvet cape, but both were out of stock and I had to order them in. Now I don’t feel so bad about putting the coat to one side while I start work on these lovely dresses!

Oh, and the reason I ended up buying from HoneymoonBus, rather than one of the many other vintage pattern sellers out there? Her Etsy store is arranged by size. I appreciate that if you’re looking for a pattern from a particular decade, that might be a bit annoying. But I’ve spent so many hours looking at vintage pattern sites, finding something I like, and discovering it’s too small, that to be able to go a place where I could just look in one section and find something in my own size was such a relief! So thanks again to Zoe, I can’t wait to get sewing!

Velvet coat – almost finished…

Butterick 5266

Not the greatest photo ever – the combination of black velvet and a dark Shed is not the best – but I think you can see the progress on this coat! It has a body now, which is a big improvement on last week’s cape and sleeves. It’s still not quite finished – the hem needs, well, hemming, and it needs front fastenings of some kind. It also needs overlocking around the sleeves, and a jolly good pressing around the collar.

(Before anybody says anything, yes, I know the purple lining doesn’t go with the red outfit underneath. I wasn’t about to go out and buy another five metres of lining when I already had this purple in the stash.)

The saving grace of this project has been its simplicity. If it had been more complicated, there would probably be a lot more swear words in this post. As it is, I simply left out most of the tricky parts to make my life easier. The sleeves will be overlocked to the body instead of slip stitched. The fronts and neck and sleeve hems are topstitched rather than understitched. Where the lining came out a quarter of an inch bigger than the coat (at the sleeve heads and the hem, don’t ask me why!), I simply chopped off the difference and stopped worrying about it. I haven’t bothered with the fourteen metres of braided trim, or the openings in the front panels. Oh, and I left out the side seam vents too. Simple!

Having moaned on about the frustrating parts, I will concede that the sleeve heads eased into place beautifully, as did the collar. I’m now deciding how I want the front to fasten, and whether I’m going to add any kind of trimmings at all. I think I might need at least a little bit of detail on the ends of the collar, to make them stand out against the front a bit more. Paul’s suggested black frog fasteners and sequin trims, and I think he might be right.

Oh, and the poster in the frame, behind the dressform? That’s a little idea we had, that we’re hoping to turn into a reality!

Pinstriped velvet coat and cape

The tidy side

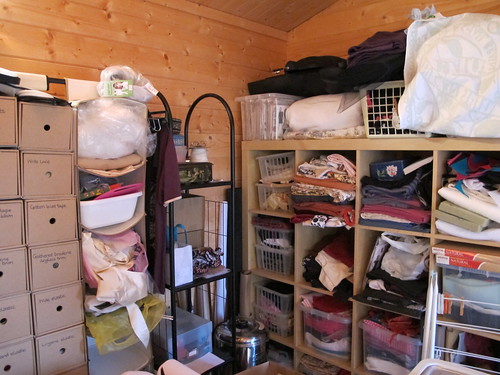
Remember when I bought this fantastic Ikea unit for the Shed, and tidied everything into neat little cubby holes?

Today I had every intention of making a hat. I had everything I needed laid out on the sewing table. Instructions, fabric, buckram, wire, lining, curved sewing needles… but no pattern. I knew it was in the Shed somewhere – most likely in the ever increasing pile of stuff I haven’t put away yet.

THE PILE

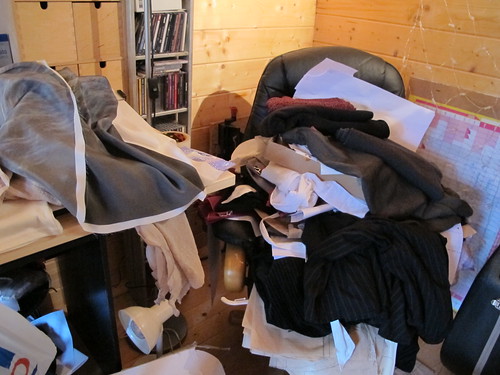
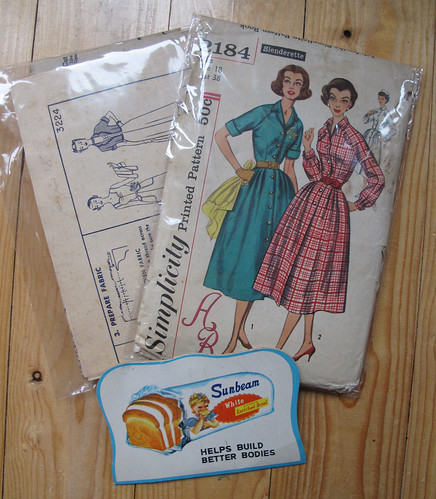
This is my (technically Paul’s) big comfy chair – where I can sit to do hand sewing. Except I can’t, because on the chair lives THE PILE. Anything that doesn’t have a tidy home yet, or anything that I’m going to “put away in a minute” tends to be dumped in the pile. I knew the hat pattern was in there somewhere, and I found it almost at the bottom – alongside the missing pattern for my niece’s dress. The last time I’d looked at either of those patterns was May. Eight months ago. Oops.

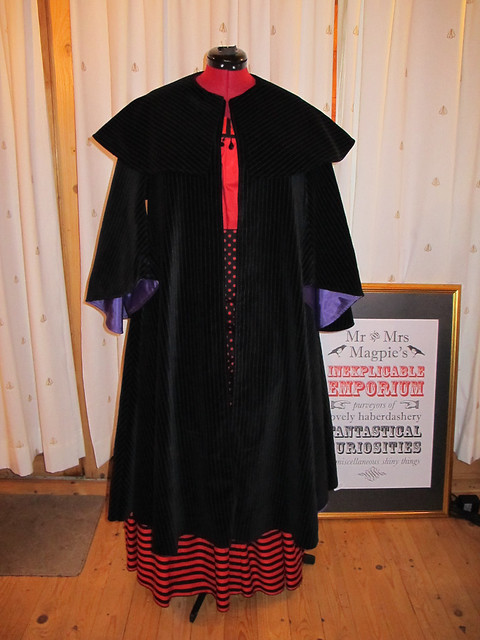
What you can also see overflowing from THE PILE is a mountain of pinstriped fabric. That’s about ten metres of cotton velvet, which I bought way back in the mists of time when I worked in a fabric shop. Scrunched up underneath it was the pattern for Butterick 5266, a pattern for a Victorian-ish coat with a cape. (Now out of print.) In my infinite wisdom, I decided that the best way to tidy this fabric and get it out of the Shed was to finally sew the dratted coat.

Cape and sleeves

So, I now have the cape part, and a pair of sleeves. Unfortunately I have also remembered how much I absolutely loathe sewing with cotton velvet. And the pinstripes aren’t helping either. They look great, but they’re printed onto the fabric rather than woven in, and they’re not printed on the straight grain. Which means that I have to choose either to follow the pinstripes or follow the grain. Not an ideal situation, particularly with velvet.

Pinstriped velvet

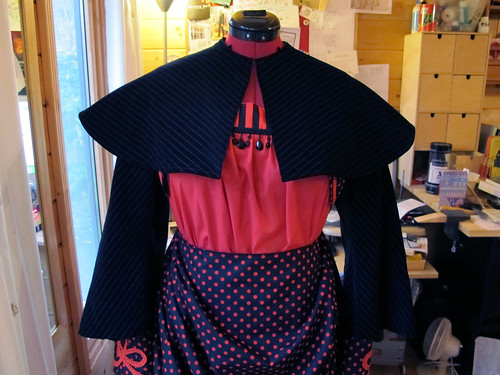
Isn’t this lovely though? That glorious moment when the pinstripes actually match at the seams as though I meant it, makes up for a lot. Unfortunately, it doesn’t make up for the frustrating way that velvet moves around when you sew it, even with the usually fantastic differential feed on my machine. So the pinstripes only match beautifully on one of the sleeves, and of course that’s the one where the fabric kept slipping as I was sewing in the lining, because the velvet was off the grain. And the sleeve that isn’t puckered around the cuff? The pinstripes don’t match up at all. Of course.

And that’s the easy bit.

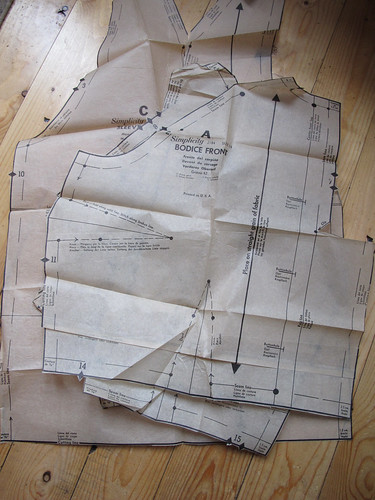
The front and back panels are so big that they each have to be cut twice from a single layer of fabric. And then lined. I think from now on I’m going to ignore the instructions, and just leave out all the fiddly bits that could go wrong. No braid trimming, no side vents, no slits to put your hands through (what are they for anyway? the thing has sleeves!), no loops for the buttons – nothing. I’ll bag out the lining so it can’t slip around, and I’ll sew on enormous poppers with buttons over the top. Or buy frog fasteners.

It’ll be a few days before I can get back in the Shed to finish this off (my Real Job calls), but hopefully I can get this finished very soon. Then I can gleefully THROW AWAY* whatever’s left of the velvet, and rejoice in my decision to NEVER SEW WITH IT AGAIN.


*No, of course I won’t actually throw it away. I’ll give it to a charity shop, or donate it to anyone daft enough to take it off my hands after they’ve read this.

[edit] Well, Lisa of Off With Her Head has admitted to being daft enough – so when I’ve finished the cape, I’ll be sending her a big parcel. Look out for pinstriped velvet millinery, coming soon!