Natural Dyeing: Blackcurrant Surprise!

Blackcurrant Dye
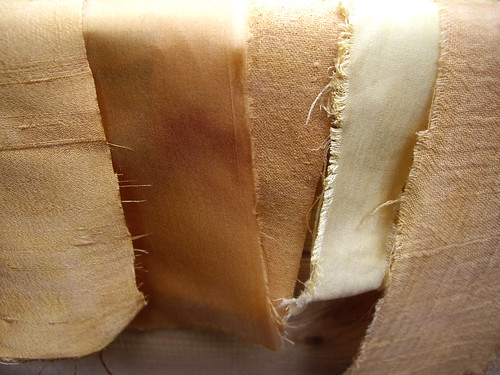
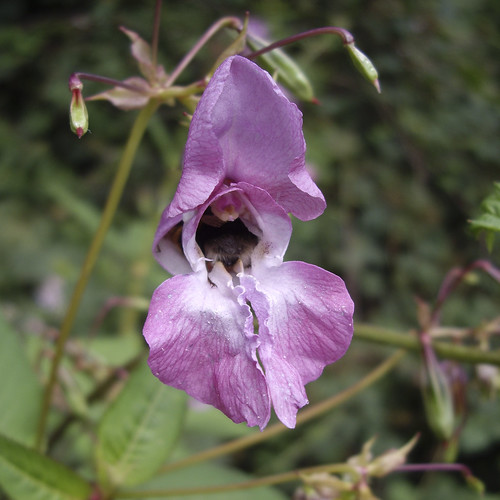
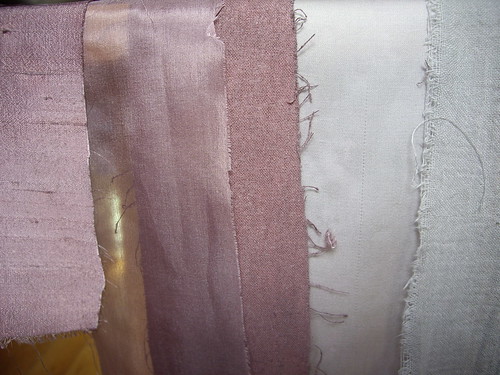
silk dupion, silk paj, silk noil, bamboo, cotton muslin

Surprise, because grey really wasn’t the colour I was expecting to get from blackcurrants! I’m completely amazed by the difference between the colours on the protein-based silks, and the cellulose-based bamboo and cotton.

This one was a bit of an experiment using more of Sarah‘s leftovers – this time some blackcurrant pulp that had already been cooked. I decided to try out my new and exciting Ebay-purchased tea urn, so I tipped the blackcurrant mush into a nylon mesh laundry bag and chucked it in. As well as about 6 litres of water, I also added a litre of out-of-date blackcurrant, pear and apple juice. Well, it seemed better than just pouring it away!

Blackcurrant Dye

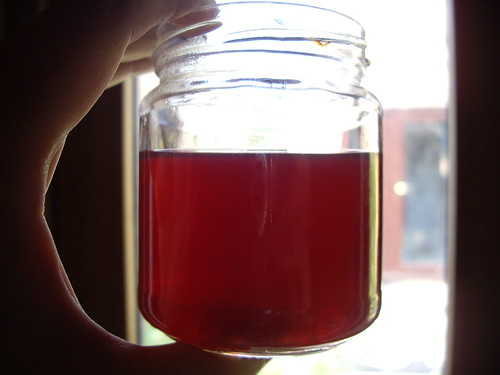
I left the liquid and the blackcurrants in the tea urn for about two hours – one to warm up, and one to cook the blackcurrants and release the dye. It came out a bit cloudy, because of the fruit juice, but a pretty colour!

At this point I also added some salt, as a fixing agent. The only salt I had in the cupboard included an anti-caking ingredient – E536, or potassium ferrocyanide. I suspect this has affected the colour a little bit, probably pushing it slightly towards the blue end of things.

Blackcurrant Dye

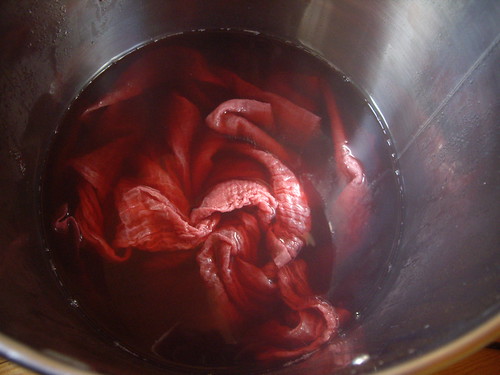
At this point I threw in the fabric, and gave it all a good stir. I left the tea urn switched on for another couple of hours which, in hindsight, was a mistake. The temperature was too hot for the silk, and it’s lost its sheen a little bit. Next time I’ll heat up the plant matter to make the dye, then switch off the urn as soon as the fabric goes in.

Blackcurrant Dye

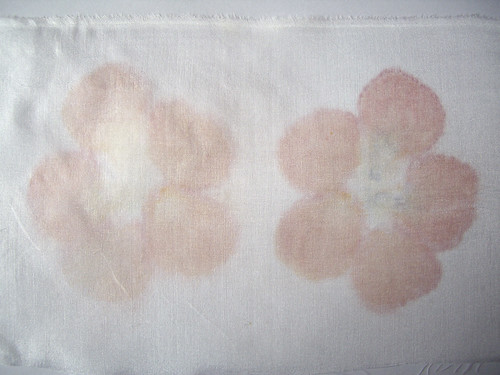
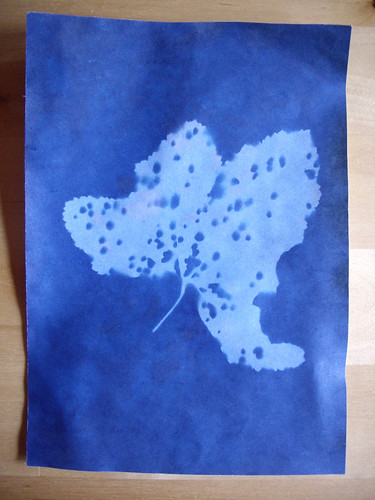
This is what came out of the urn – exactly what I’d expected! A metre and a half of cotton muslin, in a beautiful pink. So you can imagine my surprise when I turned on the shower, began to rinse the excess dye away, and ended up with this…

Blackcurrant Dye

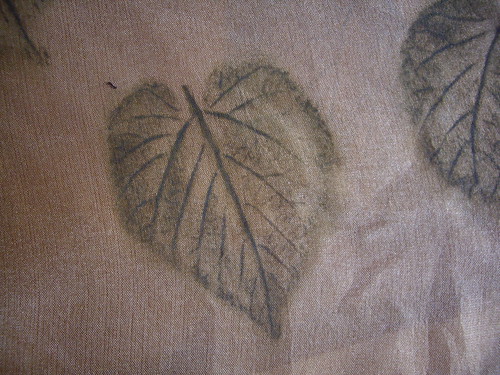
… a beautiful piece of delicate grey cotton, with no pink left in it whatsoever!

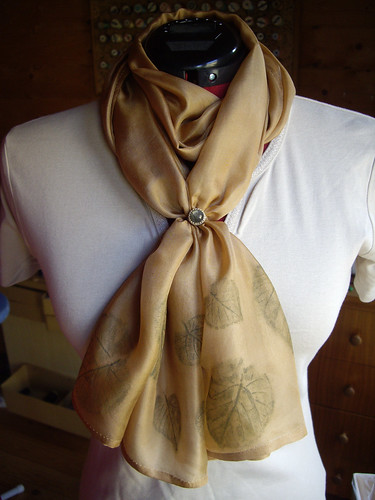
There’s enough here to make three scarves, one of which I will most definitely be keeping for myself. I wear a lot of grey, and I can just imagine decorating the ends of this with some smoky quartz beads for a bit of added sparkle.

It was very peculiar though, watching that beautiful pink colour just wash away. Not a disappointment, by any means, but definitely a surprise!

Continental Clothing

Please forgive me while I get a little bit over-excited for a minute.

Way back in the mists of time, I ran a t-shirt printing company. We used the best quality t-shirts we could afford to buy at the time, but I wanted more. I wanted organic cotton. Sustainable production. Ethical business practices. And all of these things were sadly rather hard to find. I did buy some organic cotton t-shirts, and some Fair Trade ones, but most of the inventory I bought all those years ago is still sitting in my Shed. The fit wasn’t right, the colours weren’t right, and they were so much more expensive than ordinary t-shirts that nobody was willing to pay for them.

Fast forward to yesterday, when I was looking again for wholesale suppliers of organic t-shirts that I could use in my dyeing experiments. Imagine my excitement when I stumbled upon Continental Clothing. All of their garments are either organic, fairly traded, sustainably produced or a combination of all three. They have exemplary business practices, and even more exciting, the clothes they produce are so much more than just plain t-shirts!

I have grand plans for the racerback tunic shown above, for example, worn with a contrasting vest or t-shirt underneath. Think how pretty it would look in a patchy natural dye, with hand embroidery all around the neck and armholes…

Even better, and the thing that I’m extremely over-excited about, is the fact that they offer bespoke manufacturing! Okay, so a minimum order of 150 garments per size is out of my reach at the moment, but think of the possibilities! The tunic above would be fantastic as a dress, for example. Continental could make it for me, and I’d add the embellishments myself. It would work out significantly cheaper in the long run than me buying organic jersey at retail prices, making the clothing myself, and then embellishing it.

I’ve applied for an account with them, so I can start by buying a few sample garments for myself. I can then do lots of dye tests, and see how the different styles and fabrics fit, wash and wear. I can already imagine how several of the tops would go with many of the skirts I’ve made.

So, watch this space for hand-dyed t-shirts with added embroidery, lots of pockets and other pretty things!

Hapa-zome

Plaintain leaf
Ribwort plaintain leaf

Today I have been mostly hitting plants with a hammer.

As you do.

It’s a technique called “hapa-zome”, coined by India Flint, that literally means “leaf dye” in Japanese.

Using a few sheets of thin cardboard to cushion my work table, I laid out a small piece of silk paj, and placed the plantain leaf on top. The silk was folded in half, leaving the leaf sandwiched in between. I popped a plain sheet of paper over the top… and hit it with a hammer.

A rubber hammer is advised, but I don’t have one of those, so I used my leather jeweller’s hammer instead. The trick is in hitting the leaf hard enough that the colour transfers onto the fabric, but not so hard that it turns into mush and gets stuck to the silk.

Nasturtium petals
nasturtium petals

The plantain leaf took a fair bit of hammering before I had a nice even print. These nasturtium petals, on the other hand, I barely had to touch. Interestingly, when I peeled them off the fabric they were almost transparent, having been bright orange beforehand. The print they’ve left behind is very soft and faint, almost ghostly.

These prints won’t be light fast, but apparently they should last a good couple of years if they’re not washed too often. I can’t decide whether or not I like them… but I’m keen to bring home some more leaves and have another go.

Onion skin dye

Onion skin dye

This post is for Sarah, who’s very kindly been saving her leftovers! Paul and I don’t eat onions (weirdly, they burn Paul’s mouth – does anyone else have this?), so Sarah’s been hanging on to her onion skins for me. This looked like a lot, but only weighed about 6g, so I only added small pieces of fabric that added up to about 8g. Judging by the colour of the dye bath, I could have added a lot more!

Onion skin dye

As with my previous experiments, I simmered the onion skins in almost-boiling water for about an hour, before removing them and adding the wet fabric. I left the fabric simmering for another hour, then switched off the heat and left the saucepan to cool.

Once again, I didn’t use any kind of mordant for this experiment. The colour of the water led me to hope for some really bright fabrics, but the actual results are a lot more muted. I’m definitely going to need to add mordants to my experiments if I want to explore the full potential of the colours available from plants.

Onion skin dye
Silk dupion, silk paj, silk noil, bamboo, cotton muslin

This time the dye came out rather patchy, and with very marked differences between the fabrics. The silks have once again taken up the colour much better than the vegetable fibres. The bamboo in particular is very pale, especially in contrast to the silk paj!

The next part of this experiment is to keep some of the fabric pieces I’ve dyed so far closed away in a book, and leave others to hang in a window. That will help me to find out how fade-resistant they are. (I suspect not at all.)

Sarah also gave me a big pot full of previously-cooked blackcurrant pulp, which is very exciting! I had intended to try solar dyeing with it, but I don’t think the sun’s come out once today. Maybe at the weekend, when it’s forecast to perk up a little! Failing that it’s back to the big cooking pot, in the hope of coming out with a lovely shade of blue.

Spotty cotton & bamboo

Organic cotton & bamboo

Here’s my latest order from my lovely organic cotton people. Three metres each of spotty and plain organic cotton and bamboo blend. Isn’t it lovely? It’s in the washing machine at the moment, and I’m expecting it to be super soft when it comes out. The almost-matching thread’s organic too, and I’m planning to buy a lot more of this in future.

When the pattern eventually turns up in the UK, I’m going to turn it into Simplicity 1755. I might have let out a little squeal when I saw this dress. It’s everything I usually look for in a vintage pattern – cute collar, raglan sleeves, full skirt, pockets… but in a modern size, which means I don’t have to wear terrifying underwear or spend days re-drafting the pattern only to discover that it still doesn’t fit. Marvellous!

The sample swatches are Texweave, which is a lovely heavyweight woven fabric, perfect for coats or upholstery, and Super Jersey, which is another cotton/bamboo blend. It really does feel super too, so soft, and with just enough elastane to make sure it doesn’t go baggy. I can feel some lovely soft pyjamas coming on, or perhaps a vest or two.

I have a lovely big tin full of their fabric samples now – every time they bring out something new I send off for the samples straight away. This means that any time I want to go fabric shopping, I can simply pull down the tin and look at all the little squares. Much easier than just picking something at random from the website and hoping for the best!

Dinton Pastures

Dinton Pastures

Yesterday was my first weekend day off work in months that didn’t already have a plan attached to it. When the weather turned out to be nice, we decided to go for a walk to Dinton Pastures.

Dinton Pastures

Everybody else seemed to have had the same idea, so we had to park miles away in the overflow car park. This turned out to be good, as we walked a corner of the park that we hadn’t really seen before.

Dinton Pastures

I spent ages trying to get the perfect shot of a bee hovering on one of these flowers, but my camera wasn’t quick enough to keep up. So I had to make do with this picture of a bumble bee’s bum instead.

Dinton Pastures

I came home with some souvenirs –  a few photos, a touch of sunburn, and eight (at the last count) insect bites. Ouch!

An old lady and a wet rabbit.

Old Lady moth (Mormo Maura)

Today, the rabbit escaped. He lives indoors, but I must have left his gate ajar, because he managed to make a dash for it into the garden. Paul came home from work to help me capture him, and while he was moving some pieces of wood around (Paul, not the rabbit), I spotted this great big moth.

It turned out to be an Old Lady (Mormo maura), and I took this photo of it while we were waiting for the rabbit to decide whether he was going to stay underneath my Shed all afternoon.

Eventually Paul managed to capture Mister Stinkyface (real name Johnny Depp, long story, not our fault!), and we took advantage of his captivity to unceremoniously dump him in the bath and give him a wash.

After more than an hour of wrestling with an angry, wet rabbit, we eventually decided he was as clean as he was ever going to be, and let him go.

Johnny after his bath.

As you can see, he is NOT IMPRESSED by this outrageous treatment.

Perhaps that’ll teach him not to go around escaping in future!

State of the Shed

State of the Shed

Today I have been mostly playing Fabric Stash Tetris.

Most of my stuff was stored in a set of Argos canvas and pine furniture. Sadly it hasn’t been able to take the weight of all my fabric, and over the years it’s been gradually getting more and more wonky. Today I bit the bullet and offered it all on Freegle, so I had to get my act together and empty everything out of the wardrobe and off the shelves.

The wardrobe, small shelves and bedside table are now rather inconveniently shoved in my kitchen, while I move everything else around in the Shed. All of the furniture in here (except for my lovely sewing table) is either a hand-me-down, or something I’ve had for a very long time.

All of my cardboard haberdashery boxes (from Muji, about 10 years ago) are kept in place by a shoe holder, hanging from a clothing rail with shelves. That had been stashed in the loft since the days I used to take a t-shirt stall to Infest and Whitby. It took absolutely ages to put together, so I hereby apologise to all those people who helped me to put it up and take it down again over the years!

The last thing I need to clear is the shelf unit on the right hand side. That’s an Argos canvas-and-pine piece too, but it’s been dismantled and reassembled a couple of times, and is now very wobbly indeed. I’m not entirely sure what I’m going to replace it with, but I’ll cross that bridge when I’ve sorted out its contents and figured out how much storage space I need.

Hopefully I’ll be able to get all of this stuff into some vague semblance of order by the end of the day – I really want to be able to spend tomorrow actually making things!

Blue Print

Blue Print

I’ve been wanting to make photograms with the toddlers at work for ages, but so far the summer’s been nothing but wet and horrible!

This “sun print” paper had been at the back of a cupboard for quite a while, so I wasn’t convinced it would still work. In order to check, I brought the packet home with me and made this test print.

I chose a nice big leaf with holes in it (hence the speckles), and Sarah provided a board and a piece of glass to hold it all in place. We left the paper to its own devices while we went for a foraging walk and a chipnic.*

We found a big clump of plum trees that we need to go back to in about a week, although we did manage to pick quite a lot between us! We also met a stag beetle, saw a nightshade with pretty purple flowers, and managed to find a few ripe blackberries along the way. Chatting about photography, printing, dyeing and other projects as we walked, it was a lovely way to spend a sunny Sunday evening.

When we got home, we rinsed the print and hung it up to dry in Sarah’s airing cupboard. Sarah popped it through my letterbox this morning, and I’m really pleased with it! Definitely an activity to do with the kids – if the sun’s out for my next Toddler Time…

*Buying chips from the chip shop, and eating them out of doors.

Stef’s Silk Scarf

Stef's Silk Scarf

Okay, so I did manage to get a little something done in between my increased hours at work. This was an extra little birthday gift for my mother-in-law.

I dyed the silk with tea, which came out a little bit paler than my previous experiment, but still a lovely colour. Very interesting on the silk too, as the tone seems to change in different light.

Stef's Silk Scarf

I hemmed all four edges by hand, using teeny-tiny slip slitches. Each corner has an equally teeny-tiny briolette bead dangling from it. The gemstones are labradorite, and the facets catch the light beautifully.

Stef's Silk Scarf

Each end of the scarf is embellished with leaf rubbings. Done using Inktense pencils, they picked up the detail of the leaves beautifully. Appropriately for a silk scarf, the leaves came from the mulberry tree at the Museum of English Rural Life.

Stef's Silk Scarf

Because no scarf is complete without a scarf ring, I set a matching faceted labradorite cabochon into one of Kernowcraft’s new easy-to-set rings. Because the band is adjustable, it’s perfect to use as either a scarf ring or to wear on your finger.

Stef's Silk Scarf

And here it is!

I’ve also been working on a tie-dyed turmeric scarf for myself. I did wear it last week, but I haven’t hemmed the long edges yet, so it needs a little bit more work. I’m so pleased with how Stef’s scarf ring turned out, and how incredibly easy it was to make, that I’m thinking I might need a brass and labradorite one for myself…