Organic cotton/bamboo skirt

Cotton/Bamboo Skirt

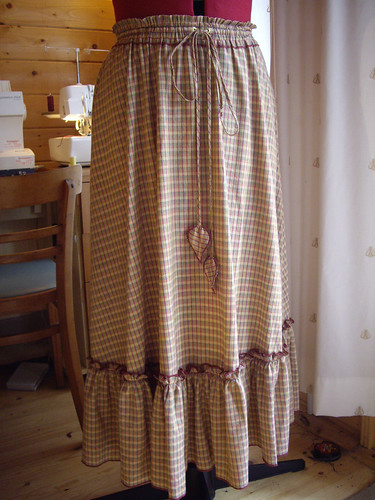
After years of buying only sample pieces from organiccotton.biz, I finally got around to ordering some yardage. The skirt above is a blend of organic cotton and bamboo, and it’s beautifully soft and drapey.

I don’t believe most of the claims about bamboo fabric having practically magical anti-fungal and anti-bacterial properties. The plant material (which does have those qualities) needs to go through so many processes before it can be spun, it’s doubtful whether any of its beneficial aspects would survive. However, it’s a very good fibre to use for fabric. It needs no pesticides to grow, uses far less water than cotton, and it grows so rapidly that it’s quick to replenish, which means you don’t need acres of space to plant it. Even better, the fabric it produces is unbelievably soft.

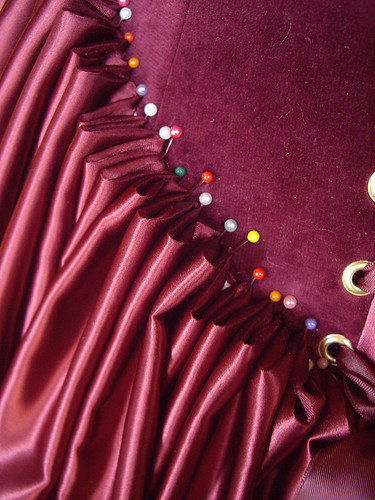
This is my usual ruffled skirt – take one calf length a-line skirt pattern, and stick a ten-inch ruffle on the bottom. Simple! It has pockets in the side seams, and the edges of the ruffle are overlocked with a satin stitch.

Waistband

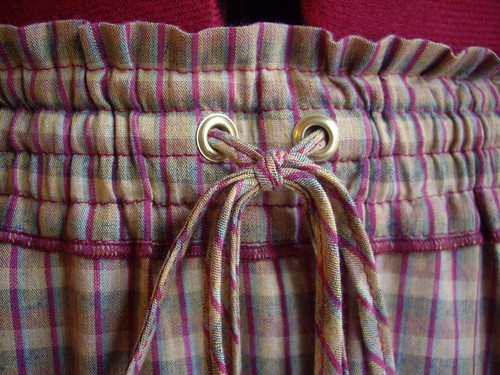
The waistband I pretty much made up as I went along. It’s based on an old favourite skirt that wore out long ago. The centre channel has a bias tape drawstring threaded through two eyelets. The channels above and below have narrow elastic threaded through.

Things I learnt as I was making it?

  1. Thread the drawstring through before the elastic.
  2. Make absolutely certain that the elastic isn’t twisted.
  3. Whilst the bias tape foot for my sewing machine is a marvellous invention, I need to learn how to make the joins in the bias strip go through it more smoothly.

Leaf detail

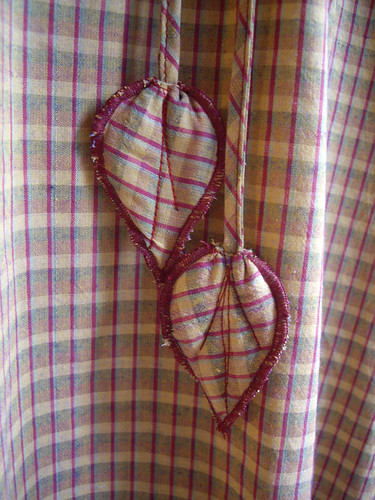
The finishing detail is this pair of little leaves on the ends of the drawstring. They each have an offcut of batting inside, making them a little bit textured and squishy. I was torn between overlocking the edges or leaving them raw so that they’d fray a little in the wash. I do like the satin stitch edge, not least because they make the leaves stand out against the skirt, but it isn’t as tidy as I’d have liked. A little more practice needed, perhaps.

I keep going on about the softness of the fabric, but that really is its stand-out quality for me. It’s like the softest sheets you’ve ever slept on, or that favourite shirt you’ve been wearing for years.

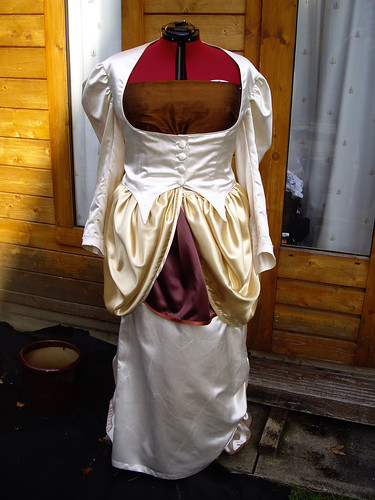
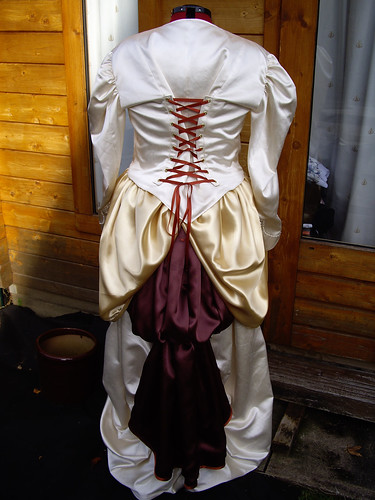
I’m working on a set of costumes at the moment, all of which seem to be made with synthetic fabrics and have lots of fiddly little details. It’s been really nice to take a break and sew something simple, that feels like a little bit of luxury.

Kiva – Maritza in Ecuador


Image © Kiva

Do you know about Kiva? They work with microfinance institutions to provide loans to people without access to traditional banking systems. One hundred percent of your loan is sent to these partners, who administer them for you. All you need to do is decide who to support – which turns out to be the trickiest part.

The lady pictured above is Maritza, and she works as a dressmaker in Ecuador. She makes and repairs clothes, and when she doesn’t have enough sewing work coming in she sells juices. Her loan is to help her with the costs of buying haberdashery and tools.

Kiva are currently offering the opportunity to lend $25 for free, so it seemed like a perfect time to get involved. One of the aims for my mythical business (I’ll start it one day…) is to make enough money to be able to give some of it to Kiva. I have no idea when or if that might ever happen, so I figured I might as well start now. You can do the same, if you like.

(That’s an affiliate link, so don’t feel obliged to use it. I don’t think anything exciting happens to me if you do, but I will be able to see who’s signed up by means of following it.)

Wordless Wednesday: Only Eight Who Do.

Supermodels

Dashing away with the smoothing iron…

Yuk.

Yuk.

I think it might be time to clean the iron, and fit the new ironing board cover.

This is what happens when you use a lot of synthetic fabrics and iron-on interfacing. Things melt and stick, and you’re left with a mess.

That’s why I usually buy the cheapest iron I can possibly find, and then use it until it’s either beyond cleaning, or the heating element burns out. Domestic irons aren’t designed to be used for hours and days at a time, so this tends to work out to a buying a new one every eighteen months or so.

I know that a lot of dressmakers swear by heavy-duty steam-generating irons. I’ve used them before, but find them too heavy for my bad wrist. I also find that the water tanks get full of limescale and the steam eventually leaves dirty marks on your fabric. I use a simple plant sprayer, using it to dampen either the fabric, the ironing board cover, or a separate pressing cloth. A nice hot iron on top creates plenty of steam.

When I (eventually) finish work on my current costume project and switch to my lovely organic cottons, I’d like to give up using iron-on interfacing altogether. Hopefully that should help my irons to last a bit longer – and make a lot less mess!

Gold Rush

Darwin Barberry

It was a beautiful sunny morning, so I thought I’d go for a little walk and see what I could find. Flashes of gold were everywhere! This Darwin Barberry was covered with the most amazing flowers…

Kerria Japonica

…as was this Kerria Japonica.

Primroses

The primroses outside the church were beautiful…

Peacock butterfly on dandelion

…and I found a peacock butterfly having a spot of lunch on these glowing dandelions.

Gorse

The gorse was lovely in all its fluffy spikiness…

Lesser Celandine

…while the Lesser Celandines shone out from under the trees.

Cowslips

Cowslips were nodding their heavy heads as I walked…

Fairysteps Moonshine

…but the most lovely golden things on my walk were the ones I took with me.

Fairysteps Moonshine

These are my Moonshine boots from Fairysteps. Hand made in the depths of Dartmoor by the lovely Ren, these are the only pair of their kind in existence, and she made them just for me! How lovely!

I can’t tell you how soft they are, and how comfortable. The only trouble is, they’re so amazing that I’m going to have to sew myself a whole new wardrobe full of clothes in order to do them justice! Still, I can’t see that being too much of a difficulty, can you?

The right tools for the job.

Upholstery & Lampshade Needles

No, I haven’t been sewing upholstery or lampshades. But I did find myself in need of a curved sewing needle today, and I knew I had a packet somewhere. I hadn’t realised that they’d be older than I am! They’re in perfect condition, and they were just what I needed to sew through multiple layers of fabric that couldn’t be done by machine.

Pleats & Pins

I’m in the process of making a costume, which is going to be an extremely sumptuous ball gown. The starting point was my (first) wedding dress, which has been sitting in my loft for almost fifteen years. Thanks to an extremely generous seam allowance, I was able to let it out enough to make it fit again! I’m replacing the ivory skirt with a matching burgundy one, but  rather than dismantling the original dress I’m simply adding an extra layer of fabric. So this is five metres of satin, draped and pleated into place.

Clearly there was no way I could have even considered doing this kind of alteration using the sewing machine, but working by hand directly on the dressform (to maintain the shape of the draping as I worked) was rather awkward. Thankfully the curved needles were strong enough to push through all those layers as I sewed down the pleats, and the perfect tool for this kind of fiddly work.

Time permitting, I’m intending to make a matching hat. I have a feeling that these curved needles are going to come in handy again!

Caca Rouge

Lush Henna...

You remember the part where I made a resolution to stop messing with my hair? Well, I’ve stuck to it since December 2nd, which is possibly the longest I haven’t messed with my hair in about fifteen years. The exception to the resolution was to use something non-damaging like Henna. I had a block of Lush’s Caca Rouge already, and now that the last little remnants of hair dye have washed out and gone a slightly pale orangey colour on top, now seemed like a good time to give it a try.

I hadn’t used Lush henna for about ten years, and I did remember it making one heck of a mess. I melted down half a block with boiling water over a bain marie, and that turned out to be far too much for my very short hair. I could probably have covered my head with just one square. Getting it to the right consistency was the hardest part, and I have to confess that I failed. I ended up with a gloopy mess that was simultaneously so runny that it dripped all over the bathroom, and so thick that it wouldn’t massage into my dry hair. Nightmare.

Lush Henna...

It was making so much mess that I washed it off straight away. But when I looked in the mirror, I could see that my hair had already changed colour after only a few minutes, so I decided to persevere. I had half a tub of Retread that was almost out of date, so I mixed it in with the henna. That gave me a gloop of a much better consistency, with plenty left over. I scrunched the mixture into my now-damp hair, and it stayed put much better than the henna alone.

Lush Henna...

And then came the afternoon of wearing a fetching carrier bag on my head. Lovely. This helps the henna to turn red rather than brown, as the exclusion of air stops it from oxidising. It also stops bits of henna dropping everywhere as it dries – although it doesn’t stop tiny powdery bits from dropping down the back of your neck. Very annoying. (Note to self: Buy a proper shower cap.)

Lush Henna

So, was it worth all that faffing about? Well, you can definitely see the colour change, and I like it. (Not that I remembered to take a “before” picture, so you’ll just have to believe me!) The most obvious difference is on the ends of my hair, which still have traces of old bleach and dye. The grey hairs around my temples are pretty bright now too. The best thing is that my hair feels amazingly soft. After so many years of mistreating it, that’s a real luxury!

I’ll use up the remaining henna/Retread mixture, which should be enough for two more goes, and then see how I feel about the prospect of doing it again. It feels kind of expensive to pay £9.50 for the conditioner and £7.75 for the henna, but when you divide that between five or six applications it does work out cheaper than big brand box dye. As long as I keep it in a sealed container it should last for quite a while, and it’s so much better for my hair. I might treat myself to a chunk of Reincarnate shampoo to keep the colour going for as long as possible. I’m a bit sad to see it (along with my favourite conditioner) relegated to the “Retro” section – I know I’ve been using Lush products for a long time, but that makes me feel old!

Sock Addict.

Stripy Sock

I always thought it was a bit silly when people learned to knit socks and promptly gave up knitting anything else. I’ve made a few pairs for other people over the past couple of years, but it wasn’t until I made a stripy pair for myself that the bug really bit. As soon as I’d cast them off, I started the toe of this one straight away.

This is another Regia colourway, and I rather like the pink, red and orange stripes. I couldn’t tell from looking at the ball quite how the pattern was going to develop, but I’m pleased that it’s turning out so regular. I’m using my usual toe-up pattern with a slip stitch heel, and I’ve just reached the stage of increasing for the instep. This means I’ve just realised that the stripe pattern’s going to be disrupted as I keep increasing and when I work the heel. I’ll find out how much that bothers me as I go along. One solution would be to work the toes and heels in another colour. This avoids the pattern disruption to a certain extent (although the stripes will still get thinner as you work the gusset increases), and it also means that the toes and heels can easily be pulled out and re-knit when they start to wear out.

I have plenty of stashed Regia waiting for me, most of it earmarked as Christmas Socks for friends and family. I’ve also thought of a few basic pattern variations, so I don’t go mad from knitting the same socks over and over again.

I’ve also started looking at different sock yarns, although there’s not much available in the shops where I live. Noro sock yarn feels kind of scratchy, and I’m not sure I’d like to knit with it. I’m looking forward to seeing how my Schoppel Wolle Flying Saucer comes out. I’m on the hunt for some extravagantly purple sock yarn for a friend (recommendations welcome!), and I’ve spent a while looking for the perfect green-and-white self-striping yarn. Thanks to the Yarn Harlot I found it this morning, and have now ordered the last ball of Clorophyll from String Theory Colorworks. I also picked up a mini skein of plain white, specifically designed for the toes and heels.

So, I’ve just spent twenty-five pounds on the materials (and international shipping) to make a single pair of socks. For a friend who hasn’t asked for socks, doesn’t know they’re getting socks, and has no idea how long a pair of socks takes to knit. Clearly this isn’t a gift for them, it’s a gift for me.

I’m turning into a sock addict.

Swarovski & Silk

Beaded Collar

This is what reminded me that I hadn’t shown you the silk steampunk outfit – I finally found the time to make one of the accessories to go with it!

In our original sketches, we’d talked about a beaded silk collar and matching wrist cuffs. I haven’t made those yet (I’ve run out of gold eyelets!), but I did manage to make the collar.

The silk is an offcut from the original dress, lined with an offcut of the bodice lining which was heavily interfaced. The Swarovski crystal beads were all unpicked from the original dress, and then sewn onto the collar in two sessions in front of the telly – taking a total of seven and a half hours. That’s just the beading, not the original unpicking, or the sewing of the collar itself. I knew all that time I spent sewing on beads in the bridal shop would come in useful eventually!

I deliberately didn’t take the beads all the way up to the edge, partly to allow a little bit of the lovely fabric to show through, and partly so that there was nice soft silk against the skin.

Beaded Collar

When the collar catches the light, it really sparkles. These photos really don’t do it any kind of justice at all – you really need to see it move. The silk has a beautiful lustre of its own, and with the beads on top… wow. I know that sounds as though I’m blowing my own trumpet, but really, it’s the materials doing all the hard work!

Beaded Collar

And this is how it fastens – three eyelets on each side at the back, and a simple ribbon. Nice and long, so you can just skip it off over your head rather than having to re-lace it every time.

I’ve still got loads of beads left over, more than enough for the matching cuffs. I might ask to borrow the jacket, so I can use up the remaining beads on the sleeves.

I’m really tempted to make one of these for myself… although where I’d go wearing a sparkly crystal collar I’m not too sure! Maybe I’ll just wear it to work.

Steampunk Silk

Steampunk Silk

This is a costume that I made for a friend, way back last October for a Hallowe’en event. She already had a corset and a mask, so they dictated the copper, gold and brown accent colours.

The ivory silk had a previous incarnation as her wedding dress. The slightly distressed texture is a result of putting it through the washing machine, but it left the fabric amazingly soft and a joy to work with. There was enough to make a jacket and a bustled skirt, with some left over for accessories.

Steampunk Silk

The jacket is a modification of two Simplicity steampunk patterns – 2172 and 2207. The back and sleeves were taken from 2207, with the front from 2172. I added lacing into the princess seams at the back, and beading to the cuffs. The buttons were from the original dress, as were the Swarovski crystal beads.

Steampunk Silk

The bustle and swags are in sections, all interchangeable so they can be worn in lots of different ways. They simply tie at the waist with ribbons. The skirt itself is bustled at the back, using ribbons sewn through channels in the centre back seam. This can be let down into a train. There’s a little bit of ruching at the front too, conveniently placed to disguise a stain that wouldn’t come out! (Shhh, don’t tell…)

I also made a petticoat to go underneath, to give  the skirt a little bit of extra fullness. I don’t know why I didn’t take a photograph of that, but you can just see the ruffle peeking out, here. There are better photos of the outfit being worn to stunning effect, but I need to get permission before I post them here. Thankfully it was well received, and looked absolutely fabulous!

As always, I wish I’d had a bit more time to make this. The bustle and swags were a bit rushed, and I would have liked to add much more beading to the cuffs. But I absolutely loved making it. It was a real treat to work with such sumptuous silk duchess satin, and to swap creative ideas with a friend. In fact, it’s inspired me to modify my own wedding dress for an event I’m attending in May.  You’ll have to wait and see how it turns out!