Ethical window shopping

I have to confess that I hadn’t looked at the Nomads website recently. I’d always associated Nomads with gothy dresses and plenty of tie-dye, so I sort of assumed they wouldn’t have anything I’d like these days. I can’t remember what drew me to have a look at their website today, but I was very wrong!

This velvet embroidered coat is absolutely beautiful. There’s also a three-quarter length version without the hood, and a matching fitted jacket. I could also happily wear a sari silk kurta, or maybe a cotton kurta for a more casual look.

Then I wandered off to have a look at Bishopston Trading, and this organic cotton pintucked shirt is making me wonder why on earth I thought it was worth the effort of making my own. (I will anyway, because I already have both the pattern and the organic cotton, but it would have been much easier just to buy one!)

People Tree also have a lovely pintucked tunic shirt, which is in the sale. I’m also coveting this striped silk blouse, which has completely ridiculous sleeves. Oh, let’s face it, I’m coveting just about everything from People Tree.

I’m not even going to look at the Gudrun Sjöden website, because I always come away wanting one of everything.

From Bishopston Trading I found out about the FairWear 2010 Fair Trade Fashion Show, which is in Bristol on February 25th. Tickets are only £8 for the daytime and  or £10 for the evening, so I think that’s definitely going to be worth a visit.

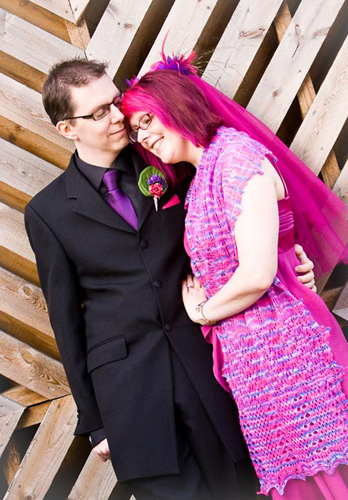
All of these lovely things are reminding me that it is possible to dress well and ethically at the same time.

Handmade Wedding – Part Two

Honeybee Stole
Photo © Jon Stockham

Nicola knitted Anne Hanson‘s Honeybee Stole for me. It took her the best part of a year, and matched my outfit perfectly. She even worked on it while she was in hospital, in labour with her daughter Gwen. Now that’s dedication!

Honeybee Stole
Photo © Jon Stockham

A close-up of Nicola’s Honeybee Stole. Isn’t it beautiful?

Cake
Photo © Tim Dawes

The cake was made by my Aunt, Helen Harrison. I sent her a photo of my flowers, and she reproduced them perfectly in icing. Amazing!

Cupcake Tower
Photo © Tim Dawes

Helen ended up making more than a hundred cupcakes! My cousins Jane and Georgina helped to make all of the little flowers to go on top of them all. The larger cake on the top was a traditional fruit cake, the cupcakes were a mixture of chocolate and plain sponge fairy cakes.

Party Bags
Photo © Jon Stockham

We had quite a lot of children at the wedding, so we asked Paul’s Mum to put together a party bag for each child. They went down really well – Paul’s cousins had set up a craft business worthy of Etsy by the end of the reception! They were making jewellery with lots of sparkly stickers, and having a great time. The little boys loved their cars and dinosaurs too.

Lego
Photo © Jon Stockham

This is an idea we stole from our friends Nicola and Ian. They put Lego on each table at their wedding, so we did the same. We managed to give away Paul’s entire childhood Lego collection, and people made some amazing collaborative creations!

Carved Pumpkin
Photo © Jon Stockham

Because the wedding was on Hallowe’en, my friend Heather and her two boys carved us a beautiful little pumpkin! It had a heart on one side, and our initials on the other.

Mr & Mrs Smith
Photo © Elaine Harrison

My Mum knitted this adorable little bride and groom from a pattern in Simply Knitting magazine. She customised them perfectly to match our outfits. Mum was becoming increasingly agitated when I kept changing my mind about what I was going to wear – and now I know why!

We liked them so much that they came on our honeymoon with us, and had an adventure of their own.

I have to say that we were absolutely thrilled to bits with everybody’s kindness and willingness to be involved. Almost everybody took pictures, and we haven’t seen them all yet, so there’s still more to look forward to! My brother-in-law Tim took hundreds of photos, and even made us a little video. We also received some beautiful hand made gifts, including an amigurumi skeleton bride and groom, and a fabulous quilt.

We had the best day, and many aspects of it were all the more special for having been made for us by our friends and family.

Handmade Wedding – Part One

Paul and I got married on Hallowe’en, which was absolutely ages ago, and whilst I showed you the honeymoon pictures, I haven’t yet posted any pictures of the wedding itself!

Because most wedding photos are of people you don’t know, I decided to concentrate on showing you the things that we made ourselves, or that our friends made for us. That turned out to be an extremely long post, so I’m splitting it into two parts. Today’s is everything that we made ourselves, and tomorrow’s will be about all the beautiful things that were made especially for us.

Stationery

The artwork for all of our wedding stationery, designed by Paul. There were plans for another picture of us in our wedding outfits, but we didn’t have time to make that happen!

Portal Cufflinks
Photo © Jon Stockham

Paul and Bob wore matching Portal cufflinks, bought from The Clay Collection on Etsy.

Buttonholes and Hankies
Photo © Jon Stockham

The buttonholes are made from silk violets and paper roses, with a few sparkly bits thrown in for good measure. The leaves came from the original bunch of violets, and the silver holder is a filigree corset-lace aglet. They’re held on by magnets, so nobody had to poke holes in their clothes with a pin. I also made the handkerchiefs, although they were a bit small and kept disappearing down inside the men’s pockets!

Bouquet
Photo © Jon Stockham

Silk and paper flowers, courtesy of Hobby Craft. Two bunches of silk violets and a lot of paper roses were reassembled into a bouquet. It’s simply held together with an elastic band, underneath the ribbon! The sparkly silver bee is a hair clip, but I didn’t manage to grow my hair long enough to wear it.

Favours
Photo © Jon Stockham

My parents went on a mission to IKEA to buy us a boxload of these little glasses. We filled them up with old-fashioned boiled sweets, from our local independent sweet shop.

Favours
Photo © Jon Stockham

We wrapped each glass in a piece of tulle, and tied it with a ribbon. They’re labelled using Moo mini cards, with the name on one side and the picture of us on the other.

Veil
Photo © Jon Stockham

I didn’t make the flowery feathery fascinator, but I did make the veil. Two yards of tulle, folded along the grain, and gathered onto a hair comb in the middle. Simple!

Coat
Photo © Jon Stockham

This was a bit of a last-minute addition! I’d been planning to make my dress from the purple fabric, and then I ended up buying a dress instead. I had a sudden crisis where I decided that I MUST have a train if I wanted to look like a bride, so I made myself a very long coat. I also added matching silk-covered buttons to the shoes.

We’re laughing because we’d just turned round and seen my Uncle Steve, wearing a bright pink wig!

We laughed pretty much all day, to be honest.

Jeffery-West

My friend Patrick is a Very Bad Influence. We were talking about shoes, and he pointed me in the direction of Jeffery-West. Now we’re both coveting beautiful shoes that we can’t afford – and they aren’t even made in my size! (And I still haven’t saved up enough money to go on a shoemaking course.)

These shoes may be constructed in a traditional way, in Northampton, but their design is far from old-fashioned. The leathers are beautifully coloured and often extremely unusual – check out this “blood-spattered” patent chelsea boot. The attention to detail is very impressive. The soles and linings are red, the heels are cloven, the punching is all diamond-shaped, and the message hidden underneath the shoe pictured above is “decadence, sleaze & excess”. What more could you demand of your footwear than that?

You can, of course, buy your shoes online, but if you’re looking for decadence, sleaze and excess, you could do worse than pay a visit to one of their shops. The words “fabulous” and “gothic” spring to mind, with more than a little elegance and luxury thrown in for good measure.

This is a window display from the Jeffery-West shop in Piccadilly:

and if shoes alone aren’t enough, they also have a gorgeous range of belts, cufflinks, canes, umbrellas and wallets – all the essentials a modern dandy might need.

(Unless you’re a woman, with too-small feet. Sigh.)

All images © Jeffery-West.

Bobbin Support.

Bobbin support

This is why I’ve been quiet lately – my sewing machine’s been out of action, and I’ve only just got it back!

Before Christmas it had started acting up a bit – the upper thread would get caught in the bobbin mechanism, and I’d have to disentangle it all every few minutes. I mentioned this when I took the machine in for its annual service, and the lovely Sue at Sewmaster told me that they’d replaced the entire bobbin support casing.

I was a bit worried that this would have added quite a lot to the price of the service, but the extra cost of this repair turned out to be a grand total of £3.98. A bargain!

Now to work on a couple of test pieces until the extra oil from the service has worked its way through the machine, and then I can get on with some proper sewing!

Spring Cleaning – Part 1

Wine crepe-backed satin

I used to work in a fabric shop, and the result is that I now have metres and metres of fabric that I’m simply never going to get around to using. My business has changed, and my personal tastes have changed since I started collecting all of this fabric, so now it’s time to have a bit of a clear-out.

Here are the photos of stage one of the clearing-out.

Still stashed away I have crepe-backed satins, chinese brocades, more recycled bedding, a box full of organza, and a huge black sack full of fabric scraps. Those will be donated to the Museum for craft workshops.

Now that I’m doing less sewing, I should be trying to stockpile less fabric “just in case”, and trying to buy only pieces which match up with specific projects. Easier said than done, of course, but I do want to give it a try!

Stamped Fimo pendants

Fimo pendants

Just a couple of tiny little pictures to show you what I’ve been up to today.

I’m still playing about with Fimo, trying out some techniques that may or may not work when I move on to using the silver clay.

Both pendants are imprinted with a rubber stamp. The Piglet has been painted with acrylics, and both pendants have been washed.

The spider pendant would be an ideal candidate for enamelling, if it was made in silver clay. The imprint of the rubber stamp makes a perfect reservoir for liquid enamel colours. The Piglet is too detailed for enamels, but the details could definitely be picked out with liver of sulphur, which creates an “antiqued” effect. I think it would look very smart if the pendant itself had a brushed finish, but the heart was burnished to make it shiny.

I have so many ideas for Fimo and silver clay pieces that I want to make, and techniques that I want to try. I think I need to get out my pencils and start a little sketch book, so I don’t forget anything.

Rose Quartz & Amethyst necklace.

Rose quartz & amethyst necklace

Today’s another snow day, so I had to cancel all the things I’d originally planned. Never short of something to make, I decided to dismantle a veritable mountain of old jewellery, and put together a new necklace.

Once it was finished I thought it would be a nice idea to take some pretty photos of it sitting on top of the snow, which I assumed had frozen hard enough to take the weight of all those beads. As it turned out, I was wrong, and the necklace sank. Oops!

Rose quartz & amethyst necklace

When I’d fished the necklace out of a snowdrift, I discovered that a lot of snow had stuck to the beads. So I hung it up in the sunshine, and took some more photos.

I like the idea of crystals-on-crystals.

For more details about the necklace itself, there’s another blog post here.

I only wish that I had more old jewellery to dismantle, so that I could make another one!

Snow Day!

It started snowing again at about 6 o’clock yesterday evening. It hasn’t stopped yet. There’s almost a foot of snow here now, which is sufficiently rare in the South of England that everything’s ground to a halt.

We don’t have snow ploughs down here because we don’t usually have enough snow to need them, so most of the roads are inaccessible. The salt and grit that’s normally laid down only works on “certain kinds of snow” apparently – the kind where enough traffic can get through to melt it. Nobody has snow tyres, because we don’t usually have snow!

Paul very sweetly came out this morning and cleared a pathway down the garden to my Shed, and put the heater on, so I’m just trying to decide what work needs to be done today. My original plan was to take my sewing machine into town to be repaired, but there are no buses because of the snow. Paul’s working from home, so we’re both safe and warm, and very grateful for that.

Unfortunately we’re supposed to be going to a funeral tomorrow, a hundred and fifty miles away. The car’s broken (it decided at New Year that the alternator didn’t want to play any more), and it won’t be fixed in time, even if the roads were to become passable in the next day or two. We’d thought of getting a train, but they’re pretty unreliable at the moment because of the weather. Given that the snow’s forecast to continue for another two days at least, I don’t think we’ll be going anywhere.

Thanks to the miracles of modern technology I can at least stay in touch with my family, even if I can’t get to see them. (Although the land line’s broken too, but I think that’s the phone, not the snow.) We have mobile phones, we have email, and times like these would be a lot more difficult without them.

A nugget of purest green!

A nugget of purest green!

I was given a starter kit of PMC (silver clay) for my birthday, but decided that I’d rather try out a few techniques with polymer clay before I dive up to my elbows into the silver. I had a few blocks of Fimo in the house, so I’ve finally found some time to have a bit of a play with it, and this is the result.

The piece on the right is a pendant made from a tumbled green aventurine stone, with the polymer clay wrapped around the edges and then textured. The texture isn’t exactly what I was hoping for, but I have plans for future improvements. The baked clay was then washed with acrylic paints, sanded and washed again.

Once I’ve taken some better photos, I’ll probably pop this one up for sale on Etsy, while I think about the next incarnation of this technique.

My original idea was to test the process a few times, and then replicate it with the silver clay. Unfortunately my jewellery magazines tell me that’s not possible, because the gemstones won’t withstand the temperatures needed to fire the silver, whereas they’re quite happy in the oven at the low temperature required for Fimo.

While I was reading up about polymer clay techniques online (shockingly, I own no books on the subject!) I came across a very interesting tutorial by Monster Kookies, about using fragrance oils to add scent.

You can’t use essential oils because the smell won’t survive the baking process, but you can use soap and candle fragrance oils, because they’re designed to be used at higher temperatures. The structure of the fragrance oils also blends well with the polymer clay, (hopefully) without compromising its structure.

The piece on the left I’ve scented using a fragrance oil from Gracefruit‘s extremely comprehensive selection, left over from my cosmetics-making days. I used the stopper from the top of the bottle to rub a very thin layer of oil across the piece of flattened clay, and then rolled it and flattened it and rolled it again until all the oil had been absorbed.

After baking it still smells, which is a very good start! I’ve written the date on the back, so I can find out how long it takes for the fragrance to fade.

I then used the baked piece to experiment with different methods of adding paint washes to the textured clay, and had a little practice with my new rotary tool’s polishing heads. I borrowed my husband’s Games Workshop Citadel Washes, as these paints are specifically designed to be used on plastics. I’m pleased with the results, and the painting tutorial was useful too.

Now I’m quite keen to try out some of Paul’s other modelling supplies! I know he has mould-making and resin casting supplies around here somewhere… I wonder what I could make with those?

(By the way – the title of the post is from Blackadder, when Percy tries his hand at Alchemy, and accidentally invents “green” instead of gold.)