El Naturalista – Iggdrasil

I’ve just bought a lovely new pair of shoes.

Aren’t they nice?

The reason I thought they were worth mentioning is that El Naturalista go to great lengths to make their shoes as eco-friendly as possible. In their eco-policy they explain how they use recycled rubber for the soles; a product which would normally be classed as industrial waste. They also promise:

To promote natural materials and dyes
To avoid polluting substances
To protect and sustain the environment
To use biodegradable substances where possible
To recycle materials where possible
To pay producers fair prices
To promote traditional skills
To support appropriate technology
To operate with transparency

And they make gorgeous, comfortable shoes in lots of lovely colours!

You can buy them online from the El Naturalista website. In the UK, they’re also available in Jones the Bootmaker, Footprints, Shoon and Schuh.

Ananse Village fabrics

This morning I received an email from Ananse Village. They’re a company based in California, who have a Fair Trade agreement with craftspeople in Africa. They sell clothing, musical instruments, jewellery, masks, baskets… all sorts of things.

They contacted me specifically to draw my attention to the fabrics, which I have to say are absolutely amazing.


The images above represent a 12″ swatch, and the prints are all made with wax. Some of them are amazingly detailed.

From a personal point of view, I probably wouldn’t want to have the fabrics shipped from Africa, to California, and then on to me. There must be a more direct route of buying African fabrics like this in the UK.

There’s no denying that the fabrics are gorgeous though.

But I can’t even drive…

Know what?

I might possibly be persuaded to have more than two driving lessons, if I thought I’d ever be able to drive around in one of these:

It’s a Morgan LifeCar. It’s a prototype at the moment, but it’s designed to run on hydrogen fuel cells, which produce zero harmful emissions. Just water, I believe.

Pottering…

I’ve seen the doctor again, and have been diagnosed with “secondary viral labyrinthitis”. Sounds more exciting than it is, I promise! I have been instructed not to stay in bed feeling sorry for myself, but instead to “potter about” doing a few gentle bits and pieces.

And so, I present to you another skirt:

Squares Skirt

This one’s made from a recycled duvet cover. It’s faded black, with squares in light and dark grey.

There will shortly be six of these available, in the following sizes:

Waist 24-34", hips 34"
Waist 28-38", hips 38"
Waist 32-42", hips 42" (pictured)
Waist 36-46", hips 46"
Waist 42-52", hips 52"
Waist 46-56", hips 56"

Finished length is approximately 27", including the elastic waistband.

Let me know if you’d like to claim one, before I add them to the shop. 🙂

Moss-stitch trim zip-up cardigan.

The Dreaded Lurgy keeps striking me down in sudden and annoying ways, so I have mostly spent the weekend quietly knitting.

The first part of the weekend was spent unravelling, when I realised that I couldn’t bear to knit another stitch on the Cardigan with Cabled Points, and I was no longer certain that I actually wanted to wear it even if I did force myself to get it finished. So, I made the executive decision to unravel the whole thing.

I still wanted to knit a zip-fronted cardigan, but I decided to go for something a lot simpler. No pointy bits, no cabling on rows that didn’t line up, just a simple fitted cardigan.

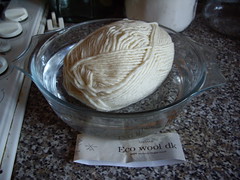
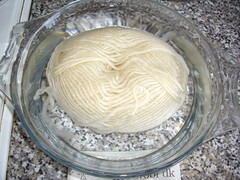
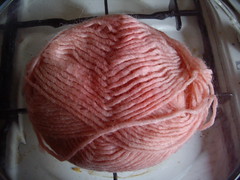
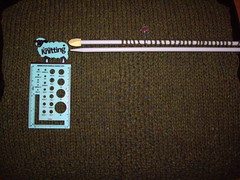
Having turned to Ann Budd for help, I managed to get this far:

Cardigan with moss stitch trim

I’ve typed the pattern out below, for a size 36″ chest. Once the cardigan’s finished, I’ll write out the pattern in more sizes and make it available, probably as a PDF file. It should work with any chunky weight wool.

I haven’t checked the pattern for any glaring errors yet, mostly because I haven’t finished knitting it! I’ll make edits as I go along, if I find anything that’s difficult to follow.

If you decide to follow the pattern and find anything odd about it, please let me know!

Moss Stitch Trim Zip-Up Cardigan

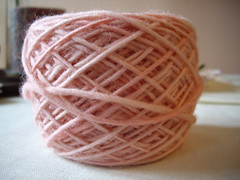
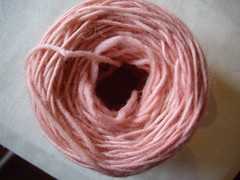
Wool used – RowanSpun Chunky, approximately 525 metres.
Any chunky weight yarn should work out fine, as long as the gauge is correct.
7.5mm straight needles.
12 stitches and 18 rows to 4 inches.

The pattern below is for a finished chest measurement of 36″.

Back
Cast on 54 sts
Moss stitch for 10 rows
St st until piece measures 6″
Dec 1 st at each end of next and foll alt row*
Work 5 rows even
Inc 1 st at each end of next and foll alt row
Work even until piece measures 13″
Armhole Shaping
Cast off 3 sts at beg of next 2 rows
Cast off 2 sts at beg of next 2 rows
Dec 1 st at each end of next and foll alt row
Work even on 40 sts until armhole measures 8½”
Shoulder Shaping
Cast off 5 sts at beg of next 4 rows
Cast off rem 20 sts for back neck

Left Front
Cast on 27 sts
Moss stitch for 10 rows
Change to st st, keeping 6 sts in moss stitch at end of all rows. (This creates self band.)
St st until piece measures 6″
Dec 1 st at beg of next and foll alt row*
Work 5 rows even
Inc 1 st at beg of next and foll alt row
Work even until piece measures 13″, ending on ws row.
Armhole Shaping
Cast off 3 sts at beg of next row
Cast off 2 sts at beg of foll rs row
Dec 1 st at beg of each rs row, 2 times
Work even on 20 sts until armhole measures 7″, ending with ws row
Neck Shaping
Slip 6 edge sts onto stitch holder
Join new yarn, and work to end of row
At beg of next ws row, cast off 5 sts
Cast off 1 st at beg of next rs row (neck edge), 2 times
Then dec 1 st at neck edge every rs row, 3 times
Cont even on 4 sts until piece measures same as back, ending with ws row.
Shoulder Shaping
Cast off 4 sts.

Right Front
Cast on 27 sts
Moss stitch for 10 rows
Change to st st, keeping 6 sts in moss stitch at beginning of all rows. (This creates self band.)
St st until piece measures 6″
Dec 1 st at end of next and foll alt row*
Work 5 rows even
Inc 1 st at end of next and foll alt row
Work even until piece measures 13″, ending on rs row.
Armhole Shaping
Cast off 3 sts at beg of next row
Cast off 2 sts at beg of foll ws row
Dec 1 st at beg of each ws row, 2 times
Work even on 20 sts until armhole measures 7″, ending on rs row
Neck Shaping
Work to last 6 sts.
Slip 6 edge sts on to stitch holder.
At beg of next rs row, cast off 5 sts
Cast off 1 st at beg of next ws row (neck edge), 2 times
Then dec 1 st at neck edge every ws row, 3 times
Cont even on 4 sts until piece measures same as back, ending with ws row.
Shoulder Shaping
Cast off 4 sts.

Neck Band
Sew fronts to back at shoulder seams
Mark centre back
Work on 6 sts of each front band in moss stitch until they are long enough to meet at centre back
Cast off and sew bands together at centre back, or graft bands together
Sew bands to fronts and back neck.

Sleeves
Cast on 28 sts
Moss stitch for 10 rows
Change to st st
Inc 1 st at each end of every 6 rows, 9 times
Work even on 46 sts until piece measures 16″ (or desired length to armhole)
Shape Cap
Cast off 3 sts at beg of next 2 rows
Cast off 2 sts at beg of next 2 rows
Dec 1 st at each end of every rs row, 2 times (32 sts)
Dec 1 st at each end every 4 rows
Dec 1 st at each end of every rs row, 6 times
Cast off 4 sts at beg of next 2 rows
Cast off rem 10 sts

Finishing
Block all pieces, if necessary
Sew fronts to back at side seams
Sew sleeve seams
Set sleeves into armholes
Insert zip at centre front.

Notes
*If you do not require waist shaping, simply leave these rows out, and work even until piece measures 13″.

As you knit the fronts, you may find that the moss stitch pulls the work upwards. you can gently stretch the bands out as you go, or you can leave it, and even things out when you block.

When you knit the bands, you may find that you need to knit them longer than you think, in order to stretch them around the curves of the crew neck.

The Great Outdoors.

It’s almost spring!

Daffodil

It was very cheering to pass this little splash of colour on a cold, grey morning.

Surprise Spring Skirt

This morning I’ve made a skirt, as a surprise for my Mum. Who probably won’t be very surprised by the time she receives it, given that she reads this blog!

We had just one small piece of this fabric at work, and it was exactly enough to make one of my elasticated waist skirts. I thought my Mum might like the print – it’s a tiny floral on a black background. The flowers are yellow, with a pink centre.

I didn’t even have to draft a new pattern, as my Mum and I are conveniently the same size, so this one came together very simply and quickly.

Mum's spring floral skirt Mum's spring floral skirt

The Return of Baby Cthulhu!

Yes, he’s back – the triumphant return of the Littlest Elder God!

We have an extremely Limited Edition of just twenty-four Baby Cthulhu t-shirts now available.

If your size isn’t shown in the store, that means we’ve run out. Sorry about that, but Baby Cthulhu’s quite popular, despite his unfortunate habit of wreaking insanity wherever he goes.

If you’d like to pre-order a t-shirt to be printed in our next batch, please let us know! We need a minimum of twelve orders before we can print more, so we can’t guarantee how long you’ll have to wait.

Click to buy Baby Cthulhu t-shirts!

Ice Cream Light Fittings.

I need these light fittings.

Immediately.

They’re designed specifically to be used with energy-saving lightbulbs, particularly the curly compact fluorescents, which are often described as looking like an ice cream. Perfect!

Ice cream light fittings not your style?

How about a skull called Dave?

Awesome.

The Great Kool Aid experiment.

Recently I bought a sewing pattern from an American Ebay seller. As a little free gift, she included a mini packet of Kool Aid! Having looked at the ingredients and decided that I didn’t want to risk actually drinking it, I thought it might be fun to do a little experiment.

I must admit, I didn’t have very high hopes for this experiment’s success. The instructions on Knitty and in Simply Knitting Magazine (Issue 26, April 2007) both state that you should use only unsweeetened Kool Aid, and that you should allow 1-2 3.9g packets per 50g of wool. I had only one individual serving (smaller – sorry, I didn’t note down the weight) packet of sweetened Kool Aid, so I wasn’t at all sure whether it would have any effect on the wool at all.

I bought a single 50g ball of Sirdar Eco Wool. It’s completely undyed, so I figured that would be perfect. I followed the instructions in Simply Knitting magazine.

Pre-soaking the wool.
First I pre-soaked the ball of wool in warm water. Apparently wool floats! Not to worry – it soon sinks when it gets nice and wet. It helps to press the air out a bit.

Pre-soaking the wool.
I left the ball of wool soaking for about an hour, to let it get nice and wet all the way through. I didn’t bother unwinding the ball into a skein, as I figured that the dye bath would penetrate all the way through, and I didn’t mind if the outside was brighter then the inside. I just wanted to see whether it would work at all! The water is warm, but not too warm.

Adding the Kool Aid.
Here’s the wool, now soaking in the Kool Aid.
I took the ball of wool out of the water, and drained it in a colander. I pressed out most of the water, taking care not to scrunch the wool about too much, in case of felting. In the casserole dish, I poured in the Kool Aid, and then diluted it with warm water, roughly the same temperature as the wet ball of wool. When all of the Kool Aid crystals were dissolved, I popped the ball of wool into the solution, and added more water – enough to cover the whole ball. I then scrunched the wool around carefully, to make sure the dye was going all the way through.

Cooking away nicely...
Then it was on with the lid, and onto the hob for a good cooking! Simply Knitting magazine said, “When cooking on the hob, cover and simmer gently for 20-30 minutes”. I left mine cooking for about an hour, because I was watching Funny Girl on tv, and lost track of the time. I don’t think it ever quite reached a simmer either, as I left it on the very lowest setting. During the ad breaks, I carefully turned the ball of wool, to make sure the dye really was going all the way through. I’d recommend using gloves for this part – firstly because it’s hot, and secondly because I ended up with pink fingers for most of the day.

It's pink!
Tipping out the Kool Aid solution, I left the ball of wool until it was cool enough to pick up.

The shower scene...
I then transferred it to the shower. I made sure that the water was roughly the same temperature as the ball of wool, and rinsed out the excess dye. I then squeezed out as much water as possible, taking care not to risk accidental felting.

Hanging out to dry.
Winding the wool around my clothes airer to dry, I’m really pleased to find that the dye is much more even than I’d hoped for. I think I’d call this experiment a success!

Ta-Daa! Candy-floss pink!
And here’s the final result! Left overnight to dry, and wound into a neat little cake, I have a lovely ball of pale pink wool!

The dyeing made no mess whatsoever (except for my pink fingers, but that was my own silly fault!), took very little supervision, and was extremely easy to do.

You can buy Kool Aid in the UK from D T Crafts or Kool Aid UK for as little as 40-50p per packet. Kool Aid UK also sometimes sell expired packets specifically for dyeing, as they can’t be used for drinking once they’re out of date.

The ball of Sirdar Eco Wool cost ÂŁ3.99, so the addition of 50p for the dye definitely wouldn’t break the bank. I’m not sure I’d want to try and dye the yarn for a whole jumper, as you’d have to get a bit scientific about the dilution of the Kool Aid to make sure that all of the wool came out pretty much the same colour. But for single-ball projects, I’m definitely going to be doing this again!